
Related Manuals for Philips mcd909


Summary of Contents for Philips mcd909
- Page 1 Register your product and get support at MCD909 www.philips.com/welcome User manual ZH-CN...
-
Page 2: Table Of Contents
Contents 6 Listen to radio Tune to a radio station Program radio stations automatically Program radio stations manually 1 Important Select a preset radio station Safety 7 Adjust sound 2 Your DVD Micro Theater Adjust volume level Introduction Select automatic loudness control What’s in the box Adjust bass level Overview of the main unit... -
Page 3: Important
g Do not block any ventilation openings. 1 Important Install in accordance with the manufacturer’s instructions. h Do not install near any heat sources Safety such as radiators, heat registers, stoves, or other apparatus (including amplifiers) Know these safety symbols that produce heat. -
Page 4: Hearing Safety
• Install all batteries correctly, + and - Hearing safety as marked on the apparatus. • Do not mix batteries (old and new Listen at a moderate volume. or carbon and alkaline, etc.). • Using headphones at a high volume can •... - Page 5 Your system consists of materials which can device that are not expressly approved by be recycled and reused if disassembled by Philips Consumer Lifestyle may void the user’s a specialized company. Please observe the authority to operate the equipment. local regulations regarding the disposal of packaging materials, exhausted batteries and old equipment.
- Page 6 ® Plays all versions of DivX video (including DivX ® 6) with enhanced playback of DivX ® ® media files and the DivX Media Format. DivX, DivX Certified, and associated logos are trademarks of DivX, Inc. and are used under license.
-
Page 7: Your Dvd Micro Theater
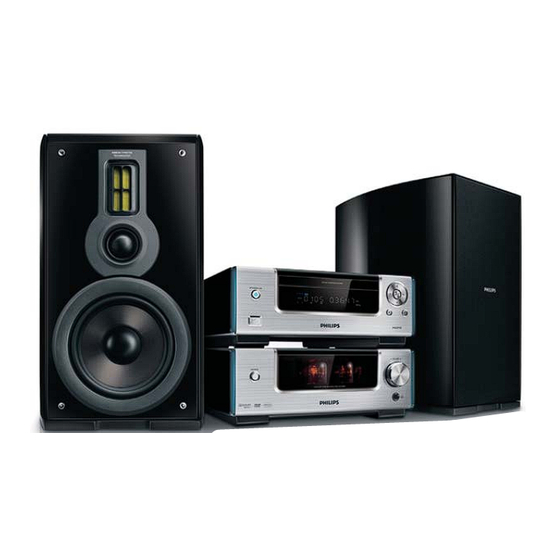
Micro Theater DVD region code Countries China Congratulations on your purchase, and welcome to Philips! To fully benefit from the support that Philips offers, register your product at www.Philips.com/welcome. Premium Hi-Fi tubes With built-in Hi-Fi tubes, you can now experience sound of the highest quality... -
Page 8: Overview Of The Main Unit
Overview of the main unit a Display panel g PRESET +/- • Display current status. • Select a preset radio station. b STANDBY-ON • Turn on the apparatus; switch to • Stop play. standby mode. • Erase a program. • In demo mode, activate or deactivate demonstration. -
Page 9: Overview Of The Remote Control
d AUX Overview of the remote • Select external audio device source. control e MODE • Select repeat play modes. • Select shuffle play modes. f A-B • Repeat a specific section within a track/disc. g SYSTEM • Access or exit the system setup menu. -
Page 10: Disc Menu
s TUNER • Select tuner source. • Skip to the previous/next track. • Skip to the previous/next title or t USB chapter. • Select USB device source. • Select a preset radio station. u DISPLAY DIM • Display play information on a •... -
Page 11: Connect
3 Connect Connect control cable Connect the supplied control cable to the CONTROL CABLE jacks on the main unit. Connect speakers Note • Insert the stripped portion of each speaker wire into the socket completely. • For optimal sound, use the supplied speakers only. -
Page 12: Connect Fm Antenna
Connect FM antenna Connect the supplied FM wire antenna to the FM AERIAL socket on the unit. For the speaker side: Unscrew the speaker connectors. For the left speaker, identify the speaker cable that is connected to the left connectors on the main unit. Insert fully the red end of the speaker Connect audio cables cable into the red (+) connector. -
Page 13: Connect Video Cables
You can enjoy multi-channel surround sound Connect video cables from this apparatus when it is connected to a digital audio device. You can select the best video connection that Connect a coaxial cable (not supplied) your TV supports. to the digital input socket on the audio •... - Page 14 Option 2: connect composite video Connect component video cables (red/ cable blue/green - not supplied) to: • VIDEO OUT (Pr/Cr Pb/Cb Y) sockets on this unit. • the component input sockets on the Option 4: connect HDMI cable Connect the supplied composite video cable to: HDMI IN •...
-
Page 15: Connect An External Audio Device (Optional)
Connect an external audio Connect power device (optional) You can also listen to an external audio device through this unit. Connect audio cables (red/white) to: • AUX IN sockets on this unit. • the audio output sockets on the external audio device. L LINE IN R Caution •... -
Page 16: Get Started
Always follow the instructions in this chapter in The minute digits are displayed and sequence. begin to blink. If you contact Philips, you will be asked for the Turn VOLUME+/- to set the minute. model and serial number of this apparatus. The Press RDS/CLOCK to confirm. -
Page 17: Select The Correct Source On Tv
Switch to standby Turn on Progressive Scan To switch to standby mode, press Progress scan displays twice the number of » The backlight on the display panel is frames per seconds than interlaced scanning reduced. (ordinary TV system). With nearly double the »... -
Page 18: Play
5 Play When you load a DVD/(S)VCD disc, a menu may be displayed on the TV screen. To access or exit the menu manually: Press DISC MENU. Caution For VCD with PlayBack Control (PBC) feature • Risk of damage to the unit! During play, never (version 2.0 only): move the unit. -
Page 19: Play Divx Video
• To display the selected picture only, Insert the USB connector on the device press OK. into the socket. • To start slideshow, press Press USB. • To return to the menu, press DISC Press to select a folder. MENU. •... -
Page 20: Play Control
Play control Note • The section A and B can be set only within the Repeat and random play same chapter/track. You can select various repeat functions during playback. The repeat play options vary Search by time or scene/track depending on the disc type. number Press MODE repeatedly to choose a play mode. - Page 21 Change camera angle Some DVDs contain alternate scenes, such as scenes recorded from different camera angles. For such DVDs, you can select from the available alternate scenes. During play, press Angle repeatedly to switch between camera angles. Zoom in/out image During video/picture play, press ZOOM repeatedly to zoom in/out the image.
-
Page 22: Listen To Radio
6 Listen to radio Press PROG to activate program mode. » [PROG] blinks on the display. Press / to allocate a number (1 to 20) Tune to a radio station to this radio station, then press PROG to confirm. » The preset number and the frequency Press TUNER. -
Page 23: Adjust Sound
7 Adjust sound Adjust volume level During play, press VOLUME+/- to increase/decrease the volume level. Select automatic loudness control The loudness feature enables the system to increase the treble and bass sound effect at low volume automatically (the higher the volume, the lower the treble and bass increase). -
Page 24: Adjust Settings
8 Adjust settings Note • Philips does not guarantee 100% interoperability with all HDMI CEC devices. General setup [EasyLink] Press SYSTEM. • [One Touch Play] - Turn on or off » [General Setup] menu is displayed. one touch play. •... -
Page 25: Video Setup
• To return to the previous menu, Note press • To exit the menu, press SYSTEM. • See the explanations of the above options in the following pages. Note [TV Type] • See the explanations of the above options in Change this setting if the video does not the following pages. -
Page 26: Preferences
[HDMI Video] – Select the HDMI video [Subtitle] output resolution that is compatible with your Select the preferred subtitle language for disc TV display capability. play. [Disc Menu] Option Description Select the preferred disc menu language. [Auto] Detect and select the best supported Note video resolution... - Page 27 • [On] - display index menu when you load Note a disc for play. • [Off] - skip the menu and start play from • Ensure that the subtitle file has the exact same file name as the movie file. If for example the the first title.
-
Page 28: Other Features
9 Other features Set the sleep timer This apparatus can switch to standby automatically after a set period of time. Set the alarm timer When the apparatus is turned on, press SLEEP/TIMER repeatedly to select a set This unit can be used as an alarm clock. The period of time (in minutes). -
Page 29: Product Information
Tuner (FM) 10 Product Tuning Range 87.5 - 108MHz information Tuning grid 50KHz Sensitivity - Mono, 26dB <22 dBf S/N Ratio Sensitivity - Stereo, 46dB <43 dBf Note S/N Ratio Search Selectivity >28dBf • Product information is subject to change without prior notice. -
Page 30: Supported Disc Formats
Supported disc formats USB playability information • Digital Video Discs (DVDs) Compatible USB devices: • Video CDs (VCDs) • USB flash memory (USB 2.0 or • Super Video CDs (SVCDs) USB1.1) • Digital Video Discs + Rewritable • USB flash players (USB 2.0 or (DVD+RW) USB1.1) •... -
Page 31: Troubleshooting
• Adjust the volume. requesting service. If the problem remains • Disconnect the headphone. unsolved, go to the Philips web site (www. Remote control does not work Philips.com/support). When you contact Philips, • Before pressing any function button, first ensure that your apparatus is nearby and the select the correct source with the remote model number and serial number are available. - Page 32 Poor radio reception • Increase the distance between the apparatus and your TV or VCR. • Fully extend the FM antenna. • Connect an outdoor FM antenna instead. Unable to select Progressive Scan • Ensure the video output mode is set to [YUV].
-
Page 33: Glossary
12 Glossary Digital Audio Digital Audio is a sound signal that has been converted into numerical values. Digital sound can be transmitted through multiple channels. Analog audio Analog sound can only be transmitted through Sound that has not been turned into numbers. two channels. - Page 34 JPEG Region code A very common digital still picture format. A system that allows discs to be played only A still-picture data compression system in the region designated. This unit only plays proposed by the Joint Photographic Expert discs that have compatible region codes. You Group, which features small decrease in image can find the region code of your unit on the quality in spite of its high compression ratio.
- Page 35 © 2010 Koninklijke Philips Electronics N.V. All rights reserved. Document order number: MCD909_93_UM_V4.2...
Need help?
Do you have a question about the mcd909 and is the answer not in the manual?
Questions and answers