Diono Radian 5 Instruction Manual
Convertible car seat
Hide thumbs
Also See for Radian 5:
- Fittings manual (57 pages) ,
- Instruction manual (4 pages) ,
- Instruction manual (55 pages)
Table of Contents
Advertisement
Quick Links
- 1 Car Seat Parts
- 2 Suitability and Use
- 3 Adjusting the Height of the Harness Shoulder Straps
- 4 Rearward-Facing Lap-Shoulder Seat Belt Installation
- 5 Forward-Facing Lap-Shoulder Seat Belt Installation
- 6 Cleaning and Maintenance
- 7 Removing the Fabric Cover
- Download this manual
See also:
Instruction Manual
Advertisement
Table of Contents

Related Manuals for Diono Radian 5


Summary of Contents for Diono Radian 5
- Page 1 convertible car seat Instruction Manual UK English, Française, Deutsch Groups 0, 0+, 1, and 2 Universal Birth to 18 kg Semi-Universal 15 to 25 kg Please read carefully Store manual on back of headrest...
- Page 2 Dear Parent, diono radian 5 convertible Congratulations on your purchase of the child safety seat. Please read this manual carefully. In order to provide the best protection for your child, always install and use the child safety seat following all the instructions in this manual.
-
Page 3: Table Of Contents
Table of contents Page UK English Française Deutsch Car seat parts Suitability and use Warnings Carrying the car seat Unfolding and folding the car seat Detachable base Harness buckle location Removing & fitting the harness buckle Infant pad and head cushion Side impact head support Reclining base adjustment Selecting the correct height for the safety harness shoulder straps... -
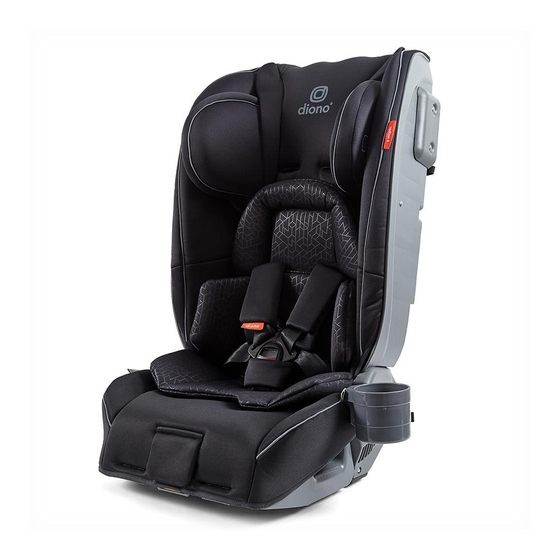
Page 4: Car Seat Parts
Car seat parts Top tether strap Rearward-facing bolster Tension indicator Harness pads Folding release lever Head support Harness adjuster 15 - 25 kg harness pads Detachable base Head cushion Harness lock Infant pad Buckle Cup holder Safe Stop ® Seat belt guides attachment Tether connecting strap Seat belt lock-off... -
Page 5: Suitability And Use
Suitability and use This child seat restraint is approved for use with children from Birth to 25 kg as follows: Universal Groups 0, 0+, 1, from Birth to 18 kg rearward-facing: Universal Group 1, from 9 to 18 kg forward-facing: Group 2, from 15 to 25 kg forward-facing and rearward-facing Semi-Universal (with 5-point harness and top tether only):... -
Page 6: Warnings
WARNINGS: WARNING: • Only install this child seat using the approved methods and load bearing components as shown in this manual. WARNING: • While this child seat can be installed in the front seat, back seat installation is most strongly recommended and is the safest way your child can travel. WARNING: •... -
Page 7: Carrying The Car Seat
Vehicle seat protection Some vehicle seat covers (i.e., leather, velour) may develop wear marks characteristic of child seat use. This can be best avoided by using a diono child seat undermat underneath the child safety seat. Carrying the car seat WARNING: •... - Page 8 Unfolding and folding the car seat • Do NOT use the car seat if the folding levers and locking bolts do not function properly. There may be an excessive build-up of debris that cannot be removed or internal damage to the locking mechanism that could prevent the car seat from functioning properly.
- Page 9 Folding your car seat: 1. Pull the red carrying strap out from behind the cover (Fig. 1). Unbuckle the car seat's safety harness (see page 23). 2. Loosen the safety harness (see page 23). 3. Raise the head support to its top position (see page 12-13). 4.
-
Page 10: Detachable Base
Detachable base WARNING: • The detachable base MUST only be used when the car seat is fitted in the rearward-facing position. • Do NOT use when car seat is forward-facing. Retaining hooks Fitting the detachable base: 1. Ensure the seat section is locked in the open unfolded position (see page 7-9). 2. -
Page 11: Harness Buckle Location
Harness buckle location IMPORTANT: Check to ensure the harness buckle is fitted in the correct position for the age/weight of the child you are putting into the car seat. Position 2 Position 1 Group Child Weight Buckle position Group 0, 0+,1 From Birth to 18 kg Use Position 1 Groups 1, 2... -
Page 12: Infant Pad And Head Cushion
Removing & fitting the harness buckle (cont.) IMPORTANT: If you have large hands, you may find it easier to partially fold the seat first (See steps 1-5 on pages 7-9 of this manual). Then, slide your hand through the gap at the back of the seat to rotate the metal buckle retainer and slot it through the seat base, padded insert and fabric cover (Fig. -
Page 13: Reclining Base Adjustment
Correct position: When using the top two harness positions, the bottom edge of the head support must be aligned with the lower edge of the child’s jaw but above the shoulders. When using the lower three harness positions, raise the head support to the top position. Lowering the head support: Place your hands on the top of the head support towards the back and push firmly down (Fig. -
Page 14: Selecting The Correct Height For The Safety Harness Shoulder Straps
Reclining base adjustment (cont.) Adjusting the reclining base: 1. Place the car seat on its back and grip the base locking bar with your hand as shown in the diagram. Pull the base locking bar upwards (Fig. 1). 2. Pull or push the base in or out of the bottom of the car seat. When the base is in the desired position, release the base locking bar (Fig. -
Page 15: Adjusting The Height Of The Harness Shoulder Straps
Adjusting the height of the harness shoulder straps 1. Lift the flap on the front of the seat cover. Lift the harness lock upwards and hold, now pull the harness shoulder straps outwards to loosen the harness (Fig. 1). 2. From the back of the car seat, remove the ends of the shoulder straps from the metal harness yoke (Fig. -
Page 16: Fitting The Cup Holder
Fitting the cup holder 1. The cup can be fitted in four different positions on the arms of the car seat marked by the grey tabs. 2. Slot the pin on the side of the cup into the hole on the fabric cover in front of the grey tab. -
Page 17: Rearward-Facing Lap-Shoulder Seat Belt Installation
(Fig. 4). 5. Move the front seat backwards to make contact with radian 5. If the gap cannot be closed or you are installing radian 5 in the front passenger seat, the rearward-facing bolster should be used. -
Page 18: Fitting & Removing The Rearward-Facing Bolster
Fitting & removing the rearward-facing bolster WARNING: • The rearward-facing bolster must only be used when fitting the car seat in the rearward-facing position • Do not use the rearward-facing bolster if it causes the bottom of the car seat to lift up. Pin Pin CLICK Fitting the bolster:... -
Page 19: Using The Top Tether Strap Rearward-Facing
Using the top tether strap rearward-facing WARNING: • The use of top tether strap is recommended for all rearward-facing installations AND MUST BE used for occupant weighing 15 to 25 kg. • When fitting the car seat in the rearward-facing position, attach the top tether to an approved tether anchorage point. -
Page 20: Tether Adjuster With Tension Indicator
Tether Adjuster with Tension Indicator Using Tether Adjuster with Tension Indicator: 1. See page 19 and 22 for top tether restraint installation instructions. 2. After installing the restraint, pull the top tether adjuster strap until the red indicator turns green. Tether connecting strap WARNING: •... -
Page 21: Using The Safe Stop® Attachment
Safe Stop Using the attachment ® WARNING: Safe Stop • ONLY use the attachment with forward-facing children ® between 15 to 25 kg. Safe Stop • NEVER use the attachment when the car seat is fitted in ® the rearward-facing position. Safe Stop ®... -
Page 22: Using The Top Tether Strap Forward-Facing
Forward-facing lap-shoulder seat belt installation 9 – 25 kg (Groups 1, 2) (cont.) 2. Feed the vehicles seat belt through the belt path under the padded seat (Fig. 2). 3. Check the seat belt has not become twisted, then fasten the seat belt by slotting the tongue on the seat belt into the buckle on the vehicles seat (Fig. -
Page 23: Using The Safety Harness
Using the top tether strap: 1. Before you fit the car seat in your vehicle, remove the top tether strap from the storage compartment on the top of the car seat’s backrest (Fig. 1). 2. Pull the adequate webbing through the tether adjuster attached to the anchorage strap on the back of the car seat while pressing release button (Fig. -
Page 24: Using The Seat Belt Lock-Off Clip
Using the safety harness (cont.) 5. Push the buckle tongues into the buckle, push down until the buckle locks with a ‘Click’ (Fig. 5). 6. When using the top two harness positions the bottom edge of the head support must be aligned with the lower edge of the jaw but above the shoulders. -
Page 25: Cleaning And Maintenance
Cleaning and maintenance Cleaning and maintenance of folding mechanisms and locking bolts: Periodically inspect all folding levers and locking bolts for cleanliness and proper function. When the folding levers are lifted, the levers and bolts should spring back immediately when the lever is released. WARNING: •... -
Page 26: Removing The Fabric Cover
Cleaning the harness buckle: 1. If a child eats or drinks in the car seat, periodically clean the harness buckle to ensure it functions correctly. 2. Remove the buckle following the instructions on pages 11-12. 3. Rinse thoroughly in luke warm hot water or soak 3-6 hours to loosen dried liquids or hardened food debris. -
Page 27: Warranty Information
Warranty information diono warranties this product only to the original purchaser effective from the date of purchase for 1 year. In case of warranty claim, the original (not a copy) proof of purchase sales receipt must be returned with the product. - Page 28 Ventura Park Road Tamworth Staffs B78 3LZ United Kingdom Customer Service Tel: +44(0) 0845 300 9071 Email: dionoUK@diono.com Complies with revised standard www.diono.com ECE R 44/04 Tested and approved © 2016 diono LLC. All rights reserved. Radian 5 EMEA 02 16...
Need help?
Do you have a question about the Radian 5 and is the answer not in the manual?
Questions and answers