Chapters
Table of Contents
Troubleshooting

Related Manuals for Philips AC3256


Summary of Contents for Philips AC3256
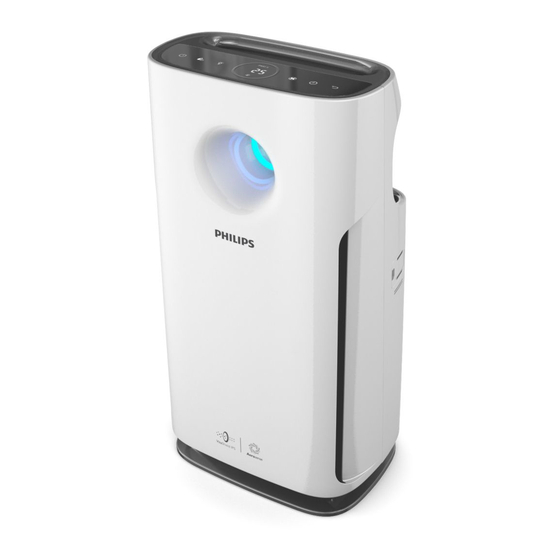
- Page 1 Always there to help you Register your product and get support from www.philips.com/welcome AC3256 Question? Contact Philips คู ่ ม ื อ ผู ้ ใ ช้ User manual Buku Petunjuk Pengguna 使用手冊...
-
Page 3: Table Of Contents
Table of contents 7 Troubleshooting 1 Important Safety 8 Guarantee and service Order parts or accessories 2 Your air purifier Product overview Controls overview 9 Notices Electromagnetic fields (EMF) 22 3 Getting started Recycling Install filter 4 Using the appliance Understand the air quality light Switch on and off... -
Page 4: Important
Important If the power cord is • damaged, you must have it replaced by Philips, a service center authorized Safety by Philips, or similarly qualified persons in order Read this user manual carefully before you use the appliance, and save it for to avoid a hazard. - Page 5 Only use the original • becomes hot. Make Philips filters specially sure that you plug the intended for this appliance into a properly appliance. Do not use any connected power socket.
- Page 6 Do not insert your fingers such as TVs, radios, and • or objects into the air radio-controlled clocks. outlet or the air inlet to The appliance is only • prevent physical injury intended for household or malfunctioning of the use under normal appliance.
-
Page 7: Your Air Purifier
2 Your air purifier Congratulations on your purchase, and welcome to Philips! To fully benefit from the support that Philips offers, register your product at www.philips.com/welcome. Product overview Control panel Air quality light Air quality sensors NanoProtect S3 filter HEPA*... -
Page 8: Controls Overview
Controls overview On/Off button Child lock button Light on/off button Display screen Fan speed button Timer button Reset button... -
Page 9: Getting Started
3 Getting started Press the two clips down and pull the pre-filter towards you. Install filter Before using the appliance, remove all packaging materials of the filters and place the filter into the appliance as described below. Note Put the unpacked air purification •... -
Page 10: Using The Appliance
4 Using the Note appliance • Make sure that the side with the two clips is pointing towards you, and that all hooks of the pre-filter are properly attached to the purifier. Understand the air To reattach the front panel, mount quality light the panel onto the top of the appliance first (1). -
Page 11: Change The Fan Speed
» After measuring the air quality for a short time, the air quality sensor automatically selects the color of the air quality light. » After measuring the particle matters in the air, the appliance shows the PM2.5 level on the screen. -
Page 12: Set The Timer
Manual Set the child lock • Touch the fan speed button repeatedly to select the fan speed Touch and hold the child lock you need. button for 3 seconds to activate child lock. » "L" displays on the screen for 3 seconds. -
Page 13: Cleaning Body Of Appliance
5 Cleaning Use the light on/off function With the light on/off button, you can Note switch on or off the air quality light, • Always unplug the appliance before the display screen and the function cleaning. indicators if needed. • Never immerse the appliance in water Touch the light on/off button or any other liquid. -
Page 14: Clean The Air Quality Sensor
Wipe away dust with a soft dry cloth from the body of the appliance. Clean the air outlet with a soft dry cloth. Clean the air quality sensor Clean the air quality sensor every 2 months for optimal functioning of the Clean the air quality sensor, the purifier. - Page 15 Pull the bottom part of the front Air dry the pre-filter. panel to remove it from the Note appliance. • Make sure that the pre-filter is completely dry. If it is still wet, bacteria may multiply in it and shorten the lifetime of the pre-filter.
-
Page 16: Replacing The Filter
6 Replacing the filter Understand the healthy air protect lock Touch and hold the reset button This appliance is equipped with the for 3 seconds to reset the pre-filter healthy air protect lock to make sure cleaning time. that the air purification filters are in optimal condition when the appliance is operating. - Page 17 Place the new filter into the appliance. Take out the expired air purification filter according to the filter code displayed on the screen, and gently Touch and hold the reset button put the expired filter into the trash for 3 seconds to reset the filter bin.
-
Page 18: Filter Force Reset
Touch and hold for 3 seconds to Filter force reset force reset the filter lifetime of the NanoProtect S3 AC filter and exit Touch simultaneously the filter force reset mode. for 3 seconds to enter the filter force reset mode. »... - Page 19 Touch and hold for 3 seconds to Touch to select the new filter confirm the filter code of the new code of the second filter. filter. Touch and hold for 3 seconds to confirm the filter code of the second filter and exit the filter type Note change mode.
-
Page 20: Troubleshooting
7 Troubleshooting This chapter summarizes the most common problems you could encounter with the appliance. If you are unable to solve the problem with the information below, contact the Consumer Care Center in your country. Problem Possible solution The appliance The filter replacement code has been displaying on the screen does not work but you have not replaced the corresponding filter yet. - Page 21 The first few times you use the appliance, it may produce a plastic smell. This is normal. However, if the appliance The appliance produces a burnt smell, contact your Philips dealer or an produces a strange authorized Philips service centre. The appliance may also smell.
-
Page 22: Guarantee And Service
(you find its phone number regarding exposure to electromagnetic in the worldwide guarantee leaflet). If fields. there is no Consumer Care Centre in your country, go to your local Philips dealer. Compliance with EMF Koninklijke Philips N.V. manufactures Order parts or... -
Page 23: Recycling
Recycling Do not throw away the product with the normal household waste at the end of its life, but hand it in at an official collection point for recycling. By doing this, you help to preserve the environment. - Page 24 Daftar isi 7 Troubleshooting 1 Penting Pengaman 8 Garansi dan servis Memesan komponen atau 2 Alat pemurni udara Anda aksesori Tinjauan umum produk Ikhtisar kontrol 9 Pemberitahuan 3 Memulai Medan elektromagnet (EMF) 44 Mendaur ulang Memasang filter 4 Menggunakan alat Pahami lampu kualitas udara Aktif dan Tidak aktif...
-
Page 25: Penting
Anda menggunakan Jika kabel listrik rusak, • alat dan simpanlah sebagai referensi Anda harus membawanya nanti. ke ke Philips untuk diganti, Bahaya pusat layanan resmi Jangan memasukkan • Philips atau orang yang air atau cairan lain atau... - Page 26 Anda daya yang digunakan menghidupkan alat. untuk mengalirkan listrik Hanya gunakan filter • ke alat tidak bagus, steker asli Philips yang khusus alat menjadi panas. dimaksudkan untuk alat Pastikan bahwa Anda ini. Jangan gunakan filter memasukkan steker lainnya.
- Page 27 atau membahayakan Selalu cabut alat setelah • orang lain. Jangan digunakan dan sebelum menggunakan filter membersihkan atau sebagai bahan bakar atau melakukan perawatan tujuan serupa lainnya. lainnya. Hindari alat terbentur Jangan gunakan alat di • • (terutama di saluran ruangan yang perubahan masuk udara dan saluran suhunya besar, karena hal keluar udara) oleh benda...
- Page 28 dapat digunakan sebagai perangkat pengaman jika terjadi kecelakaan pada proses pembakaran dan bahan kimia berbahaya. Jika Anda perlu • memindah alat, lepaskan alat dari catu daya terlebih dahulu. Jangan memindahkan • alat dengan menarik kabel dayanya.
-
Page 29: Alat Pemurni Udara Anda
2 Alat pemurni udara Anda Selamat atas pembelian Anda dan selamat datang di Philips! Untuk memanfaatkan sepenuhnya dukungan yang ditawarkan Philips, daftarkan produk Anda di www.philips.com/welcome. Tinjauan umum produk Panel kontrol Lampu kualitas udara Sensor kualitas udara Filter NanoProtect S3 HEPA*... -
Page 30: Ikhtisar Kontrol
Ikhtisar kontrol Tombol On/Off Tombol Penguncian untuk anak- anak Tombol on/off lampu Layar tampilan Tombol kecepatan kipas Tombol Timer Tombol reset 30 ID... -
Page 31: Memulai
3 Memulai Tekan dua klip ke bawah dan tarik pra-filter ke arah Anda. Memasang filter Sebelum menggunakan alat, lepaskan semua bahan kemasan filter dan pasang filter ke alat seperti yang dijelaskan berikut ini. Catatan Pasang filter pemurni udara yang • sudah dibuka dari kemasannya Pastikan bahwa sisi yang ada tag pada alat. -
Page 32: Menggunakan Alat
4 Menggunakan Catatan alat • Pastikan bahwa sisi yang ada dua klip mengarah ke Anda, dan bahwa semua kait pra-filter telah dipasang dengan benar ke alat pemurni. Pahami lampu kualitas Untuk memasang kembali panel udara depan, pasang panel ke bagian atas alat terlebih dahulu (1). -
Page 33: Mengubah Kecepatan Kipas
» Setelah mengukur kualitas Mengubah kecepatan udara dalam waktu singkat, sensor udara secara otomatis kipas akan memilih warna lampu untuk kualitas udara. Ada beberapa kecepatan kipas. Anda » Setelah mengukur partikel di dapat memilih mode otomatis, mode alergen, kecepatan 1, 2, 3, 4 atau 5. udara, alat menampilkan level PM2.5 di layar. -
Page 34: Menyetel Timer
Mode tidur Menyetel timer Dalam mode tidur, alat beroperasi Dengan timer, Anda dapat membiarkan dengan senyap pada kecepatan 1. alat beroperasi selama jam yang Satu menit setelah mode tidur dipilih, ditetapkan. Setelah waktu yang indikator daya dan lampu on/off ditetapkan berlalu, alat secara otomatis meredup, dan semua lampu lain akan dimatikan. -
Page 35: Menggunakan Fungsi On/Off Lampu
5 Membersihkan Sentuh dan tahan tombol kunci anak selama 3 lagi detik untuk menonaktifkan kunci anak. » "UL" ditampilkan pada layar selama 3 detik. Catatan • Selalu cabut alat dari stopkontak sebelum membersihkannya. • Jangan celupkan alat ke dalam air atau cairan lainnya. -
Page 36: Membersihkan Sensor Kualitas Udara
Bersihkan saluran keluar udara Lepaskan penutup sensor kualitas menggunakan kain lembut dan udara. kering. Membersihkan sensor kualitas udara Bersihkan sensor kualitas udara setiap 2 bulan agar alat pemurni berfungsi secara optimum. Bersihkan lebih sering jika Anda menggunakan alat pemurni udara di lingkungan yang berdebu. Bersihkan sensor kualitas udara, Catatan saluran masuk debu dan saluran... -
Page 37: Membersihkan Pra-Filter
Cuci pra-filter di bawah air keran Membersihkan pra-filter mengalir. Jika pra-filter sangat kotor, gunakan sikat halus untuk menyikat debunya. Status lampu Ikuti ini tanda filter F0 ditampilkan di Membersihkan layar pra-filter Angin-anginkan pra-filter hingga kering. Catatan • Pastikan bahwa pra-filter benar-benar Tarik bagian bawah panel depan kering. -
Page 38: Mengganti Pra Filter
6 Mengganti pra Untuk memasang kembali panel depan, pasang panel ke bagian atas filter alat terlebih dahulu (1). Kemudian, pelan-pelan pasang lagi panel pada badan alat (2) Memahami kunci perlindungan udara sehat Alat ini dilengkapi dengan kunci perlindungan udara sehat untuk memastikan bahwa filter pemurni udara dalam kondisi optimal saat Sentuh dan tahan tombol reset... - Page 39 Pasang filter baru ke alat. Keluarkan filter pemurni udara yang kedaluwarsa sesuai dengan kode Tekan dan tahan tombol reset filter yang ditampilkan di layar, selama 3 detik untuk mereset masa dan buang filter yang kedaluwarsa pakai filter. secara perlahan ke dalam tempat sampah.
-
Page 40: Reset Paksa Filter
Sentuh dan tahan selama Reset paksa filter 3 detik untuk memaksa reset masa pakai filter NanoProtect S3 AC dan Sentuh secara keluar dari mode reset paksa filter. bersamaan selama 3 detik untuk memasuki mode reset paksa filter. » Kode (A3) dari filter NanoProtect S3 HEPA ditampilkan di layar. - Page 41 Sentuh dan tahan selama Sentuh untuk memilih kode filter 3 detik untuk mengonfirmasi kode baru dari filter kedua. filter dari filter baru. Sentuh dan tahan selama 3 detik untuk mengonfirmasi kode filter dari filter kedua dan keluar dari Catatan mode ubah jenis filter. •...
-
Page 42: Troubleshooting
7 Troubleshooting Bab ini berisi ringkasan masalah yang paling umum ditemui dengan alat. Jika Anda tidak dapat mengatasi masalah dengan informasi di bawah ini, hubungi Pusat Layanan Konsumen di negara Anda. Masalah Solusi yang memungkinkan Alat tidak bekerja Kode penggantian filter sudah ditampilkan di layar namun meski telah Anda belum mengganti filter tersebut. - Page 43 Alat mengeluarkan demikian, jika alat mengeluarkan bau hangus, hubungi dealer bau aneh. Philips Anda atau pusat layanan Philips resmi. Alat juga mungkin mengeluarkan bau tidak sedap bila filternya kotor. Dalam hal ini, bersihkan atau ganti filter tersebut. Jika bunyi alat terlalu berisik, Anda dapat mengubah kecepatan kipas ke tingkat kecepatan kipas yang lebih rendah.
-
Page 44: Garansi Dan Servis
Jika Anda harus mengganti komponen Salah satu Prinsip Bisnis utama Philips atau ingin membeli komponen adalah mengambil semua tindakan tambahan, kunjungi dealer Philips Anda kesehatan dan keselamatan yang atau kunjungi www.philips.com/support. -
Page 45: Mendaur Ulang
Mendaur ulang Jangan membuang alat bersama limbah rumah tangga biasa jika alat sudah tidak bisa dipakai lagi, tetapi serahkan ke titik pengumpulan atau daur ulang resmi. Dengan melakukan hal ini, Anda ikut membantu melestarikan lingkungan. - Page 46 สารบั ญ 1 ข้ อ ส� า คั ญ 8 การรั บ ประกั น และบริ ก าร ปลอดภั ย สั ่ ง ซื ้ อ ชิ ้ น ส่ ว นหรื อ อุ ป กรณ์ เ สริ ม 2 เครื ่ อ งฟอกอากาศของคุ ณ 9 ประกาศ...
-
Page 47: ข้ อ ส� า คั ญ
ไฟให้ เ ครื ่ อ งไว้ ไ ม่ ด ี ปลั ๊ ก ของเครื ่ อ ง ผู ้ ช � า นาญของ Philips, ศู น ย์ บ ริ ก าร จะร้ อ น ตรวจสอบให้ แ น่ ใ จว่ า คุ ณ... - Page 48 หรื อ การบ� า รุ ง รั ก ษาอื ่ น ๆ • Philips ที ่ ผ ลิ ต มาเพื ่ อ ใช้ ง านกั บ ห้ า มใช้ ง านเครื ่ อ งในห้ อ งที ่ ม ี ก าร...
- Page 49 ห้ า มใช้ ง านเครื ่ อ งนี ้ ใ นที ่ เ ปี ย ก • ชื ้ น หรื อ ในที ่ ๆ มี อ ุ ณ หภู ม ิ ส ู ง เช่ น ห้ อ งน� ้ า หรื อ ห้ อ งครั ว เครื...
-
Page 50: เครื ่ อ งฟอกอากาศของคุ ณ
ขอแสดงความยิ น ดี ท ี ่ ค ุ ณ เลื อ กซื ้ อ ผลิ ต ภั ณ ฑ์ ข องเรา และยิ น ดี ต ้ อ นรั บ สู ่ Philips เพื ่ อ ให้ ค ุ ณ ได้ ร ั บ ประโยชน์ อ ย่ า งเต็ ม ที ่ จ ากบริ ก ารที ่ Philips มอบให้ โปรดลงทะเบี ย นผลิ ต ภั ณ ฑ์ ข องคุ ณ ที ่... -
Page 51: ภาพรวมของการควบคุ ม
ภาพรวมของการควบคุ ม ปุ ่ ม เปิ ด /ปิ ด ปุ ่ ม ระบบป้ อ งกั น เด็ ก ปุ ่ ม เปิ ด /ปิ ด ไฟ จอแสดงผล ปุ ่ ม ความเร็ ว พั ด ลม ปุ ่ ม ตั ้ ง เวลา ปุ... -
Page 52: การเริ ่ ม ต้ น ใช้ ง าน
การเริ ่ ม ต้ น ใช้ ง าน กดคลิ ป ทั ้ ง สองลง และดึ ง แผ่ น กรองชั ้ น แรกเข้ า หา ตั ว ติ ด ตั ้ ง แผ่ น กรอง ก่ อ นใช้ ง านเครื ่ อ ง แกะบรรจุ ภ ั ณ ฑ์ ท ั ้ ง หมดของแผ่ น กรองออกและวางแผ่... -
Page 53: การใช้ ง าน
การใช้ ง าน หมายเหตุ • ตรวจสอบว่ า ด้ า นข้ า งที ่ ม ี ค ลิ ป ทั ้ ง สองอยู ่ ห ั น เข้ า หาคุ ณ และตะขอทั ้ ง หมดของแผ่ น กรองชั ้ น แรกติ ด กั บ เครื ่ อ ง ฟอกอากาศดี... -
Page 54: เปลี ่ ย นความเร็ ว พั ด ลม
» หลั ง จากวั ด อนุ ภ าคฝุ ่ น ละอองในอากาศ โหมดป้ อ งกั น สารที ่ ท � า ให้ เ กิ ด ภู ม ิ แ พ้ เครื ่ อ งจะแสดงระดั บ PM2.5 บนหน้ า จอ โหมดป้ อ งกั น สารที ่ ท � า ให้ เ กิ ด ภู ม ิ แ พ้ ไ ด้ ร ั บ การออกแบบ มาเป็... -
Page 55: ตั ้ ง ค่ า ล็ อ คป้ อ งกั น เด็ ก
คู ่ ม ื อ ตั ้ ง ค่ า ล็ อ คป้ อ งกั น เด็ ก สั ม ผั ส ปุ ่ ม ความเร็ ว พั ด ลม ซ� ้ า ๆ เพื ่ อ เลื อ ก •... -
Page 56: การท� า ความสะอาด
การท� า ความสะอาด ท� า ความสะอาดเซนเซอร์ ต รวจ วั ด คุ ณ ภาพอากาศ หมายเหตุ ท� า ความสะอาดเซนเซอร์ ต รวจวั ด คุ ณ ภาพอากาศทุ ก ๆ 2 เดื อ น เพื ่ อ ประสิ ท ธิ ภ าพการท� า งานที ่ เ ป็ น เยี ่ ย มของ •... -
Page 57: ท� า ความสะอาดแผ่ น กรองชั ้ น แรก
ท� า ความสะอาดเซนเซอร์ ต รวจวั ด คุ ณ ภาพอากาศ ดึ ง ที ่ ส ่ ว นล่ า งของแผงด้ า นหน้ า เพื ่ อ ถอดออกจาก ขจั ด ฝุ ่ น ในทางลมเข้ า และทางลมออกด้ ว ยก้ า นส� า เครื ่ อ ง ลี... -
Page 58: การเปลี ่ ย นแผ่ น กรอง
การเปลี ่ ย นแผ่ น ใส่ แ ผ่ น กรองชั ้ น แรกกลั บ ลงไปในตั ว เครื ่ อ ง กรอง ท� า ความเข้ า ใจกั บ ล็ อ คปกป้ อ ง อากาศดี เครื ่ อ งนี ้ ม าพร้ อ มกั บ ล็ อ คปกป้ อ งอากาศดี เพื ่ อ ให้ แ น่ ใ จ ว่... -
Page 59: บั ง คั บ รี เ ซ็ ต แผ่ น กรอง
ใส่ แ ผ่ น กรองแผ่ น ใหม่ เ ข้ า ไปในเครื ่ อ ง น� า แผ่ น กรองเครื ่ อ งฟอกอากาศที ่ ห มดอายุ แ ล้ ว ตามรหั ส แผ่ น กรองที ่ ป รากฏบนหน้ า จอออกมา สั ม ผั ส ปุ ่ ม รี เ ซ็ ต ค้... -
Page 60: เปลี ่ ย นประเภทแผ่ น กรอง
สั ม ผั ส ค้ า งไว้ 3 วิ น าที เ พื ่ อ บั ง คั บ รี เ ซ็ ต อายุ เปลี ่ ย นประเภทแผ่ น กรอง การใช้ ง านของแผ่ น กรอง NanoProtect S3 HEPA แตะ และ พร้... - Page 61 สั ม ผั ส ค้ า งไว้ 3 วิ น าที เ พื ่ อ ยื น ยั น รหั ส ใหม่ หมายเหตุ ของแผ่ น กรองชั ้ น ที ่ ส องและออกจากโหมดเปลี ่ ย น • ประเภทแผ่ น กรอง หลั ง จากที ่ ค ุ ณ เลื อ กรหั ส ของแผ่ น กรองใหม่ โ ดยใช้ ป ุ ่ ม แล้...
-
Page 62: การแก้ ไ ขปั ญ หา
อาจมี ก ลิ ่ น พลาสติ ก เมื ่ อ ใช้ เ ครื ่ อ งสองสามครั ้ ง แรก เป็ น เหตุ ก ารณ์ ป กติ อย่ า งไรก็ ต าม หากเครื ่ อ งส่ ง กลิ ่ น ไหม้ ให้ ต ิ ด ต่ อ ตั ว แทนจ� า หน่ า ย Philips หรื อ ศู น ย์ บ ริ ก าร Philips ที ่... - Page 63 ปั ญ หา วิ ธ ี แ ก้ ไ ขที ่ ส ามารถท� า ได้ เครื ่ อ งยั ง แสดงสั ญ ญาณ ว่ า ฉั น ต้ อ งเปลี ่ ย นแผ่ น คุ ณ อาจไม่ ไ ด้ ร ี เ ซ็ ต ตั ว นั บ อายุ ก ารใช้ ง านของแผ่ น กรอง เสี ย บปลั ๊ ก เครื ่ อ ง สั ม ผั ส ปุ ่ ม กรอง...
-
Page 64: การรั บ ประกั น และบริ ก าร
บริ ก ารลู ก ค้ า Philips ในประเทศของคุ ณ (คุ ณ สามารถ Philips มุ ่ ง มั ่ น ที ่ จ ะพั ฒ นา ผลิ ต และขายผลิ ต ภั ณ ฑ์ ท ี ่ ดู ห มายเลขโทรศั พ ท์ ข องศู น ย์ บ ริ ก ารได้ ใ นในเอกสาร... - Page 65 目錄 7 疑難排解 1 重要事項 安全 8 保障及服務 2 您的空氣淨化器 訂購零件或配件 產品概要 控制鍵概覽 9 注意 電磁場(EMF) 3 使用入門 環保 安裝濾網 4 使用本產品 認識空氣質素燈 開啟與關閉 變更風扇速度 設定定時功能 設定兒童安全鎖 使用光源開啟/關閉功能 5 清潔 清潔時間表 清潔本產品機身 清潔空氣質素感應器 清洗預過濾網 6 更換濾網 了解清新空氣保護鎖 更換過濾網 濾網強制重設 濾網類型更改 ZH-T...
-
Page 66: 重要事項
重要事項 危險。請勿讓孩童將本產品 當成玩具。兒童不應於沒有 監督情況下對產品進行清潔 及維護。 安全 請勿阻塞進氣口和排氣口, • 例如在排氣口上面或進氣口 使用本產品前請先閱讀本用戶手冊,並保 管以作將來參考。 前面放置物件。 確保異物不會通過排氣口掉 • 危險事項 入裝置內部。 請勿讓水或任何液體或易燃 • 清潔劑進入此產品,以避免 注意 觸電和/或火災的危險。 本產品並不是適當通風設 • 請勿用水或任何液體或(易 備、正規吸塵器或煮食時 • 燃)清潔劑清潔此產品,以 使用的抽油煙機或風扇的 避免觸電和/或火災的危險。 代替品。 請勿在本產品周圍噴射殺蟲 若為本產品提供電力的電源 • • 劑或芳香劑等易燃物品。 插座沒有妥善連接,本產品 的插頭便會發熱。請確保您 警告 已妥善連接電源插座。 在連接本產品前,請檢查產 •... - Page 67 僅使用專門針對本產品的原 本產品不會去除一氧化碳 • • 裝 Philips 濾網。請勿使用 (CO) 或氡 (Rn)。在發生燃 任何其他濾網。 燒過程和危險化學物質的事 燃燒過濾器可能造成無可挽 故中,不能將本產品作為安 • 救對人類的危害及/或危及他 全裝置使用。 人生命。不要使用濾網作為 如果您需要移動本產品,請 • 燃料或類似用途。 先拔除其電源供應。 避免以硬物碰撞產品 (尤其 需要移動裝置時,請慢慢移 • • 是產品的通風口和排氣口)。 動,不要快速推動裝置。 請使用裝置頂部的手柄來提 不要拉扯電源線來移動 • • 起或移動裝置。 裝置。 請勿將您的手指或其他物件 • 放入通風口或排氣口,以免 造成身體傷害或產品故障。 若您使用室內煙型驅蚊劑,...
-
Page 68: 您的空氣淨化器
2 您的空氣淨化器 感謝您購買 Philips 產品,歡迎來到 Philips 世界! 要享受 Philips 為您提供的全面支援,請在以下網站 www.philips.com/welcome 註冊您的 產品。 產品概要 控制面板 空氣質素燈 空氣質素感應器 NanoProtect S3 濾網 HEPA* (FY3433) NanoProtect AC 濾網* (FY3432) 預過濾網 前面板 * 以下簡稱空氣淨化濾網 68 ZH-T... -
Page 69: 控制鍵概覽
控制鍵概覽 開/關按鈕 兒童安全鎖按鈕 光源開/關按鈕 顯示屏幕 風扇速度按鈕 定時功能按鈕 重設按鈕 ZH-T... -
Page 70: 使用入門
3 使用入門 向下按兩個夾子,然後將前置濾網向你 的方向拉。 安裝濾網 使用本產品前,取出濾網包裝內所有物 件,然後將濾網放入裝置,如下圖所示。 提示 • 確保有標籤的一邊正向著您。 將拆除包裝的空氣淨化濾網放回 裝置中。 移除空氣淨化濾網的所有包裝內物件。 拉出前面板的底部,將濾網從裝置中 提示 取出。 • 先把厚的濾網放入裝置,然後放入較薄的 濾網。 將預過濾網放回本產品內。 ZH-T... -
Page 71: 使用本產品
4 使用本產品 提示 • 確保有兩個夾的一邊正向著您,且所有預 過濾網的鉤已妥善連接本產品。 認識空氣質素燈 要重新連接前面板塊,先將板塊固定於 本產品頂部 (1)。然後輕輕將板塊放置 空氣質素指示燈的 空氣質素水平 於本產品的機身 (2)。 顏色 藍色 良好 藍紫色 一般 紅紫色 不健康 紅色 非常不健康 開啟產品時,空氣質素燈將自動亮起, 並順序顯示所有顏色。片刻之後,空氣 質素感應器將選擇與環境空氣質素相符的 顏色。 開啟與關閉 將產品的插頭插入電源插座。 按 以開啟本產品。 » 裝置默認以自動模式運行。 » 快速測量空氣質素後,空氣質素感 應器將自動選擇適當的空氣質素燈 的顏色。 ZH-T... -
Page 72: 變更風扇速度
» 測量空氣中的粒子質素後,裝置會 敏感模式 在螢幕上顯示 PM2.5 水平。 特別設計的敏感模式能有效去除常見的過 敏原,如花粉、寵物毛屑和塵蟎等。 • 按下風扇速度按鈕 以選擇敏感模式 (AL)。 按住 3 秒關閉產品。 提示 • 透過開/關按鈕關閉本產品後, 如果插 睡眠模式 頭仍插在電源插座中,則再次開啟本產 在休眠模式中,產品會安靜地運行速度 1。 品時,本產品將根據上一次的設定恢復 選擇睡眠模式一分鐘後,電源和開/關指示 工作。 燈會變暗,其他所有燈都會熄滅。 • 按下風扇速度按鈕 以選擇睡眠模式 (速度 1)。 變更風扇速度 設有多個風扇速度 你可選擇自動模式、敏 感模式、速度 1、2、3、4 或 5。 自動 (A) 在自動模式下,產品會根據四周環境的空... -
Page 73: 設定定時功能
手提式 設定兒童安全鎖 • 重複按下風扇速度按鈕 以選擇你所 需的速度。 按住兒童安全鎖按鈕 3 秒,啟動兒 童安全模式。 » 「L」將會顯示在螢幕 3 秒。 » 當兒童安全鎖處於開啟狀態時,所 有其他按鈕均不響應。 設定定時功能 透過定時功能,您可以讓本產品在設定時 間內運作。設定時間過去之後,本產品便 按住兒童安全鎖按鈕 3 秒,取消兒 會自動關閉。 童安全模式。 » 「UL」將會顯示在螢幕 3 秒。 • 以選擇本產品運作 重複按定時按鈕 所需的小時數。 使用光源開啟/關閉功能 » 定時功能的選擇為 1 至 24 個 小時。... -
Page 74: 清潔
5 清潔 清潔空氣質素感應器 每兩個月清潔空氣質素感應器,以達至淨 化器的最佳運作。若在多塵的地方使用本 提示 淨化器,請更頻密清潔。 • 每次清潔前請拔出裝置電源。 提示 • 絕不將本產品侵入水中或任何其他 液體中。 • 若房間內的濕度水平很高,空氣質素感應 • 請勿使用磨蝕性、侵略性或易燃清潔劑 器上可能會凝結水滴。因此,即使空氣質 (如漂白劑或酒精)清洗本產品的任何一 素良好,空氣質素燈可能會顯示空氣質素 部分。 為差。在此情況下,您必須清潔空氣質素 • 只有預過濾網是可清洗的。請勿清洗空氣 感應器或使用其中一個手動設定。 淨化器濾網,也切勿使用吸塵機清潔。 使用柔軟毛刷清潔空氣質素感應器進氣 口及排氣口。 清潔時間表 頻率 清潔方法 用柔軟的乾布抹乾 必要時 淨本產品表面 當 F0 顯示在螢幕 清洗預過濾網 上時 清潔空氣質素感 每兩個月... -
Page 75: 清洗預過濾網
使用有一點濕潤的棉花棒清潔空氣質素 拉出前面板的底部,將濾網從裝置中 感應器和塵埃的出入口。 取出。 再以乾爽的棉花棒刷乾。 向下按兩個夾子,然後將前置濾網向你 的方向拉。 重新裝上空氣質素感應器護蓋。 以自來水清洗預過濾網。如果預過濾網 內部十分骯髒,可用軟刷將塵埃刷走。 清洗預過濾網 按照此步驟進行 過濾網警示燈狀態 操作 F0 顯示在螢幕上時 清洗預過濾網 吹乾預過濾網 提示 • 請確保預過濾網完全乾透。如果預過濾網 仍是濕的,細菌可能會滋生,縮短預過濾 網的壽命。 ZH-T... -
Page 76: 更換濾網
6 更換濾網 將預過濾網放回本產品內。 了解清新空氣保護鎖 本產品配備清新空氣保護鎖,確保空氣淨 化過濾網在本產品運作中保持最佳狀態。 當濾網的使用期限快到時,濾網代碼會顯 示在螢幕上,提醒你需要更換濾網。 如果濾網未有在 14 天內更換,裝置會停止 運行,並會鎖上。 提示 • 確保有兩個夾的一邊正向著您,且所有預 更換過濾網 過濾網的鉤已妥善連接本產品。 提示 要重新連接前面板塊,先將板塊固定於 本產品頂部 (1)。然後輕輕將板塊放置 • 請勿清洗空氣淨化器濾網,也切勿使用吸 於本產品的機身 (2) 塵機清潔。 按照此步驟進行 過濾網警示燈狀態 操作 更換 當 A3 顯示在螢幕 NanoProtect S3 上時 濾網 HEPA 更換 當 C7 顯示在螢幕 NanoProtect AC 上時... -
Page 77: 濾網強制重設
根據螢幕上顯示的濾網代碼取出過期的 3 秒以重新設定濾網 按住重設按鈕 空氣淨化濾網,輕輕地把過期的濾網放 使用時間。 入垃圾桶。 提示 提示 • 更換濾網後請潔淨雙手。 • 請勿觸摸折叠的過濾網表面,或去聞過濾 網上的氣味,因為過濾網上聚集了空氣中 濾網強制重設 的污染物。 3 秒,進入強制重 同時按下 及 拆去新的過濾網上的所有包裝物料。 設模式。 » NanoProtect S3 濾網 HEPA 的代 碼 (A3) 將會顯示在螢幕上。 將新濾網放入裝置。 3 秒以強制重設 NanoProtect 按住 S3 HEPA 濾網的使用時間。 ZH-T... -
Page 78: 濾網類型更改
NanoProtect S3 HEPA 濾網的使用時 按下 以選擇你將會使用新濾網的濾 間重新設定後,Nanoprotect AC 濾網 網代碼。 的代碼 (C7) 將會顯示在螢幕上。 按住 3 秒以確定新濾網的濾網 3 秒以強制重設 NanoProtect 按住 代碼。 S3 AC 濾網的使用時間,並離開強制重 設模式。 提示 • 使用 按鈕選擇新濾網的濾網代碼後, 濾網類型更改 如果你按下任何其他按鈕 10 秒,裝置將 自動確認新濾網的濾網代碼。 同時按下 及 3 秒,進入濾網更 改模式。 濾網類型更改後,Nanoprotect AC 濾 »... - Page 79 按下 以選擇第二濾網的新濾網 代碼。 按住 3 秒以確認第二濾網的濾網代 碼,然後離開濾網類型更改模式。 提示 • 使用 按鈕選擇新濾網的濾網代碼後, 如果你按下任何其他按鈕 10 秒,裝置將 自動確認新濾網的濾網代碼。 提示 • 請參閱濾網隨附的單張,進一步了解你可 選擇的不同濾網組合。 ZH-T...
-
Page 80: 疑難排解
7 疑難排解 本章節總結一些您在本產品上最常見的問題。如果您按照以下資料仍未能解決問題,請聯絡 您的國家的 Philips 顧客服務中心。 問題 可行解決方案 濾網替換代碼已經顯示在螢幕上,但您還沒有作出相應的濾網替換 產品即使插上電源也 動作。如果你持續使用過期的濾網,裝置將會鎖上。在這情況,請 沒有正常運作。 更換該濾網並重設濾網使用時間。 • 產品正在運作,但按鈕無響應。請查看兒童安全鎖是否有開啟 • 產品即使啟動了也沒 濾網替換代碼持續亮起,但你沒有作出相應的濾網替換動作, 有正常運作。 裝置已經鎖上。在這情況,請更換該濾網並重設濾網使用時 間。 • 從排氣口排出的氣流 預過濾網處於骯髒的狀態。清潔預過濾網 (請查看「清潔」一 比以前顯著減弱。 章)。 • 本產品的一個濾網沒有得到更換。請確認所有過濾網均按正確 即使本產品工作很 次序裝上,從最內部數起:1) NanoProtect S3 濾網 HEPA;2) NanoProtect AC 濾網;3) 預過濾網。 久,空氣質素也沒有... - Page 81 問題 可行解決方案 錯誤代碼 「E1」、 「E2」、「E3」 裝置發生故障。請聯絡你所在國家/地區的客戶服務中心。 或「E4」 顯示在 螢幕上。 ZH-T...
-
Page 82: 保障及服務
如果您需要資料或有疑問,請前往 Philips 網站 www.philips.com 或聯絡您的國家的 電磁場(EMF) Philips 顧客服務中心(您會在全球保障小 冊子上找到其電話號碼)。如果您的國家 這款 Philips 產品符合一切有關電磁場暴露 沒有顧客服務中心,請前往當地的 Philips 的適用安全標準及條例。 經銷商。 符合 EMF 標準 訂購零件或配件 Koninklijke Philips N.V. 專為消費者製造及 銷售許多產品 (例如任何電器用品),而這 如果您需要更換零件或想訂購額外配件, 些產品都能發出與接收電磁訊號。 請前往您的 Philips 經銷商或瀏覽 Philips 貫徹執行的一項主要商業準則是對 www.philips.com/support。 我們的產品採取所有必要的健康和安全措 如果您索取有關零件時遇上問題,請聯絡 施,遵循一切可行的法律規定,並在產品 您的國家/地區 Philips 顧客服務中心(您可... - Page 84 Specifications are subject to change without notice © 2015 Koninklijke Philips N.V. 4241 210 84821 All rights reserved.
Need help?
Do you have a question about the AC3256 and is the answer not in the manual?
Questions and answers