Table of Contents
Advertisement
Preface
Thank you for purchasing Hytera MD780 DMR digital mobile radio. As a product built to
the DMR standard, MD780 is endowed with ergonomic design and comprehensive digital
functions to deliver an advanced communication solution. With MD780, you can make use
of digital functions to top the competition!
To derive optimum performance from your radio, please read this manual and the supplied
Safety Information Booklet carefully before use.
Advertisement
Table of Contents

Related Manuals for Hytera MD780


Summary of Contents for Hytera MD780
- Page 1 Preface Thank you for purchasing Hytera MD780 DMR digital mobile radio. As a product built to the DMR standard, MD780 is endowed with ergonomic design and comprehensive digital functions to deliver an advanced communication solution. With MD780, you can make use...
-
Page 2: Term Explanation
Icon Information The following icons are available through this manual: Alert Icons Caution: indicates situations that could cause damage to your radio. Note: indicates tips that can help you make better use of your radio. Function Icons : indicates functions that are available on digital channel only. : indicates functions that are available on analog channel only. - Page 3 Information Copyright Hytera and CRS are registered trademarks of Hytera in the PRC and/or other countries or areas. Hytera retains the ownership of its trademarks and product names. All other trademarks and/or product names that may be used in this manual are properties of their respective owners.
-
Page 4: Fcc Licensing Information
RF Energy Exposure Compliance Your radio is designed and tested to comply with a number of national and international standards and guidelines (listed below) regarding human exposure to radio frequency electromagnetic energy. This radio complies with the IEEE and ICNIRP exposure limits for occupational/controlled RF exposure environment at operating duty factors of up to 50% transmitting and is authorized by the FCC for occupational use only. - Page 5 reasonable protection against harmful interference in a residential installation. This equipment generates, uses and can radiate radio frequency energy and, if not installed and used in accordance with the instructions, may cause harmful interference to radio communications. However, there is no guarantee that interference will not occur in a particular installation.
-
Page 6: Table Of Contents
Contents Checking Items in the Package..................4 Radio Overview......................... 5 Front Panel ........................ 5 Rear Panel ......................... 6 Programmable Keys ....................6 Installation ......................... 7 Status Indicators......................10 LCD Icons ........................ 10 LED Indicator ......................11 Basic Operations......................12 Turning the Radio On/Off ..................12 Adjusting the Volume .................... -
Page 7: Checking Items In The Package
Checking Items in the Package Please unpack carefully and check that all items listed below are received. If any item is missing or damaged, please contact your dealer. Palm Microphone Microphone Hanger and Screws Mounting Bracket Kit Fuse Power Cord Owner’s Manual Safety Information Booklet Quick Reference Guide... -
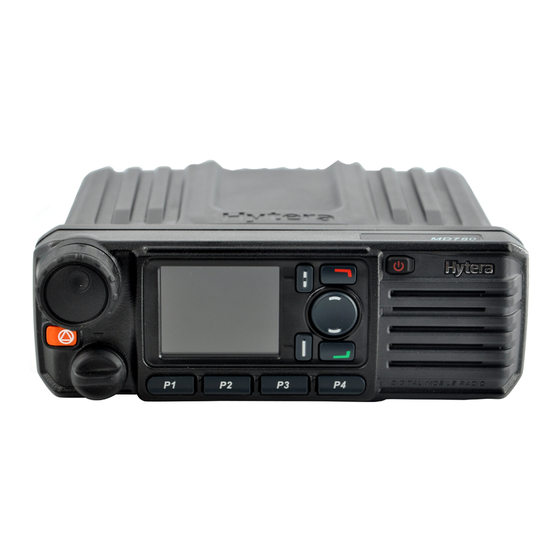
Page 8: Radio Overview
Radio Overview Front Panel Part Name Part Name Volume Control / Channel ○ ○ LED Indicator Selector Knob ○ ○ LCD Display OK/Menu Key ○ ○ Back Key Power On/Off key ○ ○ Up Key Down Key ○ ○ Speaker Programmable Keys ○... -
Page 9: Rear Panel
Rear Panel Part Name Part Name ○ ○ BNC Antenna Connector Power Inlet ○ ○ Accessory Jack Antenna Jack Programmable Keys For enhanced convenience, you may request your dealer to program the keys P1, P2, P3, P4, Emergency key, as shortcuts to the functions listed below: Shortcut Keys Description Zone Up... -
Page 10: Installation
To adjust power level through one button Adjusting Power Level press. To allow public addressing via the external Public Address speaker. Talk Around To directly communicate with other radios. To adjust the condition for incoming signal Monitor match. To adjust the condition for incoming signal Monitor Momentary match. - Page 11 Please connect the supplied antenna and power cord to the radio, before you install the radio in the bracket. Install the radio with Hytera supplied mounting bracket, to avoid radio loose in case of accidents. The loose radio may cause bodily injury.
- Page 12 Part Name Part Name ○ ○ Radio Unit Locking Knobs ○ ○ Mounting Bracket 4.8 × 20 mm Self-tapping Screws ○ ○ Palm Microphone 4 × 16 mm Self-tapping Screws...
-
Page 13: Status Indicators
○ ○ Microphone Hanger Power Inlet ○ ○ Black Power Cord Red Power Cord ○ ○ Fuse BNC Antenna Connector Status Indicators LCD Icons The LCD of your radio displays the radio status, text entries, and menu items. The following are the icons that appear on the radio’s display. Standby Interface Status Icons Icon Name... -
Page 14: Led Indicator
Scanning is in progress Scanning pauses on a non-priority channel Scan Icons Scanning pauses on Priority Channel 1 Scanning pauses on Priority Channel 2 Low Tx power for the current channel Tx Power Icons High Tx power for the current channel Monitor Icon Monitor function is active Speaker Icon... -
Page 15: Basic Operations
To turn the radio on, hold down the Power On/Off key until the following indications are given: the radio displays “Hytera" and sounds power-up alert, and LED flashes green. To turn the radio off, long press the Power On/Off key. -
Page 16: Selecting A Channel
or Zone Down key. Note: You dealer may designate the power-up zone and channel. If not, the radio will enter the zone and channel last used. Selecting a Channel Press the Volume Control / Channel Selector knob to switch it to channel selection mode (the radio displays the icon ), and then rotate the knob to select your desired channel. - Page 17 Private Call number, a Group Call number or an All Call number. Transmitting a call through Contact List or Call Log (1) Go to Contact -> Contact List, or go to Call Log -> Call List. (2) Use the Up/Down key to select the Private Call number you want to call. (3)...
-
Page 18: Menu Navigation
When a call is received, your radio will display the corresponding icon as follows: for a Private Call, for a Group Call and for an All Call. Responding to a Private/Group Call After a Private Call or Group Call is received, you may press the PTT key within the preset time period to call back. -
Page 19: Message
Contact List You can save up to 200 entries in the list. To access this item, select “Contact -> Contact List” or press the shortcut key for Contact List. Editing a Contact You can edit the number and alias of each private contact. Viewing a Contact You can view details of each contact. -
Page 20: Call Log
New Message You can create your desired text message and send it to an individual user or to a talk group. Quick Text Under this option there are some text messages (10 entries at most) preset by your dealer. You can choose to edit and send any entry. Inbox The inbox can save up to 10 received messages. -
Page 21: Scan
This radio can save up to 10 entries in the lists Outgoing Calls, Incoming Calls and Missed Calls respectively. When the memory for call log is full, the oldest entry will be overwritten by latest one automatically. After accessing a list and selecting an entry, you can perform any of these operations: hold down the PTT key to initiate a call;... -
Page 22: Zone
Editing Priority Channel To set the selected channel as a non-priority or as a priority channel. If you are interested in activities on a channel, you can set it as a priority channel, which will be scanned more frequently than a non-priority channel. Each scan list may contain two priority channels at most. - Page 23 You can optimize your radio performance by customizing related parameters according to actual needs and your preferences. Radio Setting (1) Brightness To set the display brightness. You can increase or lower it using the Up or Down key. (2) Backlight To set whether to enable this function.
-
Page 24: Functions And Operations
Functions and Operations Scan The feature “Scan” allows you to listen to communication activities on other channels so that you can keep a close track of your team members. Operation: To enable the feature, you can select “On” from the menu “Scan”; or Press the programmed Scan key in standby mode;... -
Page 25: Public Address
Public Address This feature allows public addressing via the external speaker. After the feature is enabled, your voice will not be transmitted, but output via the external speaker (connected to the accessory jack on the rear panel) if you hold down the PTT key and speak. Operation: 1. -
Page 26: Squelch Off
(2) Hold down the programmed Monitor Momentary key to enable the feature, and the mobile radio displays icon . To disable the feature, release this key. Squelch Off If the feature “Squelch Off” is enabled, your mobile radio’s speaker will keep unmuted no matter whether carrier is present. - Page 27 Emergency Type Description Siren Only In Emergency mode, the mobile radio will sound shrill alarm tone and display icon Regular In Emergency mode, the mobile radio will give audible and visible indication. Silent In Emergency mode, the mobile radio won't give any audible or visible indication.
- Page 28 Emergency Alarm with In this mode, you can send alarm information by pressing the programmed Emergency key. When icon appears, Voice to Follow you can speak into the microphone, allowing your voice and background noise to be transmitted automatically (you do not need to hold down the PTT key).
- Page 29 1. After the preset alarm tone cycles and voice cycles expire, the mobile radio will exit the Emergency mode automatically. 2. Long press the programmed Emergency key. Note: Your dealer may set the number of alarm tone cycles, alarm tone duration, number of voice cycles, duration of each cycle and Tx interval.
-
Page 30: Ignition Sense
To exit the Emergency mode, long press the programmed Emergency key. Emergency Alarm with Voice to Follow Operation: 1. Press the programmed Emergency key to send alarm information. The mobile radio displays icon and text information “Sending Alarm!”, with red LED glowing. 2. -
Page 31: Busy Channel Lockout
sense or the Power On/Off key. Operation: To power on the mobile radio, start the engine or hold down the Power On/Off key; to power it off, stop the engine or long press the Power On/Off key. Ignition Only: The mobile radio powers on or off by following the ignition sense only. The Power On/Off key does not work. -
Page 32: Troubleshooting
Troubleshooting Phenomena Analysis Solution The equipment can not The power cord may be Connect the power cord correctly. be powered on. unconnected. Increase the volume by rotating The volume may be set to a low the Volume Control knob level. clockwise. - Page 33 members in Digital Consequently, the digital mode although there is carrier can be received but can receiving indication. not be demodulated. You may be interrupted by Change the frequency, or adjust radios using the same the squelch level. Irrelevant frequency. communications or Set your radio with signaling to noises are heard on the...
-
Page 34: Care And Cleaning
Care and Cleaning To guarantee optimal performance as well as a long service life of your mobile radio, please follow the tips below. Radio Care Keep the mobile radio at a place with good ventilation and heat dissipation to facilitate normal work. -
Page 35: Appendix: Input Method
Antenna SM10A1 Port) PC37 Note: Use the accessories specified by Hytera only. If not, Hytera shall not be liable for any losses or damages arising out of use of unauthorized accessories. Appendix: Input Method You can enter aliases, numbers or messages using the keypad. This mobile radio supports the following input methods: Chinese Pinyin (simplified), English and Number. - Page 36 English Operation: 1. Press to switch to English mode; 2. Press to switch between Uppercase mode and Lowercase mode; 3. Enter the English letters through alphanumeric keys; 4. Use the Up/Down key to choose the right letter; 5. Press the OK key to enter the selected letter. You can repeat the above steps to continue.
Need help?
Do you have a question about the MD780 and is the answer not in the manual?
Questions and answers