Table of Contents
Advertisement
Advertisement
Table of Contents

Subscribe to Our Youtube Channel
Related Manuals for Promise Pegasus2 R6


Summary of Contents for Promise Pegasus2 R6
- Page 1 EGASUS R6, R4, R8 Product Manual Version 2.0...
- Page 2 You should back up all data before installing any drive controller or storage peripheral. PROMISE T echnology is not re- sponsible for any loss of data resulting from the use, disuse or misuse of this or any other PROMISE T echnology product.
-
Page 3: Bout This Guide
This Product Manual describes how to setup, use, and maintain the Pegasus2 R8, R6 and R4 unit. It also describes how to use the PROMISE Utility software that you install and run on your Macintosh computer. Although this manual is written specifically for the Pegasus2 models, many of the functions and descriptions can be applied to the original release of Pegasus, Pegasus R4 and Pegasus R6. - Page 4 Pegasus2 R4/R6/R8 Product Manual VCCI...
- Page 5 Promise Technologies WARNING WARNING WARNING WARNING...
-
Page 6: Table Of Contents
Ackground ctivities reAte A rrAy AnD ogicAl rive iewing cheduled Ackground ctivities Promise u dding A cheduled Ackground ctivity AnAge with tility hAnging A Ackground ctivity chedule ProMise u ccessing tHe tiLity nAbling or isAbling A... - Page 7 Contents Promise Technologies igrAtion anaging ogicaL rives AKing igrAtion ettingS iewing A ist of ogicAl rives iewing ogicAl rive nformAtion PDM S AKing ettingS iewing ogicAl rive tAtistics rAnsition Aking ogicAl rive ettings AKing rAnSition ettingS iewing ogicAl rive heck...
- Page 8 Ackground roubleshooting esPonding to An udible lArm rrays Hecking ediA Atrol uBSySteM rive Arrier ogicaL rives Promise u rAid l tility evels rAiD 0 – S iewing the vent triPe rAiD 1 – M iewing untiMe ventS irror nvrAM e rAiD 1e –...
- Page 9 Contents Promise Technologies ontActing echnicAl uPPort imited ArrAnty iSclAiMer of other wArrAntieS eSPonSiBilitieS eturning the roDuct ePAir PPendix 2 148 rAnsferring hysicAl egAsus through DiSK ProceDure for PPendix mPortAnt nformAtion rive oMPAtiBility gnu g enerAl uBlic icenSe...
-
Page 10: I Ntroduction To
Pegasus2 models (R4, R6, R8) are operationally compatible with the original release Pegasus R4 and R6 models. Use the latest version of the PROMISE Utility to monitor the Pegasus2 status and perform maintenance and management functions. The latest version of the PROMISE Utility can also be used... -
Page 11: A Rchitecture
Pegasus2 has two Thunderbolt ports, as required for daisy-chaining. enefitS • Thunderbolt 20 Gb/s data connection • PMC Sierra 8011 I/O processor • 512 MB of DDR2 SDRAM memory • PROMISE Utility management tool • Compatible with Apple Time Machine • R6, six SATA 3.5-inch hard disk drives • R4, four SATA 3.5-inch hard disk drives • R8, eight SATA 3.5-inche hard disk drives • Additional storage using multiple daisy-chained Pegasus and Pegasus2 enclosures... -
Page 12: Pecifications
• The Pegasus2 R4 is shipped with four HDD • The Pegasus2 R6 is shipped with six HDD • The Pegasus2 R8 is shipped with eight HDD • In addition, Pegasus2 enclosures can be connected or “daisy-chained” to other Pegasus2 or Pegasus units to scale up the available storage capacity. -
Page 13: H Ardware
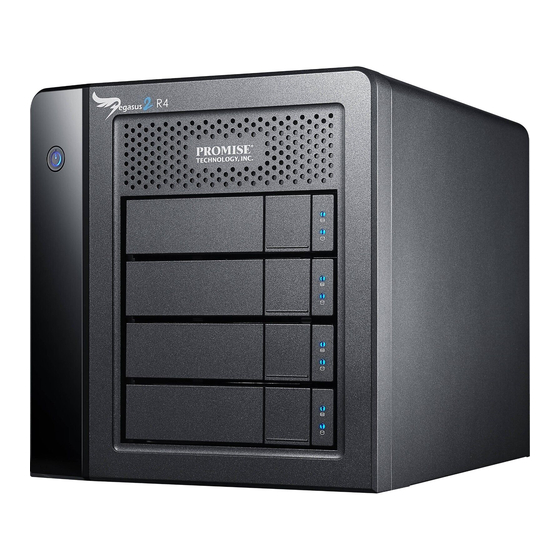
Pegasus2 R4/R6/R8 Product Manual ArdwAre This section provides a brief introduction to the external hardware of the Pegasus2 R4. R6 and R8. The R6 and R8 are taller since they have more hard disk carriers. For the purpose of installation they are nearly identical. Pegasus2 R4 front view Power Button / System Status Drive Carrier Thunderbolt Link LEDs Drive Status LED Drive Activity LED LED Description... -
Page 14: Thunderbolt Ports
Promise Technologies Note As far as the location of the Thunderbolt ports is concerned, the back of the R4, R6 and R8 are identical, i.e. near the top and left of center. The power connection is in the lower right corner on both devices. -
Page 15: I Nstallation And S Etup
Pegasus2 R4/R6/R8 Product Manual nstAllAtion And etuP This chapter contains the following topics: • “Packing List” on page 7 • “Connect the power cord” on page 8 • “Connect Pegasus2 to your Mac” on page 9 • “Installing the Software” on page 10 • “Power modes on the Pegasus2”... -
Page 16: S Ummary Of The Setup Procedure
The setup procedure for the Pegasus2 is simple and easy. The device is shipped with hard disk drives installed and a RAID array configured, so it is just necessary to plug it in and connect the device. However you should install the PROMISE Utility software used for monitoring and administration of the system. Please follow the setup procedure here or in the Quick Start Guide. -
Page 17: C Onnect The Power Cord
Pegasus2 R4/R6/R8 Product Manual onnect the Power cord To connect the power cord the Pegasus2 unit: Attach the power cord on the back of the Pegasus2 unit. See “Thunderbolt and power connections” below. Plug the other end into a suitable power source. Thunderbolt and power connections Thunderbolt ports Pegasus2 system Thunderbolt port MacBook Pro To power source (shown as an example) Power cable Thunderbolt cable... -
Page 18: C Onnect P Egasus 2 To Your M Ac
Promise Technologies onnect egAsus to your Note If the Thunderbolt cable is connected to a Mac that is running, the Pegasus2 will power up as soon as the power is connected. This is a new feature for the Pegasus2. To establish the Thunderbolt connection: Connect a Thunderbolt cable from one of the Thunderbolt ports on the back of the Pegasus2 to the Thunderbolt port on your Mac computer. See “Thunderbolt and power connections” on page... -
Page 19: I Nstalling The S Oftware
The Pegasus2 unit ships ready to use without configuration or set-up. However it is a good idea to install the PROMISE Utility software even if you do not plan to make any changes to device configuration. The utility is useful for monitoring the system and getting firmware updates. The utility is necessary if you plan to change the default RAID configuration (Pegasus2 is shipped with a RAID 5) or if you will swap out any of the hard disks shipped with the device. - Page 20 Promise Technologies The Welcome menu explains that software will be installed on the Mac. Click the Continue button to proceed with installation. The Software License Agreement appears, please read the statement and click Continue to proceed. Click Agree if you agree to the terms of the license. To read the license, click Read License. Choose Disagree if you do not agree the terms, in which case the installation procedure is terminated.
- Page 21 Click Close to end the installation procedure. The PROMISE Utility is now available to be used for management of the Pegasus2. Use this if you need to change a hard disk drive, or change the default array configuration, or to update the device firmware. This is also useful for monitoring the status of the system and for troubleshooting. For more information on using the PROMISE Utility, including instructions on how to use the Wizard menus to install a different RAID array configuration, please read “Manage with PROMISE Utility” on page 17.
-
Page 22: Power Modes On The Pegasus2
• Restart After Shutdown – When your Mac computer powers up, the Pegasus2 unit automatically powers up. • Spin down HDD - The Pegasus2 includes a power saving feature that spins down the hard disk drives if the logical drive is idle for 30 minutes. This can be enabled or disabled and the idle time can be changed in the PROMISE Utility. Click on the Controller link in the Dashboard, then click the Settings button to see how to change this setting. hutting down the egAsus The shuts down automatically if you turn off your Mac. If you want to turn off the Pegasus2 without shutting down your computer, follow the steps below. -
Page 23: Aisy -C Haining M Ultiple P
Pegasus2 R4/R6/R8 Product Manual Aisy hAining ultiple egAsus egAsus nits Up to 6 Pegasus or Pegasus2 devices can be connected to each other and to your Mac in a daisy chain sequential Thunderbolt connection. To daisy-chain multiple Pegasus and/or Pegasus2 units: Connect a Thunderbolt cable from one of the Thunderbolt ports on the back of your Mac computer to one of the Thunderbolt ports on the first Pegasus/Pegasus2 unit. Connect a second Thunderbolt cable from other Thunderbolt port on the first Pegasus/Pegasus2 unit to one of the Thunderbolt ports on the second Pegasus/Pegasus2 unit. Thunderbolt daisy-chain connections iMac used for this example, any Mac with a Thunderbolt port can be used. Thunderbolt port Thunderbolt ports Thunderbolt ports (Pegasus R4) (Pegasus2 R4) -
Page 24: Nlocking The Ui
• To view a list of the Pegasus or Pegasus2 units, click the View menu. . • To display a Pegasus or Pegasus2 unit in the PROMISE Utility, click the View menu and choose unit you want to see. -
Page 25: Reate A Isk Rray And Ogical
If you are installing new disk drives, use the Wizard to create a disk array and logical drive. The procedures are described in the next chapter. To see the Wizard menu, launch the PROMISE Utility, in the Dashboard menu, under System Status, click the Disk Array link. See “The PROMISE Utility interface with the Dashboard displayed” on page The Wizard dialog box opens with three configuration methods. -
Page 26: Anage With Promise U Tility
The PROMISE Utility requires a Thunderbolt connection between your computer and the Pegasus unit. See “Connect Pegasus2 to your Mac” on page 9. The PROMISE Utility must be installed onto your computer before you can use it. See “Installing the Software” on page 10. -
Page 27: Ccessing The Promise U Tility
• Unlocking the UI Pening T o open the PROMISE Utility, double-click the PROMISE Utility icon in the Macintosh Dock (right). The PROMISE Utility window opens and displays the Dashboard. See “The PROMISE Utility interface with the Dashboard displayed” on page 20. -
Page 28: U Nlocking The Ui
• To view a list of the Pegasus or Pegasus2 units, click the View menu. • To display a Pegasus or Pegasus2 unit in the PROMISE Utility, click the View menu and choose unit you want to see. -
Page 29: P Erusing The Promise U Tility I T
Drop-down menus in the Menu Bar Toolbar icons • PROMISE Utility – About, Checking for Updates, Preferences, Services, Hide, Quit • View – Show/Hide T oolbar, Customize T oolbar, Devices (Pegasus units) • Dashboard – Show the Dashboard • Device – Front and Back Views, Component List, Physical Drive List • Storage –... -
Page 30: C Ustomizing The T Oolbar
You can customize the toolbar by adding or removing icons. T o add and remove toolbar icons: From the PROMISE Utility window, click the View menu and choose Customize Toolbar... The toolbar options dialog box appears. Do one or both actions are needed: • Click and drag an icon from the dialog box to the toolbar to add the icon. -
Page 31: D Evice Menus
Use the Device drop-down menu in the menu bar at the top of your desktop to view an active display of the Pegaus2 device, as well as access to menus used to configure settings for device hardware and physical drives. To view the PROMISE Utility menu bar, just select the PROMISE Utility window, and the menu bar lists the Device, Admin and other menus categories. Device menu options... -
Page 32: F Ront V Iew
Promise Technologies ront The Front View active menu lets you view the enclosures and all components on the front of the Pegasus2. Move the cursor over the drive carrier to display the information of the installed physical drive, including the device ID, physical capacity, operational status, etc. Click on the drive to bring up the Physical Drive Information, displaying the detailed information of the device. -
Page 33: B Ack V Iew
Pegasus2 R4/R6/R8 Product Manual Click on of the following items in the drop-down menu: • All DA – Show all disk arrays • DA0 (DA1, DA2, etc.) – a specific disk array • close – Click to close the menu and return to normal view. The carriers containing drives that do not belong to the chosen disk array will be highlighted. Go to Admin drop-down menu and choose the Back View option to see a virtual view of the back of the Pegasus2. -
Page 34: S Ubsystems
Promise Technologies AnAging ubsystems Enclosure management includes: • “Viewing Subsystem Information” • “Making Subsystem Settings” • “Clearing Statistics” • “Restoring Factory Default Settings” • “Saving a Service Report” • “Updating Firmware” iewing ubsystem nformAtion The term enclosure refers to the Pegasus unit. -
Page 35: Aking S Ubsystem S Ettings
Pegasus2 R4/R6/R8 Product Manual Aking ubsystem ettings T o make enclosure settings: Click the Subsystem Information icon. Click the Settings button. Make changes as required: • Enter an alias or change the existing alias in the field provided. Click the Save button. leAring tAtistiCs This function clears statistical data on the RAID controller, physical drives, and logical drives. T o clear statistics: Click the Subsystem Information icon. -
Page 36: Estoring Actory Efault Ettings
Promise Technologies estoring ACtory efAult ettings This feature restores settings to their default values. To restore all settings to their default values: From the Admin drop-down menu in teh menu bar at the top of your desktop, choose Restore Factory Default. -
Page 37: Pdating Irmware
For best performance, it is a good idea to keep the Pegasus2 firmware up to date. The update procedure is used for the controller and other system hardware. Download the latest firmware from the PROMISE website at www.PROMISE.com/support/download.aspx and place the .img file on your Mac. Keep in mind that after the update process, it will be necessary to restart your Mac. To update the controller firmware: From the Admin drop-down menu in the menu bar at the top of your desktop, choose Firmware Update. -
Page 38: Anaging The
Promise Technologies rAid c AnAging the ontroller RAID controller management includes: • “Viewing Controller Information” • “Viewing Controller Statistics” • “Making Controller Settings” • “Making Buzzer Settings” • “Making Fan Settings” iewing ontroller nformAtion T o view controller information, from the Device menu, choose Component List, the Information tab is displayed. -
Page 39: Iewing C Ontroller S Tatistics
Pegasus2 R4/R6/R8 Product Manual To view advanced information, click the Advanced Information tab. Advanced controller information includes: • Memory Type • Memory Size • Flash Type • Flash Size • NVRAM Type • NVRAM Size • Preferred Cache Line Size •... -
Page 40: Aking C Ontroller S Ettings
Promise Technologies Aking ontroller ettings T o make controller settings: From the Device menu, choose Component List. Mouse-over the controller, then click the Settings button. Make setting changes as required: • Enter, change or delete the alias in the Alias field. -
Page 41: Aking B Uzzer S Ettings
Pegasus2 R4/R6/R8 Product Manual Aking uzzer ettings T o make buzzer settings: From the Device menu, choose Component List. Mouse-over the buzzer, then click the Settings button. Check the Enable Buzzer box to enable the buzzer. Or uncheck the box to disable. Click the Save button. -
Page 42: E Nclosures
Promise Technologies AnAging nclosures Enclosure management includes the following functions: • “Viewing Subsystem Information” • “Viewing Temperature Sensor Information” • “Locating an Enclosure” iewing the nClosure nformAtion T o access enclosure information: Click the Dashboard icon, then click the Controller link. -
Page 43: Iewing Emperature Ensor Nformation
Pegasus2 R4/R6/R8 Product Manual iewing emperAture ensor nformAtion T o view the status of the temperature sensor: Click the Dashboard icon, then click the Temperature link. Scroll down until you see Temperature Sensors. Temperature Sensors information includes: • ID • Status (Normal, Warning or Critical icon) • Location (Controller or Backplane) • Healthy Threshold (Enclosure Warning Temperature Threshold) • Current Temperature... -
Page 44: Ocating An E Nclosure
An nClosure If you have multiple Pegasus units, and you want to verify which unit you are accessing in the PROMISE Utility, use the Locate function. T o locate a enclosure: From the Device menu, choose Component List. Mouse-over the Enclosure, then click the Locate button. -
Page 45: B Ackground A Ctivities
Pegasus2 R4/R6/R8 Product Manual AnAging Ackground ctivities Background activity management includes: • “Viewing Current Background Activities” • “Adding a Scheduled Background Activity” • “Changing a Background Activity Schedule” • “Enabling or Disabling a Scheduled Background Activity” • “Deleting a Scheduled Background Activity” • “Media Patrol”... -
Page 46: Iewing C Urrent B Ackground A Ctivities
Promise Technologies iewing urrent ACkground Ctivities T o view a list of background activities, click on the Background Activities icon. The list of background appears: • Media Patrol • • Redundancy Check • Transition • Rebuild • Synchronization • Migration Currently running activities show a progress bar. -
Page 47: R Edundancy C Heck
Pegasus2 R4/R6/R8 Product Manual Choose the option for the activity you want: • Media Patrol • Redundancy Check • Spare Check Choose a Start Time from the dropdown menus. The menus have a 24-hour clock. • Choose a Recurrence Pattern option, daily, weekly, or monthly. • For the Daily option, enter an interval in the Every field. -
Page 48: Hanging Aackground Ctivity Chedule
Promise Technologies hAnging A ACkground Ctivity Chedule T o change an existing scheduled background activity: Click on the Background Activities icon. Click the Scheduler button. The list of scheduled background appears. Mouse-over the background activity, then click the Settings button. -
Page 49: Nabling Or D
Pegasus2 R4/R6/R8 Product Manual nAbling or isAbling A Cheduled ACkground Ctivity Background activity schedules are enabled by default when you create the schedule. If you want to stop a background activity now but plan to use it again in the future, disable the scheduled activity rather than deleting it. -
Page 50: Edia Atrol
Promise Technologies ediA Atrol Media Patrol is a routine maintenance procedure that checks the magnetic media on each disk drive. Media Patrol checks are enabled by default on all disk arrays and spare drives. Media Patrol is concerned with the media itself, not the data recorded on the media. If Media Patrol encounters a critical error, it triggers PDM if PDM is enabled on the disk array. -
Page 51: Edundancy C Heck
Pegasus2 R4/R6/R8 Product Manual edundAnCy heCk Redundancy Check is a routine maintenance procedure for fault-tolerant disk arrays (those with redundancy) that ensures all the data matches exactly. Redundancy Check can also correct inconsistencies. See “Redundancy Check on a Logical Drive” on page 64. AKing eDunDAncy hecK ettingS T o make Redundancy Check settings: Click on the Background Activities icon. -
Page 52: Aking Nitialization Ettings
Promise Technologies AKing nitiAlizAtion ettingS T o make initialization settings: Click on the Background Activities icon. Click the Settings button. Click the Logical Drive Initialization Rate dropdown menu and choose a rate: • Low – Fewer system resources to Initialization, more to data read/write operations. -
Page 53: Aking Ebuild Ettings
Pegasus2 R4/R6/R8 Product Manual AKing eBuilD ettingS Click on the Background Activities icon. Click the Settings button. Click the Rebuild Rate dropdown menu and choose a rate: • Low – Fewer system resources to the Rebuild, more to data read/write operations. • Medium –... -
Page 54: Pdm
Promise Technologies Predictive Data Migration (PDM) is the migration of data from the suspect disk drive to a spare drive, similar to rebuilding a disk array. But unlike rebuilding, PDM automatically copies your data to a spare drive before the drive fails and your logical drive goes Critical. -
Page 55: T Ransition
Pegasus2 R4/R6/R8 Product Manual rAnsition Transition is the process of replacing a revertible spare drive that is currently part of a disk array with an unconfigured physical drive or a non-revertible spare drive. See ”Running a Transition on a Spare Drive” on page 86. AKing rAnSition ettingS T o make Transition settings: Click on the Background Activities icon. Click the Settings button. -
Page 56: S Ynchronization
Promise Technologies ynChronizAtion Synchronization is automatically applied to logical drives when they are created. Synchronization recalculates the redundancy data to ensure that the working data on the physical drives is properly in sync. Mouse-over on the logical drive, click the View button, and look under Logical Drive Information beside the line that says Synchronized. -
Page 57: Anaging Hysical Rives
Pegasus2 R4/R6/R8 Product Manual AnAging hysicAl rives Physical drive management includes: • “Viewing a List of Physical Drives” • “Viewing Physical Drive Information” • “Viewing Physical Drive Statistics” • “Viewing Physical Drive SMART Log Information” • “Locating a Physical Drive” • “Making Global Physical Drive Settings”... -
Page 58: Iewing P Hysical D Rive I Nformation
Promise Technologies iewing hysiCAl rive nformAtion T o view physical drive information: Click the Physical Drive icon. Mouse-over the physical drive you want then click the View button. Physical drive information includes: • Physical Drive ID – ID number of the physical •... -
Page 59: Iewing P Hysical D Rive S Tatistics
Pegasus2 R4/R6/R8 Product Manual iewing hysiCAl rive tAtistiCs T o view physical drive statistics: Click the Physical Drive icon. Mouse-over the physical drive you want then click the View button. Click the Statistics tab. Physical drive statistics include: • Data Transferred •... -
Page 60: Iewing P Hysical D Rive Smart L
Promise Technologies smArt l iewing hysiCAl rive nformAtion T o view physical drive SMART Log information: Click the Physical Drive icon. Mouse-over the physical drive you want then click the View button. Click the SMART Log tab. SMART Log information includes: • Physical Drive ID... -
Page 61: Aking G Lobal P Hysical D Rive S
Pegasus2 R4/R6/R8 Product Manual Aking lobAl hysiCAl rive ettings T o make global physical drive settings: Click the Physical Drive icon.. Click the Global Physical Drive Settings button. Check the boxes to enable, uncheck to disable. • Enable Write Cache • Enable Read Look Ahead Cache • Enable Command Queuing Click the Save button. -
Page 62: Aking P Hysical D Rive Smart L
Promise Technologies Click the Save button. Click the X icon to close the settings panel. smArt l Aking hysiCAl rive ettings To make physical drive SMART log settings: Click the Physical Drive icon. Mouse-over the physical drive you want then click the Settings button. -
Page 63: F Orcing A P Hysical D Rive O Ffline
Pegasus2 R4/R6/R8 Product Manual orCing A hysiCAl rive ffline This feature applies only to physical drives assigned to disk arrays. T o force a physical drive offline: Click the Physical Drive icon. Mouse-over the physical drive you want then click the Force Offline button. In the Confirmation box, type the word “confirm” in the field provided and click the Confirm button. -
Page 64: R Unning M
Promise Technologies unning eDiA Atrol on your hySicAl riveS Media Patrol is a routine maintenance procedure that checks the magnetic media on each disk drive. Media Patrol checks are enabled by default on all disk arrays and spare drives. Media Patrol is concerned with the media itself, not the data recorded on the media. -
Page 65: Anaging Isk Rrays
Pegasus2 R4/R6/R8 Product Manual AnAging rrAys Disk array management includes: • “Viewing a List of Disk Arrays” • “Viewing Disk Array Information” • “Creating a Disk Array Manually” • “Creating a Disk Array and Logical Drive with the Wizard” • “Making Disk Array Settings” • “Locating a Disk Array”... -
Page 66: Iewing D Isk A Rray I Nformation
Promise Technologies iewing rrAy nformAtion T o view disk array information: Do one of the following actions: • • From the Dashboard window, click the Disk Array link. • • From the Storage menu, choose Disk Array. Mouse-over the disk array you want then click the View button. Disk array information includes: • Disk Array ID – DA0, DA1, etc. -
Page 67: Reating A Isk Rray Anually
Pegasus2 R4/R6/R8 Product Manual reAting A rrAy AnuAlly This feature creates a disk array only. You can also use the Wizard to create a disk array with logical drives and spare drives at the same time. T o create a disk array: From the Dashboard menu, click the Disk Array link. -
Page 68: C Reating A D Isk A Rray And L Ogical D
A disk array is the method of organizing the hard disk drives or solid state drives in the Pegasus unit. A logical drive is created on a disk array. The logical drive is where your computer saves files on the Pegasus. The PROMISE Utility includes a Wizard to help you set up a disk array, logical drives, and spare drive. T o open the Wizard, click the Storage menu and choose Wizard. The Wizard dialog box opens with three configuration methods. -
Page 69: C Hoosing A Utomatic C Onfiguration
Pegasus2 R4/R6/R8 Product Manual hooSing utoMAtic onfigurAtion T o use the Automatic Configuration Wizard: From the Storage menu choose Wizard. Click the Automatic button. The Automatic Configuration dialog box appears. Automatic Configuration dialog box Do one of the following actions: • If you agree with the proposed configuration, click the Submit button. The Wizard creates your disk array and logical drive. If you have a Pegasus R6, the Wizard also creates a spare drive. • If you do NOT agree with the proposed configuration, click the Cancel button to return to the original Automatic Configuration menu. -
Page 70: C Hoosing E Xpress C Onfiguration
Promise Technologies hooSing xPreSS onfigurAtion T o use the Express Configuration Wizard: From the Storage menu choose Wizard. Click the Express button. The Express configuration dialog box appears. See Figure 7. Express Configuration dialog box Check the boxes to choose any one or a combination of: • Redundancy – The array remains available if a physical drive fails • Capacity –... - Page 71 Pegasus2 R4/R6/R8 Product Manual From the Application Type dropdown menu, choose an application that best describes your intended use for the logical drives. • File Server (default) • Video Stream • Transaction Data • Transaction Log • Other Click the Next button to continue. The Summary dialog box appears with information on the disk arrays, logical drives, and spare drives you are about to create.
-
Page 72: C Hoosing A Dvanced C Onfiguration
Promise Technologies hooSing DvAnceD onfigurAtion This option enables you to directly specify all parameters for a new disk array, logical drives, and spare drives. T o use the Advanced Configuration Wizard: From the Storage menu choose Wizard. Click the Advanced button. The Create Disk Array screen displays. - Page 73 Cache or Read Ahead Read Cache Policy. • RAID 50 only. Choose the number of axles to use. • If you want the PROMISE Utility to format your logical drives, leave the Format box checked. For additional format options, see “Formatting Your Logical Drives” on page 76.
-
Page 74: Aking D Isk A Rray S Ettings
Promise Technologies Formatting your Logical Drives If you left the Format box checked under Task 2 – Logical Drive Creation, your logical drives are formatted automatically. If you UNchecked the Format box, you must format your logical drives manually. When the PROMISE Utility has finished the partition and format operation, new removable-drive icons, each representing one logical drive, appear on your desktop (right). -
Page 75: Ocating A Isk Rray
Pegasus2 R4/R6/R8 Product Manual oCAting A rrAy This feature causes the drive carrier LEDs to flash for one minute to assist you in locating the physical drives that make up this disk array. T o locate a disk array: Do one of the following actions: • From the Dashboard window, click the Disk Array link. • From the Storage menu, choose Disk Array. Mouse-over the disk array you want then click the Locate button. -
Page 76: Eleting A Isk Rray
Promise Technologies eleting A rrAy T o delete a disk array: Do one of the following actions: • From the Dashboard window, click the Disk Array link. • From the Storage menu, choose Disk Array. Mouse-over the disk array you want then click the Delete button. -
Page 77: Ebuilding A Isk Rray
Pegasus2 R4/R6/R8 Product Manual ebuilding A rrAy When you rebuild a disk array, you are actually rebuilding the data on one of its physical drives. If there is no spare drive of adequate capacity, you must replace the failed drive with an unconfigured physical drive, then perform a Manual Rebuild. On the carrier with the failed drive, the Drive Power / Status LED is red and the Drive Activity LED is dark. -
Page 78: P Ausing And R
Promise Technologies AuSing AnD eSuMing A eBuilD T o pause or resume a Rebuild: Click on the Background Activities icon. Mouse-over Rebuild and click the Pause or Resume button. toPPing A eBuilD T o stop or cancel a Rebuild: Click on the Background Activities icon. -
Page 79: Ogical Rives
Pegasus2 R4/R6/R8 Product Manual AnAging ogicAl rives Logical drive management includes: • “Viewing a List of Logical Drives” • “Viewing Logical Drive Information” • “Viewing Logical Drive Statistics” • “Making Logical Drive Settings”• • “Viewing Logical Drive Check Tables” • “Creating a Logical Drive Manually” • “Formatting Your Logical Drives”... -
Page 80: Iewing A L Ist Of L Ogical D Rives
Promise Technologies iewing A ist of ogiCAl rives T o view a list of logical drives, do one of the following actions: • • C lick the Logical Drive icon. • • F rom the Storage menu, choose Logical Drive. The list of logical drives appears. Logical drive information includes: •... -
Page 81: Iewing Ogical Rive Tatistics
Pegasus2 R4/R6/R8 Product Manual Logical Drive information displays, including: • Write Policy – WriteThru or WriteBack * • Logical Drive ID – LD0, LD1, etc. • Current Write Policy – May change from • Alias – If assigned WriteBack to WriteThru under certain conditions. •... -
Page 82: Aking Ogical Rive Ettings
Promise Technologies Logical Drive statistics display, including: • Data Transferred – In megabytes • I/O Requests • Read Data Transferred – In megabytes • Non-Read/Write I/O Requests • Write Data Transferred – In megabytes • Read I/O Requests • Errors •... -
Page 83: Iewing Ogical Rive Heck Ables
Pegasus2 R4/R6/R8 Product Manual iewing ogiCAl rive heCk Ables This feature enables you to view error tables. Use this information to evaluate the integrity of the logical drive and to determine whether corrective action is needed. T o view logical drive check tables: Do one of the following actions: • Click the Logical Drive icon. - Page 84 The Write Cache is always set to WriteThru when the Read Cache is set to NoCache. • For RAID 6 logical drives, choose a Codec Scheme from the dropdown menu. P+Q and Q+Q are available. • If you want the PROMISE Utility to format your logical drives, leave the Format box checked. See “Formatting Logical Drives” on page 108.
-
Page 85: Ormatting Our Ogical Rives
If you UNchecked the Format box, you must format your logical drives manually. See “Formatting Logical Drives” on page 108. When the PROMISE Utility has finished the format operation, new removable-drive icons, each representing one logical drive, appear on your desktop (right). When you see the icon, your logical drive is ready to use. Your logical drives are ready to use. -
Page 86: Eleting A Ogical Rive
Promise Technologies eleting A ogiCAl rive This action requires Administrator or Super User privileges. T o delete a logical drive: Do one of the following actions: • Click the Logical Drive icon. • From the Storage menu, choose Logical Drive. The list of logical drives appears. -
Page 87: Ausing And Esuming An Nitialization
Pegasus2 R4/R6/R8 Product Manual Choose the initialization option you want: • Quick Initialization – Check the box and enter a value in the Quick Initialization Size field. This value is the size of the initialization blocks in MB. • Full Initialization – Do not check the box. Enter a hexadecimal value in the Initialization Pattern in Hex field or use the default 00000000 value. -
Page 88: Ausing And Esuming A Edundancy Heck
Promise Technologies Check the options you want: • Auto Fix – Attempts to repair the problem when it finds an error • Pause on Error – The process stops when it finds a non-repairable error Click the Confirm button. AuSing AnD eSuMing A eDunDAncy hecK T o pause or resume a Redundancy Check: Click on the Background Activities icon. The list of background activities appears. - Page 89 Pegasus2 R4/R6/R8 Product Manual If you need to add physical drives to your array, be sure there are unassigned physical drives are installed in your RAID system before you begin migration. See “RAID Levels” on page 91, and “RAID Level Migration” on page 101 and “RAID Level Migration” on page 84.
-
Page 90: Unning Pdm
Promise Technologies unning on A ogiCAl rive Predictive Data Migration (PDM) is the migration of data from the suspect disk drive to a spare drive, similar to rebuilding a disk array. But unlike rebuilding, PDM automatically copies your data to a spare drive before the drive fails and your logical drive goes Critical. -
Page 91: Pare D Rives
Pegasus2 R4/R6/R8 Product Manual AnAging PAre rives Spare drive management includes: • Viewing a List of Spare Drives (below) • “Creating a Spare Drive Manually” • “Making Spare Drive Settings” • “Running Spare Check” • “Deleting a Spare Drive” • “Running a Transition” iewing A ist of pAre... -
Page 92: Iewing S Pare D Rive I Nformation
Promise Technologies iewing pAre rive nformAtion T o view spare drive information: Do one of the following actions: • From the Dashboard window, click the Spare Drive link. • From the Storage menu, choose Spare Drive. The list of spare drives appears. -
Page 93: Reating Apare Rive Anually
Pegasus2 R4/R6/R8 Product Manual reAting A pAre rive AnuAlly This feature creates a spare drive only. You can also use the Wizard to create a disk array with logical drives and spare drives at the same time. See Spare Drives for more information. For more information on settings options, see “Spare Drives”... -
Page 94: Aking S Pare D Rive S Ettings
Promise Technologies Aking pAre rive ettings For more information on settings options, see “Spare Drives” on page 92. T o make spare drive settings: From the Dashboard window, click the Spare Drive link. The list of spare drives appears. Mouse-over the spare drive you want then click the Settings button. -
Page 95: Eleting A S Pare D Rive
Pegasus2 R4/R6/R8 Product Manual eleting A pAre rive This action requires Administrator or a Super User privileges. T o delete a spare drive: From the Dashboard window, click the Spare Drive link. The list of spare drives appears. Mouse-over the spare drive you want then click the Delete button. In the Confirmation box, type the word “confirm” in the field provided and click the Confirm button. -
Page 96: Unning A Ransition
Promise Technologies unning A rAnsition T o run a transition on a revertible spare drive: Click on the Background Activities icon. The list of background activities appears. Mouse-over Transition and click the Start button. Choose a Source Physical Drive. The Source Physical Drive is the revertible spare drive that is now part of the disk array. -
Page 97: T Echnology B Ackground
Pegasus2 R4/R6/R8 Product Manual echnology Ackground This chapter covers the following topics: • “Disk Arrays” • “Logical Drives” • “Formatting Logical Drives” • “Spare Drives” • “RAID Controllers”... -
Page 98: D Isk A Rrays
Promise Technologies rrAys Disk array technology includes: • Media Patrol • ediA Atrol Media Patrol is a routine maintenance procedure that checks the magnetic media on each disk drive. Media Patrol checks all physical drives assigned to disk arrays and spare drives. Media Patrol does not check unconfigured drives. -
Page 99: Pdm
Pegasus2 R4/R6/R8 Product Manual Predictive Data Migration (PDM) is the migration of data from the suspect disk drive to a spare disk drive, similar to rebuilding a logical drive. But unlike Rebuilding, PDM constantly monitors your disk drives and automatically copies your data to a spare disk drive BEFORE the disk drive fails and your logical drive goes Critical. -
Page 100: Ogical Rives
Promise Technologies ogicAl rives Logical drive technology includes: • “RAID Levels” • “RAID Level Migration” • “Stripe Size” • “Sector Size” • “Initialization” rAid l evels RAID (Redundant Array of Independent Disks) allows multiple physical drives to be combined together in a disk array. - Page 101 Pegasus2 R4/R6/R8 Product Manual The disk array’s data capacity is equal to the number of disk drive members multiplied by the smallest drive’s capacity. For example, one 100 GB and three 120 GB drives form a 400 GB (4 x 100 GB) disk array instead of 460 GB. If physical drives of different capacities are used, there is unused capacity on the larger drives.
-
Page 102: Raid 1 - M Irror
Promise Technologies rAiD 1 – M irror When a logical drive is mirrored, identical data is written to a pair of physical drives, while reads are performed in parallel. The reads are performed using elevator seek and load balancing techniques where the workload is distributed in the most efficient manner. Whichever drive is not busy and is... -
Page 103: Raid 1E - E Nhanced M Irror
Pegasus2 R4/R6/R8 Product Manual Advantages Disadvantages • Simplest RAID level • Very high disk overhead – uses only 50% of total capacity • Can increase read performance by processing data requests in parallel since the same data resides on two different drives Recommended Applications for RAID 1: • Accounting... -
Page 104: Raid 5 - B Lock And P Arity S Tripe
Promise Technologies Advantages Disadvantages • Implemented as a mirrored disk array whose • Very high disk overhead – uses only 50% of segments are RAID 0 disk arrays total capacity • High I/O rates are achieved thanks to multiple stripe segments •... -
Page 105: Raid 6 - B Lock And D Ouble P Arity
Pegasus2 R4/R6/R8 Product Manual A RAID 5 on Pegasus R4 consists of three or four physical drives. A RAID 5 on Pegasus R6 consists of three to six physical drives. Advantages Disadvantages • High Read data transaction rate • Disk failure has a medium impact on throughput •... -
Page 106: Raid 10 - M Irror + S Tripe
10 can increase performance by reading and writing data in parallel or striping, and duplicating the data, or mirroring. PROMISE implements RAID 10 by creating a data stripe over one pair of disk drives, then mirroring the stripe over a second pair of disk drives. Some applications refer to this method as RAID 0+1. -
Page 107: Raid 50 - S Triping Of D Istributed P
Pegasus2 R4/R6/R8 Product Manual The data capacity RAID 10 logical drive equals the capacity of the smallest physical drive times the number of physical drives, divided by two. In some cases, RAID 10 offers double fault tolerance, depending on which physical drives fail. RAID 10 arrays require an even number of physical drives and a minimum of four. - Page 108 Promise Technologies RAID 50 - Striping of Distributed Parity Advantages Disadvantages • High Read data transaction rate • Higher disk overhead than RAID 5 (two drives as hot spares) • Medium Write data transaction rate • Good aggregate transfer rate • High reliability...
-
Page 109: Raid 60 - D Ouble P Arity + S Tripe
RAID 60 can increase performance by reading and writing data in parallel or striping, while simultaneously providing parity. PROMISE implements RAID 60 by creating a data stripe across two RAID 6 sets. This creates very high fault tolerance, two drives in each RAID 6 set can fail without interrupting I/O or loss of data. -
Page 110: Raid L Evel M Igration
Promise Technologies rAid l evel igrAtion The term “Migration” means either or both of the following: • Change the RAID level of a logical drive. • Expand the storage capacity of a logical drive. On Pegasus, RAID level migration is performed on the disk array but it applies to the logical drives. - Page 111 Pegasus2 R4/R6/R8 Product Manual RAID 1 A RAID 1 Source logical drive can migrate to the following T arget logical drives: Target Requirements None. RAID 0 3 or more physical drives. RAID 1E Add 1 or more physical drives. 3 physical drives minimum, maximum 4 (R4), 6 (R6) or 8 (R8). RAID 5 RAID 1 must have less than 4 (R4), 6 (R6) or 8 (R8) physical drives.
- Page 112 Promise Technologies RAID 1E A RAID 1E Source logical drive can migrate to the following T arget logical drives: Target Requirements None. RAID 0 Add physical drives. RAID 1E 3 physical drives minimum, 4 (R4), 6 (R6) or 8 (R8).
- Page 113 Pegasus2 R4/R6/R8 Product Manual RAID 6 A RAID 6 Source logical drive can migrate to the following T arget logical drives: Target Requirements Add physical drives. Maximum of 4 (R4), 6 (R6) or 8 (R8). RAID 6 8 physical drives minimum. RAID 60 See “Migrating a Logical Drive”...
- Page 114 Promise Technologies RAID 50 A RAID 50 Source logical drive can migrate to the following T arget logical drives: Target Requirements None RAID 0 None RAID 5 None RAID 6 None RAID 10 None RAID 1E None RAID 60 See “Migrating a Logical Drive” on page 79.
-
Page 115: S Tripe S Ize
Pegasus2 R4/R6/R8 Product Manual tripe Stripe Size, also called “Stripe Block Size,” refers to the size of the data blocks written to, and read from, the physical drives. Stripe Size is specified when you create a logical drive. You can choose Stripe Size directly when you use the Wizard Advanced Configuration function to create a logical drive. You cannot change the Stripe Size of an existing logical drive. You must delete the logical drive and create a new one. -
Page 116: S Ector S Ize
A sector is the smallest addressable area on a physical drive. Sector size refers to the number of data bytes a sector can hold. A smaller sector size is a more efficient use of a physical drive’s capacity. 512 bytes (512 B) is the most common sector size, and the default in the PROMISE Utility. When you create your logical drive using the Wizard Advanced option or you create a logical drive manually, you can choose a sector size of 512 B, 1 KB, 2 KB, or 4 KB. -
Page 117: F Ormatting L Ogical D Rives
• PROMISE Utility with default settings (below) • PROMISE Utility with Custom Settings (page 90) • Disk Utility (page 91) Both the PROMISE Utility and the computer’s disk utility offer a choice of formatting options. However, if there is no specific reason to customize, the default format settings are recommended. ProMiSe u... -
Page 118: Promise U Tility With C
See “Creating a Disk Array and Logical Drive with the Wizard” on page 47 and “Creating a Logical Drive Manually” on page 61. T o format your logical drives using the PROMISE Utility with your own settings: In the Logical Drive list, mouse-over the logical drive you want to format, and click the Format button. -
Page 119: D Isk U Tility
Pegasus2 R4/R6/R8 Product Manual tility For information on using your computer’s disk utility, see the online help or the computer’s User Manual. T o format your logical drives using the computer’s disk utility, you must create your logical drives using the Wizard Advanced option or create your logical drives manually, and you must UNcheck the Format box. -
Page 120: Pare Rives
Promise Technologies PAre rives Spare drive technology includes: • Definition (page 92) • Options (page 92) • Requirements (page 92) • Transition (page 93) efinition A spare drive is a physical drive that you designate to automatically replace the failed physical drive in a disk array. -
Page 121: T Ransition
Pegasus2 R4/R6/R8 Product Manual equirements The spare drive must: • Have adequate capacity to replace the largest physical drive in your disk arrays. • Be the same media type as the physical drives in your disk arrays. A revertible spare drive requires: •... - Page 122 Promise Technologies Transition happens manually when you specify a different unconfigured physical drive to transition (move) the data from the revertible spare drive. See the example on the following pages. Example Following is an example to explain the Transition function. In the example above, there is a four-drive RAID 5 disk array and a global spare drive. Physical drives 1, 2, 3, and 4 belong to the disk array. Physical drive 5 remains unconfigured. Physical drive 6 is a...
- Page 123 Pegasus2 R4/R6/R8 Product Manual When the rebuild is complete, the spare drive has replaced the failed drive. In this example, failed drive 3 was replaced by spare drive 6. The disk array now consists of physical drives 1, 2, 4, and 6. There is no spare drive at this moment.
- Page 124 Promise Technologies Returns drive 6 to spare status When the Automatic Transition is finished, physical drives 1, 2, 3, and 4 belong to the disk array and physical drive 6 is a revertible spare drive. The original configuration is restored. Manual Transition If you wanted to use the drive in slot 5 as a member of the disk array, rather than the drive in slot 3, you would run the Transition function manually. See “Running a Transition on a Spare Drive” on page 71.
-
Page 125: Raid C Ontrollers
Pegasus2 R4/R6/R8 Product Manual rAid c ontrollers RAID controller technology includes: • Cache Policy (“Read Cache Policy” and “Write Cache Policy”) • “Capacity Coercion” As it is used with Pegasus, the term cache refers to any of several kinds of high- speed, volatile memory that hold data moving from your computer to the physical drives or vice-versa. -
Page 126: Apacity Oercion
Promise Technologies ApACity oerCion This feature is designed for fault-tolerant logical drives (RAID 1, 1E, 5, 6, and 10). It is generally recommended to use physical drives of the same size in your disk arrays. When this is not possible, the system adjusts for the size differences by reducing or coercing the capacity of the larger drives to match the smaller ones. -
Page 127: Roubleshooting
This chapter deals problems you might encounter with your Pegasus unit and how to resolve them. • “Responding to an Audible Alarm” (below) • “Checking LEDs” • “PROMISE Utility” • “Viewing the Event Logs” • “Physical Drive Problems” • “Disk Array and Logical Drive Problems”... -
Page 128: Leds
Promise Technologies hecking When you boot Pegasus unit, the Power Button LED turns orange. When fully booted, the LED turns blue. See page 102, Figure 1. See “Subsystem LEDs” on page 102. The drive carrier Power / Status LEDs turn blue if a physical drive is installed. See “Drive Carrier LEDs”... -
Page 129: Rive C Arrier Led
See “Physical Drive Problems” on page 106 for a discussion of rebuilding and failed physical drives for more information. The Locator feature is triggered from the PROMISE Utility. It causes the LEDs to blink orange and blue for one minute. That action helps you find the specific drive. See “Locating a Physical Drive” on page... -
Page 130: Promise U Tility
If you can open the PROMISE utility, but you cannot create or delete disk arrays and logical drives, nor can you make settings changes, check the UI lock. See “Unlocking the UI” on page 15. iewing the... -
Page 131: Iewing Nvram E Vents
Pegasus2 R4/R6/R8 Product Manual nvrAM e iewing ventS This screen displays a list of and information about 508 most important events over multiple subsystem startups. T o display NVRAM events: Click the Events icon. The log of Runtime Events appears. Click the Runtime Events button. The log of NVRAM Events appears. -
Page 132: D Rive P Roblems
Physical drives are the foundation of data storage. A physical drive problem can affect your entire RAID system. promise u iAgnosis using the tility In the PROMISE Utility, when a yellow ! icon or a red X icon appears beside a physical drive, check the drive’s operational status: Click the Physical Drive icon. -
Page 133: Ocating A P Hysical D Rive
Pegasus2 R4/R6/R8 Product Manual oCAting A hysiCAl rive T o locate a physical drive: Do one of the following actions: • Click the Physical Drive icon. • From the Device menu, choose Physical Drive. Mouse-over and click the physical drive you want then click the Locate button. The Power/Status LED for the drive carrier holding that drive blinks blue and orange for one minute. -
Page 134: Eplacing A P Hysical D Rive
A hysiCAl rive A failed physical drive displays a red X icon in the PROMISE Utility and a red Power / Status LED on the drive carrier. Failed physical drive Power / Status LED is red Activity LED is blue Check the failed drive, then obtain a replacement drive of the same: • • T ype –... - Page 135 Pegasus2 R4/R6/R8 Product Manual T o replace a physical drive: Press the release button to unlock the drive carrier. The drive carrier handle swings out. Grasp the handle and gently pull the drive carrier out of the Pegasus unit and place it onto a static- free surface.
- Page 136 Promise Technologies Remove the four mounting screws, then slide the failed drive out of the carrier. Mounting screw Physical drive Mounting screw Mounting screw Mounting screw Drive carrier handle Place the replacement drive into the carrier then install the four mounting screws. Tighten the screws just until they are snug.
-
Page 137: Hysical Rive Arning
Pegasus2 R4/R6/R8 Product Manual hySicAl rive Arning eSSAge If you see messages that says, “ajar HDD from the backplane,” you must reseat the physical drives. T o reseat the physical drives: On the Pegasus unit, press and hold the Power Button LED until it turns red. Wait until the Power Button LED goes dark. -
Page 138: Roblems
• The operational status of the disk array becomes Critical. • The operational status of the logical drives becomes Critical or Degraded. • The operational status of the physical drive becomes Dead or Offline. The PROMISE Utility reports these conditions in the following places: • Dashboard icon –... -
Page 139: Epairing An D Isk A Aa
Offline when TWO physical drives are removed or fail. RAID 6 logical drives go Offline when THREE physical drives are removed or fail. The PROMISE Utility reports these conditions in the following places: • Dashboard icon – A red X icon appears beside the disk arrays, logical drives, and physical drives under System Status. -
Page 140: Ebuilding A Isk Rray
Promise Technologies T o recreate your logical drive: Identify the failed physical drive. See “Locating a Physical Drive” on page 124. Replace the failed drive. See ”Replacing a Physical Drive” on page 125. If the disk array had more than one physical drive, delete the disk array and re-create it. -
Page 141: Igration
If a physical drive fails during a transport, or you do not move all of the physical drives to their new locations, the PROMISE Utility displays an incomplete array. When the PROMISE Utility discovers an incomplete array, it displays a dialog box asking you to: • Click the OK button to accept the incomplete array. -
Page 142: Nreadable Isk Arning
See Figure 6. Warning message Normally, you never see this warning message for Pegasus logical drive because the PROMISE Utility formats your logical drives automatically. If the warning message appears, try using the computer’s disk utility to REPAIR the problem logical drive. -
Page 143: P Roblems
Pegasus2 R4/R6/R8 Product Manual ubsystem roblems Subsystem problem troubleshooting includes: • “Diagnosing a Subsystem Problem” • “Overheating” • “Power Supply” iAgnosing A ubsystem roblem Check System Status on the Dashboard tab. If a yellow ! or red X appears in the System Status box: Click the name link of the component with the red X icon. -
Page 144: Verheating
Promise Technologies verheAting Overheating is a potentially serious condition because the excessively high temperatures can lead to physical drive failure and controller malfunction. Overheating usually results from: • Fan failure • Inadequate air circulation around the Pegasus unit Ailure The larger fan on the back of the Pegasus unit cools the physical drives and the RAID controller. The smaller fan cools power supply. Cooling fans are not field- replaceable. If there is any problem with a... -
Page 145: Nadequate A Ir C Irculation
• Correct any problems identified above. • Shut down the Pegasus unit. Press and hold the Power Button for a few seconds until the LED turns red. The PROMISE Utility displays the message: Unable to connect to the device. • Wait at least one hour, then restart the Pegasus unit. -
Page 146: P Roblems
Promise Technologies onnection roblems Connection problem troubleshooting includes: • “Cables” • “Daisy-Chains” Ables While the installation of the cables and components was correct, they don't function properly, or at all, because: • A connector is dirty or corroded • A connector is loose or damaged • A cable looks OK outside but has an open circuit inside... -
Page 147: C Hains
Pegasus2 R4/R6/R8 Product Manual Aisy hAins If you have multiple Pegasus units daisy-chained together, all Pegasus units must be running to provide access to your volumes and the data they contain. If you shut down a Pegasus unit in the chain, that unit and those below it are effectively disconnected from your computer. -
Page 148: Erformance Onitor
Promise Technologies erformAnce onitor The Performance Monitor display can be useful for diagnosing performance issues that will not necessarily trigger any alerts to appear in the System Status display or event logs. Or you can use it for testing performance of different drive types. -
Page 149: C Ontacting T Echnical S Upport
A description of the problem / situation • System configuration information, including: motherboard and CPU type, hard drive models, SAS/ SATA/ATA/ATAPI drives & devices, and other controllers. Return the product to your dealer or retailer or contact Promise technical support for instructions before shipping the product. - Page 150 Promise Technologies United States 580 Cottonwood Drive Milpitas, Ca 95035, USA Technical Support (E-Support): https://support.PROMISE.com Web site: http://www.PROMISE.com// Australia Technical Support (E-Support): https://support.PROMISE.com Web site: http://www.PROMISE.com// EMEA Netherlands Science Park Eindhoven 5228 5692 EG Son, The Netherlands Technical Support (E-Support): https://support.PROMISE.com Web site: http://www.PROMISE.com//...
- Page 151 Pegasus2 R4/R6/R8 Product Manual Norway ITF Technical Support (E-Support): https://support.PROMISE.com Web site: http://www.PROMISE.com// Belguim Technical Support (E-Support): https://support.PROMISE.com Web site: http://www.PROMISE.com// Luxembourg Technical Support (E-Support): https://support.PROMISE.com Web site: http://www.PROMISE.com// United Kingdom Technical Support (E-Support): https://support.PROMISE.com Web site: http://www.PROMISE.com// Taiwan Technical Support (E-Support): https://support.PROMISE.com Web site: http://www.PROMISE.com//...
- Page 152 Promise Technologies Korea Technical Support (E-Support): https://support.PROMISE.com Web site: http://www.PROMISE.com// Hong Kong Technical Support (E-Support): https://support.PROMISE.com Web site: http://www.PROMISE.com// Singapore Technical Support (E-Support): https://support.PROMISE.com Web site: http://www.PROMISE.com// Japan 3F, Mura Matsu Bldg, 3-8-5, Hongo Bunkyo-ku Tokyo 113-0033, Japan Technical Support (E-Support): https://support.PROMISE.com...
-
Page 153: L Imited W Arranty
Pegasus2 R4/R6/R8 Product Manual imited ArrAnty PROMISE Technology, Inc. (“PROMISE”) warrants that this product, from the time of the delivery of the product to the original end user: a) all components for a period of two (2) years; b) will conform to PROMISE’s specifications;... -
Page 154: D Isclaimer Of Other Warranties
PROMISE does not warrant that any product is free from errors or that it will interface without problems with your computer system. It is your responsibility to back up or otherwise save important data before installing any product and continue to back up your important data regularly. -
Page 155: Y Our R Esponsibilities
You are also responsible for backing up your data before installing any product and for regularly backing up your data after installing the product. PROMISE is not liable for any damage to equipment or data loss resulting from the use of any product. eturning the... - Page 156 Include a copy of your proof of purchase You are responsible for the cost of insurance and shipment of the product to PROMISE. Note that damage incurred due to improper transport or packaging is not covered under the Limited Warranty.
-
Page 157: Ppendix
Pegasus2 R4/R6/R8 Product Manual ppendix Transferring A Physical Hard Disk From Mac To Pegasus2 Pegasus2 supports taking a hard disk out of a Mac computer and installing it as a “pass-through” disk in the Pegasus2 enclosure. When the procedure is completed, the relocated pass-through disk retains all the data and user information from the original Mac. - Page 158 Launch the PROMISE Utility and click on the Physical Drive menu link in the Dashboard. You will see the new drive status as “Pass-Thru” listed in the menu. Launch the PROMISE Utility and click on the Physical Drive menu link in the Dashboard. You will see the new drive status as “Pass-Thru”...
-
Page 159: Ppendix
Use the pull-down menus near the bottom of the page to locate Pegasus2 and then the model (R8, R6, R4). Click on Compatibility to see links for the compatibility list, and click on the latest version to view the (PDF) file PROMISE Download Center web page Find product line and model here... -
Page 160: Gnu G Eneral P Ublic L Icense
Promise Technologies gnu g enerAl uBlic icenSe This product includes copyrighted third-party software licensed under the terms of the GNU General Public License. Please see the GNU General Public License (“GPL”) for the exact terms and conditions of this license at www.gnu.org.
Need help?
Do you have a question about the Pegasus2 R6 and is the answer not in the manual?
Questions and answers