KTM DUKE 125 Installation Instructions Manual
Hide thumbs
Also See for DUKE 125:
- Installation manual ,
- Repair manual (267 pages) ,
- Owner's manual (198 pages)
Table of Contents
Advertisement
GK-ECUJ5-0001/0006 INSTALLATION INSTRUCTIONS
WARNINGS
AVVERTENZE
RACE USE ONLY POWER KIT !!!
Follow the instructions described in this manual to prevent vehicle damage or loss of performance
Don't change or modify the parts supplied by Athena
Execute the installation when the engine is cold
During installation avoid that any part installed interferes with hot engine parts, driving parts or with the driver
No high-pressure washer on the GET ECU
IL KIT E' DESTINATO SOLO ED ESCLUSIVAMENTE ALL' USO AGONISTICO.
L'inosservanza delle norme presenti nel seguente manuale può compromettere il funzionamento del veicolo e/o perdita di potenza
Non modificare o sostituire il materiale fornito da Athena
Eseguire l'installazione a motore freddo
Evitare nel modo più assoluto che qualsiasi parte installata vada ad interferire con parti calde del motore, organi di guida o
con il pilota
Evitare getti d'acqua ad alta pressione (idropulitrici) sopra alla centralina GET
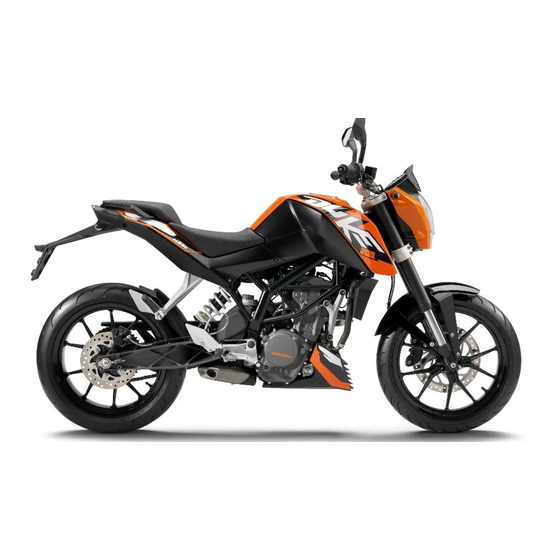
PARTS LOCATION:
UBICAZIONE DELLE PARTI:
ECU
ENGINE
TEMP.
SENSOR
KTM DUKE 125 – 200 - 390:
COIL
TPS
INJECTOR
GD-MIP-0011-AD
www.getdata.it
sales@getdata.it
STEPPER
SIDE STAND
PICK-UP
Advertisement
Table of Contents

Related Manuals for KTM DUKE 125


Summary of Contents for KTM DUKE 125
- Page 1 KTM DUKE 125 – 200 - 390: GK-ECUJ5-0001/0006 INSTALLATION INSTRUCTIONS WARNINGS AVVERTENZE RACE USE ONLY POWER KIT !!! Follow the instructions described in this manual to prevent vehicle damage or loss of performance Don’t change or modify the parts supplied by Athena ...
- Page 2 BEFORE STARTING: OPERAZIONI PRELIMINARI: 1- Remove the seats, the handles and the rear covers of the bike 2- Disconnect the battery positive pole to avoid diagnostic errors and/or malfunction in the OEM ECU 1- Rimuovere le selle, le maniglie e le plastiche posteriori dalla moto 2- Disconnettere il polo positivo della batteria per prevenire errori di diagnostica e/o malfunzionamenti nella centralina originale FITTING THE HARNESS - ECU SIDE : INSTALLAZIONE DEL CABLAGGIO - LATO CENTRALINA:...
- Page 3 FITTING THE HARNESS - SIDE STAND : INSTALLAZIONE DEL CABLAGGIO - CAVALLETTO LATERALE: 1- Place the side stand cable (marked SIDE STAND) behind the rear shock and pull it out through the left side of the bike 2- Disconnect the OEM side stand connectors 1- Passare il cavo (marcato SIDE STAND) dietro il mono ammortizzatore posteriore;...
- Page 4 FITTING THE HARNESS – PICK-UP SENSOR : INSTALLAZIONE DEL CABLAGGIO – SENSORE GIRI MOTORE: PICK-UP CONN. RIGHT SIDE LEFT SIDE 1-2 Place the pick-up cable (marked SMOT) over the engine head (see picture 1 and 2) and pull it out through the left side of the bike. Keep it away from spark cable and fix it far from heating sources 3- Disconnect the OEM pick-up connectors and connect them to the GET harness 1-2 Passare il cavo pick-up (marcato SMOT) sopra la testa del motore (vedi figura 1);...
- Page 5 FITTING THE HARNESS – TPS CABLE : INSTALLAZIONE DEL CABLAGGIO – SENSORE FARFALLA: 1-2 Place the TPS cable (marked TPS) on the right side of the bike, behind the frame pipes (see picture 1) and under the coolant pipe near the throttle sensor 1-2 Passare il cavo TPS (marcato TPS) dietro ai tubi del telaio e sotto al tubo del refrigerante vicino al sensore farfalla (vedi figura 1): operare sul lato destro della moto 3-4 Disconnect the OEM TPS connector and connect the GET TPS harness...
- Page 6 FITTING THE HARNESS – COIL CABLE : INSTALLAZIONE DEL CABLAGGIO – CAVO BOBINA: 1- Place the cable (marked COIL) in the right side of the bike, behind the frame pipes (see picture 1): it has to come out over the coolant radiator 2-3 Disconnect the OEM coil connector and connect the GET COIL harness 1- Passare il cavo (marcato COIL) dietro ai tubi del telaio e farlo uscire sopra il radiatore dell’acqua (vedi figura 1): operare sul lato destro...
- Page 7 FITTING THE HARNESS – INJECTOR CABLE : INSTALLAZIONE DEL CABLAGGIO – CAVO INIETTORE: 1- Find the injector cable (marked INJECTOR) as shown in picture 1 2-3 Pull out the OEM injector connector and connect the GET INJECTOR harness 1- Individuare il cavo iniettore (marcato INJECTOR ) - vedi figura 1 2-3 Disconnettere i connettori originali ed inserire i connettori del cablaggio GET ...
- Page 8 FITTING THE HARNESS – STEPPER MOTOR : INSTALLAZIONE DEL CABLAGGIO – CONNESSIONE STEPPER MOTOR: STEPPER EMULATOR 1- Disconnect the OEM connector from bike STEPPER motor 2- Connect STEPPER EMULATOR to the OEM STEPPER harness 3- Engage the STEPPER connector of GET harness to the bike stepper motor. Fix the STEPPER EMULATOR to the bike. 1- Disconnettere il connettore del motorino STEPPER del cablaggio originale della moto 2- Collegare lo STEPPER EMULATOR al connettore precedentemente rimosso 3- Collegare il connettore STEPPER del cablaggio GET al motorino stepper della moto.
- Page 9 FITTING THE HARNESS – ENGINE MAP SWITCH : INSTALLAZIONE DEL CABLAGGIO – CAVO CAMBIO MAPPATURA MOTORE: OPTIONAL MAP SWITCH 1- By following the same route of the pick-up cable, pass the switch map harness (marked SW MAP) from right to left side of the bike (see picture 1) 2- Pass the cable under the fuel tank and connect it to the engine switch map (optional-sold separately) 1- Passare il cavo per l’interruttore di cambio mappa (marcato SW MAP) dal lato destro a quello sinistro della moto (vedi figura 1)
- Page 10 FITTING THE HARNESS – ENGINE TEMPERATURE SENSOR (HARNESS WITH WIRE): INSTALLAZIONE DEL CABLAGGIO – SENSORE TEMPERATURA MOTORE (CABLAGGIO CON FILO): 1- Pull out the OEM engine temperature sensor connector (see picture 1) 2- Join the yellow wire of the engine temperature connector to the GET harness T ENGINE wire: use the supplied splice connector 3- Re-engage the engine temperature sensor...
- Page 11 FITTING THE HARNESS – ENGINE TEMPERATURE SENSOR (HARNESS WITH CONNECTOR): INSTALLAZIONE DEL CABLAGGIO – SENSORE TEMP.RA MOTORE (CABLAGGIO CON CONNETTORE): 1- Pull out the OEM engine temperature sensor connector (see picture 1) 2- Engage the OEM engine temperature connector to the GET harness T ENGINE connector 3- Re-engage the engine temperature sensor to the harness...
- Page 12 FITTING THE GET ECU: INSTALLAZIONE DELLA CENTRALINA GET: 1- Clean the under-seat surface and apply a piece of bi-adhesive tape as shown in picture 1 2- Connect the GND wire to the bike’s battery negative pole 1- Pulire la superficie del sottosella ed applicare un pezzo di nastro bi-adesivo 2- Connettere il cavo siglato GND al polo negativo della batteria della moto 3- Engage the black connector to GET ECU and press it over the bi-adhesive tape: this will fix the device to the bike 4- Reconnect the positive wire to the battery: the bike is ready to start...
- Page 13 ZERO TPS CALIBRATION: CALIBRAZIONE DELLO ZERO TPS: RUN POSITION TPS CALIBRATION TOOL FULLY CLOSED POSITION BEFORE START CALIBRATION PROCEDURE MAKE SURE THAT ENGINE STOP SWITCH IS IN RUN POSITION AND THE GAS TWISTGRIP IS IN FULLY CLOSED POSITION. USE ONLY GET TPS CALIBRATION TOOL DURIN CALIBRATION PRIMA INIZIARE CALIBRAZIONE...
- Page 14 Click KEY ON KEY OFF 3- Connect the TPS calibration tool to the engine temperature sensor cable: MAKE SURE THAT THE CONNECTORS ARE FULLY ENGAGED 4- TURN THE IGNITION KEY ON AND WAIT FOR 10 seconds (AT LEAST) 5- TURN THE INGNITION KEY OFF AND WAIT FOR 20 seconds (AT LEAST) 6- Disconnect the TPS calibration tool from the temperature sensor cable 3- Collegare il tool di calibrazione TPS al connettore del cavo del sensore di temperatura motore: ASSICURARSI DELLA CORRETTA INSERZIONE TRA I DUE CONNETTORI...
- Page 15 Click 7- Reconnect the engine temperature sensor cable: MAKE SURE THAT THE CONNECTORS ARE FULLY ENGAGED Now the TPS sensor is calibrated. 7- Collegare il connettore del cavo del sensore di temperatura motore alla motore: ASSICURARSI DELLA CORRETTA INSERZIONE TRA I DUE CONNETTORI. La procedura di calibrazione è conclusa ...
- Page 16 GD-MIP-0011-AD www.getdata.it sales@getdata.it...
Need help?
Do you have a question about the DUKE 125 and is the answer not in the manual?
Questions and answers
Hello from where this T Engine cable coming from?