Table of Contents
Advertisement
Quick Links
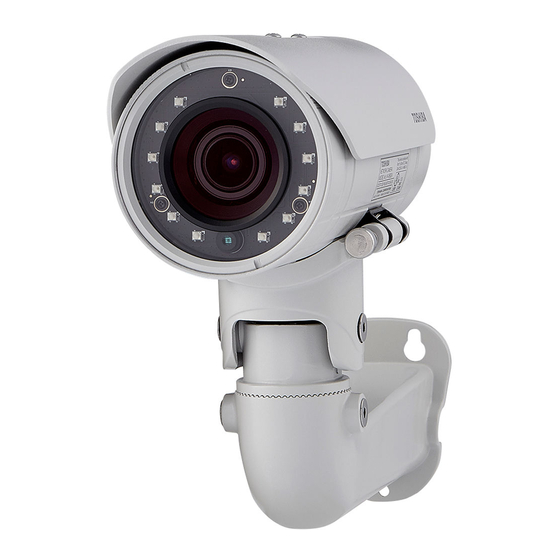
NETWORK CAMERA
Model: IK-WB82A
Quick Start Guide and Important Safeguards
This guide describes the hardware installation.
Refer to the user's manual (PDF file) contained in the CD-ROM for settings, operations
and other information.
The application Adobe
application, download it from the Adobe Systems Incorporated website.
n http://www.adobe.com/
For information on our latest products and peripheral devices, refer to the following
Website:
n http://www.toshibasecurity.com
If the URL changes, refer to the Toshiba website (http://www.toshiba.com).
is needed to view PDF files. If you do not have this
®
®
Reader
Advertisement
Table of Contents

Related Manuals for Toshiba IK-WB82A


Summary of Contents for Toshiba IK-WB82A
-
Page 1: Network Camera
The application Adobe Reader application, download it from the Adobe Systems Incorporated website. n http://www.adobe.com/ For information on our latest products and peripheral devices, refer to the following Website: n http://www.toshibasecurity.com If the URL changes, refer to the Toshiba website (http://www.toshiba.com). -
Page 2: Introduction
Introduction FCC (USA)-INFORMATION This device complies with Part 15 of the FCC Rules. Operation is subject to the following two conditions: (1) This device may not cause harmful interference, and (2) this device must accept any interference received, including interference that may cause undesired operation. -
Page 3: Terms
Thank you for purchasing the IK-WB82A Network Camera. Before using the camera, read this Quick Start Guide and Important Safeguards ("Guide") carefully to ensure correct usage. After reading this Guide, save it for future reference. The design, specifications, software, and this Guide's contents are subject to change without prior notice. -
Page 4: Table Of Contents
Table of Contents Introduction ....................... 2 FCC (USA)-INFORMATION ..................2 Terms ........................3 Table of Contents....................4 Important Safeguards ..................5 Important Safeguards (Cont.) ................7 Notes on Use and Installation................8 Setting the Network Camera Environment ............9 Items needed for network camera monitoring ............9 Package Contents .................. -
Page 5: Important Safeguards
Do not mount the product on an unstable cart, stand, tripod, bracket or table. The product may fall, causing serious injury to a person, or serious damage to the product. Mount the product only in places where Toshiba recommends in the Guide and/or the User's Manual. 8. Use the Product under Appropriate Temperature This product should never be placed near or over a radiator or heat register. - Page 6 12. Lightning If lightning occurs, do not touch the product or any connected cables in order to avoid electric shock. This product may have damage due to lightning and power-line surges during a lightning storm. For additional protection on this product, when it is left unattended and unused for long periods of time, unplug it from the wall outlet and disconnect the power supply and cable system.
-
Page 7: Important Safeguards (Cont.)
Important Safeguards (Cont.) CAUTION TO REDUCE THE RISK OF ELECTRIC SHOCK. DO NOT REMOVE COVER. NO USER SERVICEABLE PARTS INSIDE. REFER SERVICING TO QUALIFIED SERVICE PERSONNEL. The lightning flash with arrowhead symbol, within an equilateral triangle, is intended to alert the user to the presence of uninsulated "dangerous voltage"... -
Page 8: Notes On Use And Installation
Notes on Use and Installation l Do not aim the product at the sun Never aim the product at the sun even with the product power off. l Do not shoot intense light Intense light such as a spotlight to the product may cause a bloom or smear. A vertical stripe may appear on the screen. -
Page 9: Setting The Network Camera Environment
Setting the Network Camera Environment Items needed for network camera monitoring l Administrator's personal computer The personal computer that allows setting, operating, monitoring and other functions with the network camera is called the "administrator's personal computer" in this guide. * The personal computer for viewing monitored images is called the "user's personal computer"... -
Page 10: Package Contents
PDF files. If you do not have this application, download it from the Adobe Systems Incorporated website. n http://www.adobe.com/ For information on our latest products and peripheral devices, refer to the following Website: n http://www.toshibasecurity.com If the URL changes, refer to the Toshiba website (http://www.toshiba.com). -
Page 11: Physical Description
Physical Description Front Side IR LEDs Lens Light Sensor Back Side Back cover Rotate counterclockwise Pin Definition SD/SDHC/SDXC Card Slot NOTE : When inserting an SD card, note the orientation of the contacts. Status LED Power Input (12V DC) Do not use Do not use NTSC-PAL switch Signal GND... -
Page 12: Hardware Installation
Hardware Installation Notes: The attached screws and anchors are used to install the camera to a solid surface. (e.g. concrete) If installing to loose or thin material surfaces , use the appropriate anchors (not included) with the screws. Install the camera tightly. Operating environment –22 °F ~ 122 °F {–30 °C ~ +50 °C} When the camera is installed and operated in low temperatures below 14 °F {–10 °C},... - Page 13 NOTE CAUTION Installation should be done only by qualified personnel and conform to all local codes. Install this camera on a firm and solid part of the wall. If installed improperly or on a weak surface, the camera could fall causing injury and damage.
-
Page 14: Cabling Assembly
Cabling Assembly RJ45 Cable Connector RJ45 Cable Dimension (unit: mm) Components of the Waterproof Connector Sealing Nut (A) Seal (B) Screw Nut (C) Housing (D) Gasket (E) Assembly Steps Insert the seal into the housing. Insert the housing into the Prepare an Ethernet cable screw nut. - Page 15 Waterproof Connector Components of the Waterproof Connector Screw Nut (A) Seal (B) Seals (C) Housing (D) Sealing Nut (E) Assembling Steps 1. Disassemble the components of the waterproof connector into part (A) ~ (E) as shown above. 2. Open the back cover of the Network Camera. 3.
-
Page 16: Network Deployment
Network Deployment Power over Ethernet (PoE) When using a PoE-enabled switch The Network Camera is PoE-compliant, allowing transmission of power and data via a single LAN cable. see the following illustration to connect the Network Camera to a PoE switch via LAN cable. - Page 17 General Connection (without PoE) 1. Connect the Network Camera to an Ethernet switch via LAN cable. 2. Connect the power cable from a power unit (not supplied) to the appropriate port of the general I/O terminal. (See page 11). 3. Connect the PC to an Ethernet switch via Ethernet cable. Ethernet switch (not supplied) Client PC...
-
Page 18: Assigning Ip Address
Assigning IP Address 1. Install the "Installation Wizard" under the Software directory from the CD-ROM. 2. The program will analyze your network environment. After your network is analyzed, please click on the "Next" button to continue the program. Installation Wizard 3. -
Page 19: Retrieving Images
Retrieving Images 1. Access to the Network Camera from the network. ® 2. Retrieve live video through Internet Explorer For more information on camera configuration, please refer to user's manual on the CD-ROM. -
Page 20: Adjusting The Direction And Silica Gel
Adjusting the direction and Silica Gel Monitoring on the television This camera is able to output an analog NTSC video signal and sound from the Audio/Video Out jack in the backside of camera. Adjustment of Viewing angle is possible using a portable monitor without using a personal computer when installing. -
Page 21: Adjusting The Zoom And Focus
Adjusting the Zoom and Focus Access to the Network Camera from the network, and click the configuration button on the main page. Then click the following: Audio and Video Image Zoom and Focus To adjust the zoom factor and focus range 1. -
Page 22: Completion
Completion Mounting the Sun shield 1. Tighten the supplied two hex couplers by supplied hex wrench. 2. Attach the supplied sun shield to the Network Camera and slide it to the desired position. 3. Fix the sun shield with the supplied two screws. -
Page 23: Trademarks
Trademarks l Microsoft, Windows and Intenet Explorer are trademarks or registered trademarks of Microsoft Corporation in the United States and other countries. l Intel and Intel Core are trademarks or registered trademarks of Intel Corporation or its subsidiaries in the United States and other countries. - Page 24 TOSHIBA AMERICA INFORMATION SYSTEMS, INC. Surveillance & IP Video Products 9740 Irvine Boulevard, Irvine, CA 92618-1697 Phone Number: (877) 855-1349 625032900G...
Need help?
Do you have a question about the IK-WB82A and is the answer not in the manual?
Questions and answers