Table of Contents

Related Manuals for Furrion dv5600


Summary of Contents for Furrion dv5600
-
Page 1: Instruction Manual
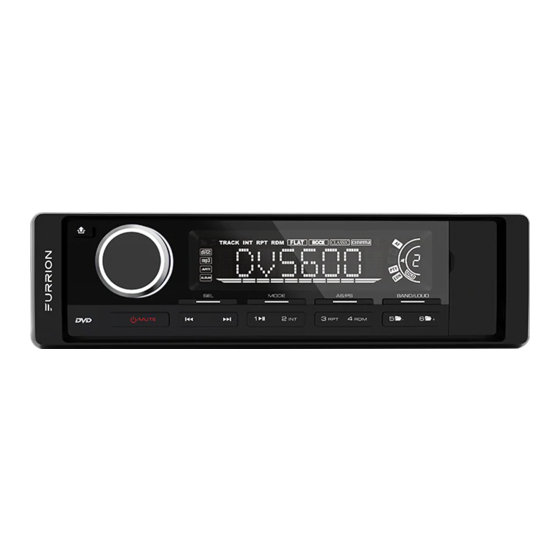
DV5600 INSTRUCTION MANUAL MODE AS/PS BAND/LOUD /MUTE MODE AS/PS BAND/LOUD /MUTE DVD Stereo 180W/CD/DVD/Radio/MP3 USB/AUX-IN/Subwoofer Out (1-6) -
Page 2: Before You Begin
THE USE OF OPTICAL INSTRUMENTS WITH THIS PRODUCT WILL INCREASE EYE HAZARD. • Keep this manual handy as a reference for operating procedures and precautions. • Always keep the volume low enough so you can hear sounds outside of the car. • Protect this product from moisture. • If the battery is disconnected or discharged, the preset memory will be erased and must be reprogrammed. FEATURES: Supported DVD-video, DVD+/-R, DVD+/-RW and DVD+/-DL. Supported VCD featuring PBC (playback control). Supported CD, CD-R and CD-RW. TV System This unit is PAL/NTSC system compatible. When connecting other components to this unit, be sure components are compatible with the same video system or else images will not be correctly reproduced. Aspect Ratio Selection Switching between wide screen, letter box and panscan display is possible. Audio Selection You can switch between multiple audio systems recorded on a DVD as desired. Subtitle Selection You can switch between multiple subtitle languages recorded on a DVD as desired. When an operation is prohibited When you are watching a DVD and attempt to perform an operation, it may not be supported by the programming on the disc. When this happens, this unit indicates on the screen. IM-DV5600-Rev1.0 - PAGE 2... -
Page 3: To Support The Unit
• Before finally installing the unit, connect the wiring temporarily and make sure the unit and the unit and the system work properly. • Fix the unit with screw according to following diagram. 182.6mm Release screw 32.7mm 9.15mm 194.6mm Recommended cutout TO SUPPORT THE UNIT 1. UNIT (included) 2. MOUNTING BRACKET (included) 3. MOUNTING SCREW CM5X8mm x 4PCS (included) 4. MOUNTING SCREW PA5X16mm x 4PCS (included) 5. TRIM COVER (included) 6. REAR SUPPORT STRAP (included) 7. HEX NUT (included) 8. LOCK WASHER (included) 9. PLAIN WASHER (included) 10. TAPPING SCREW PA5X16mm (included) Detaching and attaching the front panel The front panel of this unit can be detached in order to prevent the unit from being stolen. IM-DV5600-Rev1.0 - PAGE 3... -
Page 4: Wire Connection Guide
FRONT LEFT WHITE(+) that car battery being drained when SPEAKER the car will be not used for long GREEN(+) REAR LEFT period. GREEN/BLACK(-) SPEAKER PURPLE(+) Maintenance REAR RIGHT PURPLE/BLACK(-) SPEAKER FUSE REPLACEMENT IGNITION SWITCH If the fuse blows, check the power connection and BLUE replace the fuse. If the fuse blows again after the AUTO ANTENNA replacement, there may be an internal malfunction. BLACK GROUND In this case, consult your nearest repair center. YELLOW MEMORY B+ FUSE 10A Warning Use the specified fuse amperes for each lead. Use of a higher fuse amperes may cause serious damage. IM-DV5600-Rev1.0 - PAGE 4... -
Page 5: Locations Of Parts (Main Unit)
2. SELECT FUNCTION BUTTON (SEL) 3. VOLUME KNOB 4. PRESET STATIONS (1,2,3,4,5,6) BUTTON 5. BAND / LOUDNESS / MEDIA CHANGE BUTTON 6. MODE / SUBWOOFER BUTTON (MODE) MODE AS/PS BAND/LOUD 7. AUTO SEEK/PRESET SCAN BUTTON (AS/PS) /MUTE 8. PREVIOUS/NEXT TRACK/CHAPTER BUTTON ( 9. AUTO SEEK TUNING BUTTON 10. FRONT PANEL RELEASE BUTTON ( 11. LCD DISPLAY (1-6) 12. DISC EJECT BUTTON ( 13. DISC SLOT 14. PLAY/PAUSE BUTTON 15. INTRO BUTTON (INT) 15. REPEAT BUTTON (RPT) 17. RANDOM BUTTON (RDM) 18. SEARCH PREVIOUS / NEXT FOLDER BUTTON ( 19. USB PORT 20. MEMORY CARD SLOT (SD/MMC) 21. AUX IN IM-DV5600-Rev1.0 - PAGE 5... -
Page 6: Locations Of Parts (Remote Control)
Slide the tray out on the back of the remote control and insert the battery with the (+) and minus (-) poles pointing in the proper direction. • When using for the first time, pull out the film protruding from the tray. CAUTIONS • Remove the battery if the remote control is not used for a month or longer. • Do not recharge, disassemble, heat or dispose of the battery in a fire. • Do not store the battery with metallic materials. • In the event of battery leakage, wipe the remote control completely clean and install a new battery • When disposing of used batteries, please comply with government regulations or environmental public institution’s rule that apply in your country/area. • Always check carefully that you are loading the battery with plus (+) and minus (-) poles facing the proper directions. Using the remote control Point the remote control in the direction of the front panel to operate. IMPORTANT • Do not store the remote control in high temperatures or direct sunlight. • Do not let the remote control fall onto the floor, where it may become jammed under the brake or accelerator pedal. IM-DV5600-Rev1.0 - PAGE 6... -
Page 7: General Operations
Loudness • Unit: Press and hold BAND/LOUD button to turn on/off LOUDNESS feature. Note: Press BAND/LOUD button in DISC/SD/USB mode to select between Music/Movie/Photo • Remote Control: Press and hold LD button on remote control to turn on/off LOUDNESS feature. Equalizer Remote: Press EQ button. Press EQ again or ( ) button to select between Flat/Classic/ Cinema/Rock/EQ Off equalize modes. Subwoofer • Unit: Press and hold MODE button to turn on/off subwoofer. IM-DV5600-Rev1.0 - PAGE 7... -
Page 8: Listening To Radio
6. Press 3 RPT button repeatedly to select Rep-1/Rep DIR/Rep ALL repeatedly playback until press [A/PS] button. Remote control: Files search for stop mode: 1. Press STOP button to stop any playback. 2. Press ( ) button repeatedly to select “photo” file listed. 3. Press ( ) button to list photo folder. 4. Press ( , ) button to select desired folder then press OK button to confirm. 5. Press ( , ) button to select desired JPG file then press OK button to start playback photo. 6. Press SEEK+ for next photo. 7. Press SEEK- for previous photo. 8. Press RPT button repeatedly to select Rep-1/Rep DIR/Rep ALL repeatedly playback until press STOP button. IM-DV5600-Rev1.0 - PAGE 8... -
Page 9: Movie Playback
1. Press Stop button to stop any playback. 2. Press ( ) button repeatedly to select “Video” file listed. 3. Press ( ) button to listed movie folder. 4. Press ( , ) button to select desired folder then press OK to confirm. 5. Press ( , ) button to select desired movie file then press OK button to start playback. 6. Press SEEK+ for next file. 7. Press SEEK- for previous file. 8. Press RPT button repeatedly to select Rep-1/Rep DIR/Rep ALL repeatedly playback until press STOP button. IM-DV5600-Rev1.0 - PAGE 9... - Page 10 - You cannot operate USB hard drives on the device. - It maybe necessary to turn the flash memory ON so that it can be read. 1. Plug your USB storage medium into the USB port. 2. If you use a memory card, insert it into the memory card reader. 3. The player automatically switches to the input used and starts playback. 4. See the section on operations common for audio / video files on how to control USB or memory card playback. IM-DV5600-Rev1.0 - PAGE 10...
-
Page 11: Dvd/Vcd Playback
Repeat Off – Turn OFF repeat function. Note: PBC feature in VCD disc needs to be STOP in order to use Repeat playback. FOR DVD You can choose between repeat playback of a title or chapter. 1. Press RPT on the remote control during playback. 2. Every time you press this button, the unit switches to the following settings: Repeat Title – Repeat the current playback title. Repeat Chapter – Repeat the current playback chapter. Repeat All – Repeat all folders and tracks. Repeat Off – Turn OFF repeat function. IM-DV5600-Rev1.0 - PAGE 11... - Page 12 • To resume normal playback, press PLAY/PAUSE ( • There is no sound during slow motion playback. • With some disc, slow motion may be unclear during slow motion playback. Zooming in During Playback You can zoom in into the picture during playback. 1. Press and hold ZOOM button on the remote control during playback. 2. Every time you press this button, the unit will zoom 2 - 3 - 4 - 1/2 - 1/3 - 1/4 times and OFF. IM-DV5600-Rev1.0 - PAGE 12...
-
Page 13: Setting The Dvd Player
SYSTEM SETUP PASSWORD Setup password RATING Setup rating level DEFAULT Restore to factory settings OSD Language AUDIO Language LANGUAGE SETUP SUBTITLE Language Select preferred options appear on screen MENU Language MPEG4 Language BRIGHTNESS CONTRAST VIDEO SETUP Select preferred options appear on screen SATURATION SHARPNESS Setting Rating Password 1 Press SETUP button on the remote control. 2 Using Navigation keys select System Setup > Password and press OK button. 3 Enter the default password ‘0000’ and press OK button to unlock first and then enter new 4 digit password and press OK button. The unlock logo will switch to lock indicating password has been set. IM-DV5600-Rev1.0 - PAGE 13... - Page 14 352 x 240 (30fps) MPEG-Audio MPEG-2 (MP1/MP2/MP3) MPEG-1 .vob 720 x 480 (30fps) Dolby Digital (AC3) MPEG-2 Supported Audio Format File Extension Audio Codec Bit Rate Sampling Rate Remark .mp3 16kbps - 320kbps 8k - 48kHz WMA only support WMA7/ WMA8/WMA9 .wma 16kbps - 320kbps 8k - 48kHz (CBR/VBR) (Only support 353 format) Note: Reading the above file formats is not guaranteed. IM-DV5600-Rev1.0 - PAGE 14...
-
Page 15: Technical Specifications
20 Hz - 20 kHz FM RADIO Frequency Range 87.5-107.9 MHz Channel Step 200 kHz Sensitivity 2.8 µV Stereo Separation 30 dB Signal to Noise Ratio 50 dB AM RADIO Frequency Range 530-1710 KHz Usable Sensitivity 32 dB AUDIO/VIDEO OUTPUT Output 750 mV Impedance 10k Ohm GENERAL Power Supply 12V DC (10.8-15.6V allowable) Speaker Impedance 4 or 8 ohm Output power 45W x 4CH Fuse Note: Specification and the design are subject to possible modification without notice due to improvements. IM-DV5600-Rev1.0 - PAGE 15...
Need help?
Do you have a question about the dv5600 and is the answer not in the manual?
Questions and answers