Table of Contents
Advertisement
Advertisement
Table of Contents

Related Manuals for JBL KX200


Summary of Contents for JBL KX200
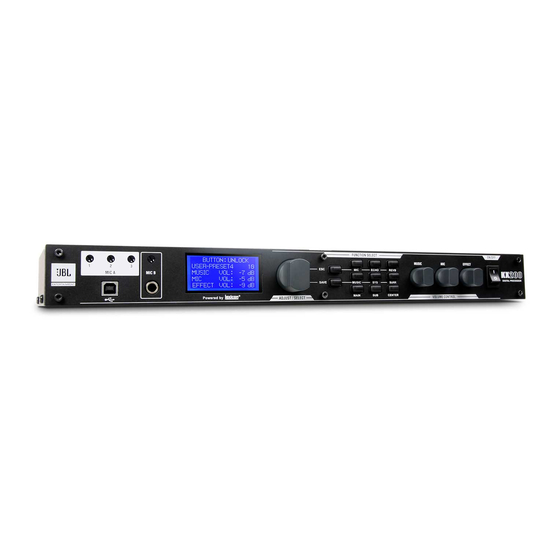
- Page 1 KX200 Digital Processor Quick Start Guide...
-
Page 2: Table Of Contents
Contents 01 - Download GUI ......................3 02 - Login GUI ....................... 7 03 - Change Password ..................... 9 04 - Reset Password ..................... 10 05 - Block Diagram ....................... 11 06 - Change MIC Settings ....................12 07 - Change ECHO Settings ..................... 13 08 - AFE ........................ -
Page 3: Download Gui
01 - Download GUI STEPS: 1. Copy and paste http://www. harmanpro.com.cn/jbl-enter- tainment/ into your browser. - Page 4 01 - Download GUI STEPS: 2. Go to Product (产品) 3. Click Processors (处理器)
- Page 5 01 - Download GUI STEPS: 4. Click the KX200 as shown.
- Page 6 01 - Download GUI STEPS: 5. Go to Download Technical Documenta- tion (技术支持资料下载) 6. Click JBL KX200_Version 1.1.3.0 to download the GUI to your computer.
-
Page 7: Login Gui
1. Power on KX200. 2. Connect KX200 to your computer through a USB cable. 3. Click to start the KX200 GUI from the downloaded file. 4. Click the connection status to Connect- 5. Choose to login in as DJ (as shown) or as Installer (see next page). - Page 8 02 - Login GUI STEPS: Login as Installer: 1. Select to Login as Installer. 2. Key in the Factory-Setting Password 123456. 3. Click Connect to login. NOTE: If logging in as Installer, settings and parameters can be adjusted and saved.
-
Page 9: Change Password
03 - Change Password STEPS: 1. Log in as Installer. 2. Go to Set Installer Password under Device. 3. Change your password in the Device Installer Password Setting window as shown. 4. Click OK. NOTE: New password must contain 6 digits from ‘1’ to ‘9’. -
Page 10: Reset Password
04 - Reset Password STEPS: 1. Switch off the power. 2. Press down both the MIC and the ECHO buttons on the front panel. 3. Switch on the power. 4. Release both buttons when the LCD screen displays as shown. 5. -
Page 11: Block Diagram
05 - Block Diagram... -
Page 12: Change Mic Settings
06 - Change MIC Settings STEPS: 1. Click Mic menu button to enter the interface for mic settings. 2. Select CH A/B Link (MIC 1, 2, 3, 4), CH A (MIC 1, 2, 3) or CH B (MIC 4) to set CH A&B microphone(s) or CHA / CH B microphone(s) individually. -
Page 13: Change Echo Settings
07 - Change ECHO Settings STEPS: 1. Click Echo menu button to enter the interface for echo settings. 2. Select target EQ filter in the EQ Filter Select. 3. Set each parameter to desired level. 4. Click Store to save the settings as Preset. -
Page 14: Afe
About AFE AFE stands for Automatic Feedback Elimi- nation. Frequency-shifting technology is incorpo- rated into our upgraded KX200 for feed- back extermination. NOTE: AFE Level can be adjusted to three levels (1, 2, 3) and Level 2 is set as default. -
Page 15: Device Setting
09 - Device Setting STEPS: 1. Go to Device. 2. Click Device Setting. 3. Set each Volume Setting to desired level. 4. Select the desired Initial Preset. 5. Click OK. NOTE: Volume Setting defines the Mic, Effect and Music volumes for next restart of the unit. Initial Preset selects the preset mode for next restart of the unit. -
Page 16: Preset Store Configuration
10 - Preset Store Configuration STEPS: 1. Go to Device. 2. Click Preset Store Configuration. 3. Lock or Unlock each Preset. 4. Tick desired parameters under the Select Content in Preset. 5. Click OK. NOTE: 1. When any Preset is Locked, no modified parameters will be saved to the Preset. -
Page 17: Short-Cuts For Eq Setting
11 - Short-cuts for EQ Setting Frequency, Q and Gain Click the parameter square of the tar- get EQ Filter in the chart. Drag the parameter square to define the frequency. Scroll your mouse wheel to define the gain. Drag the mini-sized square on the curve to define the Q value. -
Page 18: Select Speaker Models
12 - Select Speaker Models STEPS: 1. Go to Main. 2. Select speaker models through the drop-down menu. -
Page 19: Edit & Save Mic Built-In Parameters
13 - Edit & Save Mic Built-in Parameters STEPS: 1. Go to Tool. 2. Click Mic Type Setting. 3. Choose the MIC EQs to be edited. - Page 20 13 - Edit & Save Mic Built-in Parameters STEPS: 4. Set parameters of the chosen micro- phone to desired levels. 5. Click Store to save the parameters to the target Mic Store Preset. 6. Change the Preset Name if necessary. 7.
- Page 21 13 - Edit & Save Mic Built-in Parameters The edited microphone appears in the channel microphone selection menu. NOTE: EQ setting of the edited microphone is effective but not shown in the chart.
-
Page 22: Edit & Save Speaker Built-In Parameters
14 - Edit & Save Speaker Built-in Parameters STEPS: 1. Go to Tool. 2. Click Speaker Type Setting. - Page 23 14 - Edit & Save Speaker Built-in Parameters STEPS: 3. Set parameters of the speaker to de- sired levels. 4. Click Store to save the parameters to the target Speaker Store Preset. 5. Change the Preset Name if necessary. 6. Click OK.
-
Page 24: Upgrade Firmware
3. Wait till the connection status turning to Connected. 4. Click Yes to start upgrading. 5. Click OK. 6. Restart KX200. 7. Load all the presets to KX200 through the PC-GUI (Device - Restore Factory Setting). CAUTION: DO NOT switch off the power when upgrading the... -
Page 25: Remote Control Through Vod Player
16 - Remote Control through VOD Player To configure KX200 for remote control through a VOD player, an IR receiver (not provided by the manufacturer) is required. STEPS: 1. Connect the IR receiver to EXT REMOTE on the rear panel of KX200. - Page 26 16 - Remote Control through VOD Player STEPS: 2. Go to Device. 3. Click Ext Remote Configuration. 4. Change the IR Code of each Preset to match the remote controller of your VOD player. (Or change the IR code of the VOD player’s remote controller to match the unit).
-
Page 27: Set Mic Volume
Mic Input Volume NOTE: To avoid clipping, ensure the maximum signal input do not exceed -30 dBu by adjusting both the wireless mic volume and KX200 mic input volume. Adjust the Mic Volume to set the mic output volume. Signal should not... - Page 28 JBL Professional 8500 Balboa Blvd. Northridge, CA 91329 USA Phone: (818) 894-8850 Fax: (818) 830-7801 Intl. Fax:(818) 830-7802 For more information, please visit: www.jblpro.com KX200 Digital Processor 05/2016...
Need help?
Do you have a question about the KX200 and is the answer not in the manual?
Questions and answers