Table of Contents
Advertisement
Available languages
Available languages
Quick Links
DMX-LED-Scheinwerfer
DMX LED Spotlight
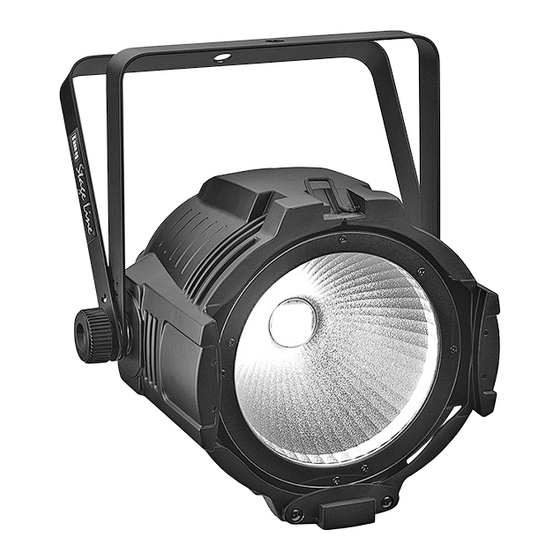
PARC-56/WS
PARC-64/WS
PARC-64SI/WS
BEDIENUNGSANLEITUNG
INSTRUCTION MANUAL
MODE D'EMPLOI
ISTRUZIONI PER L'USO
GEBRUIKSAANWIJZING
MANUAL DE INSTRUCCIONES
INSTRUKCJA OBSŁUGI
SIKKERHEDSOPLYSNINGER
SÄKERHETSFÖRESKRIFTER
TURVALLISUUDESTA
ELECTRONICS FOR SPECIALISTS ELECTRONICS FOR SPECIALISTS ELECTRONICS FOR SPECIALISTS ELECTRONICS FOR SPECIALISTS
Bestellnummer 38.6690
Bestellnummer 38.6770
Bestellnummer 38.6930
Advertisement
Table of Contents

Related Manuals for IMG STAGE LINE PARC-56/WS


Summary of Contents for IMG STAGE LINE PARC-56/WS
- Page 1 DMX-LED-Scheinwerfer DMX LED Spotlight PARC-56/WS Bestellnummer 38.6690 PARC-64/WS Bestellnummer 38.6770 PARC-64SI/WS Bestellnummer 38.6930 BEDIENUNGSANLEITUNG INSTRUCTION MANUAL MODE D’EMPLOI ISTRUZIONI PER L’USO GEBRUIKSAANWIJZING MANUAL DE INSTRUCCIONES INSTRUKCJA OBSŁUGI SIKKERHEDSOPLYSNINGER SÄKERHETSFÖRESKRIFTER TURVALLISUUDESTA ELECTRONICS FOR SPECIALISTS ELECTRONICS FOR SPECIALISTS ELECTRONICS FOR SPECIALISTS ELECTRONICS FOR SPECIALISTS...
- Page 2 Œ Eigenständiger Betrieb: W = Helligkeit, ST= Blitzfrequenz Independent operation: W = brightness, ST = flash rate Fonctionnement indépendant : W = luminosité, ST = fréquence des éclairs Funzionamento autonomo: W = luminosità, ST= frequenza lampi Temperatur (°C) im Scheinwerfer Temperature (°C) inside the spotlight Température (°C) dans le projecteur Temperatura (°C) nel proiettore...
- Page 3 Before switching on … Wir wünschen Ihnen viel Spaß mit Ihrem neuen We wish you much pleasure with your new “img Gerät von „img Stage Line“. Bitte lesen Sie diese Stage Line” unit. Please read these operating Bedienungsanleitung vor dem Betrieb gründlich instructions carefully prior to operating the unit.
- Page 4 Auf der Seite 2 finden Sie alle be schriebenen Wird das Gerät zweckentfremdet, nicht sicher Bedienelemente und An schlüsse. montiert, nicht richtig angeschlossen, falsch bedient oder nicht fachgerecht repariert, kann keine Haftung für daraus resultierende Sach- oder Personenschäden und keine Garantie für 1 Übersicht der Bedienelemente das Gerät übernommen werden.
- Page 5 4) Soll die Stroboskop-Funktion eingeschaltet wer- oder eine Farbfolie (z. B. aus der Serie LCF-… von den, die Taste ENTER erneut drücken, sodass „img Stage Line“) einsetzen. Den Rahmen in die das Display anzeigt. Schienen vorne am Scheinwerfer schieben und mit 5) Mit den Tasten UP und DOWN die Blitzfrequenz der Klammer (2) gegen Herausfallen sichern.
-
Page 6: Table Of Contents
Widerstand (> 0,3 W) abgeschlossen werden: In 1) Die Taste MENU so oft drücken, bis das Display die DMX-Ausgangsbuchse einen entsprechen- anzeigt. den Abschlussstecker (z. B. DLT-123) stecken. 2) Die Taste ENTER drücken. 3) Wenn angezeigt wird, die Taste ENTER 5.2.2 DMX-Startadresse einstellen drücken: Die Innentemperatur wird in °C an ge- Um alle am Lichtsteuergerät angeschlossenen... -
Page 8: Safety Notes
All operating elements and connections de - rial damage will be accepted if the spotlight is scribed can be found on the page 2. used for other purposes than originally intended, if it is not safely installed or not correctly con- nected or operated, or if it is not repaired in an expert way. - Page 9 4 screws supplied into the threaded holes of the For operation via a DMX light controller (e. g. DMX- door barns. 1440 or DMX-510USB from “img Stage Line”), the spotlight is equipped with three DMX control chan- nels. DMX is short for digital multiplex and means 4.3 Switching on...
-
Page 10: Parc-56 / Ws
1) Connect the DMX INPUT (1) to the DMX output 5.3 Temperature indication of the light controller or to the DMX output of and overheat control another DMX-controlled unit. The spotlight is equipped with an overheat control. When the temperature inside the spotlight is too 2) Connect the DMX OUTPUT (3) to the DMX high, the spotlight will be switched off. - Page 11 Vous trouverez sur la page 2, lʼensemble des Ne débranchez jamais lʼappareil en tirant sur le cordon secteur ; retirez toujours le cordon sec- éléments et branchements. teur en tirant la fiche. Nous déclinons toute responsabilité en cas de 1 Eléments et branchements dommages matériels ou corporels résultants si lʼappareil est utilisé...
- Page 12 (par exem- 3) Avec les touches UP et DOWN, réglez la lumi- ple de la série LCF-… de “img Stage Line”) dans le nosité voulue. cadre de filtre de couleur livré (4). Faites glisser le 4) Si la fonction stroboscope doit être activée,...
-
Page 13: Parc-56 / Ws
1) Reliez lʼentrée DMX INPUT (1) à la sortie DMX 5.3 Affichage de la température et du contrôleur ou dʼun autre appareil géré par protection contre les surchauffes DMX. Le projecteur dispose dʼune protection contre les surchauffes. En cas de température trop élevée à 2) Reliez la sortie DMX OUTPUT (3) à... -
Page 14: Messa In Funzione
A pagina 2 trovate tutti gli elementi di comando Nel caso dʼuso improprio, di montaggio non e collegamenti descritti. sicuro, di collegamenti sbagliati, dʼimpiego scor- retto o di riparazione non a regola dʼarte dellʼap- parecchio, non si assume nessuna responsabi- 1 Elementi di comando lità... -
Page 15: Parc-56 / Ws
Per irradiare della luce colorata, inserire un filtro cromatico o una pellicola colorata (p. es. della serie 3) Con i tasti UP e DOWN impostare la luminosità LCF-… di “img Stage Line”) nel telaio per filtri (4) in desiderata. dotazione. Spingere il telaio nelle guide sul lato... - Page 16 ENTER: la temperatura è indicata in °C. dʼuscita DMX un terminatore (p. es. DLT-123 di 4) Con il tasto MENU si può uscire da questo ramo “img Stage Line”). del menù. 5.2.2 Impostare lʼindirizzo di start DMX Per poter comandare separatamente tutti gli appa- recchi DMX collegati con lʼunità...
- Page 17 Op pagina 2 vindt u een overzicht van alle Trek de stekker nooit met het snoer uit het stop- bedieningselementen en de aansluitingen. contact, maar met de stekker zelf. In geval van ongeoorloofd of verkeerd gebruik, onveilige montage, verkeerde aansluiting, fou- 1 Overzicht van de bedienings- tieve bediening of van herstelling door een niet- elementen en aansluitingen...
- Page 18 3) Met de toetsen UP en DOWN stelt u de ge - schijf of een gekleurde folie (bv. uit van de serie wenste helderheid in. LCF-… van “img Stage Line”). Schuif het frame in de geleiderails aan de voorzijde van de schijnwer- 4) Als u de stroboscoopfunctie wilt inschakelen,...
-
Page 19: Technische Gegevens
(> 0,3 W): steek een geschikte afsluitstekker toets ENTER: De binnentemperatuur wordt in (bv. DLT-123 van “img Stage Line”) in de DMX- °C weergegeven. uitgangsbus. 4) Met de toets MENU kunt u het geselecteerde menu-item opnieuw verlaten. -
Page 20: Notas De Seguridad
Todos los elementos de funcionamiento y las No tire nunca del cable de corriente para desco- conexiones que se describen pueden encon- nectarlo de la toma, tire siempre del enchufe. trarse en la página 2. No podrá reclamarse garantía o responsabilidad alguna por cualquier daño personal o material resultante si el proyector se utiliza para otros 1 Elementos de Funcionamiento... - Page 21 (p. ej. la gama LCF-… 4) Para activar la función de estroboscopio, pulse de “img Stage Line”) en el marco para filtro de color el botón ENTER de nuevo para que el visuali- (4) entregado. Deslice el marco por la ranura del zador indique frontal del proyector y asegúrelo con la pinza (2).
- Page 22 que todos los aparatos controlados por DMX 1) Pulse el botón MENU hasta que en el visualiza- estén conectados en cadena. dor aparezca 3) Para evitar interferencias en la transmisión de 2) Pulse el botón ENTER. señal en cableados largos o para un gran 3) Cuando se indique , pulse el botón número de aparatos conectados en serie, ter-...
- Page 23 Opisane elementy sterujące i gniazda połącze- dzialności za wynikłe uszkodzenia sprzętu lub niowe zostały przedstawione na stronie 2. obrażenia użytkownika w przypadku gdy urzą- dzenie jest wykorzystywane w innych celach niż to się przewiduje lub jeśli jest nieodpowiednio 1 Elementy operacyjne oraz złącza zainstalowane, użytkowane lub naprawiane.
- Page 24 Aby uzyskać efekt kolorowego światła, umieścić kolorowy filtr lub folię (np. z serii LCF-… marki 4) Aby włączyć funkcję stroboskopu, wcisnąć “img Stage Line”) w dołączonej ramce (4). Wsunąć ponownie przycisk ENTER aż wyświetlacz ramkę do uchwytów na przedniej stronie reflektora pokaże...
- Page 25 5.2.2 Ustawianie adresu startowego DMX 6 Czyszczenie urządzenia Podczas pracy z kontrolerem, należy ustawić adres Plastikowy panel przedni należy czyścić w regular- startowy DMX pierwszego kanału. Jeżeli np. adres nych odstępach czasowych, w zależności od 17 kontrolera DMX jest przewidziany do sterowania warunków pracy urządzenia.
- Page 26 Læs nedenstående sikkerhedsoplysninger Läs igenom säkerhetsföreskrifterna innan grundigt igennem før ibrugtagning af enheden. enheten tas i bruk. Ytterligare information åter- Bortset fra sikkerhedsoplysningerne henvises finns på övriga språk i manualen. til den engelske tekst. Vigtige sikkerhedsoplysninger Säkerhetsföreskrifter Denne enhed overholder alle relevante EU-direktiver Denna enhet uppfyller alla relevanta direktiv inom og er som følge deraf mærket EU och har därför fått...
- Page 27 Ole hyvä ja tutustu seuraaviin ohjeisiin varmis- taaksesi tuotteen turvallisen käytön. Tarvites- sasi lisätietoja tuotteen käytöstä löydät ne muun kielisistä käyttöohjeista. Asennus Turvallisuudesta Asenna laite aina siten, että riittävä ilmankierto on Laite vastaa kaikkia vaadittuja EU direktiivejä, joten varmistettu käytön aikana. Älä koskaan peitä tuu- se on varustettu merkinnällä.
- Page 28 ® MONACOR INTERNATIONAL GmbH & Co. KG • Zum Falsch 36 • 28307 Bremen • Germany Copyright © by MONACOR INTERNATIONAL. All rights reserved. A-1601.99.03.07.2014...
Need help?
Do you have a question about the PARC-56/WS and is the answer not in the manual?
Questions and answers