LaCie 8BIG RACK THUNDERBOLT 2 User Manual
Hide thumbs
Also See for 8BIG RACK THUNDERBOLT 2:
- Quick start manual (28 pages) ,
- User manual (21 pages)
Table of Contents
Advertisement
Quick Links
Advertisement
Table of Contents

Related Manuals for LaCie 8BIG RACK THUNDERBOLT 2


Summary of Contents for LaCie 8BIG RACK THUNDERBOLT 2
- Page 1 LACIE 8BIG RACK THUNDERBOLT 2 USER MANUAL CLICK HERE TO ACCESS AN UP-TO-DATE ONLINE VERSION of this document. You will find the most recent content as well as expandable illustrations, easier navigation, and search capability. LaCie 8big Rack Thunderbolt 2 User Manual...
-
Page 2: What Is In This Manual
4K video and 3D graphics. This means that professional editors, photographers, and graphic artists get the highest performing storage for their most challenging projects. Use this manual to guide you through the process of connecting your LaCie storage. For questions on installation, consult the Getting Help page. -
Page 3: Box Contents
Important info: Save your packaging. In the event that the product should need to be repaired or serviced, it must be returned in its original packaging. LaCie 8big Rack Thunderbolt 2 User Manual... -
Page 4: Software Suite
LaCie 8big Rack Thunderbolt 2: Advanced Storage Technology). Important info: Your LaCie product's performance can be affected by such external forces as type of cable, hardware, distance, and setup. For optimal performance: use the cables provided with your device or, cables supported by LaCie; make certain to follow the installation instructions provided in the Quick Install Guide and this user manual. -
Page 5: Lacie 8Big Rack Thunderbolt 2: Advanced Storage Technology
STORAGE TECHNOLOGY THUNDERBOLT 2 TECHNOLOGY The LaCie 8big Rack Thunderbolt 2 uses Thunderbolt 2 technology, the fastest, most versatile connection for your computer. While first generation Thunderbolt technology transfer rates are 10Gb/s bi-directional, Thunderbolt 2 technology provides 20Gb/s bi-directional. Additionally, Thunderbolt 2 technology gives priority to the video stream, apportioning the required bandwidth for playback. - Page 6 HARDWARE FOR PERFORMANCE AND REDUNDANCY Featuring hardware RAID and redundant components, the LaCie 8big is a rarity in the world of high-end DAS. While most DAS must choose between high transfer rates or data protection, the LaCie 8big offers both extraordinary performance and built-in protection.
-
Page 7: System Overview
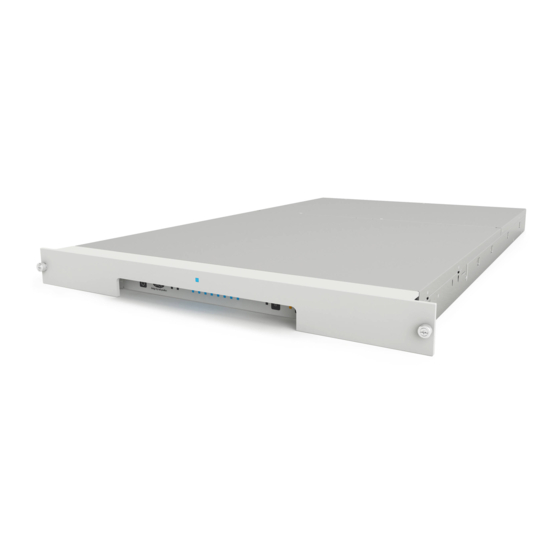
SYSTEM OVERVIEW The LaCie 8big Rack Thunderbolt 2 is a 1U-sized hard drive enclosure. It houses up to eight 3.5-inch hard drives in its front chassis. Enclosures shipped with hard drives feature high-performance Seagate Desktop HDD. In case of hard drive failure or, the need to expand storage capacity, each individual hard drive is hot-swappable and field replaceable. -
Page 8: Enclosure Weight
Enclosure weight Hard drives Weight 15 Kg / 33 lbs 18 Kg / 40 lbs 20 Kg / 44 lbs LaCie 8big Rack Thunderbolt 2 User Manual... -
Page 9: Temperature Ranges
+5ºC to +40ºC Storage (non-operating) -20ºC to +60ºC Important info: The maximum operating ambient temperature for the LaCie 8big is 40°C. Should the environment remain above 40°C for an extended period of time, there is a strong risk that the enclosure will automatically spin down the hard drives and enter idle mode (see Operation). -
Page 10: Front Panel View
Identification button: Pushing this button will cause the identification LEDs on the front and rear of the LaCie 8big to blink amber. The alarm will also sound. The flashing LEDs allow you to identify the LaCie 8big among a group of racked devices. There is another identification button on the rear of the device that can also be pushed to turn on the identification LEDs and sound the alarm. -
Page 11: Rear Panel View
Identification button and LED: Pushing this button will cause the identification LEDs on the front and rear of the LaCie 8big to blink amber. The alarm will also sound. The flashing LEDs allow you to identify the LaCie 8big among a group of racked devices. There is another identification button on the front of the device that can also be pushed to turn on the identification LEDs and sound the alarm. -
Page 12: Hard Drive Frames
Hard drive frames The LaCie 8big Rack Thunderbolt 2 has two hard drive frames, each housing four 3.5-inch hard drives. Each frame has mounting locations for SATA connections. The hard drive frames provide protection from thermal conduction, radio frequency, and electro-magnetic induction. - Page 13 Alarm The LaCie 8big features an alarm that will sound when the the enclosure experiences errors: The enclosure temperature is too high A fan fails A power supply fails A disk fails and/or the RAID is broken The alarm also works in tandem with the identification buttons on the front and rear of the device as well as the identification button in LaCie RAID Manager.
-
Page 14: System Leds
SYSTEM LEDS The LaCie 8big Rack Thunderbolt 2 LEDs provide information on the system status. Review the illustrations below for the LED locations on the chassis. See System Overview for further details on each LED. FRONT Thunderbolt host Thunderbolt daisy chain... -
Page 15: Inside The Front Chassis
INSIDE THE FRONT CHASSIS Fan LEDs Hard drive LEDs LED BEHAVIOR General LED behavior The list of colors below will help you identify the general status of your LaCie 8big. Color State Solid blue Ready Slow blinking blue Idle mode... -
Page 16: Status And Hard Drive Leds
Status and hard drive LEDs The status and hard drive LEDs work together to provide up-to-date details on your LaCie 8big’s health. Status LED Hard drive LEDs State Fast blinking blue Blinking blue Startup and shutdown Hard drives have spun down and the Thunderbolt ports... -
Page 17: Thunderbolt 2 Ports, Identification, And Mute Leds
Solid blue on the Thunderbolt 2 host LED The Thunderbolt 2 port is connected to a computer. Solid blue on the Thunderbolt 2 daisy chain The LaCie 8big is connected to a daisy chain of Thunderbolt devices and/or displays. Identification... -
Page 18: Hard Drive And Fan Leds (Inside The Front Chassis)
A hard drive has not been plugged into the slot's SATA connection Off on hard drive slots within the chassis or it is not receiving power. Fans Behavior State Solid blue The fan is working. Solid red The fan has failed. LaCie 8big Rack Thunderbolt 2 User Manual... - Page 19 An additional plastic bag with screws has been provided to fasten hard drives to the hard drive drawers. If you must secure hard drives to the hard drive trays, make certain to use the included screws. The instructions below are also available on the Quick Start Guide included with the LaCie 8big. LaCie 8big Rack Thunderbolt 2 User Manual...
-
Page 20: Step 1 - Download And Install Lacie Raid Manager
LaCie RAID Manager to monitor and manage the storage The LaCie 8big hard drives are preconfigured as RAID 5 and formatted for Mac (HFS+). Use LaCie RAID Manager to confirm the health of the hard drives or to change the RAID configuration: Download the installer at http://www.lacie.com/support/raidmanager/. - Page 21 STEP 2 - RACK RAILS Attach the inner rack rails to the LaCie 8big using four screws on each side. Attach the outer rack rails to the rack. If necessary, unlock the rear screws on the outer rack rails to extend the sliding brackets.
- Page 22 Slide the LaCie 8big into the rack. To unlock the rails, pull the rail fasteners on each side toward you. An audible click indicates that the LaCie 8big is securely fastened to the rack. LaCie 8big Rack Thunderbolt 2 User Manual...
- Page 23 LaCie 8big Rack Thunderbolt 2 User Manual...
-
Page 24: Step 3 - Cable Management Arm
Attach the cable management arm to the back of the rack rails. Snap the right outer connection into the outside rail. Snap the left connection into the outside rail. Guide the right inner connection into the inner rack rail. LaCie 8big Rack Thunderbolt 2 User Manual... - Page 25 LaCie 8big Rack Thunderbolt 2 User Manual...
- Page 26 LaCie 8big models shipped with two power supplies offer redundancy in case one should fail. When inserting two power supplies into the LaCie 8big, make certain to plug them both into active power supplies. The enclosure will sound the alarm if it senses two power supplies but only one is connected to an active power supply.
- Page 27 Placement Open the panels on the cable management arm and thread the cables. Allow slack for external connections and sliding the LaCie 8big on its rails. Close the panels. LaCie 8big Rack Thunderbolt 2 User Manual...
-
Page 28: Step 5 - Hard Drives
STEP 5 - HARD DRIVES Remove the cover Slide the LaCie 8big toward you until it locks into position. Release the cover by simultaneously pushing both front latches toward you. Lift the cover. LaCie 8big Rack Thunderbolt 2 User Manual... - Page 29 LaCie 8big Rack Thunderbolt 2 User Manual...
-
Page 30: Insert The Hard Drives
Push the hard drive’s lock button to open the latch. Place the hard drive on the LaCie 8big’s hard drive guides. Confirm that the hard drive is correctly aligned on the guides by gently pushing it away from the SATA connection. - Page 31 Slide the hard drive into the SATA connection. LaCie 8big Rack Thunderbolt 2 User Manual...
- Page 32 Close the hard drive’s latch. LaCie 8big Rack Thunderbolt 2 User Manual...
- Page 33 Repeat the steps for each hard drive. Close the cover and slide the LaCie 8big into the rack. To unlock the rails, pull the rail fasteners on each side toward you. Secure the LaCie 8big to the rack using the two front screws.
- Page 34 Step 6 - Computer and power connections Connect the power cables to active outlets. Connect the Thunderbolt cable to your computer. LaCie 8big Rack Thunderbolt 2 User Manual...
- Page 35 Apply a short push to the power button. See Operation for details on how to use the power button. See the LaCie RAID Manager User Manual for instructions on how to manage the hard drives. LaCie 8big Rack Thunderbolt 2 User Manual...
-
Page 36: Operation
The ambient temperature is within the specified temperature range (see System Overview). When booting the LaCie 8big, certain LEDs on the chassis will blink blue for a short period before turning solid blue. See System LEDs for further information. -
Page 37: Powering Off The Lacie 8Big Hard Drives: Idle Mode
Thunderbolt ports remain active and are available for daisy chaining. This is called idle mode. For example, a display that is daisy chained to the LaCie 8big will remain available to the computer following a short push. Short push and RAID synchronization Applying a short push during RAID synchronization spins the hard drives down. -
Page 38: Removing The Thunderbolt Cable During Operation
A long push is a manual depression on the power button that lasts more than four seconds. When the product is operating, a long push will cut the power from the LaCie 8big, forcing it to shut down immediately. A long push is not recommended as it may result in data loss. -
Page 39: Daisy Chain
Thunderbolt technology storage devices and a display with a MiniDisplay port. In such a case, make certain that the LaCie 8big is the first enclosure connected to the computer. You can lose the higher performance offered by Thunderbolt 2 technology if a Thunderbolt 2 device is daisy-chained behind first generation Thunderbolt devices and/or displays. -
Page 40: How To Daisy Chain
You can daisy chain Thunderbolt 2 technology and first generation Thunderbolt technology devices even when the hard drives within the LaCie 8big are spun down. To spin down the hard drives, apply a short push on the power button (see Operation). The status LED blinks slowly, indicating that the LaCie 8big is in idle mode. - Page 41 SOFTWARE The storage for the LaCie 8big Rack Thunderbolt 2 is managed by LaCie RAID Manager. Use LaCie RAID Manager Identify the installed hard drives Configure RAID Check the health of the storage Set up storage alerts Troubleshoot the hard drives...
-
Page 42: Raid Example
RAID The information below provides a basic guide to the RAID modes available to the LaCie 8big Rack Thunderbolt 2. Note that the levels of performance and protection differ based upon the number of drives in a volume. For instructions on how to configure RAID, see the LaCie RAID Manager User Manual. - Page 43 Disk 1 is full, data will be written to Disk 2, then Disk 3, etc. Two advantages to this level of RAID are the availability of 100% of the hard drives’ total storage capacity and easy expansion. However, all data will be lost if a single hard drive fails. LaCie 8big Rack Thunderbolt 2 User Manual...
- Page 44 However, RAID 0 lacks a very important feature: data protection. If one hard drive fails, all data becomes inaccessible. A recommended option is RAID 5, which offers comparable performance and data protection in case a single drive fails. LaCie 8big Rack Thunderbolt 2 User Manual...
- Page 45 Additionally, RAID 1 will cut hard drive capacity by 50% or more since each bit of data is stored on all the hard drives in the volume. LaCie 8big Rack Thunderbolt 2 User Manual...
- Page 46 RAID 5 offers comparable performance to RAID 0 with the advantage of protecting data. Additionally, you still have 75% of the storage capacity of a RAID 0 array (based upon total available hard drives and storage capacities). LaCie 8big Rack Thunderbolt 2 User Manual...
- Page 47 A minimum of four hard drives is required to create a RAID 6 volume. RAID 6 offers very good data protection with a slight loss in performance compared to RAID 5. LaCie 8big Rack Thunderbolt 2 User Manual...
- Page 48 RAID 10 is a great choice for database managers that need to read and write a multitude of smaller files across the volume's hard drives. The impressive IOPS and data protection offered by RAID 10 gives database managers impressive reliability both in keeping files safe and rapid access. LaCie 8big Rack Thunderbolt 2 User Manual...
- Page 49 RAID 10, the second failed hard drive would have to be on the same mirrored set as the spare hard drive that is synchronizing data for the RAID to break. RAID 6 allows for two hard drives to fail. LaCie 8big Rack Thunderbolt 2 User Manual...
-
Page 50: Hardware Maintenance
HARDWARE MAINTENANCE The LaCie 8big Rack Thunderbolt 2 has a front chassis and rear chassis, each with its own cover. Review the details below for hardware module locations and, where applicable, replacement. Important info: Refer to the product's Warranty Information before performing any hardware repairs or maintenance that is not described in this manual. -
Page 51: Replacing A Power Supply Unit (Psu)
REPLACING A POWER SUPPLY UNIT (PSU) For optimal power management, the power load for the LaCie 8big can be shared between the two PSU. If one should fail, all power will automatically run from the active PSU, guaranteeing continuous operation. To help extend the lifetime of your hardware, make certain to replace a failed PSU as soon as possible. -
Page 52: Front Chassis
Make certain that the LaCie 8big is not being accessing before following the steps below. (Skip this step if you are hot-swapping hard drives or fans.) Eject the LaCie 8big volumes from the computer and apply a short push on the power button. Wait for the components to completely cool before moving to Step 2. - Page 53 LaCie 8big Rack Thunderbolt 2 User Manual...
-
Page 54: Front Chassis Components
Front chassis components Fans (x3) Frame 1, hard drives 1 - 4 Hard drive LEDs; SATA connections Frame 2, hard drives 5 - 8 LaCie 8big Rack Thunderbolt 2 User Manual... -
Page 55: Replacing A Hard Drive
REPLACING A HARD DRIVE If a failed hard drive is under warranty, make certain to contact LaCie Technical Support to receive a replacement hard drive (see Getting Help for contact information). When adding or replacing hard drives, consider using Seagate Desktop HDD that are optimized for use with your LaCie 8big. For further information on... - Page 56 Place the hard drive on the hard drive guides. Confirm that the hard drive is correctly aligned on the guides by gently pushing it away from the SATA connection. Slide the hard drive into the SATA connection. LaCie 8big Rack Thunderbolt 2 User Manual...
- Page 57 Replace the cover and slide the enclosure into the rack. To unlock the rails, pull the rail fasteners on each side toward you. Secure the DAS to the rack using the two front screws. LaCie 8big Rack Thunderbolt 2 User Manual...
- Page 58 When replacing hard drives that are members of an active RAID configuration, the hard drive LEDs will blink red and blue indicating that the RAID is synchronizing data. You can continue to use the LaCie 8big storage but performance will be reduced until the synchronization is complete.
-
Page 59: Replacing A Fan
Replacing a fan Caution: The fans are hot-swappable and can be replaced when the LaCie 8big is powered on. You must use caution when removing a fan. In most instances, the fan will stop rotating once it is removed from its slot. It is highly recommended that you use extreme caution with the fans since moving parts can cause severe damage to your hands and body. - Page 60 Insert the replacement fan into the empty slot. LaCie 8big Rack Thunderbolt 2 User Manual...
-
Page 61: Rear Chassis: Non-Serviecable Components
Additionally, removing, replacing, or changing any part in the rear chassis or, performing any action that involves the components in the rear chassis, will void the product’s warranty. If you are experiencing hardware errors or failure, contact LaCie technical support for assistance (see Getting Help for contact information). -
Page 62: Getting Help
GETTING HELP If you are having problems with your LaCie product, consult the table below for a list of available resources. Order Source Description Location Concise steps to Quick follow for getting your Either a printed leaflet or accessory box and included in the... -
Page 63: Troubleshooting Topics
The LaCie 8big turns off when I daisy chain a device. Q: Did the product turn off as soon as the device and the LaCie 8big’s Thunderbolt 2 port came into contact? A: The device may not be compatible with Thunderbolt products. Unplug any devices you have connected and reboot the product. -
Page 64: Problem: I Do Not See The Lacie 8Big On My Computer
A: Eject the volume from the computer and shut down the LaCie 8big by applying a short push on the front button. If nothing happens after a few minutes, you can force the LaCie 8big to turn off by applying a long push (more than four seconds), then release it. - Page 65 A: Thunderbolt 2 storage requires cables specifically constructed for Thunderbolt technology. Use the cable that was shipped with your device. Q: I connected a cable that supports Thunderbolt technology to my new Mac but the LaCie 8big does: (a.) not power on and/or (b.) not receive sufficient power.
- Page 66 These characters include, but are not limited to: ? < > / \ : Since it does not offer optimal performance, LaCie does not recommend using the FAT 32 file system with Thunderbolt 2 technology storage. Q: Did you get an error message telling you that the hard drive has been disconnected when coming out of sleep mode? A: Ignore this message.
- Page 67 Q: Did you daisy chain the LaCie 8big behind a display? A: Thunderbolt 2 technology devices can share the same daisy chain as a display. However, the LaCie 8big can only reach Thunderbolt 2 transfer rates if it is connected directly to the computer with the other devices daisy-chained behind it.
-
Page 68: Safety Guidelines
Important info: Do-it-yourself repairs not covered in this manual will invalidate the warranty. SAFE HANDLING The LaCie 8big Rack Thunderbolt 2 must run with all of its parts and units in place. In order to comply with applicable safety, emission, and thermal requirements, no covers should be removed during normal operation. - Page 69 WARNING: Removing the enclosure cover when the DAS is powered on will reveal moving parts, specifically the rotating fan blades. You must remain vigilant when opening the enclosure cover. Above all, show extreme caution with the fans and other moving parts within the LaCie 8big Rack Thunderbolt 2. LaCie 8big Rack Thunderbolt 2 User Manual...
-
Page 70: Rack System Safety Precautions
When loading a rack cabinet with the units, fill from the bottom up and empty it from the top down. Do not add any load onto the LaCie 8big Rack Thunderbolt 2 when it is mounted on its rack rails and installed on its slide. -
Page 71: Rack Installation Prerequisites
RACK INSTALLATION PREREQUISITES The LaCie LaCie 8big Rack Thunderbolt 2 enclosure is designed for installation into an industry standard 19-inch rack cabinet subject to the following requirements: There must be a minimum depth of 850mm (33.5 inches) from rack posts to maximum extremity of enclosure (including rear cabling and cable management kit). -
Page 72: Equipment Handling Precautions
DATA SECURITY Any loss, corruption, or destruction of data while using a LaCie hard drive or a LaCie hard drive system is the sole responsibility of the user, and under no circumstances will LaCie be held liable for the recovery or restoration of this data. -
Page 73: Warranty Information
LaCie (“LaCie”) warrants, to the original purchaser, that this equipment shall be free of defects in materials and workmanship for a period of one (1), two (2), three (3), or five (5) years, depending on the model, from LaCie's date of original shipment when the equipment is used normally and is properly serviced when needed. If you... - Page 74 LaCie, in its sole discretion to (i) repair or replace the product at no charge to you; or, if a repaired unit or replacement product is not available, (ii) to refund the current market value of your product.
- Page 75 Any loss, corruption or destruction of data while using a LaCie drive is the sole responsibility of the user, and under no circumstances will LaCie be held liable for the recovery or restoration of this data. To help prevent the loss of your data, LaCie highly recommends that you keep TWO copies of your data;...
-
Page 76: Service Doa
Within the 15 calendar days of purchase, should you experience an issue with your new LaCie product, we ask you to return the product to the place where it was originally bought. You will be required to give a proof of purchase. -
Page 77: Legal Info
LEGAL INFO COPYRIGHTS Copyright © 2014 LaCie. All rights reserved. No part of this publication may be reproduced, stored in a retrieval system, or transmitted in any form or by any means, electronic, mechanical, photocopying, recording or otherwise, without the prior written consent of LaCie. -
Page 78: Canada Compliance Statement
CAN ICES-3 (A)/NMB-3(A) MANUFACTURER'S DECLARATION FOR CE CERTIFICATION We, LaCie, solemnly declare that this product conforms to the following European standards: Electromagnetic Compatibility Directive (2004/108/EC); Low-Voltage Directive: 2006/95/EC 1.Thunderbolt and the Thunderbolt logo are trademarks of Intel Corporation in the U.S. and/or other countries.
Need help?
Do you have a question about the 8BIG RACK THUNDERBOLT 2 and is the answer not in the manual?
Questions and answers