Table of Contents
Advertisement
Available languages
Available languages
Quick Links
BEDIENUNGSANLEITUNG
USER MANUAL
MODE D'EMPLOI
MANUAL DEL USUARIO
DMX OPERATOR
192-channel lighting controller
© Copyright
Für weiteren Gebrauch aufbewahren!
Keep this manual for future needs!
Nachdruck verboten!
Gardez ce mode d'emploi pour des
Reproduction prohibited!
utilisations ultérieures!
Réproduction interdit!
Guarde este manual para posteriores usos.
Prohibida toda reproducción.
Advertisement
Table of Contents

Subscribe to Our Youtube Channel
Related Manuals for EuroLite DMX OPERATOR


Summary of Contents for EuroLite DMX OPERATOR
-
Page 1: User Manual
BEDIENUNGSANLEITUNG USER MANUAL MODE D'EMPLOI MANUAL DEL USUARIO DMX OPERATOR 192-channel lighting controller © Copyright Für weiteren Gebrauch aufbewahren! Keep this manual for future needs! Nachdruck verboten! Gardez ce mode d’emploi pour des Reproduction prohibited! utilisations ultérieures! Réproduction interdit! Guarde este manual para posteriores usos. -
Page 2: Table Of Contents
MULTI-LANGUAGE-INSTRUCTIONS Inhaltsverzeichnis Table of contents Sommaire Contenido 1. EINFÜHRUNG............................... 4 2. SICHERHEITSHINWEISE..........................4 3. BESTIMMUNGSGEMÄSSE VERWENDUNG ....................5 4. GERÄTEBESCHREIBUNG .......................... 5 4.1 Features ..............................5 4.2 Geräteübersicht............................6 5. SETUP................................7 5.1 Installation ..............................7 5.2 Musiksteuerung............................7 5.3 Anschluss an den Projektor ........................7 6. - Page 3 1. INTRODUCTION ............................21 2. INSTRUCTIONS DE SÉCURITÉ ........................ 21 3. EMPLOI SELON LES PRESCRIPTIONS....................22 4. DESCRIPTION ............................22 4.1 Features ..............................22 4.2 Aperçu de l'appareil ..........................23 5. SETUP................................. 24 5.1 Montage ..............................24 5.2 Contrôle par le son..........................24 5.3 Connexion au projecteur........................
-
Page 4: Einführung
- diese Bedienungsanleitung genau beachten. 1. EINFÜHRUNG Wir freuen uns, dass Sie sich für einen EUROLITE DMX Operator entschieden haben. Sie haben hiermit ein leistungsstarkes und vielseitiges Gerät erworben. Wenn Sie nachfolgende Hinweise beachten, sind wir sicher, dass Sie lange Zeit Freude an Ihrem Kauf haben werden. -
Page 5: Bestimmungsgemässe Verwendung
Der Aufbau entspricht der Schutzklasse III. Das Gerät darf niemals ohne Transformator betrieben werden. Gerät bei Nichtbenutzung und vor jeder Reinigung vom Netz trennen. Beachten Sie bitte, dass Schäden, die durch manuelle Veränderungen an diesem Gerät verursacht werden, nicht unter den Garantieanspruch fallen. Kinder und Laien vom Gerät fern halten! Im Geräteinneren befinden sich keine zu wartenden Teile. -
Page 6: Geräteübersicht
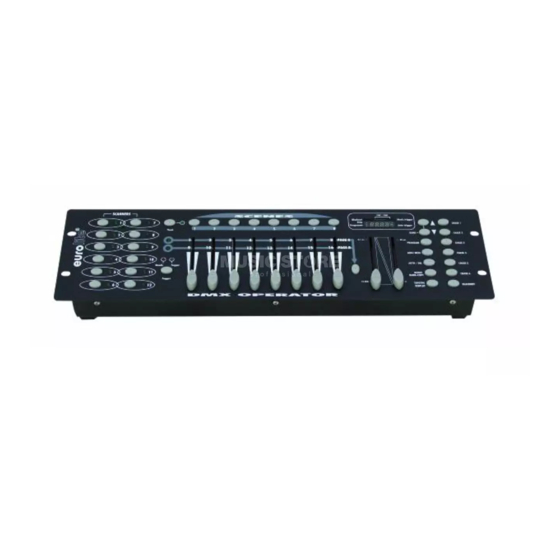
4.2 Geräteübersicht Übersicht über die Bedienelemente SCANNERS SCENES Music trigger Blackout 8888 Step Programm Auto trigger BANK CHASE 1 CHASE 2 PAGE A 0,1 sec 30 sec PROGRAM PAGE B CHASE 3 MIDI / ADD CHASE 4 AUTO / DEL CHASE 5 BANK BANK-COPY... -
Page 7: Setup
16) MIDI-Eingangsbuchse 17) DMX POLARITY-Wahlschalter 18) DMX-Ausgangsbuchse 19) Netzanschlussbuchse 5. SETUP 5.1 Installation Stellen Sie das Gerät auf einer ebenen Fläche auf oder installieren Sie es in Ihrem Rack. Rackinstallation: Dieses Gerät ist für ein 19"-Rack (483 mm) vorgesehen. Bei dem Rack sollte es sich um ein „Double-Door-Rack“... -
Page 8: Bedienung
100) umschalten. 6.2 Programmierung Ein Programm ist eine Aneinanderreihung von verschiedenen Szenen, die nacheinander abgespielt werden. Mit dem DMX Operator lassen sich bis zu 30 verschiedene Programme (Banks) mit bis zu 8 Szenen programmieren. 6.2.1 Programmierung eines Programms Drücken und halten Sie die Program-Taste bis die Prog-LED im Display blinkt. Wählen Sie das gewünschte Programm (Bank) über die Bank-Tasten aus. -
Page 9: Chaser
Drücken und halten Sie die Program-Taste, um das edititierte Programm abzuspeichern. 6.3 Chaser Ein Chaser ist eine Aneinanderreihung von verschiedenen Programmen, die nacheinander abgespielt werden. Mit dem DMX Operator lassen sich bis zu 6 verschiedene Chaser mit bis zu 240 Steps programmieren. 6.3.1 Programmierung eines Chasers Drücken und halten Sie die Program-Taste. -
Page 10: Kopieren Und Löschen Von Szenen Und Programmen
6.3.4 Editieren eines Chasers Step einfügen Drücken und halten Sie die Program-Taste und wählen Sie den gewünschten Chaser über die Chase-Tasten aus. Drücken Sie die Display-Taste zur Umschaltung auf Step-Anzeige (Step-LED leuchet). Wählen Sie durch Drücken der entsprechenden Bank-Taste die Szene aus, vor der ein Step eingefügt werden soll. Drücken Sie die Add-Taste. -
Page 11: Musiksteuerung
6.5 Musiksteuerung Durch Drücken der Music-Taste aktivieren Sie die Musiksteuerung (LED leuchtet). Bitte beachten Sie, dass Programme und Chaser in diesem Modus nur aktiv sind, wenn der Controller ein Musiksignal empfängt. Liegt keine Musik an, steht das Programm oder der Chaser. 6.6 MIDI-Betrieb Drücken Sie die MIDI-Taste und die dritte und vierte Stelle im Display beginnen zu blinken. -
Page 12: Technische Daten
9. TECHNISCHE DATEN Spannungsversorgung: 230 V AC, 50 Hz ~ über mitgeliefertes 9-12 V DC, 300 mA Netzteil Gesamtanschlusswert: Anzahl Steuerkanäle: Musiksteuerung: über eingebautes Mikrofon DMX 512-Ausgang: 3-polige XLR-Einbaukupplung mit Polungsschalter Freie Programme: 6 x 240 Szenen Maße (LxBxH): 483 x 132 x 80 mm 19"-Einbaumaße mit 3 HE Mindesteinbautiefe: 170 mm... -
Page 13: Introduction
- be qualilfied - follow the instructions of this manual 1. INTRODUCTION Thank you for having chosen a EUROLITE DMX Operator. You will see you acquired a powerful and versatile device. Unpack your DMX Operator. Before you initial start-up, please make sure that there is no damage caused by transportation. Should there be any, consult your dealer and do not use the device. -
Page 14: Operating Determinations
This device falls under protection-class III. The device always has to be operated with an appropriate transformer. Always disconnect from the mains, when the device is not in use or before cleaning it. Please note that damages caused by manual modifications on the device or unauthorized operation by unqualified persons are not subject to warranty. -
Page 15: Overview
4.2 Overview Overview on the control elements SCANNERS SCENES Blackout Music trigger 8888 Step Programm Auto trigger BANK CHASE 1 CHASE 2 PAGE A 0,1 sec 30 sec PROGRAM CHASE 3 PAGE B MIDI / ADD CHASE 4 AUTO / DEL CHASE 5 BANK BANK-COPY... -
Page 16: Setup
You can adjust the XLR polarity via the DMX POLARITY selector. Building a serial DMX-chain: Connect the DMX-output of the DMX Operator with the DMX-input of the nearest projector. Always connect one output with the input of the next fixture until all fixtures are connected. -
Page 17: Operation
100). 6.2 Programming A program is a sequence of different scenes that will be called up one after another. With the DMX Operator, you can program up to 30 different programs (banks) with up to 8 scenes each. 6.2.1 Programming a program Press and hold the Program-button until the Program-LED flashes in the display. -
Page 18: Chaser
Adjust the desired settings via the respective channel faders. Select the next projector via the projector select buttons and adjust the settings. Press the Add-button and the respective Scene-button in order to save the edited step. Edit the next steps until the program is finished. 6.3 Chaser A chaser is a sequence of different programs that will be called up one after another. -
Page 19: Copying Scenes, Programs And Records
6.4 Copying scenes, programs and records With the Copy-function, you can make programming of programs and chasers easier by copying already existent scenes into a program. Copy a scene Press and hold the Program-button and select the desired program via the Bank-buttons. Press the respective Scene-button. -
Page 20: Problem Chart
7. PROBLEM CHART PROBLEM CAUSE REMEDY No power. The power unit is not connected. Check the connection cable of the power unit and any extension-cables. 8. CLEANING AND MAINTENANCE DANGER TO LIFE! Disconnect from mains before starting maintenance operation! We recommend a frequent cleaning of the device. Please use a soft lint-free and moistened cloth. Never use alcohol or solvents! There are no servicable parts inside the device. -
Page 21: Introduction
- être suffisamment qualifiée - suivre strictement les instructions de service suivantes. 1. INTRODUCTION Nous vous remercions d'avoir choisi un EUROLITE DMX Operator. Vous êtes en possession d'un appareil très performant. Sortez le DMX Operator de son emballage. Avant tout, assurez vous que l'appareil n'a pas subi de dommages lors de son transport. Si tel était le cas, contactez immédiatement votre revendeur. -
Page 22: Emploi Selon Les Prescriptions
Débranchez l'appareil lorsque vous ne l'utilisez pas et avant de le nettoyer. Tout dommage résultant d'une modification sur l'appareil n'est pas couvert par la garantie. Tenir les enfants et les novices éloignées de l'appareil. L'intérieur de l'appareil ne contient pas de partys nécessitant un entretien. L'entretien et les réparations doivent être effectuées par un technicien compétent! 3. -
Page 23: Aperçu De L'appareil
4.2 Aperçu de l'appareil Aperçu des éléments de manipulation SCANNERS SCENES Music trigger Blackout 8888 Step Programm Auto trigger BANK CHASE 1 CHASE 2 PAGE A 0,1 sec 30 sec PROGRAM PAGE B CHASE 3 MIDI / ADD CHASE 4 AUTO / DEL CHASE 5 BANK... -
Page 24: Setup
Vous pouvez ajustez la polarité de la connexion grâce au sélecteur DMX POLARITY. Connecter une chaîne DMX serielle: Connectez la sortie DMX du DMX Operator à l’entrée DMX de l'appareil le plus proche. Toujours connectez une sortie avec une entrée de l'appareil prochain jusqu'à ce que tous les appareils soient connectés. -
Page 25: Maniement
Codage des projecteurs S'il-vous-plaît considérez que le DMX Operator assigne les adresses DMX start en pas de 16. Vous devez coder le projecteur correspondant à l'adresse start désirée, sinon, l'assignement des canaux n'est pas correcte. Tous les projecteurs adressés avec une même adresse, fonctionnent de manière synchronisée. -
Page 26: Chaser
Appuyez sur la touche de programme pour mémorizer le programme édité. 6.3 Chaser Un chaser est aligner de différents programmes qui sont joués successivement. Avec le DMX Operator, vous pouvez programmer jusqu'à 6 chaser différents avec jusqu'à 240 steps. -
Page 27: Copier Et Annuler Des Scènes Et Des Programmes
6.3.6 Annuler tous les chasers Attention: Quand vous choississez cette fonction, tous les chaser programmés sont perdus. Les scènes et programmes individuels restent en fonction. Appuyez et maintenez la touche Bank Down et Del quand vous débranchez l'appareil. Branchez l'appareil autre fois. -
Page 28: Problèmes
Scene 1 Chase Chase 1 Scene 2 Chase Chase 2 Bank 2 Scene 3 Chase Chase 3 Chase Chase 4 Chase Chase 5 Chase Chase 6 Chase Blackout 7. PROBLEMES PROBLEME CAUSE SOLUTION L'alimentation ne s'enclenche pas. Le bloc d'alimentation n'est pas Contrôler le câble de connexion et branché. -
Page 29: Introducción
-estar cualificada -seguir las instrucciones de este manual 1. INTRODUCCIÓN Gracias por haber elegido un EUROLITE DMX Operator. Desembale su DMX Operator. Antes de la puesta en marcha inicial, por favor asegúrese de que no hay daños causados durante el transporte. -
Page 30: Instrucciones De Manejo
Manténga el aparato lejo del alcance de los niños y de personal no profesional. No hay piezas que requieran servicio dentro del aparato. Las operaciones de mantenimiento y servicio deben ser llavadas a cabo únicamente por concesionarios autorizados. 3. INSTRUCCIONES DE MANEJO Este aparato es un controlador DMX para controlar los efectos de luz DMX o focos en escenas, discotecas etc. -
Page 31: Sobrevista
4.2 Sobrevista Vista de los elementos de control SCANNERS SCENES Music trigger Blackout 8888 Step Programm Auto trigger BANK CHASE 1 CHASE 2 PAGE A 0,1 sec 30 sec PROGRAM PAGE B CHASE 3 MIDI / ADD CHASE 4 AUTO / DEL CHASE 5 BANK BANK-COPY... -
Page 32: Setup
18) Salida DMX 19) Conexion a la red 5. SETUP 5.1 Instalación Instale el aparato en una superficie plana. Instalación en Rack: Este aparato está construido para racks de 19" (483 mm). El rack que usted use debe ser un rack de doble puerta donde usted pueda abrir el panel frontal y el panel trasero. El rack debe disponer de un ventilador para la refrigeración. -
Page 33: Operación
DMX del ulterior aparato. Codificación de los proyectores Por favor, tome nota que el DMX OPERATOR asigna las direcciones de comienzo en 16 pasos. Tiene que codificar el proyector respectivo en la dirección de comienzo deseado. Los proyectores con la misma dirección de comienzo funcionarán sincronizadamente. -
Page 34: Chaser
LED Auto Trigger. Ajuste la velocidad del programa y la frecuencia de repitición mediante el Speed-fader y Fader Time-fader. Como alternativa, Vd. puede ajustar la velocidad del programa en presionar la tecla Tapsynch dos veces. El intervalo de tiempo entre los dos presiones corresponde a la velocidad del programa (10 minutos por máximo). -
Page 35: Copiar Y Cancelar Escenas Y Programas
6.3.5 Cancelar un chaser Presione y mantiene la tecla Program y seleccione el chaser deseado mediante las teclas Chase. Presione y mantiene la tecla Del y presione la tecla Chase. 6.3.6 Cancelar todos los chaser Atención: Cuando Vd. selecciona esta función, todos los chaser programados están perdidos irrevocablemente. -
Page 36: Solución De Problemas
Scene 1 Chase Chase 1 Scene 2 Chase Chase 2 Bank 2 Scene 3 Chase Chase 3 Chase Chase 4 Chase Chase 5 Chase Chase 6 Chase Blackout 7. SOLUCIÓN DE PROBLEMAS PROBLEMA: CAUSA: SOLUCION: La alimentación no se conecta. La unidad de alimentación no está Compruebe el cable de conexión y conectado.
Need help?
Do you have a question about the DMX OPERATOR and is the answer not in the manual?
Questions and answers