Table of Contents
Advertisement
Available languages
Available languages
Quick Links
1
Before You Begin...
System Requirement:
10 Base-T Ethernet or 100 Base-TX Fast Ethernet
●
CD-ROM drive
●
CPU: Intel Pentium II 266MHz or above
●
Memory: 32MB (64MB recommended)
●
VGA resolution: 800x600 or above
●
Package Contents:
One SOHO Wireless Internet Camera
●
Quick Installation Guide
This
●
One External Antenna
●
One Installation CD-ROM
●
One Camera Stand
●
One DC Power Adapter
●
One RJ-45 Ethernet Cable
●
Note: If any item contained is damaged or missing, please contact
your local dealer immediately.
Quick Installation Guide
1
Advertisement
Table of Contents

Related Manuals for Lindy 42449


Summary of Contents for Lindy 42449
-
Page 1: Before You Begin
Quick Installation Guide Before You Begin… System Requirement: 10 Base-T Ethernet or 100 Base-TX Fast Ethernet ● CD-ROM drive ● CPU: Intel Pentium II 266MHz or above ● Memory: 32MB (64MB recommended) ● VGA resolution: 800x600 or above ● Package Contents: One SOHO Wireless Internet Camera ●... -
Page 2: Hardware Installation
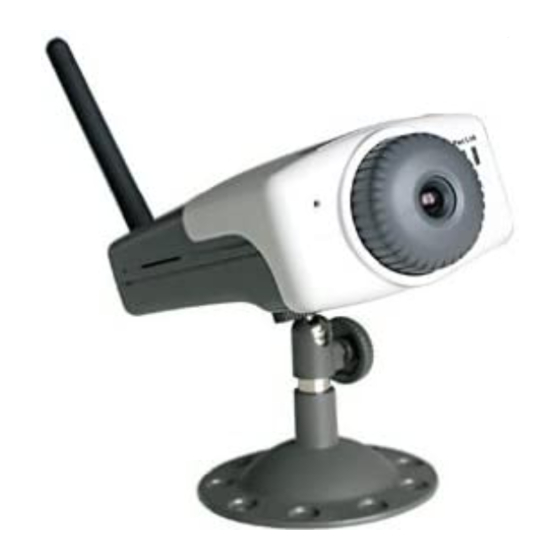
Quick Installation Guide Hardware Installation Attaching the Camera Stand The Wireless Internet Camera comes with a camera stand, which has a swivel ball screw head that can be attached to the camera’s screw hole on the top/bottom panel. Attach the camera stand to the camera and station it for your application. -
Page 3: Running The Setup Wizard
Quick Installation Guide Running the Setup Wizard The Setup Wizard is a convenient tool that will guide you through the installation of your camera easily and quickly. After connecting the camera to your computer, you can install the Setup Wizard and complete the configuration now. - Page 4 Quick Installation Guide 4. Click Next. 5. Click Finish. To run the Setup Wizard, click Start -> Programs -> Setup Wizard.
-
Page 5: Using The Setup Wizard
Quick Installation Guide Using the Setup Wizard When you launch the Setup Wizard, the main window will appear as shown, and the connected camera will be displayed in the list. Control buttons The connected camera list The components on the Setup Wizard: Click Wizard to begin configuring the selected camera. - Page 6 Quick Installation Guide Changing the Admin ID and Password By default settings, the Admin ID and Password are blank. For security purpose, you are recommended to change the Admin ID and Password immediately. Click Wizard. The dialog box as shown appears, asking you to enter the Admin ID and Password.
- Page 7 Quick Installation Guide This window displays the settings you set up. For any change, click modify your settings. Otherwise, click to save and apply the settings. The configuration is completed, and you will return to the main window. Click Link to launch the web browser and view the images.
-
Page 8: Software Information
Quick Installation Guide Tips Software Information Click About to show the general information of the selected camera. Click V to return to the main window. Technical Support For more information, please refer to the User’s Guide located on the CD-ROM. -
Page 9: Avant De Commencer
Quick Installation Guide Avant de Commencer… Système Requis: ● 10 Base-T Ethernet ou 100 Base-TX Fast Ethernet ● Lecteur CD-ROM ● CPU: Intel Pentium II 266MHz ou supérieur ● Mémoire: 32MB (64MB recommandé) ● Résolution VGA: 800x600 ou supérieur Contenu de l'Emballage: ●... -
Page 10: Installation Du Matériel
Quick Installation Guide Installation du Matériel Fixer la Caméra au Support La Caméra Internet MPEG-4 est fournie avec un support, possédant une tête de vis à bille orientable pouvant s'attacher au trou prévu sur le haut/bas de la caméra. Attacher le support à la caméra et orienter selon votre utilisation. - Page 11 Quick Installation Guide Utiliser l'Assistant de Configuration L'assistant de Configuration est un outil pratique qui vous guidera pendant l'installation de votre caméra. Après la connexion de la caméra à votre ordinateur, vous pouvez installer l'Assistant de Configuration et compléter la configuration. 1.
- Page 12 Quick Installation Guide 4. Cliquer sur Next. 5. Cliquer sur Finish. Pour exécuter l'assistant de configuration, cliquer Démarrer -> Tous les Programmes -> Setup Wizard.
- Page 13 Quick Installation Guide Using the Setup Wizard Lors du lancement de l'Assistant de Configuration, la fenêtre principale apparaîtra telle qu'indiquée, et les caméras connectées s'afficheront dans la liste. Boutons de contrôle Liste des caméras connectées Les composants de l'Assistant de Configuration: Cliquer sur Wizard pour commencer à...
- Page 14 Quick Installation Guide Changer l'ID Admin et le Mot de Passe Les paramètres par défaut laissent l'ID Admin et le Mot de Passe blancs. Pour des raisons de sécurité, il vous est recommandé de les changer immédiatement. Cliquer sur Wizard. La boîte de dialogue indiquée ci-contre apparaît et vous demande de saisir l'ID Admin et le Mot de Passe.
- Page 15 Quick Installation Guide La fenêtre affiche vos paramètres. Pour tout changement, cliquer sur pour les modifier. Sinon, cliquer sur pour sauvegarder et appliquer les paramètres. La configuration est achevée, et la fenêtre principale revient. Cliquer sur Link pour lancer le navigateur web et visionner les images.
-
Page 16: Information Logiciel
Quick Installation Guide Trucs Information Logiciel Cliquer sur About pour afficher les informations générales de la caméra sélectionnée. Cliquer sur V pour revenir à la fenêtre principale. Support Technique Pour de plus amples informations, veuillez vous référer au Guide de l'Utilisateur sur le CD-ROM. - Page 17 Quick Installation Guide Vor dem Beginnen… Systemvoraussetzung: 10 Base-T Ethernet oder 100 Base-TX Fast Ethernet ● CD-ROM-Laufwerk ● CPU: Intel Pentium II 266MHz oder höher ● Speicher: 32 MB (64 MB empfohlen) ● VGA-Auflösung: 800x600 oder höher ● Inhalt der Verpackung: Eine kabellose SOHO-Internet-Kamera ●...
- Page 18 Hardware-Installation Das Kameragestell anbringen Die kabellose Internet-Kamera wird mit einem Kameragestell geliefert, das mit einem schwenkbaren Kugelumlaufspindelkopf ausgestattet ist, der in das Schraubloch der Kamera auf der Ober-/Unterseite befestigt werden kann. Das Kameragestell an die Kamera befestigen und die Kamera Ihrem Anwendungszweck entsprechend ausrichten.
- Page 19 Quick Installation Guide Den Installationsassistenten starten Der Installationsassistent ist ein praktisches Werkzeug, das Sie durch den einfachen und schnellen Installationsvorgang Ihrer Kamera führen wird. Nach dem Anschließen der Kamera an Ihren Computer kann die Konfiguration mit Hilfe des Installationsassistenten nun zu Ende geführt werden.
- Page 20 Quick Installation Guide 4. Auf Next (Weiter) klicken. Finish (Beenden) klicken. Zum Starten des Installationsassistenten auf Start -> Programme -> Setup Wizard (Installationsassistent) klicken.
- Page 21 Quick Installation Guide Den Installationsassistenten anwenden Beim Starten des Installationsassistenten erscheint das Fenster wie abgebildet und die angeschlossene Kamera wird auf der Liste angezeigt. Control buttons The connected camera list Komponenten des Installationsassistenten: Zum Beginnen mit der Konfiguration der ausgewählten Kamera auf Wizard klicken.
- Page 22 Quick Installation Guide Die Admin ID und das Paßwort ändern Laut Standardeinstellung sind die Admin ID und das Paßwort leer. Aus Sicherheitsgründen wird empfohlen, die Admin ID und das Paßwort sofort abzuändern. Auf Wizard (Installationsassistent) klicken. Der Dialogkasten erscheint wie abgebildet und fordert Sie zum Eingeben der Admin ID und des Paßwortes auf.
- Page 23 Quick Installation Guide Dieses Fenster zeigt die Einstellungen an, die Sie vorgenommen haben. Für beliebige Abänderungen klicken Sie (Zurück), um Ihre Einstellungen abzuändern. Wenn nicht, klicken Sie auf (Neustarten), um die Einstellungen abzuändern und anzuwenden. Die Konfiguration ist nun vollständig und Sie kehren zum Hauptfenster zurück.
-
Page 24: Software-Service
Quick Installation Guide Tipps Software-Information Zum Anzeigen der allgemeinen Informationen über die ausgewählte Kamera auf About (Infos über) klicken. Auf V klicken, um zum Hauptfenster zurückzukehren. Software-Service Weitere Informationen sind in der Benutzeranleitung auf der CD-ROM enthalten. -
Page 25: Contenuto Della Confezione
Quick Installation Guide Prima di cominciare… Requisiti del sistema: 10 Base-T Ethernet o 100 Base-TX Fast Ethernet ● Lettore CD-ROM ● CPU: Intel Pentium II 266MHz o superiore ● Memoria: 32MB (consigliato 64MB) ● Risoluzione VGA: 800x600 o superiore ● Contenuto della confezione: Una Videocamera SOHO Wireless Internet ●... -
Page 26: Collegamento Dell'alimentazione
Quick Installation Guide Istallazione dell’Hardware Come si attacca il Supporto della videocamera La videocamera internet senza fili è dotata di un supporto della videocamera, che ha una vite a palla girevole che si può attaccare al foro della vite della videocamera sul pannello in cima/fondo. Attaccare il supporto della videocamera alla videocamera e posizionarlo per la vostra applicazione. - Page 27 Come eseguire il Mago dell’Istallazione Il Mago dell’Istallazione è uno strumento comodo che vi guiderà con facilità e rapidità attraverso l’istallazione della videocamera. Dopo aver collegato la videocamera al computer, voi potete ora istallare il Mago dell’Istallazione e completare la configurazione. 1.
- Page 28 Quick Installation Guide 4. Cliccare Avanti. 5. Cliccare Finisci. Per eseguire il Mago dell’Istallazione, cliccare Avvia -> Programmi -> Mago dell’Istallazione.
- Page 29 Quick Installation Guide Uso del Mago dell’Istallazione Quando lanciate il Mago dell’Istallazione, appare la finestra principale come mostrato, e la videocamera collegata viene mostrata nell’elenco. Pulsanti di Elenco videocamere collegate Componenti del Mago dell’Istallazione: Cliccare Wizard per cominciare a configurare la videocamera selezionata.
- Page 30 Quick Installation Guide Come si cambia l’Admin ID e la Password Nelle impostazioni predefinite l’Admin ID e la Password sono vuote. Per la sicurezza vi consigliamo di cambiare immediatamente l’Admin ID e la Password. Cliccare Mago. Appare la finestra di dialogo come mostrato, a chiedervi di scrivere l’Admin ID e la Password.
- Page 31 Quick Installation Guide Questa finestra mostra le impostazioni che voi mettete. Per fare dei cambiamenti, cliccare modificare le impostazioni. Altrimenti cliccare per salvare le impostazioni e applicarle. La configurazione è completata, e voi tornate alla finestra principale. Cliccare Link per lanciare il browser di rete e visualizzare le immagini.
-
Page 32: Informazioni Sul Software
Quick Installation Guide Suggerimenti Informazioni sul software Cliccare Informazioni per mostrare le informazioni generali sulla videocamera selezionata. Cliccare V per tornare alla finestra principale. Supporto tecnico Per ulteriori informazioni consultare la Guida dell’Utente situata sul CD-ROM. -
Page 33: Antes De Comenzar
Quick Installation Guide Antes De Comenzar... Requisitos del sistema: 10 Base-T Ethernet o 100 Base-TX Fast Ethernet ● Unidad de CD-ROM ● CPU: Intel Pentium II 266MHz o superio ● Memoria: 32 MB (64 MB recomendado) ● VGA de resolución: 800x600 o superior ●... -
Page 34: Instalación De Hardware
Quick Installation Guide Instalación de hardware Colocación de la cámara de pie La Inalámbrica Internet cámara viene con una cámara de pie, que tiene un tornillo de la bola giratoria cabeza que puede estar conectado a la cámara de agujero de tornillo en la parte superior / inferior del panel. - Page 35 Quick Installation Guide Ejecutar el Asistente para la instalación El Asistente para la instalación es una herramienta conveniente que le guiará a través de la instalación de sus cámara fácil y rápidamente. Después de conectar la cámara a su ordenador, puede instalar el Asistente para la instalación y la configuración completa ahora 1.
- Page 36 Quick Installation Guide 4.Hag clic en Siguiente. 5.Haga clic en Finalizar. Para ejecutar la instalación del Asistente , haga clic en Inicio -> Programas -> instalación del Asistente.
- Page 37 Quick Installation Guide Usando Asistente para la instalación Al iniciar el Asistente para la instalación, la ventana principal aparecerá como se muestra, y la cámara conectada se mostrará en la lista. Control buttons The connected camera list Los componentes en el Asistente para la instalación: Haga clic en Asistente para comenzar a configurar la cámara selecto.
- Page 38 Quick Installation Guide Cambiar el administrador ID y contraseña Por la configuración de la predeterminada, el Administrador de ID y contraseña están en blanco. Para razones de seguridad, se recomienda cambiar el administrador de ID y contraseña de inmediato Haga clic en Asistente. El cuadro de diálogo aparece como se muestra, que se le pide que introduzca el ID de administrador y contraseña.
- Page 39 Quick Installation Guide Esta ventana muestra las configuración que creó. Para cualquier cambio, haga clic en para modificar su configuración. En caso contrario, haga clic en para guardar y aplicar los ajustes. La configuración se ha completado, y usted volverá a la ventana principal. Haga clic en Enlace para iniciar el Rastreador web y ver las imágenes.
-
Page 40: Información De Software
Quick Installation Guide Propinas Información de Software Haga clic en Acerca para mostrar la información de la cámara selecto. Haga clic en V para volver a la ventana principal. Apoyo Técnico Para obtener más información, por favor, consulte la Guía del Usuario se encuentra en la unidad de CD-ROM. - Page 41 Quick Installation Guide 安裝前注意事項… 系統需求: ● 10 Base-T 乙太網路或 100 Base-TX 高速乙太網路 ● 光碟機 ● CPU:Intel Pentium II 266MHz 以上 ● 記憶體:32MB (建議 64MB) ● VGA 解析度:800x600 以上 包裝內容 ● 一台 SOHO 無線網路攝影機 ● 本快速安裝指南 ● 一條外接天線 ● 一片安裝光碟 ● 一組攝影機支架...
- Page 42 Quick Installation Guide 硬體安裝 安裝攝影機支架 本無線網路攝影機附有一組攝影機支架,可 利用旋轉球形螺絲頭,鎖緊於攝影機頂部/ 底部面板的螺絲孔上。將攝影機安裝於支架 上,並將整組攝影機置於欲使用的位置上。 安裝天線 將隨附的乙太網路線,連接至攝影機後面板 上的網路連接器,然後將它連接至網路。 連接乙太網路線 將隨附的乙太網路線,連接至攝影機後面板 上的網路連接器,然後將它連接至網路。 連接電源線 將隨附的外部電源線,連接至攝影機後面板 上的 DC 電源輸入接頭,然後將它連接至牆 壁上的電源插座。 ( 小秘訣 : 您可藉由攝影機 前面板的電源 指示燈來確認電源狀 態。...
- Page 43 Quick Installation Guide 執行設定精靈(Setup Wizard) 「設定精靈」是一個方便的工具,能在整個安裝過程中給您便利、快速 的指導。將攝影機與電腦相連接後,您可以安裝「設定精靈」以完成設 定。 1. 將安裝光碟片置入光碟機 中。 點選「安裝精靈(Install Wizard)」。 2. 點選「下一步(Next)」。 3. 點選「是(Yes)」。...
- Page 44 Quick Installation Guide 4. 點選「下一步(Next)」。 5. 點選「完成(Finish)」。 要執行「設定精靈(Setup Wizard)」時,請點選開始 -> 程式集-> Setup Wizard。...
- Page 45 Quick Installation Guide 使用設定精靈(Setup Wizard) 當您執行設定精靈(Setup Wizard)時,螢幕將會出現下列視窗,並在清單 中列出已連接的攝影機。 控制鍵 已連接的攝影機清單 設定精靈(Setup Wizard)之組成元件: 點選「精靈(Wizard)」鍵後,即可開始設定您所選取 的攝影機。 點選「搜尋(Search)」鍵後,即可再次搜尋已連接的攝 影機。 點選「連結(Link)」鍵後,即可啟動網站瀏覽器並瀏覽 圖像。 點選「關於(About)」鍵後,即可查看該攝影機的一般 資訊。 點選「離開(Exit)」鍵後,即可關閉本設定精靈。...
- Page 46 Quick Installation Guide 變更 Admin ID 與 Password 原廠預設的 Admin ID 與 Password 是空白的。為安全起見,建議您立即 變更 Admin ID 與 Password。 點選「精靈(Wizard)」。螢幕會出現右 圖所示的對話方塊,並要求您輸入 Admin ID 與 Password。兩組設定值均 為”空白”。 點選 必要時,請選取「變更(Change)」選項 並輸入新的 Admin ID 與 Password。 點選 IP 位址、子網路遮罩(Subnet Mask)與預 設閘道(Default Gateway)等設定值,須 與攝影機及網路的設定值一致。請向您 的網路管理員進行確認。...
- Page 47 Quick Installation Guide 視窗會顯示您的設定值。如要變更設定 值,請點選 以進行修改。如不變更 設定值,請點選 以儲存並運用這些 設定值。 設定已完成 , 您將返回主視窗 。 點選 「連 結(Link)」鍵,以開啟網站瀏覽器並瀏 覽圖像。...
- Page 48 Quick Installation Guide 小秘訣 軟體資訊 點選「關於(About)」鍵,即 可查看所選取攝影機的一 般資訊。 點選「V」鍵,即可返回主 視窗。 技術支援 如需查詢更多資訊,請參考光碟片中的用戶指南(User Guide)。...
Need help?
Do you have a question about the 42449 and is the answer not in the manual?
Questions and answers