
Related Manuals for Kodo Pro KSD-2200/L3


Summary of Contents for Kodo Pro KSD-2200/L3
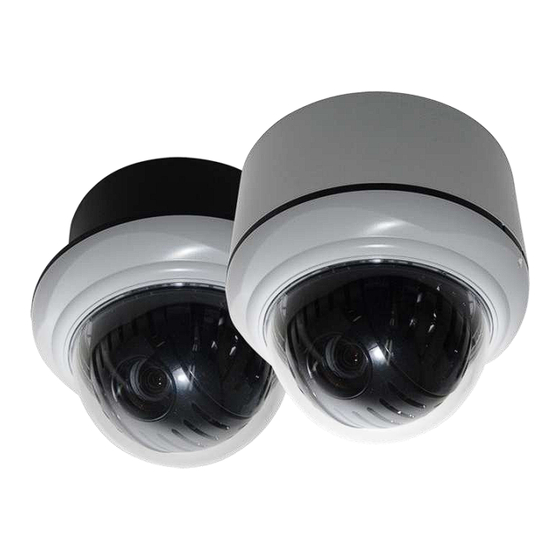
- Page 1 INSTRUCTION MANUAL 22X MINITRAX III Lite DOME CAMERA KSD-2200/L3 www.kodobr.com.br Please read this manual thoroughly before use and keep it handy for future reference.
-
Page 2: Explanation Of Graphical Symbols
WARNING TO REDUCE THE RISK OF FIRE OR ELECTRIC SHOCK, DO NOT EXPOSE THIS PRODUCT TO RAIN OR MOISTURE. DO NOT INSERT ANY METALLIC OBJECTS THROUGH THE VENTILATION GRILLS OR OTHER OPENINGS ON THE EQUIPMENT. CAUTION EXPLANATION OF GRAPHICAL SYMBOLS The lightning flash with arrowhead symbol, within an equilateral triangle, is intended to alert the user to the presence of uninsulated ―dangerous voltage‖... -
Page 3: Fcc Compliance Statement
FCC COMPLIANCE STATEMENT FCC INFORMATION: This equipment has been tested and found to comply with the limits for a Class A digital device, pursuant to Part 15 of the FCC Rules. These limits are designed to provide reasonable protection against harmful interference when the equipment is operated in a commercial environment. -
Page 4: Important Safety Instructions
IMPORTANT SAFETY INSTRUCTIONS 1. Read these instructions. 2. Keep these instructions. 3. Heed all warnings. 4. Follow all instructions. 5. Do not use this apparatus near water. 6. Clean only with dry cloth. 7. Do not block any ventilation openings. Install in accordance with the manufacturer‘s instructions. -
Page 5: Table Of Contents
Table of Contents Chapter 1 — Introduction......................1 1.1 Features ............................. 1 Chapter 2 — Installation and Configuration ................. 2 2.1 Package Contents..........................2 2.2 Installation ............................3 2.3 Basic Configuration of Dome Camera System ................ 5 2.4 Setting Dome Camera Termination ..................... 6 2.5 Setting Dome Camera Address (ID) .................... -
Page 6: Chapter 1 - Introduction
Chapter 1 — Introduction 1.1 Features The dome camera and the keyboard controller make up the building blocks for any surveillance/security system. Using multiple keyboard controllers and multiple dome cameras, no place is too large for monitoring. Extensible and flexible architecture facilitates remote control functions for a variety of external switching devices such as multiplexers and DVRs. -
Page 7: Chapter 2 - Installation And Configuration
Chapter 2 — Installation and Configuration 2.1 Package Contents The dome camera is design to a compact, small size, flush/surface dome camera housing. The housing is constructed of aluminum, steel and plastic. The housing is designed to be mounted both wall and ceiling type. * Dome Camera * Instruction Manual (This Document) * Template sheet... -
Page 8: Installation
2.2 Installation (1) Flush Type 1) Make screw holes for camera on the ceiling with Template Sheet. 2) Disassemble a camera by Surface Case, Camera Set, and Top Case. 3) Fix the Camera Set using Anchors(3x) and Screws(3x) to the ceiling. 4) Assemble Top Case to Camera Set. - Page 9 (2) Surface Type 1) Make screw holes for camera on the ceiling with Template Sheet. 2) Disassemble a camera by Surface Case, Camera Set, and Top Case. 3) Fix the Surface Case using Anchors(4x) and Screws(4x) to the ceiling. 4) Assemble Camera Set into the Surface Case with Screws and Safety Lanyard. 5) Assemble Top Case to Camera Set.
-
Page 10: Basic Configuration Of Dome Camera System
2.3 Basic Configuration of Dome Camera System Figure 1 – Basic Installation Diagram The dome camera must be installed by qualified service personnel in accordance with all local and federal electrical and building codes. -
Page 11: Setting Dome Camera Termination
Figure 2 – Layout of DIP Switches 2.4 Setting Dome Camera Termination The device which is connected at end of line, whether it is a dome camera or keyboard controller, must have the cable for communication terminated by setting the appropriate DIP switch. Without proper termination, there is potential for control signal errors. - Page 12 Example: Port 1 = Dome 1, Port 2 = Dome 2 … Port 16 = Dome 16. If more than 16 dome cameras are installed using two or more multiplexers, ID of the dome camera should be ID of MUX x No. of camera IN. (e.g. multiplexer ID= n, Camera IN= m then ID of Dome =16x(n-1)+m ) DOME ID (16) (32)
- Page 13 DOME ID (16) (32) (64) (128) Figure 4.2 – Setting Dome Camera Address (ID)
- Page 14 DOME ID (16) (32) (64) (128) Figure 4.3 – Setting Dome Camera Address (ID)
- Page 15 DOME ID (16) (32) (64) (128) Figure 4.4 – Setting Dome Camera Address (ID)
- Page 16 DOME ID (16) (32) (64) (128) Figure 4.5 – Setting Dome Camera Address (ID)
- Page 17 DOME ID (16) (32) (64) (128) Figure 4.6 – Setting Dome Camera Address (ID)
-
Page 18: Setting Dome Camera Protocol
2.6 Setting Dome Camera Protocol If a dome camera is to be installed with the keyboard controller, select the default protocol. Consult service personnel if a dome camera is installed with device other than a keyboard controller. You can set Protocol with dip switch D2, D3 and D4 in S2. ROTOCOL F2, F2E, Pelco-P, Pelco-D : default F2, F2E... -
Page 19: Connections
2.7 Connections • Connecting to the RS485 The dome camera can be controlled remotely by an external device or control system, such as a control keyboard, using RS485 half-duplex serial communications signals. • Connecting Video out connector Connect the video out (BNC) connector to the monitor or video input. •... -
Page 20: Getting Started
2.8 Getting Started Once installed apply power to the dome camera. The dome camera will start a configuration sequence. PRESET TITLE AREA TITLE STATUS of AF AE FOCUS and AE FUNCTION UNDER RUNNING CAMERA TITLE INFORMATION EMPTY DATA DISPLAY CAMERA ID ALARM:1 DOMEID:001 W→360.0 090.0... -
Page 21: Chapter 3 - Program And Operation
Chapter 3 — Program and Operation 3.1 Dome Camera Selection Before you program or operate a dome camera, you must select the dome camera by pressing No. + CAM keys. Example: Pressing 1 , 0 + CAM keys sequentially will select dome camera 10. The selected dome camera ID will be displayed on the LCD monitor of the keyboard controller. -
Page 22: Auto Scan (Shortcut: Scan)
3.4 Auto Scan (Shortcut: SCAN) The Auto Scan supports up to 5 programmed angles at user-programmable speeds. Follow these steps to program Auto Scan: AUTO SCAN SETUP NUMBER : 01 TITLE : A01 SPEED : 05 STEP START ANGLE : ----- ----- END ANGLE : ----- ----- SCAN DIR... -
Page 23: Preset (Shortcut: Prst)
6. Select ―END ANGLE‖. Hold down the CTRL key while moving the Joystick to select the end position. The end position angle should be larger than start position. Release the CTRL key to complete the selection of the end position. Or press the IRIS Open key then the ―CTRL‖ displays. - Page 24 3. After selecting a blank position, press and hold the CTRL key. Use the Joystick to control the direction of the camera and lens. 4. After aiming the camera (view direction and lens control), release the CTRL key. The cursor will be on the ―TITLE‖...
-
Page 25: Shortcut Of Preset Program
3.6 Shortcut of Preset Program After selecting the desired scene, press No. (1 to 120), and press the CTRL and PRST keys subsequently. The current view will be stored to the selected Preset number if the Preset number is empty. If selected Preset number is not empty, ―OVER WRITE‖ message will be displayed on the monitor and select the ―OK‖... -
Page 26: Alarm
3.8 Alarm ALARM SETUP PRI FUN IN HLD LATCH 001 NC SAVE AND EXIT(ESC TO CANCEL) : alarm input number PRI(Priority) : The lower number has higher priority. (1 fixed) FUN(Function) : Stored preset number to be called by alarm. : NO/NC –... -
Page 27: Camera Menu
5. Select ―SWAP‖. Set to ON, to exchange the start angle and the end angle. 6. Select ―SAVE AND EXIT‖ and push the Joystick to the right or press the IRIS Open key. Press the ESC or IRIS Close key to exit the program without saving. 3.10 Camera Menu CAMERA SETUP FOCUS CONTROL... - Page 28 MANUAL Manual mode, you can change R and B Gain manually. RGAIN 0 ~ 255 BGAIN 0 ~ 255 RGAIN / BGAIN modes are controllable only in MANUAL Mode. • AE CONTROL AE SETUP MODE : MANUAL GAIN : MIN BRIGHT : 024 SHUTTER...
-
Page 29: Dome Setup
3.11 Dome Setup CONFIGURATION MENU LANGUAGE : ENGLISH HOME FUNCTION SETUP OSD DISPLAY VIEW ANGLE SETUP INITIALIZE DATA SYSTEM MENU SYSTEM INFORMATION SAVE AND EXIT(ESC TO CANCEL) • LANGUAGE SETUP LANGUAGE : Select the language you want. • HOME FUNCTION SETUP HOME FUNCTION SETUP HOME FUNCTION : NONE... - Page 30 • OSD DISPLAY OSD DISPLAY SETUP CAMERA TITLE : DOMEID VIEW DIRECTION : OFF DOME OSD : ON AREA TITLE : OFF PRESET TITLE : CONSTANT FOCUS EXPOSURE : ON SAVE AND EXIT(ESC TO CANCEL) CAMERA TITLE : up to 6 characters. VIEW DIRECTION : ON / OFF ―ON‖...
- Page 31 • INITIALIZE DATA INITIALIZE DATA FACTORY DEFAULT ERASE PROGRAMMED DATA PRESET FOCUS DEFAULT EXIT(ESC TO EXIT) FACTORY DEFAULT Select ―FACTORY DEFAULT‖ to initialize the Data. FACTORY DEFAULT ARE YOU SURE ? CANCEL ERASE PROGRAMMED DATA Erase all stored data from the Flash-ROM of the selected dome camera. You will be asked to enter ON or OFF.
- Page 32 • SYSTEM MENU SYSTEM MENU MOTOR SETUP PASSWORD EDIT ORIGIN CHECK WHITE DEFECT COMPENSATION CALIBRATION : ON PASSWORD ENABLE : OFF BLINK CURSOR : ON DOME ANSWER : ON SAVE AND EXIT(ESC TO CANCEL) CALIBRATION : ON(Auto origin check) / OFF PASSWORD ENABLE : ON(requires the password to enter menu) / OFF BLINK CURSOR...
- Page 33 You can change the password with 6-digit character in this menu. The default password is 555555. When the password enable is on, the input password window displays to enter the menu. At this time, move the cursor to the desired character by the Joystick and press the CTRL or IRIS Open key.
-
Page 34: Appendix A - Specifications
Appendix A — Specifications 22X Optical Zoom MINITRAX III Lite Dome Camera MODEL 22X Type I MODULE CCD Type 1/4" Type Super HAD CCD II Optical Zoom Max Resolution 580 TVL Focal length f = 3.9mm ~ 85.8mm 3.9mm – 49.5° (H) Angle of view 85.8mm –... - Page 35 Figure 6.1 – Dimension (Flush Case)
- Page 36 Figure 6.2 – Dimension (Surface Case)
-
Page 37: Appendix B - Troubleshooting
Appendix B — Troubleshooting If problems occur, verify the installation of the camera with the instructions in this manual and with other operating equipment. Isolate the problem to the specific piece of equipment in the system and refer to the equipment manual for further information. Problem Possible Solution Verify that power is connected to all pieces of... -
Page 38: Appendix C - Short Cut Key
Appendix C — Short Cut Key Short Cut Key Function PRST Pop up Preset setup menu. TOUR Pop up Tour setup menu. SCAN Pop up Auto Scan setup menu. No.+ CTRL+ PRST Store the current view at the selected number. Short Cut Key Function Short Cut Key... - Page 40 22X MINITRAX III Lite DOME CAMERA 50303087B Printed in Korea...
Need help?
Do you have a question about the KSD-2200/L3 and is the answer not in the manual?
Questions and answers