Table of Contents
Advertisement
Quick Links
Advertisement
Table of Contents

Related Manuals for Samsung SM-R321


Summary of Contents for Samsung SM-R321
- Page 1 USER MANUAL SM-R321 Printed in Korea GH68-43857A Rev.1.2 English (EU). 04/2015...
-
Page 2: Table Of Contents
Table of Contents Read me first Basics Health and safety warnings 38 Using the touchpad 41 Oculus Home screen and VR App screen Getting started 44 Moving the pointer or the screen 15 About the Gear VR for S6 45 Selecting items 16 Package contents 48 Managing apps 17 Device layout... - Page 3 Table of Contents Apps 54 Oculus Store 56 Oculus Cinema 58 VR Gallery 60 Oculus 360 Videos 61 Oculus 360 Photos Troubleshooting Safety information...
-
Page 4: Read Me First
Use the Gear VR for S6 for its intended purpose only. Using the Gear VR for S6 for other purposes may result in injury. • The Gear VR for S6 must be connected to a Samsung GALAXY S6 when in use. The Gear VR for S6 cannot be operated by itself. •... - Page 5 Read me first Instructional icons Warning: situations that could cause injury to yourself or others Caution: situations that could cause damage to your device or other equipment Notice: notes, usage tips, or additional information...
-
Page 6: Health And Safety Warnings
Read me first Health and safety warnings • Please ensure that all users of the Gear VR for S6 read the warnings below carefully before using the Gear VR for S6 to reduce the risk of personal injury, discomfort or property damage. •... - Page 7 Read me first Seizures Some people (about 1 in 4000) may have severe dizziness, seizures, epileptic seizures or blackouts triggered by light flashes or patterns, and this may occur while they are watching TV, playing video games or experiencing virtual reality, even if they have never had a seizure or blackout before or have no history of seizures or epilepsy.
- Page 8 Read me first General instructions and precautions You should always follow these instructions and observe these precautions while using the Gear VR for S6 to reduce the risk of injury or discomfort. Use only in a safe environment • The Gear VR for S6 produces an immersive virtual reality experience that distracts you from and blocks your view of your actual surroundings.
- Page 9 Read me first • Ease into the use of the Gear VR for S6 to allow your body to adjust. Use for only a few minutes at a time at first, and only increase the amount of time using the Gear VR for S6 gradually as you grow accustomed to virtual reality.
- Page 10 Stop using the Gear VR for S6 if it seems to be hot. Prolonged contact with an overheated device can cause burns. • Do not wear the Gear VR for S6 without the Samsung GALAXY S6 attached. • Listening to sound at high volumes can cause irreparable damage to your hearing.
- Page 11 Read me first Discomfort • Immediately discontinue use if anyone using the Gear VR for S6 experiences any of the following symptoms: seizures, loss of awareness, eye strain, eye or muscle twitching, involuntary movements, altered, blurred, or double vision or other visual abnormalities, dizziness, disorientation, impaired balance, impaired hand-eye coordination, excessive sweating, increased salivation, nausea, lightheadedness, discomfort or pain in the head or eyes, drowsiness, fatigue, or any...
- Page 12 Read me first • Do not drive, operate machinery, or engage in other visually or physically demanding activities that have potentially serious consequences (i.e., activities in which experiencing any symptoms could lead to death, personal injury, or damage to property), or other activities that require unimpaired balance and hand-eye coordination (such as playing sports or riding a bicycle, etc.) until you have fully recovered from any symptoms.
- Page 13 Read me first Repetitive stress injury Prolonged use of the Gear VR for S6 and input devices (e.g. controllers) can make your muscles, joints or skin hurt. If any part of your body becomes tired or sore while playing, or if you feel symptoms such as tingling, numbness, burning or stiffness, stop and rest for several hours before playing again.
- Page 14 Read me first Electrical shock To reduce risk of electric shock, follow the warnings below. • Do not modify or disassemble any of the components provided. • Do not use the Gear VR for S6 if any cable is damaged or any wires are exposed.
-
Page 15: Getting Started
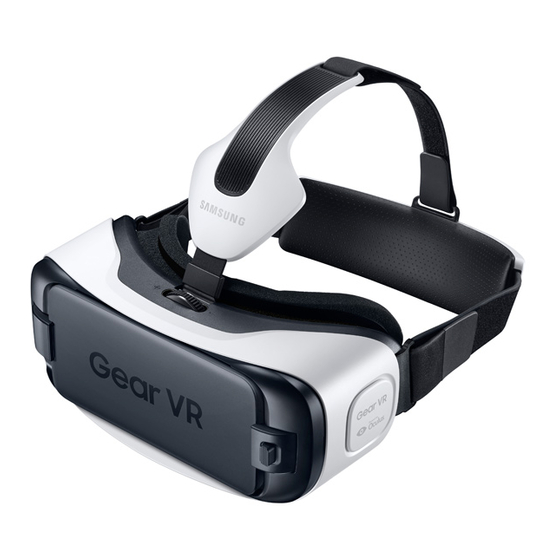
Getting started About the Gear VR for S6 The Samsung Gear VR Innovator Edition for S6 (also referred to as Gear VR for S6) is a head-mounted, virtual reality device that provides an immersive experience for a wide range of users. -
Page 16: Package Contents
Use only Samsung-approved accessories. Using unapproved accessories may cause performance problems and malfunctions that are not covered by the warranty. • Availability of all accessories is subject to change depending entirely on manufacturing companies. For more information about available accessories, refer to the Samsung website. -
Page 17: Device Layout
Getting started Device layout Focus adjustment wheel Connector Charging port Phone lock key Lenses Foam cushioning Proximity sensor... - Page 18 The fan may cause noise during operation. This is normal and does not affect the Gear VR for S6's lifespan or performance. • The Gear VR for S6 does not require charging as it is powered using the Samsung GALAXY S6’s battery.
- Page 19 – If you use the Gear VR for S6 while the charger is connected, it is powered by the charger and does not use the Samsung GALAXY S6’s battery. When you use content that has high power demand (more than 1A) while the charger is connected, the Gear VR for S6 uses two power sources.
- Page 20 Getting started • To save energy, unplug the charger when not in use. The charger does not have a power switch, so you must unplug the charger from the electric socket when not in use to avoid wasting power. The charger should remain close to the electric socket and easily accessible while charging.
- Page 21 Gear VR for S6 and configure settings. • Press to adjust the Gear VR for S6 Volume volume. • Press to separate the Samsung GALAXY Phone lock S6 from the Gear VR for S6. • Rotate to focus by adjusting the Focus...
-
Page 22: Wearing The Gear Vr For S6
Gear VR for S6. • The Gear VR for S6 is compatible only with the Samsung GALAXY S6 and the Samsung GALAXY S6 Edge. • Factory lens protectors are pre-installed on the Gear VR for S6. - Page 23 Ensure that you keep your face clean and dry when wearing the Gear VR for S6. • When you remove the Gear VR for S6 from your head, the Samsung GALAXY S6's screen locks and the touchpad stops working. •...
- Page 24 Getting started Position the main strap so that the strap loop is at the top. Then, insert each end of the main strap through a strap loop on the Gear VR for S6 and use the velcro to fasten each end.
- Page 25 Getting started Attach the hook to the top of the Gear VR for S6’s front frame and pull it upwards until it locks in place.
- Page 26 Getting started Slide the end of the top head strap through the strap loop on the main strap and use the velcro to fasten it.
- Page 27 Getting started Press the Phone lock key, and then remove the front cover.
- Page 28 Getting started Connect the multipurpose jack of the Samsung GALAXY S6 to the connector. After the Samsung GALAXY S6 emits a sound, push it in firmly until it locks in place.
- Page 29 Getting started • Push the Samsung GALAXY S6 into the Gear VR for S6 firmly until it locks in place. If it is not securely locked, the Samsung GALAXY S6 may accidentally separate from the Gear VR for S6 and be damaged.
- Page 30 Getting started Secure the Gear VR for S6 to your head with the straps and place it comfortably over your face. Adjust the length of the top head strap and the main strap.
- Page 31 Getting started Do not walk or drive while wearing the Gear VR for S6. Always be aware of your surroundings while using the Gear VR for S6 to avoid injuring yourself or others. • Wear the Gear VR for S6 properly. If you wear the Gear VR for S6 tilted to one side, it may cause discomfort.
- Page 32 Getting started Separating the devices Separate the Samsung GALAXY S6 from the Gear VR for S6 when you finish using it. Press the Phone lock key, and then remove the Samsung GALAXY S6.
- Page 33 Getting started Connecting a headset You can connect a headset or a Bluetooth headset to the Samsung GALAXY S6 when using the Gear VR for S6. A headset or a Bluetooth headset is not supplied with the Gear VR for S6. For more information about connecting a Bluetooth headset, refer to the Samsung GALAXY S6’s user manual.
- Page 34 Getting started Replacing the foam cushioning You can replace the foam cushioning if it deteriorates over time. Or, you can change it to another type of foam cushioning that fits comfortably over your nose. Detach the foam cushioning from the Gear VR for S6. Align the replacement foam cushioning with the Gear VR for S6.
-
Page 35: Installing The Gear Vr For S6
To use the Gear VR for S6, you must manually install the Gear VR for S6 software. When you connect the Samsung GALAXY S6 to the Gear VR for S6 for the first time, the software installation will start automatically. - Page 36 Connect the Samsung GALAXY S6 to the Gear VR for S6. When a voice prompt requests you to separate the Samsung GALAXY S6 from the Gear VR for S6, remove the Samsung GALAXY S6. Then, perform steps 3–10 on the Samsung GALAXY S6.
-
Page 37: Software
Getting started Tap Install Apps to install the default VR apps. Connect the Samsung GALAXY S6 to the Gear VR for S6. Or, tap Browse Oculus Store to launch the Oculus Store app. When the software is installed, the Oculus Store app will appear on the Apps screen of the Samsung GALAXY S6. -
Page 38: Basics
Basics Using the touchpad The touchpad is located on the right side of the Gear VR for S6. Use the touchpad to select items or to control the Gear VR for S6. When you are not wearing the Gear VR for S6, the touchpad does not work. - Page 39 Basics Swiping To move to the next item, swipe forwards across the touchpad. To move to the previous item, swipe backwards across the touchpad.
- Page 40 Basics To move to the next item, swipe downwards across the touchpad. To move to the previous item, swipe upwards across the touchpad. Some apps may not support upwards or downwards swiping actions.
-
Page 41: Oculus Home Screen And Vr App Screen
Basics Oculus Home screen and VR App screen Oculus Home screen The Oculus Home screen is the starting point for accessing apps and features. You can launch or download VR apps on the Oculus Home screen. Before the Oculus Home screen opens for the first time, a tutorial will start explaining how to safely use and control the Gear VR for S6. - Page 42 Basics Pointer Recently used apps View a list of all Download apps. downloaded apps. Change the current page.
- Page 43 Basics VR App screen You can launch an app, view app information, and more. On the Oculus Home screen, select Library → Installed. Swipe backwards or forwards across the touchpad to move to an app. When you have moved to the app, select View Details. Launch an app.
-
Page 44: Moving The Pointer Or The Screen
Basics Moving the pointer or the screen The Gear VR for S6 recognises your head movements. Move your head in any direction to move the pointer or the screen. The pointer is located in the centre of the screen. Some apps may not display the pointer at all times. -
Page 45: Selecting Items
Basics Selecting items You can select items or apps by moving your head and then tapping the touchpad. The following example shows the steps to perform to select an image from the VR Gallery app. The screen, item selection method, and pointer may differ depending on the app you are using. - Page 46 Basics Move the pointer to Installed by moving your head, and then tap the touchpad to select it. Swipe backwards or forwards across the touchpad to move to VR Gallery. Move the pointer to START by moving your head, and then tap the touchpad to select it.
- Page 47 Basics Move the pointer to an image in the list by moving your head. When the border of the image is highlighted, tap the touchpad to select it. While viewing an image, you can swipe backwards or forwards across the touchpad to view more images.
-
Page 48: Managing Apps
On the Oculus Home screen, select Library → Installed. Move to the app that you want to launch and select START. Installing apps You can install VR apps on the Samsung GALAXY S6 while wearing the Gear VR for S6. On the Oculus Home screen, select Store or Samsung, and then select an app. -
Page 49: Receiving Calls
Answering a call when the Samsung GALAXY S6 is hot may cause minor burns to your face or ear. To avoid burns, remove the Samsung GALAXY S6 and wait for it to cool down. If you have to answer calls... - Page 50 Basics • You cannot answer calls while using the Gear VR for S6. To answer a call, separate the Samsung GALAXY S6 from the Gear VR for S6 and answer the call. • The Gear VR for S6 blocks pop-up messages for incoming calls when the Do Not Disturb feature is activated.
-
Page 51: Viewing Notifications
When a notification comes in, a pop-up message is displayed on the screen. To see more notification details, check them on the Samsung GALAXY S6 after you separate it from the Gear VR for The Gear VR for S6 blocks pop-up messages for notifications when the Do Not Disturb feature is activated. -
Page 52: Using The Universal Menu
Oculus Home: Return to the Oculus Home screen. • Pass-through Camera: Off / Pass-through Camera: On: Activate or deactivate the Samsung GALAXY S6's rear camera to see outside the Gear VR for S6. • Reorient: Align the screen with the current direction you are facing. - Page 53 Basics • Comfort Mode: Off / Comfort Mode: On: Restore the default colour settings or use warm colour settings. These features may not be available in some apps.
-
Page 54: Oculus Store
Apps Oculus Store Manage apps for the Gear VR for S6 on the Samsung GALAXY S6. On the Samsung GALAXY S6, open the Apps screen and tap Oculus. When you launch the Oculus Store app for the first time, you must sign in to an Oculus account. - Page 55 → Settings → Language, and then select To change the language, tap a language. The selected language is only applied to the Oculus Store app and the Gear VR for S6, not to the language displayed on the Samsung GALAXY S6.
-
Page 56: Oculus Cinema
Videos will be sorted based on the screen type. • Shorts: View or download free videos from Oculus that are optimised for a standard screen. • My Videos: View a video stored in the Samsung GALAXY S6 on a standard screen. Select a video. - Page 57 Apps • You can change your surroundings when viewing the video on the standard screen. • When the video finishes, the next video will play automatically after several seconds. While watching videos, you can control video playback. Tap the touchpad to use the following features: •...
-
Page 58: Vr Gallery
Apps VR Gallery View images and videos from the Samsung GALAXY S6. On the Oculus Home screen, select Library → Installed. Move to VR Gallery and select START. Playing videos Select a video folder. Select a video to watch and select . -
Page 59: Viewing Images
Apps Viewing images Select an image folder and then select an image. To view the previous image, swipe backwards across the touchpad. To view the next image, swipe forwards across the touchpad. To enlarge the size of the image, swipe upwards on the touchpad. To reduce the size of the image, swipe downwards on the touchpad. -
Page 60: Oculus 360 Videos
Apps Oculus 360 Videos View 360 degree panoramic videos. On the Oculus Home screen, select Library → Installed. Move to Oculus 360 Videos and select START. Select a video. Turn your head and view a panorama of the video. While viewing the video, you can tap the touchpad to use the following features: •... -
Page 61: Oculus 360 Photos
Apps Oculus 360 Photos View 360 degree panoramic images. On the Oculus Home screen, select Library → Installed. Move to Oculus 360 Photos and select START. Swipe upwards or downwards across the touchpad to select an image category. Select an image. Turn your head and view a panorama of the image. While viewing the image, you can tap the touchpad to use the following features: •... -
Page 62: Troubleshooting
Before contacting a Samsung Service Centre, please attempt the following solutions. Some situations may not apply to your device. If the tips below do not solve the problem, contact a Samsung Service Centre. The Oculus Home screen does not appear when the Samsung GALAXY S6 is connected to the Gear VR for S6 •... - Page 63 Gear VR for S6 and to wait for it to cool down. Stop using the Gear VR for S6 until the Samsung GALAXY S6 cools down, and then resume use. This is normal and should not affect the Samsung GALAXY S6's lifespan or performance.
- Page 64 • Rotate the Focus adjustment wheel until the screen looks clear. The image on the screen is shaking • Disconnect the Samsung GALAXY S6 from the Gear VR for S6 and then reconnect it. • Restart the Samsung GALAXY S6.
- Page 65 • Ensure that the Bluetooth device is connected to the Samsung GALAXY • Ensure that the Samsung GALAXY S6 and the other Bluetooth device are within the maximum Bluetooth range (10 m). • Ensure that the battery of the Bluetooth device that you are connecting...
- Page 66 Safety information To prevent injury to yourself and others or damage to your device, read the safety information about your device before using it. Use the device for its intended purpose only. Do not drop or cause an impact to the charger or the device. Do not use or store your device in areas with high concentrations of dust or airborne materials.
- Page 67 Safety information Do not insert the device or supplied accessories into the eyes, ears, or mouth. Doing so may cause suffocation or serious injuries. Do not expose the device to heavy smoke or fumes. Doing so may damage the outside of the device or cause it to malfunction. Keep your device dry.
- Page 68 Safety information Do not look directly at bright light while you are wearing the device without the mobile device inserted. Doing so may damage your eyesight. Do not use the device if errors occur. Continued use of the device after errors occur may result in discomfort or personal injury.
- Page 69 Broken glass or acrylic could cause injury to your hands and face. Take the device to a Samsung Service Centre to have it repaired. Use manufacturer-approved batteries, chargers, accessories, and supplies. Samsung cannot be responsible for the user’s safety when using accessories or supplies that are not approved by Samsung.
- Page 70 Do not disassemble, modify, or repair your device. Any changes or modifications to your device can void your manufacturer’s warranty. If your device needs servicing, take your device to a Samsung Service Centre. When cleaning your device, mind the following.
- Page 71 Safety information Allow only qualified personnel to service your device. Allowing unqualified personnel to service your device may result in damage to your device and will void your manufacturer’s warranty. Correct disposal of this product (Waste Electrical & Electronic Equipment) (Applicable in countries with separate collection systems) This marking on the product, accessories or literature indicates that the product and its electronic accessories (e.g.
- Page 72 Safety information Household users should contact either the retailer where they purchased this product, or their local government office, for details of where and how they can take these items for environmentally safe recycling. Business users should contact their supplier and check the terms and conditions of the purchase contract.
- Page 73 No part of this manual may be reproduced, distributed, translated, or transmitted in any form or by any means, electronic or mechanical, including photocopying, recording, or storing in any information storage and retrieval system, without the prior written permission of Samsung Electronics. Trademarks •...
- Page 74 (Name and signature of authorised person) * This is not the address of Samsung Service Centre. For the address or the phone number of Samsung Service Centre, see the warranty card or contact the retailer where you purchased your product.
- Page 75 www.samsung.com...
Need help?
Do you have a question about the SM-R321 and is the answer not in the manual?
Questions and answers