Table of Contents
Advertisement
Quick Links
49-M500WMEN25
500 RANGE
500 RANGE
500 RANGE
500 RANGE
W W W Wind
W W W W - - - - 010, W
010, W- - - - 015, W
010, W
010, W
015, W
015, W- - - - 020, W
015, W
M M M Mistral
istral
istral
istral
M M M M - - - - 510, M
510, M- - - - 515, M
515, M- - - - 5 5 5 5 20, M
510, M
510, M
515, M
515, M
ind
ind
ind
020, W- - - - 025
020, W
020, W
025
025
025
20, M- - - - 525
525
20, M
20, M
525
525
Advertisement
Table of Contents

Related Manuals for Dibal Wind W-010


Summary of Contents for Dibal Wind W-010
- Page 1 500 RANGE 500 RANGE 500 RANGE 500 RANGE W W W Wind W W W W - - - - 010, W 010, W 010, W 010, W- - - - 015, W 015, W 015, W- - - - 020, W 015, W 020, W 020, W- - - - 025...
-
Page 3: Table Of Contents
500 Range CONTENTS INTRODUCTION ..............................1 1.1. PRESENTATION ............................1 1.2. MAIN CHARACTERISTICS ........................1 1.3. WEIGHING SCALES SPECIFICATIONS ....................2 1.3.1. General..............................2 1.3.2. Accessories..............................2 1.4. INSTALLATION OF SCALES ........................3 1.5. MAINTENANCE ADVICE AND HOW TO LOOK AFTER YOUR 500 RANGE SCALES ....4 OPERATION.................................5 2.1. - Page 4 USER´S MANUAL 5.1.4. Label configuration [ 3 4 ] ........................46 5.1.5. Printing configuration [ 3 5 ].......................48 5.1.6. Conf. EAN [ 3 6 ]..........................50 5.1.7. Configuration. Others [ 3 7 ] .......................54 5.1.8. Conf. Display [ 3 8 ]..........................56 TEXTS [ 4 ] ................................57 6.1.
- Page 5 500 Range DATA [ 7 ]................................93 11.1. DATES [ 7 1 ]............................93 11.1.1. Group Number[ 7 1 1 ] ........................93 11.1.2. Wholesalers Limit [ 7 1 2 ] ........................93 11.1.3. Vat Types [ 7 1 3 ]..........................94 11.1.4. Tares [ 7 1 4 ]............................94 11.1.5.
- Page 6 USER´S MANUAL 14.2. COPYING MACROS [ 10 2 ] .......................119 14.3. DELETING MACROS [ 10 3 ] ......................119 14.4. EDITING MACROS [ 10 4 ] .........................120 APPENDIX ..............................121 15.1. TROUBLESHOOTING..........................121 15.1.1. Problems with weighing........................121 15.1.2. Communication errors ........................121 15.1.3. Problems with articles.........................122 15.1.4.
- Page 7 500 Range 19.1. MODELS ..............................153 19.2. LABELLING ASSEMBLY........................153 19.2.1. LINERLESS CASSETTE ........................153 19.2.2. INCOMPATIBILITIES........................154 19.3. CONFIGURATION..........................154 19.4. RECOMMENDATIONS OF USE......................154...
-
Page 9: Introduction
1.INTRODUCTION 1.1. PRESENTATION The 500 weighing scale Range are the top of the DIBAL range, especially designed for use in direct sales to the public. DIBAL’s 500 weighing scale Range are a powerful work tool that will permit you to reap maximum benefit from your business. -
Page 10: Weighing Scales Specifications
USER´S MANUAL 1.3. WEIGHING SCALES SPECIFICATIONS 1.3.1.General POWER SUPPLY......... 110/230 VAC,50Hz, 1,3A PRINTING METHOD ..........THERMAL PAPER DISPLAY..............According to model* * DISPLAY SUPERLUX or DISPLAY BLUE L PAPER SIZE OF LABELLING MACHINE ..Dimensions: Width x Length Maximum Length: 100*mm Max. -
Page 11: Installation Of Scales
500 Range 1.4. INSTALLATION OF SCALES Follow the instructions below to ensure correct installation and operation of the scales. Check that the mains voltage corresponds to that stated on the specifications label on the scales and that it does not fluctuate in excess of 10% of nominal voltage. -
Page 12: Maintenance Advice And How To Look After Your 500 Range Scales
USER´S MANUAL 1.5. MAINTENANCE ADVICE AND HOW TO LOOK AFTER YOUR 500 RANGE SCALES By following these recommendations, your scales will remain in perfect working order, thus obtaining a better performance and a longer life. Never place a weight on the scales that exceeds the maximum limit. -
Page 13: Operation
500 Range 2.OPERATION 2.1. SWITCHING ON Check that the weighing scales are correctly installed and then turn on the switch on the bottom of the scales. 99999 99999 While the scales are checked for any possible errors, the 99999 99999 display shows a countdown from 9 to 0, and information on the H5XX V010N... -
Page 14: Starting Up
USER´S MANUAL 2.2. STARTING UP Each of the following steps must be completed to start operating the scales: STEP 1: Install scales described sect 1.4.INSTALLATION OF SCALE and switch on as described in sect. 2.1.SWITCHING ON. STEP 2: Programme the weighing scale communications, i.e., set up the scales as MASTER or SLAVE and assign the corresponding address (See sect.7.4.1.1 Set up as MASTER-SLAVE) -
Page 15: How To Operate The Scales
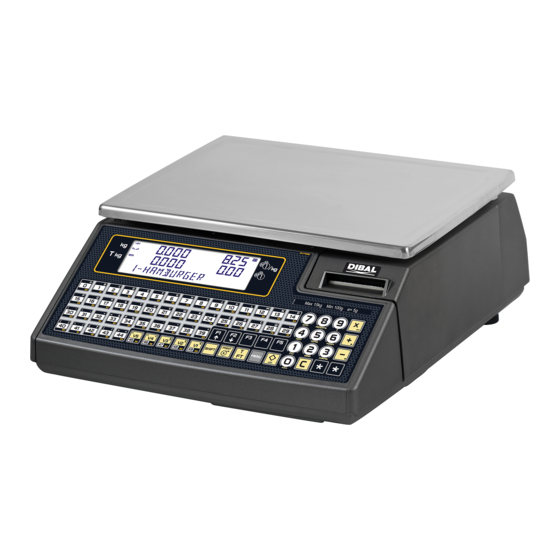
500 Range 2.3. HOW TO OPERATE THE SCALES DIBAL 500 Range weighing scale are specially designed to simplify the sales assistant’s work, ensuring a high level of speed and reliability on the part of the system, whether the latter is one set of weighing scales or a network of MASTERS and SLAVES connected to a PC. -
Page 16: Non-Weight Operations (Adding, Subtraction And Multiplication)
USER´S MANUAL 4.Memorise the operation for the corresponding sales assistant by 0.410 pressing one of the, V1, V2..., Vxx keys. These memory keys 0.000 ^Euros^ must have been registered beforehand. (See sect. 4.1. REGISTERING VENDORS ). 5. Remove the article and then start again with the next one. 0.410 5.00 0.000... -
Page 17: In Line Discount
500 Range 2.3.5. In line discount In receipt mode, this option permits a percentage discount to be applied to a certain article. Proceed as follows: 1. Check that the parameter for applying discounts has been set 0.000 0.00 up correctly. (See sect. 5.1.3.6. DISCOUNT IN LINE) 0.000 0.00 PRINT... -
Page 18: Review Receipt
USER´S MANUAL 6. If the option CALCULATE EXCHANGE is activated (See sect . 5.1.3.1 CALCULATE EXCHANGE), TYPE the amount tendered by the customer. The display will then show the amount tendered by the customer, the amount to be returned ∗ ∗ ∗ ∗ by the sales assistant or the change, and the amount to pay. -
Page 19: Receipt Reopening
500 Range 2.3.7.1. Complete deleting receipt If you wish to cancel the entire ticket, Follow the next steps: ◊ ◊ ◊ ◊ 1. Press the subtotal key ◊ ◊ ◊ ◊ . SUBTOTAL SALES ASSIST 2. Press the corresponding sales assistant’s memory key. Subto 0.36 M: 04... -
Page 20: Fix Price
USER´S MANUAL The label will be printed when the memory key is pressed ∗ ∗ ∗ ∗ corresponding to the sales assistant who has effected the operation. 3. If you wish to make a certain number of COPIES* of the last Total label issue, press ∗... -
Page 21: Net Weight Operations
500 Range • This procedure compatible with adding subtraction of one or more articles to be weighed. • In-line discount is not compatible (See sect. 5.1.3.6. IN LINE DISCOUNT ) with this procedure. Effect the following procedure: 0.590 7.89 0.000 4.69 1. -
Page 22: Free Price
USER´S MANUAL 2.3.13. Free price If you wish to FREE THE PRICE of a product at any time: Check that configuration parameter 323: FREE PRICE has 0.205 0.00 the default value (See sect. 5.1.2.3 FREE PRICE) and place 0.000 0.00 the product on the platform. -
Page 23: Best Before
• Models: W-020, W-025 & M-520,M-525 2.3.16.Batch number* In the Dibal 500 Range scales it is possible to programme a batch number, which can be alphanumeric with a maximum of ten digits, in which a global reference to labels of articles may be assigned when the scales are in label mode. -
Page 24: Totals Labels
USER´S MANUAL 2.3.17.Totals labels With this procedure it is possible to issue a label with the totals of the previously issued labels. There are two modes of operation: 2.3.17.1.Normal Accumulation Label After issuing several labels, you can request a label with the totals of the previous operations. -
Page 25: Forms Of Payment
500 Range 2.3.18.Forms of payment This Function permits sales to be associated with a form of payment so that later they can be listed separately. There are nine forms of payment, four of which are defined: PLU1 Cash PLU4 To account PLU7 Programmable Card or... -
Page 26: Two Pay Mode
USER´S MANUAL 4. Press MENU 8 1 16 to enter the Lists menu. Enter number 21, which is the number that corresponds to the customers’ list. This list shows each customer, name and amount owed. MENU To ensure that the balance of the cash drawer adds up correctly, in list 8 1 16 TOTAL SALES ASSIST. - Page 27 500 Range The choice of the first form of payment and the amount to pay through this form are confirmed by pressing ∗ ∗ ∗ ∗ , and a second dialog box will appear, showing: - Number of articles sold - Sales total - Sales assistant code - Description of second form of payment...
-
Page 28: Selecting A Default Vendor
USER´S MANUAL Use the number keys to enter the amount the customer wishes to pay by cheque. Press ∗ ∗ ∗ ∗ again. If the amount entered differs from the amount due (i.e. if it is less) a second form of payment will be requested. -
Page 29: Self-Service Mode
500 Range 2.3.23.SELF-SERVICE MODE The way it works in this mode is performed by placing a weight on the plate and when pressing the corresponding key label, without 0.135 0.00 requiring the intervention of a vendor, the label of the required 0.000 0.00 03 - POTATOES... - Page 30 USER´S MANUAL The movements we can have are the following ones 100.525 STOCK + + + + Add the stock: The indicated amount is added to the 12- POTATOES current stock. − − − − Subtract the stock: The indicated amount is subtracted from the current stock.
- Page 31 500 Range [ 3 2 8 ] Subtotal [ 3 5 5 ] Two Pay. Modes [ 1 ] ARTICLES [ 3 5 6 ] Section barcode [ 3 3 ] CONF. RECEIPT [ 2 ] VENDORS [ 3 6 ] CONF. EAN [ 3 3 1 ] Exchange Calculation [ 2 1 ] CREATION [ 3 3 2 ] Customer Number...
- Page 32 USER´S MANUAL [ 3 7 10 ] Memo weight zero [ 4 6 ] SHORT MESSAGES [ 5 4 ] INTERCONEXION [ 3 7 11 ] Headers Lin Lists [ 4 6 1 ] Read messages [ 5 4 1 ] Master/Slave Configuration [ 3 6 12 ] Scan Load Class [ 4 6 2 ] Delete messages [ 5 4 1 1 ] Net Identifier...
- Page 33 500 Range [ 6 2 ] RECEIPT [ 7 4 ] PRINTING PARAMETERS [ 8 1 1 ] Report of Articles by Code [ 8 1 2 ] Report of Articles by PLU [ 6 2 1 ] Prog Receipt Format [ 7 4 1 ] Label Parameters [ 8 1 3 ] Report of Articles by Equivalence [ 6 2 2 ] Copy Receipt Format...
- Page 34 USER´S MANUAL [ 9 3 ] PARTIALS [ 9 3 1 ] Articles Deletion [ 9 3 2 ] Formats Deletion [ 9 3 3 ] Traceability Deletion [ 9 3 3 1 ] Complete [ 9 3 3 2 ] Only Products [ 9 3 3 3 ] Active Animal [ 9 3 4 ] Configuration Deletion [ 10 ] MACROS...
-
Page 35: Programming
500 Range 3.PROGRAMMING DIBAL 500 Range scales offer a menu-based programming system, i.e. there is a hierarchical coded structure of programming menus that provides fast and simple access to the different programmes by using their corresponding codes. Access to the main programming menu is gained by pressing the key MENU for 2 seconds. - Page 36 USER´S MANUAL OPTION 2: OPTION 2: OPTION 2: OPTION 2: Press MENU MENU Pressr 7 4 1 3 7 4 1 3 PROG 1 – 9 Enter the value of the parameter, in this case 5. ARTICLES Press MENU to exit the Programming menu. PROG 7.4.1.3 MENU...
-
Page 37: Articles [ 1 ]
500 Range 3.1. ARTICLES [ 1 ] 3.1.1.Creating/modifying a PLU In this section articles are programmed on the scales. The 500 model scales. The models Wind: W-010, W-015 and Mistral: M- 510, M515 allow to program 2000 articles. On the other hand, the models W-020, W-025, M-520 and M-525 allow to program 5000 articles. - Page 38 USER´S MANUAL Proceed to programme the type of article. Articles may be of the following types: price/Kg. (WEIGHT), unit price (UNIT), fixed weight (FIXED W.) o. Use C to select type of article desired: - WEIGHT. Type of article by default; the price per kilo will be programmed, and the amount will be the weight of the product multiplied by the price.
- Page 39 500 Range 9. Assign the barcode format (from 1 to 10) that is to appear on the article label and/or receipt. All 10 barcode types can be defined by the user in C 000001 FOR EAN 13 sect..11.1.8.1. CONF. EANC01...EANC10. MILK Press X to proceed to define the VAT rate associated to the PLU.
- Page 40 USER´S MANUAL If you select Free Quantity, it will program the quantity from which you offer another amount free of charge, press X to programme the value of the free amount. There are three areas. Example: A store owner makes the following offers: Free quantity Weight Gift 1...
- Page 41 500 Range 17. Text lines. There are a total of 10 text lines with a maximum of 24 characters per line available for each article. If the article is to be supplied with text lines, press C until Yes can be selected. C 000001 TEXTS To add a new line in a text, press F5 10 ∗...
-
Page 42: Copy An Article
USER´S MANUAL 22. Logo. C 000001 The logo associated with the article is programmed here. The LOGO scale has one set of programmed logos. MILK ∗ ∗ ∗ ∗ Press in order to save ∗ ∗ ∗ ∗ 23.- Alter price When this field is programmed to “Yes”, it is possible to modify the price of the article by pressing on its direct key. -
Page 43: Vendors [ 2 ]
500 Range 4.VENDORS [ 2 ] The maximum number of vendors available on each scale will depends on the model. • For models: W-010, W-015, M-510 & M-515 Max.: 5 vendors.( V5 ) • For models: W-020, W-025, M-520 & M-525 Max.: 10 vendors.( V10 ) The keys corresponding to the vendors will be labelled with the... -
Page 44: Consulting Active Vendors
In order to change the code or name of a sales assistant, they must first be removed and then registered. 4.1.2.Training model The DIBAL 500 Range scale has a special working mode for training new sales assistants. In this working position, the transactions carried out are not accumulated in the scale’s totals, and the receipts issued include... -
Page 45: Removing Vendors [ 2 2 ]
500 Range 4.2. REMOVING VENDORS [ 2 2 ] In order to remove a vendor, that is, free the memory occupied by the said sales assistant, take the following steps: MENU 1. Access vendors programming and select Remove Vendors MENU (2 sec) 2 2. 2. -
Page 46: Cash Drawer Operation [ 2 3 ]
USER´S MANUAL 4.3. CASH DRAWER OPERATION [ 2 3 ] The 500 Range weighing scales permit joint operation with a cash drawer. To do this, a connection cable is required, and this operation mode must be activated (See sect .5.1.7.5 CASH DRAWER CONTROL). -
Page 47: Configuration [ 3 ]
500 Range 5.CONFIGURATION [ 5.1. MAIN CONFIGURATION These parameters allows to program the operative setup of the section where the scale is installed. PROG MENU The access to the main programming menu is gained by pressing ARTICLES the key MENU for 2 seconds. PROG After gaining access to the programming mode, select the option CONFIGURA... - Page 48 USER´S MANUAL [ 3 1 1 ] 5.1.1.1. Day Movement The value of this parameter indicates if the scale sends data to the computer. This parameter has either of the following values: PROG 3 1 1 ‘NO’ – The scale does NOT send data to the computer. Day Movement ‘YES’...
-
Page 49: Conf. Keyboard [ 3 2 ]
500 Range 5.1.2.Conf. keyboard [ 3 2 ] This programming allows to define all the parameters related to the keyboard and keys functions To enter in this menu press MENU for 2 seconds and then 3 2. MENU PROG ∗ ∗ ∗ ∗ Press CONFIGURA CONF. -
Page 50: Receipt Configuration [ 3 3 ]
USER´S MANUAL [ 3 2 5 ] 5.1.2.5. Multiplication This option is used to determine if the scale can carry out multiplication operations in normal working mode. ‘YES’ – It enables multiplication. (Default value) PROG 3 2 5 ‘NO’ – It does not enable multiplication. MULTIPLICATIO ‘FORCE UNIT’... - Page 51 500 Range [ 3 3 1 ] 5.1.3.1. Calculate Exchange With this option you determine if the scale must calculate the change before issuing the receipt or not. To do so: ‘N0’ – Without calculation of the change. (Default value) ‘DELAYED’...
- Page 52 USER´S MANUAL [ 3 3 4 ] 5.1.3.4. Tare on receipt This parameter is for setting the printing of the tare. You can enter one of these values: PROG 3 3 4 ‘NO’ – The tare is not printed on the receipt. RECEIPT TARE ‘YES’...
- Page 53 500 Range [ 3 3 9 ] 5.1.3.9. Deleted lines This parameter shows how to print and send to a pc lines that have cancelled from a receipt. Deleted lines will be shown in inverted video, regardless of how they are printed later. Possible values are: PROG 3 3 9...
-
Page 54: Label Configuration [ 3 4 ]
USER´S MANUAL Rounding off is not considered for all accountancy lists that are accumulated per receipt line (e.g. article sales), i.e., the sum of amounts that appear in these lists refers to a calculation without rounding off. At the end of lists 7 and 9 a line is printed to indicate the total sum of rounding off that has been applied to receipts. - Page 55 [ 3 4 7 ] 5.1.4.7. Print General Text DIBAL’s 500 Range scale allows the printing on labels of a general text on each article. This text is programmed after the 10 texts for each article. It has 1024* characters but the ingredients...
-
Page 56: Printing Configuration [ 3 5 ]
USER´S MANUAL 5.1.5.Printing configuration [ 3 5 ] This programming allows to define all the parameters related to the printed data (register voucher, copies of ticket, ticket reopening and payment modes). To enter in this menu press MENU for 2 seconds and then 3 5. MENU ∗... - Page 57 3 min. 30sec. 4 min. Without reopening time limit [ 3 5 5 ] 5.1.5.5. Two Pay Mode Dibal’s 500 Range scale allows two forms of payment. (see PROG 3 5 5 Section.2.3.21 Two Pay Mode). TWO PAY MODE ‘NO’ – One form of payment ‘YES’...
-
Page 58: Conf. Ean [ 3 6 ]
USER´S MANUAL 5.1.6.Conf. EAN [ 3 6 ] This programming allows to define all the parameters related to the barcodes programming and printing To enter in this menu press MENU for 2 seconds and then 3 6. PROG CONFIGURA ∗ ∗ ∗ ∗ Press CONF. - Page 59 500 Range [ 3 6 3 ] 5.1.6.3. Interpret Line This parameter is for setting up the read-out line of the bar code. The possible values are: ‘NO CODEBAR’ – If the amount exceeds the limit (999,99 €), the bar code is not printed on the receipt. PROG 3 6 3 ‘INTERPRET LIN’...
- Page 60 USER´S MANUAL Default formats are automatically generated by the scale while the special formats are those defined by the user in configuration parameters (EAN 13 LABEL). The configuration parameter EAN 13 Label is the special bar code that is printed in the label. It is an alphanumeric text with 12 positions.
- Page 61 500 Range [ 3 6 9 ] 5.1.6.9. Scanner* Sales Mode This option allows to make a direct sale of articles readen with scanner, when the scale is working in receipt mode. The possible values are: 'NO' – It is not possible to make direct sale of the articles readen with scanner.
-
Page 62: Configuration. Others [ 3 7 ]
USER´S MANUAL 5.1.7.Configuration. Others [ 3 7 ] This programming allows to define other operative the parameters related to the barcodes programming and printing To enter in this menu press MENU for 2 seconds and then 3 7. PROG ∗ ∗ ∗ ∗ Press CONFIGURA MENU... - Page 63 500 Range [ 3 7 5 ] 5.1.7.5. Draw Control This parameter allows you to enable or disable the cash drawer check. ‘CONTROL OFF’ – Cash drawer check is disabled. PROG 3 7 5 ‘CONTROL ON’ – Cash drawer check is enabled. DRAW CONTROL ‘DETECT ON’...
-
Page 64: Conf. Display [ 3 8 ]
USER´S MANUAL [ 3 7 9 ] 5.1.7.9. Memo Zero Amount PROG 3 7 9 ‘NO’ – Does not Allow to memorise with Amount Zero MEMO AMNT ZER ‘YES’ – Allows to memorise with Amount Zero [ 3 7 10 ] 5.1.7.10.Memo Zero Weight PROG 3 7 10... -
Page 65: Texts [ 4 ]
500 Range 6.TEXTS [ 4 ] This programming allows to define all the programmable texts of the scale. To enter in this menu press MENU for 2 seconds and then 4 PROG MENU 4 ∗ ∗ ∗ ∗ Press to save. TEXTS ∗... -
Page 66: Advertising Texts [ 4 2 ]
4. Enter the text . To make a preview of the line under edition LINE RYT5 ◊ ◊ ◊ ◊ press ◊ ◊ ◊ ◊ . DIBAL 5. Press ∗ ∗ ∗ ∗ to record the line. ∗ ∗ ∗ ∗ Press MENU to exit from the programming menu. DIBAL... -
Page 67: Sections [ 4 3 ]
500 Range 6.3. SECTIONS [ 4 3 ] This parameter allows to program the section names and the barcode format for each section. The names of 100 sections, as well as logo an barcode format EAN-13. MENU To access to the setting up, press MENU (2 seconds) and then PROG SECTION code 4 3 6.3.1.Section names... -
Page 68: Payment Mode [ 4 4 ]
USER´S MANUAL 6.4. PAYMENT MODE [ 4 4 ] The 500 Range scales permit the payment mode 6 to 9 to be programmed, and printed on the receipt when the corresponding form of payment is selected. To programme payment mode: PAYMENT MODE 1.Press MENU (2 seconds) and 4 4. -
Page 69: Traceability [ 4 5 ]
500 Range 6.5. TRACEABILITY [ 4 5 ] Articles that are defined with traceability belong to a class or type, such as meat, fish, fruit… A general text table has to be created for these classes in order to define the text that is common to each class. For example, slaughtered in:, caught in: produced in…... -
Page 70: Product Programming [ 4 5 1 ]
USER´S MANUAL 6.5.2.Product programming [ 4 5 1 ] The following keys are useful in programming product characteristics: Change field and record Delete the character that is being edited. + + + + Move the cursor forwards. − − − − Move the cursor backwards. -
Page 71: Table Of Texts Programming [ 4 5 2 ]
500 Range 6.5.3.Table of texts Programming [ 4 5 2 ] The following keys are useful in programming the table of text: Change field and record Delete the character that is being edited. + + + + Move the cursor forwards. −... -
Page 72: Example
USER´S MANUAL 6.5.4.Example 6.5.4.1. . PLU with beef type traceability Here a PLU with traceability will be defined. In this case the item belongs to the beef-type class. The class refers to the fact that the PLU belongs to a certain class such as beef, fish, fruit, etc. - Page 73 500 Range Enter the characteristics of the PLU we are programming such as IDN, product, (1-20*), defined by the keypad for example 2 and press X. We have continue programming sections in the point 6.5.2 Products programming, having into account that: 1.
-
Page 74: Short Messages [ 4 6 ]
USER´S MANUAL 6.5.4.2. PLU with fish type traceability Here is an example of how to define a PLU with fish-type traceability, assuming that the beef-type class has already been defined. The PLU to be programmed will therefore be entered in class two*. -
Page 75: Comunications [ 5 ]
500 Range 7.COMUNICATIONS [ The DIBAL 500 Range scale was designed to work alone or s part of a network of MASTER and SLAVE scales. If operating alone, the scale must be set up as MASTER. (Follow the steps shown below to obtain this configuration) -
Page 76: Ethernet Communication Parameter [ 5 1 ]
USER´S MANUAL 7.1. ETHERNET COMMUNICATION PARAMETER [ 5 1 ] PROG If ETHERNET TCP/IP communication is to be used, the next step is programming ETHERNET COMMUNICATION. COMUNICATIONS 7.1.1.Configure the Scale’s IP Address [ 5 1 1 ] MENU Access to the configuration of scale’s IP address by pressing 5 1 1 the MENU (2 seconds) 5 1 1 keys. -
Page 77: Configure The Tcp Rx Port [ 5 1 5 ]
500 Range 7.1.5.Configure the TCP RX Port [ 5 1 5 ] MENU 1. Access to the configuration of the RX port by pressing the 5 1 5 MENU (2 secons) 5 1 5 PROG 3000 2. Program Rx TCP port=3000 (always) ∗... -
Page 78: Communication Parameter [ 5 2 ]
MENU 7.3. OPERATIONS WITH PC [ 5 3 ] Using one of the DIBAL scales’ communication programs for working under commonly used operating systems (MS-DOS, MS- WINDOWS, UNIX,...), you can use the PC to do all the tasks related to set-up as well as obtain all the data concerning the transactions carried out by the scales for their subsequent computer processing. -
Page 79: Send End Of Day Without Totals Deletion [ 5 3 2 ]
[ 5 3 2 ] This operation allows you to forward the data stored in the scale to the computer for their subsequent processing by a suitable program like DIBAL RMS. The totals accumulated will NOT be cleared to zero. MENU 1. -
Page 80: Scale Network [ 5 4 ]
USER´S MANUAL 7.4. SCALE NETWORK [ 5 4 ] MENU PROG To acces to this menu press MENU (2 secs) 5 4. COMMUNICA 4 - 4 INTERCONEXION 7.4.1.Master slave When a scale is setted up as a master the next submenu will MENU appeared. - Page 81 500 Range 7.4.1.2. Master-slave operations [ 5 4 2 ] PROG 5.4.2. To acces to this submenu press MENU (2 secs) 5 4 2. MENU INTERCONE 2 - 2 M/S OPERATIONS 5 4 2 1. Network set up [ 5 4 2 1 ] Autoconfigurating the scale is set as master.
-
Page 82: Slave Scale
USER´S MANUAL 7.4.2.Slave scale When a scale is setted up as a slave the next submenu will appeared. MENU 7.4.2.1. Set up as MASTER-SLAVE [ 5 4 1 ] PROG 5 4 1 ICONFIG To acces to this menu press MENU (2 secs) 5 4.1. 1. - Page 83 500 Range 7.4.2.2. Master slave operations 1. Network set up [ 5 4 2 1 ] Autoconfigurating the scale is set as master. The other scales are connected with the same network ID and the UDP port remains as slaves. The parameters of master-slave communication will be set automatically.
-
Page 84: Scanner Connection
USER´S MANUAL 8.SCANNER CONNECTION* The Software has been developed for Dibal 500 Range scales to communicate with a scanner for reading bar codes, so that the article bar codes are read and sales operations carried out on the scale. * EAN13 reading. Models W-020, W-025, M-520 &... - Page 85 500 Range Remember that the last character of the bar code is the checksum, which is why, if you do not wish to, it is not necessary to enter it. Therefore, you will need 12 or 7 digits for each EAN (the last character is omitted).
- Page 86 USER´S MANUAL In the case of separate ‘E’ appearing in the article’s EAN code, it will only take into account the last to be found. In the case of WEIGHED articles: If the price of the article is 0 and the letters ‘E’ or ’X’ appear in its EAN code, the scale will associate the value of the positions of the EAN code where the letters are with the value of the price of the article for that sale.
-
Page 87: Formats [ 6 ]
Examples of receipts and labels: 9.1. LABEL [ 6 1 ] 9.1.1.Program label format [ 6 1 1 ] DIBAL 500 Range Scales has different label formats that can PROG 6 .1.1 be programmed by the user. This section explains how to design LABEL (the size and fields to print) these special labels. - Page 88 USER´S MANUAL Sect. Description Sect. Description Sect. Description Sect. Description Barcode Vendor Name Euro Exchange Rate Text Line 22: “Cold” Total secondary Amount Name 3 Text Line 23: “OFFER” currency Offer Price / Special Total Register Weight Text Line 24: “SAVE” Price Voucher Complete Date (01...
- Page 89 500 Range Sect. Description Sect. Description Sect. Description Sect. Description General Text (1024 Piece Portions Product’s Answer 2 Product’s Question 2 Text) 145 - Recipe Title Product’s Answer 3 Prodcut’s Question 3 Text Line: “TEMPERATURE Recipe Text Product’s Answer 4 Product’s Question 4 IDEAL TO CONSERVATION“...
- Page 90 USER´S MANUAL MENU Press the MENU key 2 seconds. To move from one option to another use F2 to go down through F2 x 5 the menu and F1 to go up. PROG 6 .1.1 LABEL ∗ ∗ ∗ ∗ Select option 6 Formtas, press and then press option 1, Label.
- Page 91 500 Range The values of positions X and Y may range from 0 to the value of the label size. The different parameters in the ROTATION field are: ‘[0]’ – No rotation. ‘[1]’ – 90º rotation. ‘[2]’ – 180º rotation. ‘[3]’...
-
Page 92: Copying A Label Format [ 6 1 2 ]
USER´S MANUAL Therefore, if letter type 74 is selected, this means that the base letter type is 60, size 16 x 32 and it is increased by 14, which means that the letter width is multiplied by 2 and the height by 5, and the final letter size will therefore by 32 x 160. -
Page 93: Receipt [ 6 2 ]
500 Range 9.2. RECEIPT [ 6 2 ] 9.2.1.Program Receipt Format [ 6 2 1 ] The 500 Range scales offer the possibility of printing different types of receipts. There are different fixed receipt formats and PROG 6 .2.1 RECEIPT user programmable receipt formats depending the model of PROG RECEIPT FORMAT scale. - Page 94 USER´S MANUAL The key functions are as follows: Programme the next section. In general, the field being edited is deleted. In the format number field: If it is a fixed format: this deletes the associated headings If it is a programmable format: this deletes the whole format.
- Page 95 500 Range 9.2.1.1. Meaning of Fields Each receipt line presents certain fields, and in each line the field presents different options. The details of each field are given below. MODE For printing with “special effects”: NORMAL, UNDERLINE, FRAME, and REVERSE Represents the text print mode of MODE the line...
- Page 96 USER´S MANUAL FRAME LINE STATUS This represents the status of the lines that frame the receipt line. Four types of lines can be defined, with the following values: POSITION Represent ‘NO’ [ 0 ] No line ‘LOWER’ [ 1 ] Lower line ‘UPPER’...
- Page 97 500 Range BARCODE FORMAT NUMBER This field defines the barcode format, where: ‘[0]’: EAN - 8 format ‘[1]’: EAN – 13 format NUMBER This section refers to the logo number to be printed from 1 to 10, for fixed logos and from 11 to 15 for user-programmable ones.
- Page 98 USER´S MANUAL LOGO (0) UBICATION (0) LOGO (1) INITIAL LINES SALES ASSISTANT NAME UBICATION (1) TITLE LINE UBICATION (2) Sales lines DESCRIPTION LINE UBICATION (3) TOTAL IN PRINCIPAL CURRENCY 2 fields TOTAL IN SECONDARY CURRENCY 2 fields DISCOUNT TENDERED/CHANGE TENDERED/CHANGE SEC CURR EURO EXCHANGE RATE CURRENCY UBICATION (4)
-
Page 99: Copying A Receipt Format [ 6 2 2 ]
500 Range 9.2.2.Copying a receipt format [ 6 2 2 ] It is possible to copy one receipt format to another. To do this: SOURCE DESTINY MENU 1. Enter receipt programming menu MENU 6 2 2. COPY TCK FORMAT 6 2 2 . 2. -
Page 100: Logotypes Loading
USER´S MANUAL 10.LOGOTYPES LOADING 500 serie weighing scales are allowed to print the logos in the receipt and the label. The machine will have 100 fixed logos and other 100 logos that the client can charged the RMS program. In terms of size, the maximum of each of these images will be a maximum of 432 pixels width and 1200 high. -
Page 101: Data [ 7 ]
500 Range 11. DATA [ 7 ] Access the main programming menu by pressing key MENU MENU 2 seconds. Once in programming, select option 7 and press ∗ ∗ ∗ ∗ in order to PROG ∗ ∗ ∗ ∗ DATA 1 –... -
Page 102: Vat Types [ 7 1 3 ]
USER´S MANUAL 11.1.3.Vat Types [ 7 1 3 ] Up to five VAT rates can be programmed as follows: Press MENU (2 seconds) 7 1 3 MENU Enter the value of VAT rate 1. VAT rate 1 is that 7 1 3 ∗... - Page 103 500 Range 11.1.5.1.Program Currencies To program the currencies, proceed as follows: 1. Press MENU (2 seconds) 7 1 5 MENU 2. Enter the change from the local currency to the chosen 7 1 5 currency. There are 7 fixed exchange rates as shown in Table above.
-
Page 104: Date And Time [ 7 1 6 ]
USER´S MANUAL 11.1.6.Date and time [ 7 1 6 ] This function allows you to change the date and time of the scale’s internal clock. Proceed as follows for programming: 1. Press MENU (2 seconds) 7 1 6 MENU 2. Use the numeric keyboard to enter the date and time. CLOCK 7 1 6 00 : 00 : 00... -
Page 105: Programmable Ean [ 7 1 8 ]
500 Range 11.1.8.Programmable EAN [ 7 1 8 ] EAN13 bar codes to be defined by the user for articles are those which can be selected in the totals bar code field when defining the PLU. (See section 3.1.Articles) MENU 1. -
Page 106: Self-Service Mode [ 7 2 ]
The label of the product selected is thus obtained, without the intervention of a sales assistant. DIBAL 500 Range models of scale which can operate in this working mode. PROG In self-service mode only the direct keys are operational, and DATA 2 –... -
Page 107: Self-Service Mode. Fix Code [ 7 2 2 ]
500 Range 11.2.2.Self-service Mode. Fix Code [ 7 2 2 ] When working in self-service mode, an article can be fixed on: • The entire keyboard • The first row of direct keys • The left or right half of the keyboard •... -
Page 108: Programming Codes [ 7 3 ]
USER´S MANUAL 11.3. PROGRAMMING CODES [ 7 3 ] This option is used for programming the access codes to the scale’s different programming options. They are 4-digit PROG DATA 3 - 4 codes. The structure is the following: PASSWORDS A Super user code allows access to all programming options. In addition there are 4 codes with restricted access to certain programming options. -
Page 109: Communications Password [ 7 3 4 ]
500 Range 11.3.4. Communications Password [ 7 3 4 ] If this code is programmed it will have to be entered in order to gain access to programming: 5 – Communications. To program this code, do as follows: MENU 1. Press MENU 2 seconds. 7 3 4 2. - Page 110 USER´S MANUAL 11.4.1.2.Label Contrast [ 7 4 1 2 ] The value of this parameter (from 0 to 9) is in direct proportion to the contrast with which the labels will be printed. Enter the value of the contrast as a number between 0 and 9 PROG 7.4.1.2 (default value 5).
- Page 111 500 Range 11.4.1.4.Heading [ 7 4 1 4 ] This parameter affects the printing mode of both the labels and the receipts, and can have a value of between 0 and 1 with the meanings: PROG 7.4.1.4 ‘0’ - No backward and does not print the header. LABEL WAY OUT ‘1’...
- Page 112 USER´S MANUAL 11.4.1.9.EAN Format of level 1 totals [ 7 4 1 Here, the EAN format of the level 1 totals label is selected if you wish to work with accumulated total labels for an article. PROG 7.4.1.9 (See CONF. EANC01...EANC10) If this parameter is set to 0, the format of the labelled article FOR.
-
Page 113: Receipt Parameters [ 7 4 2 ]
500 Range 11.4.1.14. Distance Opto Thermal Head [ 7 4 1 14 ] By varying the value of this parameter you can centre the printing field of the labels in a vertical sense both upwards and downwards achieving greater efficacy than with the PROG 7.4.1.14 previous CENTRE LABEL parameter. -
Page 114: Reports [ 8 ]
USER´S MANUAL 11.4.2.4.Receipt of labelt [ 7 4 2 4 ] Not available. 12.REPORTS [ 8 ] 12.1. LISTS [ 8 1 ] To avoid manipulation in the management of the cash drawer, lists involving the sum total of sales cannot be issued until the CASH DRAWER LIST has previously been printed. -
Page 115: Sales Per Artcile By Code [ 8 1 4 ]
500 Range 12.1.4.Sales per Artcile by Code [ 8 1 4 ] This list gives information about sold articles classified by code. Pressing the X key, you can select the range of codes, the department, the section or the VAT type. In this list does not appear the article number operation. -
Page 116: Sales By Vendor/Article [ 8 1 6 ]
USER´S MANUAL 12.1.6. Sales by Vendor/Article [ 8 1 6 ] With the aid of the sales assistants’ keys V0... Vxx, you can enter the number of the sales assistant whose sales you wish to print. Si se desea obtener un listdo de todos los vendedores, pulse la tecla T/FT . -
Page 117: Sales Per Article By Code [Extended] Fom 00000 To 99999 [8 1 8]
500 Range 12.1.8. Sales per Article by Code [Extended] fom 00000 to 99999 [8 1 8] By pressing the X key you can select the range of codes, the department, the section or the VAT rate. This list contains the codes, the associated PLU, the designation, the number of operations, the weight and the amount of each of the articles sold, and at the bottom:... -
Page 118: Big Total Group [ 8 1 9 ]
USER´S MANUAL 12.1.9. Big Total Group [ 8 1 9 ] This list shows the number of receipts (customers) and the total number per sales assistant (memory) broken down acc. to totals, wholesalers’ totals, negative totals, weighed articles, non-weighed articles, returned articles and finally, all totals acc. -
Page 119: Totals [ 8 1 10 ]
500 Range There are different types of levels: 1 → level 1 (day’s sales) 2 → level 2 (weekly sales) 3 → level 3 (monthly sales) Certain lists are obtained by levels of accumulation. There are three levels of accumulation, from 1 to 3. To select levels of accumulation, having selected the list to be printed, press the department key (1, 2 and 3) corresponding to the level selected (1, 2 &... -
Page 120: Sales Per Section [ 8 1 11 ]
USER´S MANUAL 12.1.11.Sales per Section [ 8 1 11 ] This list shows the total sum of sales according to departments. SECTION – TOTAL There are different types of levels: 1 → level 1 (day’s sales) 2 → level 2 (weekly sales) 3 →... -
Page 121: Cash Drawer Report [ 8 1 14 ]
500 Range 12.1.14.Cash Drawer Report [ 8 1 14 ] This list includes the totals, classified according to form of payment, and the state of the cash drawer when first opened, as well as the balance. If you print the list for the first time after starting up the scale, at the end of the day with or without deletion or clearance to zero of partial accumulation, you must enter the amount of money there is in the cash drawer with the numeric keypad,... -
Page 122: Stock Report [ 8 1 18 ]
USER´S MANUAL To edit the date, press X when positioned over the start or end date and enter the date with the number keypad using the format “ddmmyy”. The Fiscal list can be printed on the receipt printer (by default) or the labeller. -
Page 123: Deletions [ 9 ]
500 Range 13. DELETIONS [ 9 13.1. Z DELETION [ 9 1 ] To carry out this operation: 1. Access to the list menu pressing MENU for 2 seconds. 2. Press the 9 1 keys. 3. Press the ∗ ∗ ∗ ∗ key 6 times. 4. -
Page 124: Parcial Deletings [ 9 3 ]
USER´S MANUAL 13.3. PARCIAL DELETINGS [ 9 3 ] 13.3.1. Articles Deletion [ 9 3 1 ] This menu option deletes the article store in the memory of the scale. To carry out this operation: Access to the menu pressing MENU during 2 seconds. Press the 9 3 1 keys. -
Page 125: Configuration Deletion [ 9 3 4 ]
500 Range 13.3.3.2.Deleting Only Products [ 9 3 3 2 ] To carry out this operation: Access to the menu pressing MENU during 2 seconds. Press the 9 3 3 2. keys. Press the∗ ∗ ∗ ∗ 3 times. The scale gives 2 options: Press the ∗ ∗ ∗ ∗ key (YES), or Press the X key (NO): Pressing the ∗... -
Page 126: Macros [ 10 ]
USER´S MANUAL 14.MACROS [ 10 ] DIBAL Gama 500 models are capable of recording a sequence of keystrokes and subsequently reproducing said sequence. Only in models W-020, W-025 and M-520, M- 525 is possible to record up to 2 macros. -
Page 127: Copying Macros [ 10 2 ]
500 Range 14.2. COPYING MACROS [ 10 2 ] It is possible to make copies of one macro to others, either to modify data without losing the previous ones, or to generate new data. To do so: Press MENU for 2 seconds. MENU PROG 10.2... -
Page 128: Editing Macros [ 10 4 ]
USER´S MANUAL 14.4. EDITING MACROS [ 10 4 ] In this section, you can edit the sequence of keys you have programmed in a given macro. To access this setting: Press MENU for 2 seconds. MENU PROG 10.4 To move from one option to another, use F2 to move down MACROS EDIT MACROS the menu and F1 to move up. -
Page 129: Appendix
500 Range 15.APPENDIX 15.1. TROUBLESHOOTING DIBAL 500 Serie scales carry out a test to check for anomalies whenever they are started up, error messages being emitted by the scale if any are detected. Below is a list of the more frequent problems and error messages as well as how to tackle the said problems. -
Page 130: Problems With Articles
USER´S MANUAL THERE IS NO COMMUNICATION BETWEEN THE SCALE AND THE COMPUTER • Check the connections in the scales • Check the Ethernet communication in section Ethernet communication parameters • Check the group number in section GROUP THERE IS NO COMMUNICATION BETWEEN SCALES •... -
Page 131: Problems With The Screen And Keyboard
500 Range THE EURO FIELD IS EITHER INCORRECT OR FAILS TO APPEAR • Check section 5.1.3 CONF. TYPE OF RECEIPT in the MANUAL. • Check that the label format incorporates the sections dealing with the Euro. (See section 9.1.1 PROGRAMMING LABEL FORMATS). -
Page 132: Communication Connectors
USER´S MANUAL 15.2. COMMUNICATION CONNECTORS The communication connectors are located on the lower part of the scale. The arrangement and characteristics of the connectors are as follows. Connector marked as: ETHERNET Ethernet Communication Scanner connection* Powered 5v *Models: W-020, W-025, M-520 & M-525 Connector marked Drawer/Turnomatic... -
Page 133: Change Of Paper
500 Range 15.5. CHANGE OF PAPER 15.5.1.Changing paper in the printer To change the paper in the printer, proceed as follows: • Open the new reel of paper and remove the part containing glue. • Open the cover. Remove the remains of the paper and the reel holder. -
Page 134: Changing Paper In The Labelling Machine
USER´S MANUAL 15.5.2.Changing paper in the labelling machine 15.5.2.1. Flat Model Scale 500 Range Model Flat can operate with continuous paper, adhesive labels or continuous adhesive paper. To replace continuous paper (only ticket): 1. Open the printer and releasing on the right side. Remove the spent roll. 2. - Page 135 500 Range To replace adhesive paper (Labels): 13. Remove the weighing platform by lifting it from the right as described above. 14. Open the printer and release the paper from the head by working the lock. Remove the spent roll. 15.
- Page 136 USER´S MANUAL 15.5.2.2. Doble Body Model The scale is fitted with a cartridge system to facilitate the job of changing the paper in the labelling machine. Open the front drawer of the machine by pressing the button located on the left hand side of the machine.
- Page 137 500 Range 15.5.2.3.Flat Mistral model The scale is fitted with a cartridge system to facilitate the job of changing the paper in the labelling machine. Open the right hand side drawer of the machine You will then see three blue levers. Turn the lever on the top anticlockwise to release the cartridge. Remove the cartridge roll to change the paper Having removed the cartridge, you must open the other two levers in order to remove the old paper holder and remove the remaining cardboard.
- Page 138 USER´S MANUAL To replace adhesive paper : 1. Open the cover of the machine. 2. You will then see three blue levers. Turn the lever on the bottom anticlockwise to release the cartridge. 3. Remove the cartridge roll to change the paper Having removed the cartridge, you must open the other two levers in order to remove the old paper holder and remove the remaining cardboard.
-
Page 139: Formats
500 Range 15.6. FORMATS 15.6.1.label formats 49-M500WMEN25... - Page 140 USER´S MANUAL 49-M500WMEN25...
- Page 141 500 Range Format Size Nº 1 60x60 mm Nº 2 60x60 mm Nº 3 60x60 mm Nº 4 60x60 mm Nº 5 60x60 mm Nº 6 60x60 mm Nº 7 60x60 mm Nº 8 60x60 mm Nº 9 60x60 mm Nº...
-
Page 142: Voucher Formats
USER´S MANUAL 15.6.2.Voucher formats The voucherformats are related to the format of labels carrying totals as can be appreciated in the chart below: LEVEL 1 TOTALS LABEL VOUCHERFORMATS FORMATS 1, 2, 3, 4, 5, 6, 7, 8, 9, 10, 11, 12 y 20 1 (60x60mm) 13, 14, 15, 16, 18, 19 2 (60x40mm) -
Page 143: Keyboards
500 Range 15.7. KEYBOARDS 15.7.1.Formats The keyboards differ according to the model of the scale. Therefore, the arrangement of the keys varies. Below is an illustration of the keyboards of the different models. W W W W W-010 W-015 W-020 W-025 Keys Vendors... - Page 144 USER´S MANUAL Flat Pole W W W W Vendors (W-010 & W-015) Vendors (W-020 & W-025) Flat Receipt Pole Receipt M M M M istral istral istral istral Vendors (M-510) Vendors (M-520) 49-M500WMEN25...
- Page 145 500 Range Flat Pole Mistral Mistral Mistral Mistral Vendors M-515 Vendors M-525 Hanging ABS / Hanging Stainless Steel / Double Body M M M M istral istral istral istral Vendors (M-510 & M-515) Vendors (M-520 & M-525) 49-M500WMEN25...
-
Page 146: Display
USER´S MANUAL 15.8. DISPLAY According to the scale model. There are different options and display characterisitcs. Display Display Display Display All models of the series Wind & Mistral Only in models W-020, W-025 & M-520, M-525 49-M500WMEN25... -
Page 147: Back-Up And Restore (Lbs)
500 Range 16.BACK-UP AND RESTORE (LBS) Use LBS (Load Backup System) software to make a back up copy of the scale or for loading programmed data. The following screen will display once the program is run: Enter the PC’s IP address as well as the IP address of the scale or scales you are working with. Then you can make back-up copies of the scale (Backup) and restore the scale system using one saved previously in the event that is has failed (Restore). -
Page 148: Restore File (Restore)
USER´S MANUAL 16.2. RESTORE FILE (RESTORE) In order to restore a file in the scale, select the file to be restored and click on Click on to restore the file in the scale or on in order not to restore it. 49-M500WMEN25... -
Page 149: Blue Graphic Display
500 Range 17.BLUE GRAPHIC DISPLAY 17.1. INTRODUCTION The scales include as an option a Blue Graphic Display ,this is a backlighted matricial graphic display with blue background and white dots with a resolution of 240 x 64 pixels. The general management of the scale is exactly the same as the version with alphanumeric display. The special characteristics of the scales including this display are described below. -
Page 150: Display Formats
USER´S MANUAL 17.2.1.Display Formats The selection of the display format is done by pressing the keys: Shift, F4 (long pressing, wait until the second beep). 17.2.1.1. Format 1 Complete classic screen with logo section and optional analog clock. 17.2.1.2. Format 2 Complete classic screen with vendors and subtotal indicator. -
Page 151: Menus
500 Range 17.3. MENUS The menus are implemented with a tree structure, being able to low levels pressing the key * or the menu associated number, and level up pressing MENU. Press the MENU button for 2 seconds and you exit the menu mode directly. -
Page 152: Item Details
USER´S MANUAL 17.4. ITEM DETAILS Once entered the code number item, you access to the saved item detail (if it existed) or a new item detail (if it did not exist): Code, name and PLU Logo associated section. Item fields with their values. The values can be directly edited. -
Page 153: Label Format Edition
500 Range 17.6. LABEL FORMAT EDITION Enter the desired format. Selected settings field The Fields List that compose the label. Select them using the + and - Indicator of the selected font. 17.7. TOTAL SCREENS The sales operation is exactly the same as the alphanumeric version. Current payment mode. -
Page 154: Subtotal Screens
USER´S MANUAL Selected payment mode Icons: Cash Cheque Card Account Others Programmable 17.8. SUBTOTAL SCREENS Use the + and Weight, price and amount of the line. Type icon, code and reviewed item name. 49-M500WMEN25... -
Page 155: Display Setup Menu
500 Range Tickets reopening menu. Last Ticket, Other tickets 17.9. DISPLAY SETUP MENU This is the programming menu for configuring the parameters of the graphic display. To access it press access pressing MENU-> 3 -> 8. 17.9.1.Display Standby [ 3 8 1 ] Menu for programming the time for activation of the display standby screen (screensaver). -
Page 156: Warning Screens
USER´S MANUAL 17.10. WARNING SCREENS During the scale operative can appear warning screens: The icons indicate the level of importance or the type of window: Warning. Indicates that an action is required or that you should pay attention to something. Error. -
Page 157: Appendix On Batteries
Without battery It includes a battery charger 4519006600 451100110000 charger (MHFADIB6) (MHKFABAT1) For EPSON printer Printer interface 4509012300 For DIBAL printer 4509013000 Printing Unit 49-1757 EPSON 7,5 V FG2072112VFIAMM 1 x 12V / 7,2Ah ó ó Batteries - - - -... -
Page 158: Working Modes Of The 500 Series Battery
0: Operation with no saving in consumption. 1: Operation with average savings in consumption. (default value).. 2: Operation with maximum savings in consumption. Please contact your DIBAL dealer to know the procedure for programming this parameter. 18.4. OPERATION DEPENDING ON THE BATTERY CONTROL PARAMETER VALUE 18.4.1.Battery control to 0... -
Page 159: Messages And Indicators In Battery-Run Scale
500 Range 18.5. MESSAGES AND INDICATORS IN BATTERY-RUN SCALE 18.5.1.Messages and indicator of battery load When operating, the battery scale shows its status in relation to the battery through: 1. Messages: which appear on the display to indicate status, changes in status, alarms, etc. 2.Battery Charge indicator: battery icon on the display made up of segments. -
Page 160: Messages In Operating Mode Changes
USER´S MANUAL When the load is less than 30 a BATTERY LOW alarm message displays. (Flashing for several seconds) When the load is below a BATTERY VERY LOW alarm message displays. (Flashing for several seconds) 10%, 18.5.3.Messages in operating mode changes These messages flash for several seconds when the change from one status to another is detected. -
Page 161: Linerless Appendix
500 Range 19.LINERLESS APPENDIX The “LINERLESS” system uses for printing a special type of adhesive thermal paper without backpaper. Linerless systems is only available in M-525 19.1. MODELS The 500 series scales equiped with the “LINERLESS” option can also print standard continuous paper or adhesive continuous labels just changing the labels cassette. - Page 162 USER´S MANUAL 19.2.2.INCOMPATIBILITIES The scales with linerless printing assembly can also print: standard labels ( with backpaper), adhesive continuous paper (with backpaper) and continuous paper (non adhesive). The scales with standard labelling assembly can’t print in Linerless paper. 19.3. CONFIGURATION To activate the printing with linerless paper, it is necessary to access the configuration menu, Type of Paper, as follows: Pressr MENU during 2 seconds.
- Page 164 The information contained in this manual can be changed by the manufacturer without prior notice. Ref.: 49-M500WMEN25 16/07/2013...
Need help?
Do you have a question about the Wind W-010 and is the answer not in the manual?
Questions and answers