
Related Manuals for TeleEye CX784

Summary of Contents for TeleEye CX784
-
Page 1: Quick Start Guide
CX Series Video Recording Server CX784 / CX788 / CX7816 Quick Start Guide Version 1.05.00... -
Page 2: Table Of Contents
This manual is copyrighted. All rights are reserved. This manual should not be copied, reproduced or translated in whole or part without prior consent from Signal Communications Limited. TeleEye is a trademark of Signal Communications Limited and is registered in China, European Communities, Hong Kong, US and other countries. - Page 3 Signal Communications Limited has taken care in preparation of this manual, but makes no expressed or implied warranty of any kind and assume no responsibility for errors or omissions. No liability is assumed for incidental or consequential damages in connection with or arising out of the use of the information or accessories contained herein. Features and specifications are subject to change without prior notice.
-
Page 4: Introduction
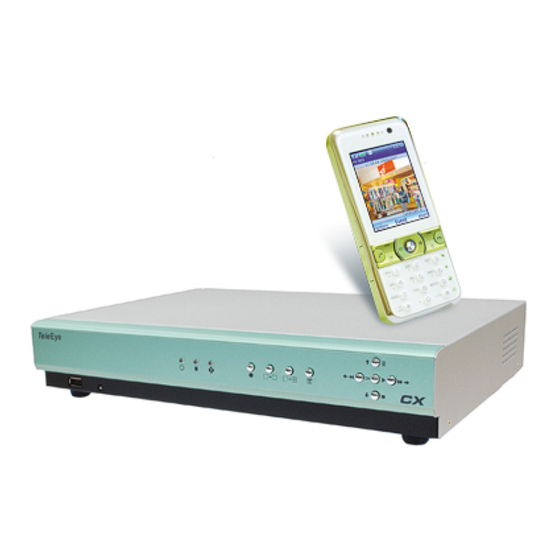
PAGE 1 1.Introduction TeleEye CX Series is a range of simple to use yet feature rich 4-, 8- and 16-channel video recording servers suitable for small to medium sized surveillance applications. When using with TeleEye Multi-site Software, videos from up to 16 sites can be monitored and recorded. -
Page 5: Hardware Features
Quick Start Guide PAGE 2 1.2. Hardware Features 1.2.1. Front View 1. Notification LEDs 2. Main control buttons Menu / back Sequential screen mode Power Recording Event Recording FULL/QUAD/3x3*/H screen mode only for CX788 and CX7816 only for CX7816 3. Menu control / Local playback control / PTZ control buttons Buttons Menu Mode Playback Mode... -
Page 6: Back View
Quick Start Guide PAGE 3 1.2.2. Back View 1. Alarm / switch Port 2. VGA output 3. Audio In/Out Port, PA 4. NC (Not available for use) 5. Video Input Connectors 6. Power on / off 7. Power input (12V DC) 8. -
Page 7: Functional Features
Quick Start Guide PAGE 4 1.3. Functional Features sureLINK, support both static and dynamic IP Sophisticated event management Flexible connections: LAN, ADSL, mobile network, etc. Triplex operation: simultaneous video monitoring, recording & playback Video motion detection ... - Page 8 Quick Start Guide PAGE 5 3. Put the hard disk into the CX video recording server and connect it to the cables. 3.1 For CX784 and CX788 3.2 For CX7816 Hard Disk Installation...
-
Page 9: Local Operation (Cctv / Vga Monitor)
Quick Start Guide PAGE 6 2.Local Operation (CCTV / VGA Monitor) 2.1. Icons Description (OSD) When you observe video from CCTV monitor or VGA monitor, icons may be shown on the video. Each of the icons has special meaning. Please find their meanings from the table summary in next page. -
Page 10: View Live Video (Osd)
Quick Start Guide PAGE 7 Audio CH 2 Installed Motion • • PA Installed Video Loss • • 3. Switches Disk Usage • Switch 1 setting • HDD Available • 4. Date / Time 7. Server Time Sync Enabled • Server Name •... -
Page 11: Recording (Osd)
Quick Start Guide PAGE 8 2.4. Recording (OSD) 2.4.1. Manual Recording 1. Press [Menu] button select [RECORDING] 2. Set all the configurations needed 3. Press [Rec] button on the front panel 4. Select [START RECORDING] 5. During recording, press [Rec] button again for stopping it 2.4.2. -
Page 12: Footage Extraction (Osd)
Quick Start Guide PAGE 9 2.2.1. Select [SEARCH DATE] to set date 2.2.2. Select [SEARCH TIME] to set time 2.2.3. Select [SEARCH] 3. Press local playback control buttons on the CX to control playback process 4. Press main control buttons on the CX to change the view mode in local CCTV video playback if needed 2.6. -
Page 13: Remote Operation (Network)
Quick Start Guide PAGE 10 3.Remote Operation (Network) 3.1. Network Configuration (Network) PC Requirements: CPU: Intel Pentium Dual-Core 2.2GHz or above Memory: 1GB or above OS: Windows XP or Windows Vista Home/Business Other Requirements: Java: Sun Microsystems Java 2 runtime Version 1.5.0 or above IE: Windows Internet Explorer Version 6 or above There are Ethernet and 3G networks. -
Page 14: Icons Description (Network)
Quick Start Guide PAGE 11 3.2. Icons Description (Network) Icons Description Logout Show menu panel Recording Playback Screen mode selection panel Quad screen 3x3 screen Hex screen Full screen Camera selection panel Event status panel Alarm event Video loss event Motion event Disc event Clear event... - Page 15 Quick Start Guide PAGE 12 Icons Description Menu panel Setting Audio View log Advanced Footage extraction Switch Event icons on screen Motion Playback Video loss Icons on log panel Next page Previous page Icons on PTZ panel Tilt up Pan left Tilt down Pan right Zoom in...
-
Page 16: Menu Overview (Network)
Quick Start Guide PAGE 13 Icons Description Icons on audio panel Mute Audio level – low Audio level – medium Audio level – high Audio channel 1 Audio channel 2 Audio on/off Icons on playback panel Rewind Play/pause Stop Forward Fast forward 3.3. -
Page 17: Setup Tcp/Ip (Network)
Wait for the system to save the setting or exit from [MAIN MENU] to save the settings 3.4.2. By IP Setup Utility Install TeleEye IP Setup Utility software by the software CD. .NET framework is needed for IP Setup Utility operation. You can find .NET framework installer in the software CD. -
Page 18: View Live Video (Network)
Quick Start Guide PAGE 15 3.5. View Live Video (Network) Enter IP address plus port number in this format http://IPAddress:PortNumber (e.g. http://192.168.0.1:1024) or sureLINK address in web browser address bar Enter password. Default password can be found in the given registration code sheet. Press [Connect] button Use screen mode selection panel and/or camera selection panel to view video Remarks: If the cross logo is shown at the top left hand corner of the web page, it implies the Java... -
Page 19: Recording (Network)
Quick Start Guide PAGE 16 3.6. Recording (Network) 3.6.1. Manual Recording Click on [Recording] button Select “Manual Recording” During manual recording, press [Rec] button again for stopping it 3.6.2. Scheduled Recording Go to [Menu] [Server Setting] [Recording] [Scheduled Recording] Click on [Add] to add a schedule recording Select “Normal Recording”...
Need help?
Do you have a question about the CX784 and is the answer not in the manual?
Questions and answers