Brother DCP-130C Quick Setup Manual
Hide thumbs
Also See for DCP-130C:
- User manual ,
- Service manual (383 pages) ,
- Software user's manual (155 pages)
Table of Contents
Advertisement
Quick Links
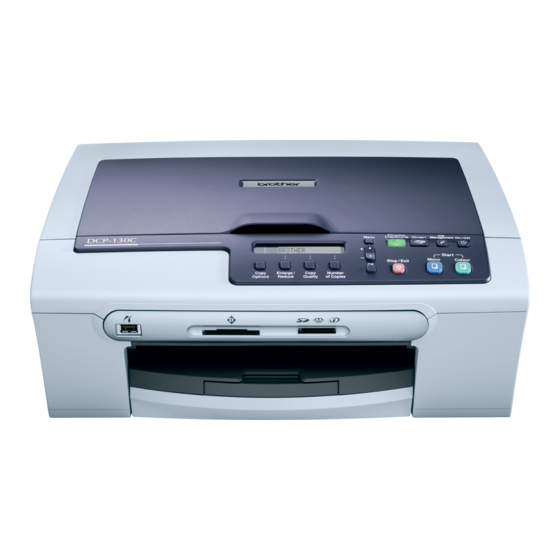
DCP-130C
Before you can use the machine, you must set up the hardware and install the software.
Please read this Quick Setup Guide for the correct setup procedure and installation instructions.
Installing the Driver & Software
Keep this Quick Setup Guide, the User's Guide and the supplied CD-ROM in a convenient place for
quick and easy reference at all times.
STEP 1
Setting Up the Machine
STEP 2
Setup is Complete!
Advertisement
Table of Contents

Related Manuals for Brother DCP-130C


Summary of Contents for Brother DCP-130C
- Page 1 DCP-130C Before you can use the machine, you must set up the hardware and install the software. Please read this Quick Setup Guide for the correct setup procedure and installation instructions. STEP 1 Setting Up the Machine STEP 2 Installing the Driver & Software Setup is Complete! Keep this Quick Setup Guide, the User’s Guide and the supplied CD-ROM in a convenient place for...
-
Page 2: Setting Up The Machine
STEP1 Setting Up the Machine Removing the protective Loading paper parts Pull the paper tray completely out of the machine and lift the output paper tray cover (1). Remove the protective tape and film covering the scanner glass. Remove the foam bag containing the ink cartridges from on top of the paper tray. - Page 3 STEP1 Setting Up the Machine Check that the paper is flat in the tray. Slowly push the paper tray completely into the machine. Gently adjust the paper side guides with both hands and the paper length guide to fit the paper.
-
Page 4: Connecting The Power Cord
Setting Up the Machine Connecting the power cord Installing the ink cartridges Connect the power cord. Warning If ink gets in your eyes, wash them out with water Improper Setup at once, and if irritation occurs consult a doctor. DO NOT connect the USB cable. Connecting the USB cable is done during the software installation process. - Page 5 STEP1 Setting Up the Machine brother XXXX Preparing System Approx 4 Minutes Cleaning Please Wait...
-
Page 6: Print Quality Check
Setting Up the Machine The LCD asks you if the print quality is OK for Print quality check black and colour. Press a (Yes) or b (No). Black OK? Set Paper and a Yes b No Color OK? Press Start Make sure paper is loaded in the paper tray. -
Page 7: Setting The Lcd Contrast
STEP1 Setting Up the Machine Setting the LCD contrast Setting the date and time Press Menu. Press Menu. Press a or b to choose 0.Initial Setup, Press a or b to choose 0.Initial Setup, and then press OK. and then press OK. Press a or b to choose 2.LCD Contrast, Press a or b to choose 1.Date/Time, and and then press OK. -
Page 8: Installing The Driver & Software
Follow the instructions on this page for your operating system and interface. For the latest drivers and documentations and to find the best solution for your problem or question, access the Brother Solutions Center directly from the driver or visit http://solutions.brother.com. -
Page 9: For Usb Interface Users
The installation of PaperPort SE will automatically start and is followed by the installation of MFL-Pro Suite. When the Brother MFL-Pro Suite Software License Agreement window appears, click Yes if you agree to the Software License Agreement. Choose Standard, and then click Next. The installation continues. - Page 10 ® Windows Turn on the machine by connecting the power cord. The installation of the Brother drivers will automatically start. The installation screens appear one after another. Please wait, it will take a few seconds for all the screens to appear.
-
Page 11: For Usb Interface Users (For Mac Os ® X 10.2.4 Or Greater)
Please wait, it will take a few seconds for the software to install. After the installation, click Restart to finish installing the software. The Brother software will search for the Brother device. When this screen appears, click OK. Improper Setup ®... - Page 12 Choose USB. Choose DCP-XXXX (where XXXX is your model name), and then click Add. Click Print Center, then Quit Print Center. The MFL-Pro Suite, Brother printer driver, scanner driver and Brother ControlCenter2 have been installed and the installation is now complete.
- Page 13 The contents of this manual and the specifications of this product are subject to change without notice. Brother reserves the right to make changes without notice in the specifications and materials contained herein and shall not be responsible for any damages (including consequential) caused by reliance on the materials presented, including but not limited to typographical and other errors relating to the publication.
- Page 14 EEU-ENG Printed in China...