Table of Contents
Advertisement
Quick Links
Advertisement
Table of Contents

Subscribe to Our Youtube Channel
Related Manuals for Rush MH 4 Beam


Summary of Contents for Rush MH 4 Beam
- Page 1 MH 4 Beam User Manual...
- Page 2 The Martin logo, the RUSH by Martin logo, the RUSH by Martin name, the Martin name and all other trademarks in this document pertaining to services or products by Martin Professional or its affiliates and subsidiaries are trademarks owned or licensed by Martin Professional or its affiliates or subsidiaries.
-
Page 3: Table Of Contents
Table of contents Safety information ..................... 4 Introduction ......................10 Before using the product for the first time ............10 Physical installation ....................11 Fastening the fixture to a flat surface ..............11 Mounting the fixture on a truss ................11 Securing with a safety cable ................ -
Page 4: Safety Information
If you have any questions about how to install, operate or service the fixture safely, please contact your Martin™ distributor (see www.martin.com/distributors for details) or call the Martin™ 24-hour service hotline on +45 8740 0000, or in the USA on 1-888-tech-180. RUSH MH 4 Beam User Manual... - Page 5 It may also cause damage or malfunction and it may void your product warranty. Install, operate and service RUSH by Martin™ products only as directed in their user manuals, or you may create a safety hazard or cause damage that is not covered by product warranties.
- Page 6 MAINS OUT throughput socket to MAINS IN input socket, but do not link more than: • five (5) RUSH MH 4 fixtures in total at 100-120 V, or • ten (10) RUSH MH 4 fixtures in total at 200-240 V.
- Page 7 Replace the lamp immediately if it becomes visually deformed, damaged or in any way defective. Replace the lamp if light output intensity falls noticeably. RUSH MH 4 Beam User Manual...
- Page 8 Martin™ service agent for replacement. Protection from injury Fasten the fixture securely to a fixed surface or structure when in use. The fixture is not portable when installed. RUSH MH 4 Beam User Manual...
- Page 9 In the event of an operating problem, stop using the fixture immediately and disconnect it from power. Never attempt to use a fixture that is obviously damaged. Do not modify the fixture or install other than genuine RUSH by Martin™ parts. RUSH MH 4 Beam User Manual...
-
Page 10: Introduction
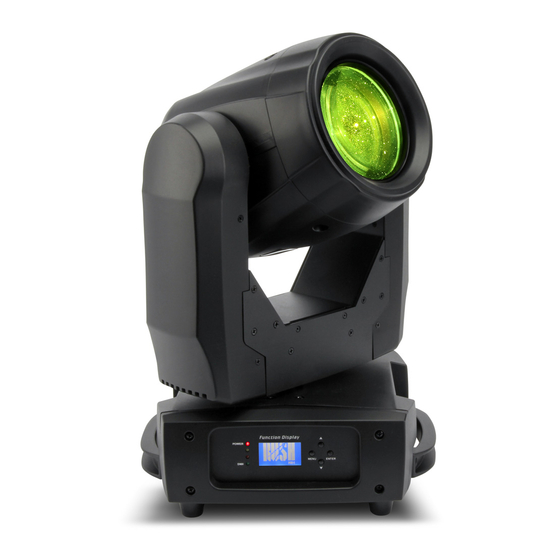
Introduction The RUSH MH 4 Beam™ is a compact-beam moving head fixture. It is equipped with a discharge lamp with integral reflector in a state-of-the-art optical system. The fixture is rugged, lightweight and compact, making it ideal for smaller venues. -
Page 11: Physical Installation
To clamp the fixture to a truss: 1. Check that the rigging structure can support at least 10 times the weight of all fixtures and equipment to be installed on it. RUSH MH 4 Beam User Manual... -
Page 12: Securing With A Safety Cable
Loop the safety cable through the cutout in the fixture’s baseplate (arrowed in illustration on right) and around a secure anchoring point. RUSH MH 4 Beam User Manual... -
Page 13: Ac Power
EU system The fixture has an auto-ranging power supply that accepts AC mains power at 100-240 V at 50/60 Hz. Do not apply AC mains power at any other voltage or frequency to the fixture. RUSH MH 4 Beam User Manual... -
Page 14: Linking Fixtures To Power In A Chain
Using 14 AWG or 1.5 mm cables from Martin™, you can link: • Maximum five (5) RUSH MH 4 fixtures to power in a chain at 100-120 V, or • Maximum ten (10) RUSH MH 4 fixtures to power in a chain at 200-240 V. -
Page 15: Dmx Data Link
DMX channels. Fixtures that are required to behave identically can share the same DMX address and channels. To add more fixtures or groups of fixtures when the above limit is reached, add a DMX universe and another daisy-chained link. RUSH MH 4 Beam User Manual... -
Page 16: Connecting The Data Link
To access the control menus in the control panel, press the MENU button. • Navigate the menu structure using the ENTER, DOWN and UP buttons. • Scroll between menu items using the DOWN and UP buttons. RUSH MH 4 Beam User Manual... -
Page 17: Dmx Function Settings
DMX signal stopped. To adjust the setting: 1. Select DMX STATE and press ENTER. The currently set option will blink in the display. RUSH MH 4 Beam User Manual... -
Page 18: Fixture Settings
1. Select LAMP SETTINGS and press ENTER to confirm. 2. Use the DOWN and UP buttons to scroll to ON/OFF and press ENTER to confirm. 3. Use the DOWN and UP buttons to select ON or OFF. RUSH MH 4 Beam User Manual... - Page 19 4. Press ENTER to confirm (or to return to the previous menu level without making a change, press MENU). Low-power delay In a low-power delay, when a lamp off command is sent the lamp runs at half power for a period before powering completely off: RUSH MH 4 Beam User Manual...
-
Page 20: Display Settings
The brightness of the control panel display can be adjusted: 1. Select DISPLAY SETTINGS and press ENTER to confirm. 2. Use the DOWN and UP buttons to select BACKLIGHT INTENSITY and press ENTER to confirm. RUSH MH 4 Beam User Manual... -
Page 21: Fixture Tests
The fixture can carry out an automatic test of all functions, or individual functions can be tested manually. Auto test To perform a complete test of all of the effects: 1. Select FIXTURE TEST and press ENTER to confirm. RUSH MH 4 Beam User Manual... -
Page 22: Fixture Information
To see which software version is installed in the fixture: 1. Select FIXTURE INFORMATION and press ENTER to confirm. 2. Use the DOWN and UP buttons to select FIRMWARE VERSION and press ENTER to confirm. The firmware version will be shown. RUSH MH 4 Beam User Manual... -
Page 23: Special Functions
RESET TIME restarts the timer countdown at the number of hours defined in INTERVAL. 3. Press ENTER to confirm or press MENU to exit. Factory settings The fixture’s factory default settings can be restored using FACTORY SETTINGS. RUSH MH 4 Beam User Manual... -
Page 24: Effect Home Position (Offset) Adjustment
DOWN and UP buttons to adjust it. 4. Once the correct position has been reached, press ENTER to set this (or to return to the previous menu level without making a change, press MENU). RUSH MH 4 Beam User Manual... -
Page 25: Effects
This can be enabled or disabled as required (see ‘Control menus’ on page 38). Dimming Full range mechanical dimming is provided. RUSH MH 4 Beam User Manual... -
Page 26: Strobe Effects
Strobe effects A range of variable strobe and pulse effects are available, with variable speed and random effects. Gobos The fixture contains a rotating wheel with 17 fixed gobos plus open (white): RUSH MH 4 Beam User Manual... -
Page 27: Prism
Amber Slot 9 Magenta Slot 3 Blue Slot 10 Deep blue Slot 4 Green Slot 11 Yellow Slot 5 Light green Slot 12 Slot 6 Lavender Slot 13 Slot 7 Pink Slot 14 Violet RUSH MH 4 Beam User Manual... -
Page 28: Maintenance
Check again at frequent intervals. This procedure will allow you to assess cleaning requirements in your particular situation. If in doubt, consult your RUSH by Martin dealer about a suitable maintenance schedule. -
Page 29: Lamp Service
Read ‘Lamp safety’ on page 7 before servicing the lamp. Important! The RUSH MH 4 Beam™ has been available in two models: • A Philips Platinum 2R lamp model produced until 2015 • An Osram HRI 132 W lamp model produced from 2015. - Page 30 4. See illustration on right. Loosen the screws in the top head cover (arrowed) using a Phillips screwdriver and remove the cover. Loosen the corresponding screws in the bottom head cover and remove that cover also. RUSH MH 4 Beam User Manual...
- Page 31 Repeat this process until you obtain the most even light output. 11. Reset the Lamp On Time counter in the control menus. RUSH MH 4 Beam User Manual...
-
Page 32: Fuse Replacement
2. Use a large flat-bladed screwdriver to unscrew the cap of the fuseholder. 3. Replace the fuse with one of the same type and rating only. 4. Reinstall the fuseholder cap before reapplying power. RUSH MH 4 Beam User Manual... -
Page 33: Dmx Protocol
Light green Lavender Lavender 67-76 Lavender Pink Pink 78-87 Pink Light yellow Light yellow 89-98 Light yellow Magenta Magenta 100-109 Magenta Deep blue Deep blue 111-120 Deep blue Yellow RUSH MH 4 Beam User Manual... - Page 34 Color wheel: random slots 244-247 Random color, fast 248-251 Random color, medium 252-255 Random color, slow Gobo wheel: continuous scrolling Snap Open Open Gobo 1 Gobo 1 10-17 Gobo 1 Gobo 2 Gobo 2 RUSH MH 4 Beam User Manual...
- Page 35 Gobo 16 Gobo 17 Gobo 17 154-156 Gobo 17 Open Gobo wheel: stepped scrolling 157-158 Gobo 1 159-160 Gobo 2 161-162 Gobo 3 163-164 Gobo 4 165-166 Gobo 5 167-168 Gobo 6 169-170 Gobo 7 RUSH MH 4 Beam User Manual...
- Page 36 No rotation (prism stops at current position) 130-253 Rotation CCW Slow CCW Fast 254-255 No rotation (prism indexed at 45°) 0-255 Focus Infinity Near Fade 0-255 Pan coarse 0° 540° Fade 0-255 Pan fine Fade RUSH MH 4 Beam User Manual...
- Page 37 Store gobo wheel calibration 220-224 Store focus calibration 225-229 Store color wheel calibration 230-234 Store prism calibration 235-239 Store pan calibration 240-244 Store tilt calibration 245-249 Reset all calibration values to factory defaults 250-255 No function RUSH MH 4 Beam User Manual...
-
Page 38: Control Menus
No pan or tilt position error correction If a pan or tilt position error is detected, the fixture corrects pan/tilt position Bl.O. P/T Moving Blackout during pan or tilt movement Bl.O. Color Change Blackout during color change RUSH MH 4 Beam User Manual... - Page 39 Set display panel contrast Temperature Unit °C Temperature display Celsius/Fahrenheit °F Display Warning Show service warnings in display panel Fixture Test Auto Test Automatic test of all functions Manual Test Manual test of each function RUSH MH 4 Beam User Manual...
- Page 40 Reset gobo wheel Focus Reset focus Reset all effects Special Fixture Interval Set new maintenance Functions Maintenance countdown timer period Remain time View maintenance countdown timer Factory Settings Return fixture to factory default settings RUSH MH 4 Beam User Manual...
-
Page 41: Offset Menu
Offset -128127 Pan offset Menu Tilt -128127 Tilt offset Shutter 0255 Shutter offset Color -128127 Color offset Gobo -128127 Gobo offset Prism 0255 Prism offset R-Prism -128127 Rotating prism offset Focus 0255 Focus offset RUSH MH 4 Beam User Manual... -
Page 42: Error Messages
No lamp detected or wiring fault. Temperature Sense Error Temperature sensor on the PCB is damaged. Contact your RUSH by Martin authorized distributor for assistance. Lamp Too Hot Low Power Temperature higher than 105º C detected. The fixture runs at a low power level. -
Page 43: Troubleshooting
Check that fixture’s DMX cable, or potential indicator LED is on, and if interference from not, check all DMX cables proximity to a high- and connections. voltage installation. Check that DMX link is terminated. RUSH MH 4 Beam User Manual... - Page 44 Check that all devices on DMX link use standard DMX polarity. Attempt to control the fixture with another DMX control device. Move or shield link if it is very close to an unshielded high-voltage installation. RUSH MH 4 Beam User Manual...
-
Page 45: Specifications
Approved lamp ............ Philips MSD Platinum 2R Color temperature ................9000 K CRI (Color rendering index) ..............75 Average lifetime (manufacturer’s figure, to min. 70% output) ... 2000 hours *See serial number label on base of product to identify model RUSH MH 4 Beam User Manual... - Page 46 AC power in/out ..............Neutrik PowerCon DMX data in/out ........... 3-pin & 5-pin locking XLR Electrical AC power ............100-240 V nominal, 50/60 Hz Fuse ....................T6.3A Power supply unit ......Auto-ranging electronic switch-mode RUSH MH 4 Beam User Manual...
- Page 47 Power relay cable, 14 AWG, SJT, 1.5 mm2, H05VV-F, with PowerCon connectors, 2.25 m (7.4 ft.) ...... P/N 11541510 Power relay cable, 14 AWG, SJT, 1.5 mm2, H05VV-F, with PowerCon connectors, 3.25 m (10.7 ft.) ....P/N 11541511 RUSH MH 4 Beam User Manual...
- Page 48 RUSH Software Uploader 1™ ..........P/N 91611399 Ordering Information RUSH MH 4 Beam™ in cardboard box, EU model ....P/N 90280030 RUSH MH 4 Beam™ in cardboard box, US model ....P/N 90280035 Specifications are subject to change without notice. For latest product specifications, see www.martin.com...
- Page 49 The label shown above is displayed on this product. If it becomes difficult or impossible to read, it must be replaced using the above illustration to reproduce a new label in black with a yellow background. RUSH MH 4 Beam User Manual...
Need help?
Do you have a question about the MH 4 Beam and is the answer not in the manual?
Questions and answers