Table of Contents
Advertisement
Advertisement
Table of Contents

Related Manuals for Rush MH-3 Beam


Summary of Contents for Rush MH-3 Beam
-
Page 1: User Manual
MH-3 Beam User Manual Professional Entertainment Technology... - Page 2 The Martin logo, the RUSH by Martin logo, the RUSH by Martin name, the Martin name and all other trademarks in this document pertaining to services or products by Martin Professional A/S or its affiliates and subsidiaries are trademarks owned or licensed by Martin Professional A/S or its affiliates or subsidiaries.
-
Page 3: Table Of Contents
Table of contents Safety information ..................... 5 Introduction ....................... 9 Before using the product for the first time............9 Physical installation ..................10 Fastening the fixture to a flat surface ............10 Mounting the fixture on a truss..............10 AC power ......................11 Fixture overview.................... - Page 4 Service and repairs ..................29 DMX protocol ....................30 Control menus....................35 Offset menu ....................37 Error messages....................38 Troubleshooting ....................39 Specifications ....................41...
-
Page 5: Safety Information
Keep this manual for future use. If you have questions about how to operate the fixture safely, please contact your RUSH by Martin™ dealer or call the Martin™ 24-hour service hotline on +45 8740 0000, or in the USA on 1-888-tech-180. - Page 6 Ensure that there is free and unobstructed airflow around the fixture. Provide a minimum clearance of 100 mm (4 in.) around fans and air vents. Do not attempt to bypass thermostatic switches or fuses. RUSH MH 3 Beam user manual...
- Page 7 To minimize the risk of eye irritation or injury, disconnect the fixture from power at all times when the fixture is not in use, and provide well-lit conditions to reduce the pupil diameter of anyone working on or near the fixture. RUSH MH 3 Beam user manual...
- Page 8 Never attempt to use a fixture that is obviously damaged. Do not modify the fixture or install other than genuine RUSH by Martin™ parts. Refer any service operation not described in this manual to a qualified technician.
-
Page 9: Introduction
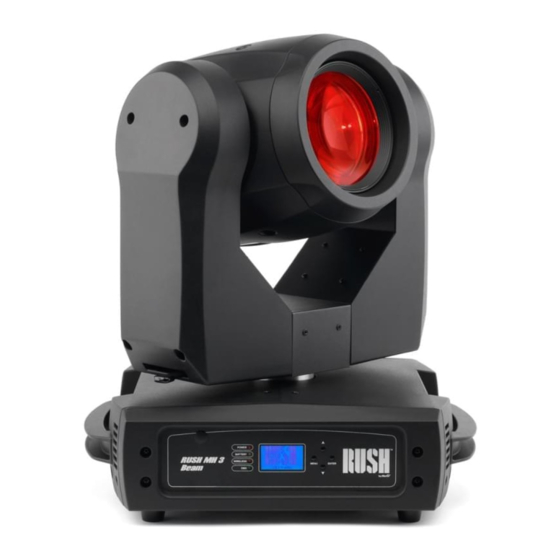
Introduction The MH-3 Beam is a high performance moving head, equipped with an MSD Platinum 5R lamp in a state-of-the-art optical system that incorporates a 1°~ 3.8° zoom. Its compact design makes it ideal for live shows, TV events, stage and concerts. -
Page 10: Physical Installation
5. Secure the fixture against clamp failure with a secondary attachment such as an approved safety cable that is rated for the weight of the fixture. 6. Check that the head will not collide with other fixtures or objects. RUSH MH 3 Beam user manual... -
Page 11: Ac Power
AC power Read Safety information on page 5 before connecting the fixture to AC mains power. For protection from electric shock, the fixture must be grounded (earthed). The power distribution circuit must be equipped with a fuse or circuit breaker and ground-fault (earth-fault) protection. Socket outlets or external power switches used to supply the fixture with power must be located near the fixture and easily accessible so that the fixtures can easily be disconnected from... -
Page 12: Fixture Overview
Fixture overview 1 - LEDs The fixture has four LEDs on the front of the base: POWER Power on BATTERY Reserved for possible future use WIRELESS Reserved for possible future use Valid DMX signal present 2 – Display 3 – Buttons •... -
Page 13: Pan And Tilt Locks
Pan and tilt locks Always disengage the pan (yaw) and tilt locks before turning on the fixture. The discharge lamp used in the fixture is very delicate, so engage the pan and tilt locks before moving or transporting the fixture. MH 3 Beam user manual... -
Page 14: Control Data Link
Control data link A DMX 512 data link is required in order to control the fixture via DMX. The fixture has 3-pin and 5-pin XLR connectors for DMX data input and output. The number of daisy-chained fixtures is limited by the number of DMX channels required by the fixtures in relation to the maximum 512 channels available in one DMX universe. -
Page 15: Fixture Setup
Fixture setup This section explains the fixture characteristics that can be set that determine how it can be controlled and will behave. These settings are made using the menus available from the control panel, and are retained, even when the fixture is powered off. -
Page 16: Fixture Settings
To set the fixture’s DMX address: 1. Select DMX FUNCTIONS and press the ENTER button 2. Use the UP and DOWN buttons to select DMX ADDRESS and press the ENTER button to confirm. The present address will blink on the display. 3. -
Page 17: Lamp Settings
button to confirm. 3. Use the DOWN and UP buttons to select the YES (blackout during movement or change) or NO (normal) mode. 4. Press the ENTER button to confirm (or, to return to the higher level of the menu structure without any change press the MENU button). Lamp settings Lamp on/off To turn the lamp on or off:... - Page 18 On if DMX on To enable or disable the lamp being turned on automatically if a DMX signal is present: 1. Select LAMP SETTINGS and press the ENTER button to confirm. 2. Use the DOWN and UP buttons to select ON IF DMX ON and press the ENTER button to confirm.
-
Page 19: Display Settings
3. Use the DOWN and UP buttons to specify a duration. 4. Press the ENTER button to confirm (or, to return to the higher level of the menu structure without any change press the MENU button). Display settings Invert display Inverting the display is useful if the fixture is hung from a truss or from elevation. -
Page 20: Fixture Test
Fixture test Automatic tests of all functions, or manual test of individual functions can be run from the control menus. Auto test To perform a complete test of all of the fixture functions: 1. Select FIXTURE TEST and press the ENTER button to confirm. 2. -
Page 21: Reset Factory Default Settings
be manually reset to their home positions: 1. Select RESET FUNCTIONS and press the ENTER button to confirm. 2. Use the DOWN and UP buttons to select the function or effect that is to be reset. Press the ENTER button. 3. -
Page 22: Effects
Effects This section describes DMX-controllable effects that require particular explanation. See DMX protocol on page 30 for a full list of the DMX channels and values required to control the different effects. Lamp control The fixture can be set up to turn the lamp on or off depending on whether or not a DMX signal is present. -
Page 23: Dimming
Control menus on page 35). Dimming Full range mechanical dimming is provided. Two dimming curves are available—linear or conventional—and either of these can be selected using the function channel. Frost filter A frost filter is provided. Zoom The fixture provides a 1°~ 3.8° zoom. Strobe effects A range of variable speed and random shutter/strobe effects are provided. -
Page 24: Prism
automatically blackout during gobo changes. The sharpness of gobo projections can be adjusted using the electronic focus. Prism The fixture incorporates an 8-faceted prism that can be inserted into the beam to provide split effects. The prism can be set to an indexed position or rotated clockwise or counter-clockwise. - Page 25 To avoid the risk of a discharge lamp exploding in the fixture, always replace the lamp before its expected lifespan has been exceeded. The lamp must be perfectly clean. Never touch the lamp with bare hands. If this happens, clean the lamp with an alcohol wipe and dry it with a lint-free cloth.
- Page 26 3. Remove the fan at the rear of the head. 4. Lift the lamp out of its recess. 5. Disconnect the lamp and connect the replacement lamp. Only use approved lamp. 6. Place the new lamp into the lamp recess. 7.
-
Page 27: Cleaning
Check again at frequent intervals. This procedure will allow you to assess cleaning requirements in your particular situation. If in doubt, consult your RUSH by Martin dealer about a suitable maintenance schedule. -
Page 28: Service And Repairs
Never try to repair the fixture by yourself as this may result in damage or malfunction, and it may potentially void your product warranty. The equipment must only be serviced or repaired by an authorized RUSH by Martin service technician. -
Page 29: Dmx Protocol
DMX protocol Channel Value Function 1-255 Pan 0°~540° 1-255 Pan (fine control) 1-255 Tilt 0°~270° 1-255 Tilt (fine control) 1-255 Pan/tilt speed – fast-slow Function 0-29 No function 30-39 Dimmer conventional mode 40-49 Dimmer linear mode 50-59 Pan/tilt fast mode 60-69 Pan/tilt normal mode 70-79... - Page 30 Channel Value Function 48-55 Macro 6 56-63 Macro 7 64-71 Macro 8 72-79 Macro 9 80-87 Macro 10 88-95 Macro 11 96-103 Macro 12 104-111 Macro 13 112-119 Macro 14 120-127 Macro 15 128-135 Macro 16 136-143 Macro 17 144-151 Macro 18 152-159 Macro 19...
- Page 31 Channel Value Function 30-31 Light pink 32-33 Split color 34-35 Yellow green 36-37 Split color 38-39 Dark pink Split color 40-42 Blue 43-44 45-46 Split color 47-48 Light yellow 49-50 Split color 51-52 Off white 53-54 Split color Light blue 55-56 Split color 57-58...
- Page 32 Channel Value Function 64-67 Gobo 2 shake 68-71 Gobo 3 shake 72-75 Gobo 4 shake 76-79 Gobo 5 shake 80-83 Gobo 6 shake 84-87 Gobo 7 shake 88-91 Gobo 8 shake Gobo 9 shake 92-95 96-99 Gobo 10 shake 100-103 Gobo 11 shake 104-107 Gobo 12 shake...
- Page 33 Channel Value Function 215-218 Prism rotation effects 20 219-223 Prism rotation effects 21 224-227 Prism rotation effects 22 228-232 Prism rotation effects 23 233-236 Prism rotation effects 24 237-241 Prism rotation effects 25 242-246 Prism rotation effects 26 247-250 Prism rotation effects 27 251-255 Prism rotation effects 28 Prism rotation (coarse control)
-
Page 34: Control Menus
Control menus To access the control menus, press the MENU button. Use the UP and DOWN buttons to navigate the menus. Select any required menu option using the ENTER button. For more information, see Using the control menus on page 16. Default fixture settings are shown in bold. - Page 35 Menu Sub-menu Setting/value Explanation Ignition Delay 0~255S Delay lamp ignition: 0 to 255 seconds. Low Power Delay 0~255S Low power delay: 0 to 255 seconds. Display Display inverse Invert control panel settings display Backlight Auto Off Automatically turn off display panel backlight when not in use.
-
Page 36: Offset Menu
Offset menu The offset menu is used to adjust the home position of the various effects. To access the Offset menu, press the MENU button to enter the menu structure and then press and hold the ENTER button for three seconds. Menu Sub-menu Setting... -
Page 37: Error Messages
Error messages Error: Appears when: Lamp Startup Fail No lamp or some wires are damaged. Temperature Sense Error Temperature sensor on the PCB is damaged. Lamp Too Hot Power Off Temperature is detected higher than 110° C. Ensure that the fixture is adequately ventilated. The fans or temperature sensor might be damaged (contact Martin support). -
Page 38: Troubleshooting
LED is lit. Check all power connections and cables. Replace the fixture fuse. One of the control Damaged step motor or Contact your RUSH by channels is cable connection Martin authorized unresponsive or only between the head and distributor or service center responds body. - Page 39 Symptom Potential cause Remedies Fixture does not Fault in the DMX Check that the fixture DMX respond to DMX network due to LED is on, and if not, check control. connector or cable all DMX cables and damaged, or connections to ensure the integrity of the physical incorrect DMX network.
-
Page 40: Specifications
Specifications Physical Weight .................. 20.5 kg (45.2 lbs.) Dimensions (W x H x D) ..... 418 x 489 x 321 mm (16.5 x 19.3 x 12.6 in.) Lamp Approved lamp............Philips MSD Platinum 5R Color temperature ..................8000 K CRI (Color rendering index) ................75 Average lifetime ................ - Page 41 Zoom ....................Motorized Focus ....................Motorized Dimmer..........0 - 100%, four dimming curve options Pan ......540°, with coarse & fine control and speed, P/T macros Tilt ......270°, with coarse & fine control and speed, P/T macros Optics Beam angle ................... 1°- 3.8° Control and Programming Control options ..................
- Page 42 Disposing of this product RUSH by Martin™ products are supplied in compliance with Directive 2012/19/EC of the European Parliament and of the Council of the European Union on WEEE (Waste Electrical and Electronic Equipment), where applicable. Help preserve the environment! Ensure that this product is recycled at the end of its life.
- Page 44 I n n o v a t i o n Q u a l i t y P e r f o r m a n c e...
Need help?
Do you have a question about the MH-3 Beam and is the answer not in the manual?
Questions and answers