Advertisement
Quick Links
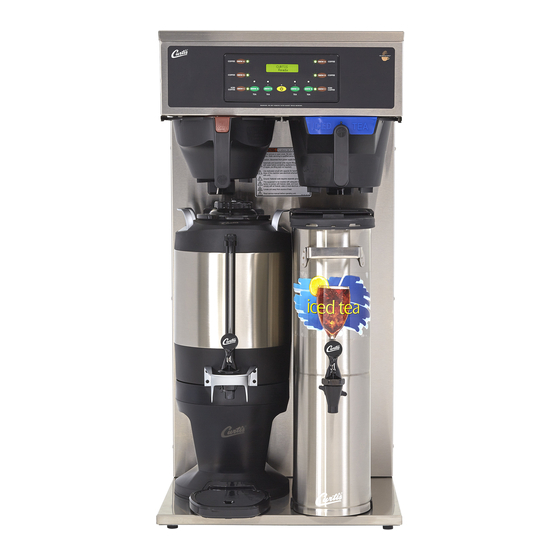
Model
CBHT
CAUTION: Follow these
setup instructions before
attempting to use this
brewer. Failure to follow the instruc-
tions can result in injury or voiding of
the warranty.
IMPORTANT: Equipment
to be installed to comply
with applicable govern-
mental plumbing/electrical codes
having jurisdiction.
CAUTION: DO NOT
connect this brewer to hot
water. The inlet valve is
not rated for hot water.
ISO 9001:2008 REGISTERED
WILBUR CURTIS CO., INC.
6913 Acco Street
Montebello, CA 90640-5403
For the latest information go to
www.wilburcurtis.com
Tel: 800-421-6150
Fax: 323-837-2410
Service Manual – Combo Brewer Twin
Important Safeguards/Symbols
This equipment is designed for commercial use. Any servicing other than cleaning and routine maintenance
should be performed by an authorized Wilbur Curtis Co., Inc. Service Technician.
• DO NOT immerse the brewer in water or any other liquid
• To reduce the risk of fire or electric shock, DO NOT open service panels. There are no user serviceable
parts inside.
• Keep hands and other items away from hot areas of the brewer during operation.
• Never clean with scouring powders or harsh chemicals.
Symbols:
WARNINGS – To help avoid personal injury
Important Notes/Cautions – from the factory
Sanitation Requirements
This Curtis Generation 3 brewer is factory preset and ready to go right from the box.
Following are the factory settings for your G3 Coffee Brewing System:
• Brew Temperature = 204°F
• Brew Volume = Set to vessel requirement.
System Requirements:
• Water Source: 20 – 90 psi (38 - 62- kPa), minimum flow rate of 1 gpm (3.8 lpm)
• Electrical: See attached schematic for standard model or visit www.wilburcurtis.com for your model.
SETUP INSTRUCTIONS
1. The unit should be level (left to right - front to back), on a secure surface.
2. Install the hot water faucet as instructed on page 2.
3. Connect the water line to the water inlet fitting on the rear of the brewer.
The water volume flow to the machine should be consistent. Use tubing
sized sufficiently to provide a minimum flow rate of one gallon per minute.
NOTE: A water filtration system must be used to help maintain trouble-free operation. Air must
be purged from the cartridge prior to connection to the equipment. In areas with extremely
hard water, we highly recommend the use of a Curtis approved water filter. For our full line of
filters, please log on to www.wilburcurtis.com.
NSF International requires the following water connection:
1. A quick disconnect or additional coiled tubing (at least 2x the depth of the brewer) is required so
that the brewer can be moved for cleaning.
2. This brewer must be installed with adequate back-flow protection to comply with applicable
federal, state and local codes.
3. Water pipe connections and fixtures directly connected to a portable water supply shall be sized,
installed and maintained in accordance with federal, state and local codes.
4. Connect the brewer to electrical outlet with an appropriate amperage rating (see serial tag on machine).
5. Once power has been supplied to the brewer, flip the toggle switch to the ON position (located on the rear
of the unit), the water tank will begin to fill. When the water level in the tank reaches the probe, the heating
element(s) will turn on.
6. Water in the heating tank will require approximately a half hour before reaching operating temperature (fac-
tory setting of 204°F). Turn on the universal control module (UCM). When the brewer reaches operating
temperature, it will display Ready to Brew.
FOR THE LATEST SPECIFICATIONS AND INFORMATION GO TO WWW.WILBURCURTIS.COM
W
C
C
ilbur
urtis
o
• Water Bypass = On for LARGE brew only
., i
.
nC
WARNING: Use the
leveling legs to level the
brewer only. Do not use
them to adjust brewer height. Do not
extend them higher than necessary.
1
Advertisement

Related Manuals for Curtis CBHT


Summary of Contents for Curtis CBHT
- Page 1 Important Notes/Cautions – from the factory Sanitation Requirements This Curtis Generation 3 brewer is factory preset and ready to go right from the box. Following are the factory settings for your G3 Coffee Brewing System: • Brew Temperature = 204°F •...
- Page 2 HOT WATER FAUCET INSTALLATION The hot water faucet is shipped loose and must be attached during the initial set-up of the brewer. To attach the hot water faucet, you will need a ratchet type socket wrench with a 3/4” (approximately 2” deep) socket for nut removal and tightening. Faucet Installation Instructions: 1.
- Page 3 COFFEE BREWING INSTRUCTIONS 1. Brewer should be ON (confirm at rear toggle switch, then press the ON/OFF button). Ready to Brew should be on the display. 2. Place an empty coffee dispenser under the brew basket. Make sure the dispenser is open at the top and it is centered under the brew basket. 3. Place a clean filter into 4. Fill the brew basket with 5. Slide the filled brew 6.
- Page 4 Your Curtis G3/Gold Cup Series is factory preset for optimum performance. After connection to water and power; the rear toggle switch must be on. You will hear a beep sound, indicating power is available to the controller. The control displays .
- Page 5 Press to display the number and to change a number, (the number can be changed 1 to 4) or ◄ to move the number place Access Code and EX to exit when complete. Banner Name (factory set to CURTIS) Banner Name Press to display letters and change letters or ◄ to move place and EX to exit when complete. This feature allows up to 14 letters to be programmed for a company name or a regional name. Programming all blanks disables the Banner Name. If...
- Page 6 Brew by Time (Factory settings: LARGE 5min-25sec. SMALL 1min-52sec.) The next item in the sequence is Brew by Time. Press to select and to change the brew time. The display will now show the Brew By Time current time. By pressing ◄ or ► you can toggle back and forth from minutes to seconds and to exit (ex). Change the time or set and exit by pressing the ...
- Page 7 Sweetener Time (factory set to Full 48 sec.) Sweetener Time Not applicable for this model. Model Select (factory set to CBHV-Twin) Press to select. Press ◄ or ► to select the model. The available selections are: CBHV-Twin, CBHV-Single, CBHV-Twin Model Select SW and CBHV-Single SW. Press to set and exit. When the Model Select feature is changed, all settings are reset to the fac- tory defaults of the newly selected model.
-
Page 8: Illustrated Parts
Illustrated Parts... - Page 9 KIT, STRAIGHT FITTING & BUSHNG 8mm GEN USE WC-37121* KIT, DUMP VALVE LEFT WC-37365 KIT, FITTING TANK INLET WC-390060 LABEL, UCM OVERLAY & OUTER CBHT CURTIS ICED COF WC-62033 TANK, COMPLETE GEMTS W/ULTEM FITTINGS WC-37557* KIT, UCM & LABEL CBHVT & CBHT WC-4382...
-
Page 10: Electrical Schematic
Electrical Schematic... -
Page 11: Rough-In Drawing
Rough-In Drawing 22.88” (58.1 cm) COFFEE BREW BASKET TEA BREW BASKET 18.13” (46.1 cm) 22.00” (55.9 cm) 36.75” (93.3 cm) 3.75” 24.25” (9.5 cm) 23.63” (61.6 cm) (60.0 cm) 23.13” (58.8 cm) 12.50” 1.25” 10.25” (31.8 cm) (3.2 cm) (26.0 cm) 20.88”... -
Page 12: Product Warranty Information
The warranty covers original equipment at time of purchase only. Wilbur Curtis Co., Inc., assumes no responsibility for substitute replacement parts installed on Curtis equipment that have not been purchased from Wilbur Curtis Co., Inc. Wilbur Curtis Co., Inc. will not accept any responsibility if the following conditions are not met.The warranty does not cover and is void under the following circumstances:...
Need help?
Do you have a question about the CBHT and is the answer not in the manual?
Questions and answers