Table of Contents
Advertisement
Quick Links
Download this manual
See also:
Troubleshooting Manual
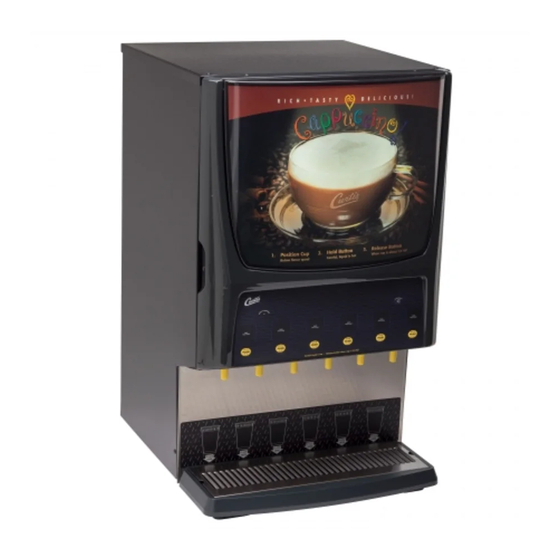
Model
• PCGT6
CAUTION: Equipment
must be installed to
comply with applicable
federal, state, and local plumbing/
electrical codes having jurisdiction.
CAUTION: Follow this
setup procedure before
attempting to use this
unit. Failure to follow these instruc-
tions can result in injury and/or void
of warranty.
CAUTION: DO NOT
connect the unit to hot
water. The inlet valve is
not rated for hot water.
ISO 9001:2008 REGISTERED
WILBUR CURTIS CO., INC.
6913 Acco Street,
Montebello, CA 90640-5403
For the latest information go to
www.wilburcurtis.com
Tel: 800/421-6150
Fax: 323/837-2410
Service Manual – PCGT6
Important Safeguards/Symbols
This appliance is designed for commercial use. Any servicing other than cleaning and routine main-
tenance should be performed by an authorized Wilbur Curtis Company service technician.
• DO NOT immerse the unit in water or any other liquid
• To reduce the risk of fire or electric shock, DO NOT open service panels. There are no user
serviceable parts inside.
• Keep hands and other items away from hot areas of the unit during operation.
• Never clean with scouring powders or harsh chemicals.
Symbols
WARNINGS – To help avoid personal injury
Important Notes/Cautions – from the factory
Sanitation Requirements
Your Curtis G3 System is Factory Pre-Set and Ready to Go, Right from the Box.
Following are the Factory Settings for your Primo Cappuccino Beverage System:
• Tank Temperature = 190°F
• Flavor Controls= Set at 60%
• Dispensing Mode Set for Manual Dispensing
Generally there will never be a reason to change your G3 programming. However, should you need
to make slight adjustments to meet your dispensing needs, programming instructions are provided
later in this manual.
System Requirements:
• Water Source 20 – 90 PSI (Minimum Flow Rate of 1 GPM)
• Electrical: See electrical schematic on page 9.
SETUP STEPS
1. The unit should be level (left to right - front to back), on a secure surface.
2. Connect the water line to the water inlet fitting on the rear of the unit. Water volume going to the
machine should be consistent. Use tubing sized sufficiently to provide a minimum flow rate of
one gallon per minute.
NOTE: A water filtration system must be used to help maintain trouble-free operation. Air must
be purged from the cartridge prior to connection to equipment. In areas with extremely
hard water, we highly recommend the use of a Curtis approved water filter. For our full line of
filters, please log on to www.wilburcurtis.com.
NSF International requires the following water connection:
1. A quick disconnect or additional coiled tubing (at least 2x the depth of the unit) so that the machine
can be moved for cleaning underneath.
2. This equipment is to be installed with adequate backflow protection to comply with applicable
federal, state and local codes..
3. Water pipe connections and fixtures directly connected to a potable water supply shall be sized,
installed and maintained in accordance with federal, state, and local codes.
3. Plug the power cord into an electrical outlet rated at 20A.
4. Turn on power at the toggle switch behind the unit. The display window on the front door will light
and the heating tank will start to fill.
5. Once filled, the water in the heating tank will start heating, requiring about one hour to reach
operating temperature (factory setting of 190°F). This is indicated on the UCM (Universal Control
Module), inside the front door. The UCM will display "READY TO DISPENSE".
6. Remove and fill the canisters with powdered cappuccino product.
FOR THE LATEST SPECIFICATIONS AND INFORMATION GO TO WWW.WILBURCURTIS.COM
Technical support: 1-800-995-0417. M-F 5:30am-4:00pm PST.
W
C
C
ilbur
urtis
o
Email: techsupport@wilburcurtis.com
., i
.
nC
1
Advertisement
Table of Contents

Related Manuals for Curtis PCGT6


Summary of Contents for Curtis PCGT6
- Page 1 NOTE: A water filtration system must be used to help maintain trouble-free operation. Air must be purged from the cartridge prior to connection to equipment. In areas with extremely hard water, we highly recommend the use of a Curtis approved water filter. For our full line of CAUTION: DO NOT filters, please log on to www.wilburcurtis.com.
-
Page 2: Rough-In Drawing
Operating Instructions 1. SELECT A FLAVOR. 2. PLACE YOUR CUP UNDER THE SPOUT DIRECTLY BENEATH THE DE- SIRED FLAVOR. 3. PRESS AND HOLD THE DISPENSING BUTTON FOR THIS FLAVOR. 4. RELEASE THE BUTTON WHEN THE CUP IS ¾ FULL. AFTER THE BUTTON IS RELEASED, PRODUCT WILL CONTINUE FLOWING AND COMPLETELY FILL THE CUP. - Page 3 Cleaning the Curtis Primo Cappuccino GT Beverage Dispenser CAUTION - Do not use cleansers, liquid bleach, powders or any other substance containing chlorine. These products promote corrosion and will pit the stainless steel. THE USE OF THESE PRODUCTS WILL VOID YOUR WARRANTY.
- Page 4 Heating system SENSOR ERROR or a WATER ERROR. Press > to continue to the next menu. Banner Name (Factory Set to Curtis) Press to display letters, press to change letters or > to move places and EX to exit when complete.
-
Page 5: Anti-Tip Brackets
One bracket is required, two are optional. Drill pilot holes. Drill a ⅛” pilot hole where the screws fasten the bracket to the counter top. PCGT6 UNIT Mount the bracket onto the counter top. VIEWED FROM TOP Insert the two screws into the holes on the bracket and secure the bracket fasten the bracket with the screws. - Page 6 COVER, TOP PCGT4/5 WC-68121 PANEL, RIGHT SIDE PCGT CA-1110-01 FILM, CURTIS LOGO PCGT-4/5 CA-1174 LAMP, LED ASSY 11-12W 36VDC WC-37550* KIT, UCM & LABEL PCGT6 CA-1107 WINDOW, FRONT CLEAR PCGT4/5 WC-39950 MEMBRANE CNTRL PNL PCGT6 WC-38569 LABEL, SPLASH PANEL PCGT6 WC-68222...
- Page 7 KIT, RPL DUMP VALVE FOR WC-880E PCGTs WC-2627* BUSHING, CONICAL WC-904-04* HEATING ELEMENT, 1.6KW W/JAMNUTS WC-1438-101* SENSOR, TEMPERATURE TANK WC-4394 GUARD, SHOCK HEATING ELEMENT WC-523* THERMOSTAT, MNL RESET 120/240V 25A WC-62059 TANK COMPLETE, 120VAC, 1600W PCGT6 * RECOMMENDED PARTS TO STOCK...
- Page 8 CANISTER ASSY, 10LB RIGHT CA-1026-07 ELBOW, CANISTER LEFT HAND CA-1175K KIT, POWER SUPPLY FOR LED LAMP PCGTs WC-10013 CONTROL POWER MODULE - UPM PCGT6 WC-37123 KIT, FAN EXTRACT 120V 29 CFM & BRACKET CA-1011-05* BULKHEAD FITTING, WATER WC-37118* KIT, WHIPPER PLATE 3/PKG...
-
Page 9: Illustrated Parts
MIXING BOWL CA-1008-07 PROPELLER, WHIPPER CHAMBER CA-1006-06 CHAMBER, WHIPPER OFFSET CA-1037-3Y TUBE, EXTENSION 3.0”LG YELLOW WC-13467 HARNESS ASSY, COMPLETE PCGT6 WC-37174* KIT, GEAR MOTOR AND GEAR PCGT CA-1095* CONNECTOR, ORIFICE WATER WC-3739* KIT, WHIPPER MOTOR, SCREWS & INSTRUCTION WC-8556* HEATSINK & TRIAC ASSY 40A 600V... -
Page 10: Electrical Diagram
Electrical Diagram... - Page 11 Page Intentionally Left Blank...
- Page 12 The warranty covers original equipment at time of purchase only. The Wilbur Curtis Co., Inc., assumes no responsibility for substitute replace- ment parts installed on Curtis equipment that have not been purchased from Wilbur Curtis Co., Inc. The Wilbur Curtis Co., Inc. will not accept any responsibility if the following conditions are not met.
Need help?
Do you have a question about the PCGT6 and is the answer not in the manual?
Questions and answers