Ashley AGVF340 Installation And Operating Manual
Hide thumbs
Also See for AGVF340:
- Installation and operating manual (40 pages) ,
- Owner’s instruction and operation manual (29 pages) ,
- Installation and operating manual (37 pages)
Table of Contents
Advertisement
Quick Links
Installation and Operating Manual
FREESTANDING FIREPLACE, AS A ZERO CLEARANCE FIREPLACE OR
WARNING: IF THE INFORMATION IN THIS MANUAL IS NOT FOLLOWED EXACTLY, A FIRE OR
EXPLOSION MAY RESULT CAUSING PROPERTY DAMAGE, PERSONAL INJURY OR LOSS OF LIFE.
•
Do not store or use gasoline or other flammable vapors and liquids in vicinity of this or any other appliance.
WHAT TO DO IF YOU SMELL GAS:
•
Do not try to light any appliance.
•
Do not touch any electrical switch; do not use any phone in your building.
•
Immediately call your gas supplier from a neighbor's phone. Follow gas supplier's instructions
•
If you cannot reach your gas supplier, call fire department.
•
Installation and service must be performed by a qualified installer, service agency or gas supplier.
This is an unvented gas-fired heater. It uses air (oxygen) from room in which it is installed. Provisions for
adequate combustion and ventilation air must be provided. Refer to section," Producing Adequate Air
For Combustion And Ventilation". This appliance may be installed in an aftermarket, permanently located,
manufactured (mobile) home, where not prohibited by local codes. This appliance is only for use with type
of gas indicated on rating plate. This appliance is not convertible for use with other gases.
INSTALLER: Leave this manual with appliance.
CONSUMER: Retain this manual for future reference.
This appliance is intended for supplemental heating.
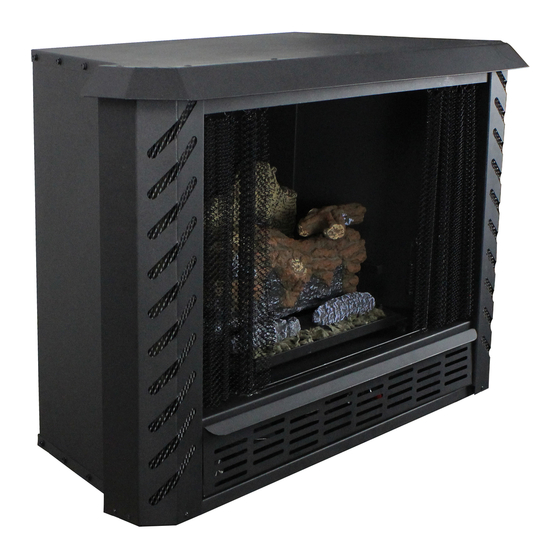
AGVF340
MAY BE INSTALLED IN A SOLID FUEL BURNING FIREPLACE, AS A
WITH AN OPTIONAL WOODEN SURROUND
Certified for installations in the USA
Approved for installation in mobile homes
This appliance may be installed in an aftermarket,
permanently located, manufactured (mobile) how,
where not prohibited by local codes.
This appliance is only for use with the type of gas
indicated on the rating plate. This appliance is not
convertible for use with other gases.
852372C-4802E
Advertisement
Table of Contents

Related Manuals for Ashley AGVF340


Summary of Contents for Ashley AGVF340
- Page 1 Installation and Operating Manual AGVF340 MAY BE INSTALLED IN A SOLID FUEL BURNING FIREPLACE, AS A FREESTANDING FIREPLACE, AS A ZERO CLEARANCE FIREPLACE OR WITH AN OPTIONAL WOODEN SURROUND Certified for installations in the USA Approved for installation in mobile homes WARNING: IF THE INFORMATION IN THIS MANUAL IS NOT FOLLOWED EXACTLY, A FIRE OR EXPLOSION MAY RESULT CAUSING PROPERTY DAMAGE, PERSONAL INJURY OR LOSS OF LIFE.
-
Page 2: Safety Information Warnings
SECTION I IMPORTANT: READ THIS OWNER’S MANUAL CAREFULLY AND COMPLETELY BEFORE TRYING TO ASSEMBLE, OPERATE, OR SERVICE APPLIANCE. IMPROPER USE OF THESE LOGS CAN CAUSE SERIOUS INJURY OR DEATH FROM BURNS, FIRE, EXPLOSION AND CARBON MONOXIDE POISONING. IMPORTANT: VENT-FREE HEATERS ADD MOISTURE TO AIR. ALTHOUGH THIS IS BENEFICIAL, INSTALLING HEATER IN ROOMS WITHOUT ADEQUATE VENTILATION MAY CAUSE MILDEW TO FORM FROM TOO MUCH MOISTURE. - Page 3 7. “This heater shall not be installed in unusually tight 20. All heater screens must be kept closed when construction unless provisions are provided for operating gas logs. adequate combustion and ventilation air.” See “Producing Adequate Air For Combustion And 21.
- Page 4 SECTION II SAFETY INFORMATION WARNINGS The fireplace needs to be prepared before installing heater. A. Turn off the gas supply to fireplace. “WARNING: BEFORE INSTALLING IN A SOLID-FUEL BURNING FIREPLACE, CHIMNEY FLUE AND FIREBOX MUST BE CLEANED OF SOOT, CREOSOTE, ASHES AND LOOSE PAINT BY A QUALIFIED CHIMNEY CLEANER.”...
-
Page 5: Gas Connection
INSTALLATION AND CLEARANCES To ensure a safe installation into a masonry or factory built fireplace, following instructions must be carefully followed: 1. Sidewall Clearances: Clearance from side of fireplace opening to any adjacent combustible wall should not be less than: right side 7”, left side 7”. -
Page 6: Log Set Placement
LOG SET PLACEMENT E.S.B. LOG SET PLACEMENT FOR MODEL 384 “MILLIVOLT ONLY” WARNING: FAILURE TO POSITION PARTS IN ACCORDANCE WITH THESE DIAGRAMS OR FAILURE TO USE ONLY PARTS SPECIFICALLY APPROVED WITH THIS HEATER MAY RESULT IN PROPERTY DAMAGE OR PERSONAL INJURY. WARNING: POSITIONING OF LOGS IS VERY CRITICAL (SEE DIAGRAM ABOVE) (1) Rear Log, (2) Middle Log, (3) Left Top Middle Log, (4) Right Top Middle Log (5), Left Front Log (6), Right Front Log (7), Glowing Embers in front of 5 &... -
Page 7: Gas Pressure Check
GAS PRESSURE CHECK Check inlet pressure to burner to ensure that it is as shown in table below. NOTE: The pressure check point is located on the right side of valve facing burner, for SIT Millivolt. Appliance and its appliance main gas valve must be disconnected from the gas supply piping system during any pressure testing of that system at test pressures in excess of 1/2 psi (3.5kPa). -
Page 8: Operation
OPERATING INSTRUCTIONS Before operating this appliance, proceed through following checklist. 1. Read and understand these instructions before operating this appliance. 2. Check that there are no gas leaks. If you smell gas do not attempt to light this appliance. 3. Verify that log placement is correct. WARNING: ANY CHANGE TO THIS HEATER OR ITS CONTROLS CAN BE DANGEROUS. -
Page 9: Lighting Instructions
LIGHTING INSTRUCTIONS 1. STOP! Read the safety information on reverse side of this label. 2. Make sure manual shutoff valve is fully closed. If equipped with thermostat, set to lowest setting. 3. Turn off all electrical power to appliance. 4. Open access door located at bottom of front of appliance. 5. -
Page 10: To Turn Off Gas To Appliance
11. Turn control knob counterclockwise to “ON”. 12. If using the unit without a wall thermostat place the Off/Manual (Off/Man) switch into the manual position. If using a wall thermostat place Auto/Off /Manual (Man) switch to Auto or Off position and place thermostat to a setting higher than room temperature. -
Page 11: Manual Lighting Procedure
MANUAL LIGHTING PROCEDURE 1. If pilot cannot be lit with piezo, it can be manually lit with the use of a paper match and a lighter rod. 2. Open access panel door located at bottom front of appliance. 3. Place match in holder and light. With left hand, turn control knob counterclockwise to “PILOT”position. Press in gas control knob for fifteen (15) seconds. -
Page 12: Wiring Diagram
WIRING DIAGRAM WARNING: CHILDREN AND ADULTS SHOULD BE ALERTED TO HAZARDS OF HIGH SURFACE TEMPERATURES AND SHOULD STAY AWAY TO AVOID BURNS OR CLOTHING IGNITION. YOUNG CHILDREN SHOULD BE CAREFULLY SUPERVISED WHEN THEY ARE IN SAME ROOM WITH APPLIANCE WARNING: DO NOT PLACE CLOTHING OR OTHER FLAMMABLE MATERIAL ON OR NEAR APPLIANCE. -
Page 13: Left Side
SECTION III INSTALLATION MODEL IN SOLID FUEL BURNING FIREPLACES This model may be installed in a masonry fireplace. The figure below demonstrates the required dimensions. NOTE: See “Producing Adequate Air for Combustion And Ventilation” NOTE: Installer of this appliance must mechanically (peel and stick) attach marking supplied with this unvented appliance before installing to inside of firebox of solid-fuel burning fireplace or listed ventless firebox enclosure into which unvented fireplace insert is installed. -
Page 14: Optional Kits
SECTION IV OPTIONAL KITS There are optional kits available for your stove. These are listed below: • Insert Fireplace Facade • Wooden Surround • Brick Panel Kit • Stainless Steel Kit For more information on these kits contact your local representative or appliance manufacture. Mineral Boards Stainless Steel Insert Brick Boards... -
Page 15: Zero Clearance Installation
SECTION V ZERO CLEARANCE INSTALLATION The installation must conform with local codes or in the absence of local codes, with National Fuel Gas Code, ANSI Z223.1/NFPA54. This appliance may be installed in an After-Market* Manufactured (Mobile) Home, where not prohibited by state or local codes. - Page 16 ZERO CLEARANCE STANDOFF(S) ASSEMBLY NOTE: All Standoff must be attached to the appliance before installing as a Zero Clearance appliance. Follow the instructions given in the diagrams below exactly. NOTE: If installing with the mantle kit refer to the instructions included with the mantle kit for correct installation. Top Standoff (2 per unit) Side Standoff...
-
Page 17: Side View
FIREPLACE CLEARANCES (ZC) Entire fireplace can be elevated above floor to achieve a raised hearth effect. This can be done by Fireplace may be placed directly on a combustible adding a small platform to achieve desired height. floor, against a combustible wall at marked NOTE: Wiring for lower blower must be installed during clearances or on a raised wooden platform. - Page 18 FINISHING YOUR FIREPLACE (ZC) There is a wide variety of finishing material available for your fireplace from formal wall treatments with marble and mantels, to rustic wood paneling, stone or brick. Noncombustible materials used in this installation such as slate, tile, marble, etc. must be at least 1/2" thick. IT IS IMPORTANT THAT BLACK FACE OF FIREPLACE NOT BE COVERED WITH ANY TYPE OF COMBUSTIBLE MATERIAL.
-
Page 19: Freestanding Installation
SECTION VI FREESTANDING INSTALLATION 1. Determine exact position of your gas heater. NOTE: Due to high temperatures, this heater should be located out of traffic areas and away from furniture and draperies. NOTE: For safe installation the minimum clearances must be met. See Figure below. 1-1/2”... -
Page 20: Alcove Installation
FREESTANDING LEGS INSTALLATION To make this model free standing using cast legs, follow the instructions below: 1. Place heater on its back. 2. Your heater is equipped with four leg mounting nuts. Place a leg at each nut and secure leg with bolts provided. 3. -
Page 21: Section Viii
SECTION VIII PRODUCING ADEQUATE AIR FOR COMBUSTION AND VENTILATION This section is for residential or manufactured (mobile) installation “This heater shall not be installed in unusually tight construction unless provisions are adequate for combustion and ventilation air.” NOTE: This heater shall not be installed in a room or space unless the required volume of indoor combustion air is provided by the method in National Fuel Gas Code, ANSIZ223.1/NFPA 54, the International Fuel Gas Code, or applicable codes. - Page 22 Determine the volume of the space (length x width x height). Length x Width x Height = _____________cu.ft.(volume of space) EXAMPLE: 20 ft.(Length) x 16 ft.(Width) x 8 ft.(ceiling Height)= 2560 cu. ft. (volume of space) If additional ventilation to adjoining room is supplied with grills or openings, add the volume of these rooms to the total volume of the space.
-
Page 23: Air For Combustion And Ventilation Inside Building
SECTION IX AIR FOR COMBUSTION AND VENTILATION INSIDE BUILDING This fresh air would come from an adjoining unconfined space. When venting to an adjoining space, you must provide two permanent openings: one within 12" of ceiling and one within 12" of floor, on wall connecting two spaces. -
Page 24: Ventilation Air From Outdoors
SECTION X AIR FOR COMBUSTION AND VENTILATION OUTDOORS Provide extra fresh air by using ventilation grills or ducts. You must provide two permanent openings: one within 12" of ceiling and one within 12" of floor. Connect these items directly to outdoors. These spaces include attics and crawl spaces. -
Page 25: After Market Mobile Home Installation
SECTION XI AFTER MARKET MOBILE HOME INSTALLATION NOTE: See “Producing Adequate Air For Combustion And Ventilation” THIS APPLIANCE MAY BE INSTALLED IN AN AFTERMARKET*, PERMANENTLY LOCATED, MANUFACTURED (MOBILE) HOME, WHERE NOT PROHIBITED BY LOCAL CODES. *After Market: Completion of sale, not for purpose of resale from manufacturer. THIS APPLIANCE IS ONLY FOR USE WITH TYPE OF GAS INDICATED ON RATING PLATE. -
Page 26: Requirements For The Commonwealth Of Massachusetts
REQUIREMENTS FOR THE COMMONWEALTH OF MASSACHUSETTS This product must be installed by a licensed plumber or gas fitter when installed within the Commonwealth of Massachusetts. NOTE REGARDING VENTED PRODUCTS Flex line installation must not exceed 36 inches and must have a T shutoff valve. Any residence with a direct vent product must have a CO detector installed in the residence. - Page 27 GAS EQUIPMENT VENTING SYSTEM PROVIDED When the manufacturer of Product Approved side wall horizontally vented gas equipment provides a venting system design or venting system components with the equipment, the instructions provided by the manufacturer for installation of the equipment and the venting system shall include: •...
-
Page 28: Troubleshooting
TROUBLESHOOTING WARNING: TURN OFF, UNPLUG HEATER AND LET COOL BEFORE SERVICING. ONLY A QUALIFIED SERVICE PERSON SHOULD SERVICE AND REPAIR HEATER. CAUTION: NEVER USE A WIRE, NEEDLE OR SIMILAR OBJECT TO CLEAN ODS/PILOT. THIS CAN DAMAGE ODS/PILOT. OBSERVED PROBLEM POSSIBLE CAUSE SOLUTION Igniter button is pressed no spark Igniter electrode positioned... - Page 29 OBSERVED PROBLEM POSSIBLE CAUSE SOLUTION ODS/PILOT lights but flame goes Control knob is not fully pressed in Press control knob completely out when control knob is released Control knob not pressed in long enough After ODS/Pilot lights keep control knob pressed thirty (30) seconds Safety interlock system has been triggered (if Wait one (1) minute for safety interlock...
-
Page 30: If You Smell Gas
WARNING: IF YOU SMELL GAS: • SHUT OFF GAS SUPPLY • DO NOT TRY TO LIGHT APPLIANCE • DO NOT TOUCH ANY ELECTRICAL SWITCH; DO NOT USE ANY PHONE IN YOUR BUILDING • IMMEDIATELY CALL YOUR GAS SUPPLIER FROM A NEIGHBOR’S PHONE. -
Page 31: Limited Warranty
Limited Warranty VENT-FREE HEATERS United States Stove Company warrants to the original purchaser its products against premature failure of any component due to workmanship, quality, or materials as follows: TIME PERIOD: Controls/Valves ................... One Year From Time Of Purchase Thermocouple/Thermopile ................One Year From Time Of Purchase All Electrical Components ................ - Page 32 SIT MILLIVOLT VALVE BASE...
-
Page 33: Replacement Parts
REPLACEMENT PARTS PART NUMBER PART DESCRIPTION 81212.2 Flex Tube 89761 Piezo Ignitor 81196 Control Valve (LP) 81198 Control Valve (NAT) 81212-6 Lower Burner 81212.8 On/Off Valve 81212.14 Switch (Auto/Off/Manual) 81212.10 Primary Gas Tubes 81212.9 Male Run Tee Fitting 81212.11 Upper Burner Gas Tube 81212.12 Lower Burner Gas Tube 89921... -
Page 34: How To Order Repair Parts
HOW TO ORDER REPAIR PARTS THIS MANUAL WILL HELP YOU OBTAIN EFFICIENT, DEPENDABLE SERVICE FROM YOUR APPLIANCE DEALER, AND ENABLE YOU TO ORDER REPAIR PARTS CORRECTLY. KEEP THIS MANUAL IN A SAFE PLACE FOR FUTURE REFERENCE. WHEN WRITING, ALWAYS GIVE THE FULL MODEL NUMBER WHICH IS ON THE NAMEPLATE ATTACHED TO THE HEATER. - Page 35 WARRANTY INFORMATION CARD Name__________________________________________ Telephone #: (_____)_____________ City____________________________________________ State_______ Zip_________________ Email Address __________________________________________________________________ Model # of Unit________________________________ Serial #___________________________ Fuel Type: qWood qOther _________________________ qCoal qPellet qGas Place of Purchase (Retailer)______________________________________________________ City____________________________________________ State_______ Zip_________________ If internet purchase, please list website address___________________________________ Date of Purchase _______________________________________________________________ Reason for Purchase: qAlternative Heat...
- Page 36 Ê É Fold Here Fold Here Fold Here PLACE STAMP HERE United States Stove Company P.O. Box 151 South Pittsburg, TN 37380...
Need help?
Do you have a question about the AGVF340 and is the answer not in the manual?
Questions and answers