Black Box LW6005A User Manual
Pure networking 802.11g wireless router
Hide thumbs
Also See for LW6005A:
- Specification (6 pages) ,
- Specifications (6 pages) ,
- Specifications (6 pages)

Subscribe to Our Youtube Channel
Related Manuals for Black Box LW6005A


Summary of Contents for Black Box LW6005A
- Page 1 © Copyright 2004. Black Box Corporation. All rights reserved. 1000 Park Drive • Lawrence, PA 15055-1018 • 724-746-5500 • Fax 724-746-0746...
-
Page 2: Wireless Router
Order toll-free in the U.S.: Call 877-877-BBOX (outside U.S. call 724-746-5500) SUPPORT FREE technical support 24 hours a day, 7 days a week: Call 724-746-5500 or fax 724-746-0746 INFORMATION Mailing address: Black Box Corporation, 1000 Park Drive, Lawrence, PA 15055-1018 Web site: www.blackbox.com • E-mail: info@blackbox.com... -
Page 4: Federal Communications Commission
FCC AND IC RFI STATEMENTS FEDERAL COMMUNICATIONS COMMISSION and INDUSTRY CANADA RADIO FREQUENCY INTERFERENCE STATEMENTS Class B Digital Device. This equipment has been tested and found to comply with the limits for a Class B computing device pursuant to Part 15 of the FCC Rules. These limits are designed to provide reasonable protection against harmful interference in a residential installation. - Page 5 PURE NETWORKING 802.11G WIRELESS ROUTER NORMAS OFICIALES MEXICANAS (NOM) ELECTRICAL SAFETY STATEMENT INSTRUCCIONES DE SEGURIDAD 1. Todas las instrucciones de seguridad y operación deberán ser leídas antes de que el aparato eléctrico sea operado. 2. Las instrucciones de seguridad y operación deberán ser guardadas para referencia futura.
- Page 6 NOM STATEMENT 12. Precaución debe ser tomada de tal manera que la tierra fisica y la polarización del equipo no sea eliminada. 13. Los cables de la fuente de poder deben ser guiados de tal manera que no sean pisados ni pellizcados por objetos colocados sobre o contra ellos, poniendo particular atención a los contactos y receptáculos donde salen del aparato.
- Page 7 PURE NETWORKING 802.11G WIRELESS ROUTER TRADEMARKS USED IN THIS MANUAL Macintosh is a registered trademark of Apple Computer, Inc. pcANYWHERE is a registered trademark of Dynamic Microprocessor Associates, Inc. Microsoft, Windows, and Windows NT are either registered trademarks or trademarks of Microsoft Corporation in the United States and/or other countries. Netscape Navigator is a registered trademark of Netscape Communications Corporation.
-
Page 8: Table Of Contents
CONTENTS Contents Chapter Page 1. Specifications ........... 7 2. - Page 9 Calling Black Box ........
-
Page 10: Specifications
CHAPTER 1: Specifications 1. Specifications Standards: 802.11g, PPPoE, PPTP, L2TP, IEEE 802.3 (10 Mbps), IEEE 802.3u (100 Mbps), WEP, WPA, WES CPU: ADMtek 6120 (175-MHz MIPS R4000) Memory: Flash: 2 MB NOR; RAM: 16 MB DRAM Speed: (1) WAN and (4) LAN ports: 10 or 100 Mbps, autosensing Internet Access Throughput: Up to 50 Mbps Users Supported: Up to 253 Connectors: (5) RJ-45: (4) LAN, (1) WAN... -
Page 11: Introduction
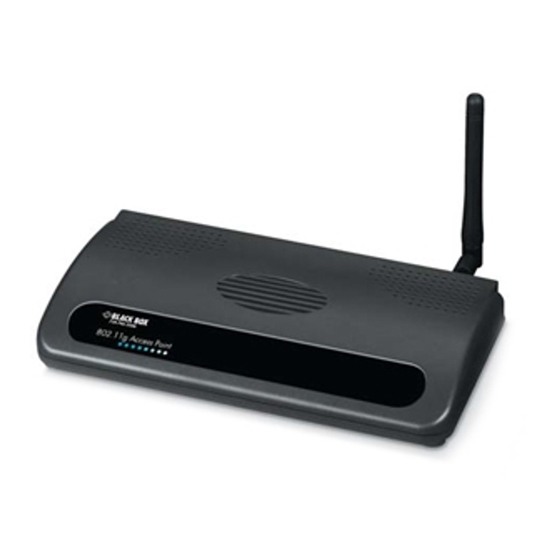
PURE NETWORKING 802.11G WIRELESS ROUTER 2. Introduction 2.1 Overview The Pure Networking 802.11g Wireless Router is a cost-effective IP sharing router that enables multiple users to share the Internet through an ADSL or cable modem. Simply configure your router’s Internet connection settings, plug your PC into the LAN port, and you’re ready to share files and access the Internet. -
Page 12: The Router Illustrated
CHAPTER 2: Introduction • (1) power adapter • (1) 2.2-dBm dipole antenna 2.4 The Router Illustrated 2.4.1 B ANEL Figure 2-1 shows the router’s back panel. Numbers 1–5 in Figure 2-1 correspond to Numbers 1–5 in the text following Figure 2-1. ➀... -
Page 13: Front Panel
PURE NETWORKING 802.11G WIRELESS ROUTER ➃ Power connector. ➄ Antenna connector. 2.4.2 F RONT ANEL On the router’s front panel are LED lights that inform you of the router’s current status. Table 2-1 and Figure 2-2 describe these LEDs. Numbers 1–6 in Figure 2-2 correspond to numbers 1–6 in Table 2-1. - Page 14 CHAPTER 2: Introduction Table 2-1. Front-panel LEDs and their functions. Status Description ➀ PWR Router’s power supply is on. ➁ WAN 10/100M WAN port 100 Mbps is connected. WAN port 10 Mbps is connected. ➂ WAN LNK/ACT WAN is connected. No WAN connection.
-
Page 15: Installation
Pure Networking 802.11g WAN port to cable or Wireless Router DSL modem (LW6005A) Switch/hub Figure 3-1. Typical application. 2. Set your LAN PC client so that it can obtain an IP address automatically. All LAN clients require an IP address. Just like an address, it allows LAN clients to find one another. - Page 16 CHAPTER 3: Installation Configure your PC to obtain an IP address automatically Because the router’s DHCP is on, you only have to configure your PC to obtain an IP address automatically. Once you’ve configured your PC to obtain an IP address automatically, the router obtains its IP address automatically. Step 2 will show you how to configure your PC so that it can obtain an IP address automatically for either Windows 95/98/Me (step 2a), Windows XP...
- Page 17 PURE NETWORKING 802.11G WIRELESS ROUTER Figure 3-2. TCP/IP Properties screen, IP Address tab. 7. Check each of the tabs and verify the following settings: • Bindings: Check Client for Microsoft Networks and File and Printer Sharing for Microsoft Networks. • Advanced: Select the router’s configuration. •...
- Page 18 CHAPTER 3: Installation • IP Address: Select Obtain IP address automatically. 8. Reboot the PC. Your PC will now obtain an IP address automatically from your router’s DHCP server. NOTE Please make sure that the router’s DHCP server is the only DHCP server available on your LAN.
- Page 19 PURE NETWORKING 802.11G WIRELESS ROUTER Figure 3-3. Internet Protocol (TCP/IP) Properties screen, General tab. 5. Click on the OK button to confirm the setting. Your PC will now obtain an IP address automatically from your router’s DHCP server. NOTE Make sure that the router’s DHCP server is the only DHCP server available on your LAN.
- Page 20 CHAPTER 3: Installation 2. Double-click on the Network and Dial-up Connections icon. In the Network and Dial-up Connection window, double-click on the Local Area Connection icon. The Local Area Connection window will appear. 3. In the Local Area Connection window, click on the Properties button. 4.
- Page 21 PURE NETWORKING 802.11G WIRELESS ROUTER 6. Click on the OK button to confirm the setting. Your PC will now obtain an IP address automatically from your router’s DHCP server. NOTE Make sure that the router’s DHCP server is the only DHCP server available on your LAN.
- Page 22 CHAPTER 3: Installation Figure 3-5. Microsoft TCP/IP Properties screen, IP Address tab. 6. Check each of the tabs and verify the following settings: • IP Address: Select Obtain an IP address from a DHCP server. • DNS: Leave all fields blank. •...
- Page 23 PURE NETWORKING 802.11G WIRELESS ROUTER NOTE Make sure that the router’s DHCP server is the only DHCP server available on your LAN. Once you’ve configured your PC to obtain an IP address automatically, proceed to step 3 (below). 3. Once you have configured your PCs to obtain an IP address automatically, the router’s DHCP server will automatically give your LAN clients an IP address.
- Page 24 CHAPTER 3: Installation Figure 3-7. Enter the password and user name. 6. The Home screen (shown in Figure 3-8) will appear. The Home screen is divided into four sections: Quick Setup Wizard, General Setup, Status Information, and Tools. Table 3-1 also describes these sections. •...
- Page 25 PURE NETWORKING 802.11G WIRELESS ROUTER Figure 3-8. Home screen. Table 3-1. Home screen options. Menu Description Quick Setup Wizard Select your Internet connection type, then type in the configurations needed to connect to your Internet Service Provider (ISP). See Chapter 4.
- Page 26 CHAPTER 3: Installation Table 3-1 (continued). Home screen options. Menu Description General Setup This section contains configurations for the router’s advanced functions such as bridge, address mapping, virtual server, access control, hacker attack prevention, DMZ, special applications, and other functions to meet your LAN requirements.
- Page 27 PURE NETWORKING 802.11G WIRELESS ROUTER Figure 3-9. Select the Home screen options.
-
Page 28: Quick Setup Wizard
CHAPTER 4: Quick Setup Wizard 4. Quick Setup Wizard The Quick Setup Wizard is designed to get you using the router as quickly as possible. You’re required to fill in only the information necessary to access the Internet. Once you click on the Quick Setup Wizard in the Home screen (see Figure 3-8), Figure 4-1 should appear. -
Page 29: Broadband Type
PURE NETWORKING 802.11G WIRELESS ROUTER Table 4-1. Time zone parameters. Parameter Description Set Time Zone Select the time zone of the country you are currently in. The router will set its time based on your selection. Time Server Address You can manually assign the time server’s address if the default time server does not work. - Page 30 CHAPTER 4: Quick Setup Wizard Figure 4-2. Setting the broadband type. Table 4-2 lists the router’s broadband type options, including ISP requirements. Table 4-2. Broadband type parameters. Parameter Description Cable Modem Your ISP will automatically give you an IP address. Fixed-IP xDSL Your ISP has given you an IP address already.
-
Page 31: Cable Modem
PURE NETWORKING 802.11G WIRELESS ROUTER Click on one of the broadband types and click on OK, then proceed to the manual’s relevant sub-section (4.2.1, 4.2.2, 4.2.3, or 4.2.4). Click on Back (Figure 4-2; scroll down to see this button) to return to the previous screen. 4.2.1 C ABLE ODEM... - Page 32 CHAPTER 4: Quick Setup Wizard Table 4-3. Cable modem parameters. Parameters Description Host Name If your ISP requires a host name, type in the host name provided by your ISP; otherwise, leave it blank if your ISP does not require a host name. MAC Address Your ISP may require a particular MAC address in order for you to connect to the Internet.
-
Page 33: Fixed-Ip Xdsl
PURE NETWORKING 802.11G WIRELESS ROUTER 4.2.2 F IXED Select Fixed-IP xDSL (see Figure 4-4) if your ISP has given you a specific IP address to use. Your ISP should provide all the information required. Figure 4-4. Fixed-IP xDSL. Table 4-4 lists the router’s Fixed-IP xDSL options. Table 4-4. -
Page 34: Pppoe Xdsl
CHAPTER 4: Quick Setup Wizard Table 4-4 (continued). Fixed-IP xDSL parameters. Parameters Description Back Click on this button to return to the previous screen. Click on this button to save your changes. Click on the OK button. The configuration for the Fixed-IP xDSL connection is complete. - Page 35 PURE NETWORKING 802.11G WIRELESS ROUTER Table 4-5 lists the router’s PPPoE xDSL options. Table 4-5. PPPoE xDSL parameters. Parameter Description User Name Enter the user name provided by your ISP for the PPPoE connection. Password Enter the password provided by your ISP for the PPPoE connection Service Name (This is optional.) Enter the service name if your ISP...
- Page 36 CHAPTER 4: Quick Setup Wizard Table 4-5 (continued). PPPoE xDSL parameters. Parameter Description Connect button Click on this button to connect to the Internet via PPPoE. Disconnect button Click on this button to disconnect from the Internet via PPoE. Idle Time You can specify an idle time threshold (minutes) for the WAN port.
-
Page 37: Pptp Xdsl
PURE NETWORKING 802.11G WIRELESS ROUTER 4.2.4 PPTP Select PPTP xDSL if your ISP requires the PPTP protocol for connecting to the Internet. Your ISP should provide all the information required in this section (see Figure 4-6). Figure 4-6. PPTP xDSL. Table 4-6 lists the router’s PPTP options shown in Figure 4-6. - Page 38 CHAPTER 4: Quick Setup Wizard Table 4-6. PPTP xDSL parameters. Parameter Description Obtain an IP address The ISP requires you to obtain an IP address by automatically DHCP automatically before connecting to the PPTP server. Use the following IP address The ISP gives you a static IP to be used to connect to the PPTP server.
- Page 39 PURE NETWORKING 802.11G WIRELESS ROUTER Table 4-6 (continued). PPTP xDSL parameters. Parameter Description Connection Type If you select Continuous from the drop-down menu, the router will always connect to the ISP. If the WAN line breaks down and links again, the router will auto-reconnect to the ISP.
- Page 40 CHAPTER 4: Quick Setup Wizard NOTE This idle timeout function may not work because of some network application software’s abnormal activities, computer virus, or hacker attacks from the Internet. For example, some software sends network packets to the Internet in the background, even when you are not using the Internet.
-
Page 41: General Setup
PURE NETWORKING 802.11G WIRELESS ROUTER 5. General Setup Once you click on the General Setup button from the Home screen, the screen in Figure 5-1 appears. If you have already configured the Quick Setup Wizard (Chapter 4), you do not need to configure anything in the General Setup screen for you to start using the Internet. - Page 42 CHAPTER 5: General Setup Table 5-1. General Setup options. Menu Description System This section allows you to set the router’s system time zone, password, and remote management administrator. This section allows you to select the connection method in order to establish a connection with your ISP (same as the Quick Setup Wizard, Chapter 4).
-
Page 43: System
PURE NETWORKING 802.11G WIRELESS ROUTER 5.1 System The system screen (see Figure 5-2) allows you to specify a time zone, to change the system password, and to specify a remote management user for the router. Figure 5-2. System settings screen. Table 5-2 lists the router’s system settings options. -
Page 44: Time Zone
CHAPTER 5: General Setup Select one of the previous three system settings selections and proceed to the manual’s relevant sub-section (Section 5.1.1, 5.1.2, or 5.1.3). 5.1.1 T The Time Zone (see Figure 5-3) allows your router to base its time on the settings configured here. - Page 45 PURE NETWORKING 802.11G WIRELESS ROUTER Table 5-3 (continued). Time Zone parameters. Parameter Description Start Daylight Select the day you want to start Daylight Savings Time. Savings Time End Daylight Select the day you want to end Daylight Savings Time. Savings Time Apply button Click on this button to save your changes.
-
Page 46: Password Settings
CHAPTER 5: General Setup 5.1.2 P ASSWORD ETTINGS You can change the password (see Figure 5-4) required to log into the router’s system Web-based management. By default, there is no password. Assign a password to the administrator as soon as possible and store it in a safe place. Passwords can contain up to 12 alphanumeric characters and are case-sensitive. - Page 47 PURE NETWORKING 802.11G WIRELESS ROUTER Table 5-4. Password settings parameters. Parameters Description Current Password Enter your current password for the remote management administrator to login to your router. New Password Enter your new password. Confirmed Enter your new password again for verification purposes. Password Apply button Click on this button to save your changes.
-
Page 48: Remote Management
CHAPTER 5: General Setup 5.1.3 R EMOTE ANAGEMENT The remote management function (see Figure 5-5) gives an Internet host the ability to configure the router from a remote site. Enter the designated host IP address in the Host Address field. Figure 5-5. - Page 49 PURE NETWORKING 802.11G WIRELESS ROUTER Table 5-5. Remote management parameters. Parameters Description Host Address This is the host’s IP address in the Internet (not the local IP address) that will have management/configuration access to the router from a remote site. If you are at home and your home IP address has been designated as the router’s remote management host IP address (located in your company office), then you are able to configure...
-
Page 50: Wan
CHAPTER 5: General Setup Click on the Apply button at the bottom of the screen to save the above configurations. You can now configure other advanced sections or start using the router (with the advanced settings in place). 5.2 WAN Use the WAN Settings screen (Figure 5-7) if you have already configured the Quick Setup Wizard section and you would like to change your Internet connection type. -
Page 51: Dynamic Ip
PURE NETWORKING 802.11G WIRELESS ROUTER Table 5-6 (continued). WAN settings parameters. Parameters Description Static IP address Your ISP has given you an IP address already. PPPoE Your ISP requires you to use a PPPoE connection. PPTP Your ISP requires you to use a Point-to-Point Tunneling Protocol (PPTP) connection. -
Page 52: Pptp
CHAPTER 5: General Setup 5.2.4 PPTP Select PPTP if your ISP requires the PPTP protocol for connecting to the Internet. Your ISP should provide all the information required in this section. (See Section 4.2.4, PPTP xDSL, for more details.) 5.2.5 L2TP Select L2TP if your ISP requires the L2TP protocol for connecting to the Internet. - Page 53 PURE NETWORKING 802.11G WIRELESS ROUTER Table 5-7 (continued). L2TP parameters. Parameter Description Use the following IP address The ISP give you a static IP to be used to connect to the L2TP server. IP Address This is the IP address that your ISP has given you to establish an L2TP connection.
- Page 54 CHAPTER 5: General Setup Table 5-7 (continued). L2TP parameters. Parameter Description Connection Type (continued) If you select Connect On Demand, the router will auto-connect to the ISP when someone wants to use the Internet and stay connected until the WAN idle timeout. The router will close the WAN connection if the time period that no one is using the Internet exceeds the idle time.
-
Page 55: Telstra Big Pond
PURE NETWORKING 802.11G WIRELESS ROUTER NOTE This idle timeout function may not work because of some network application software’s abnormal activities, computer virus, or hacker attacks from the Internet. For example, some software sends network packets to the Internet in the background, even when you are not using the Internet. -
Page 56: Dns
CHAPTER 5: General Setup Table 5-8. Telstra Big Pond parameters. Parameter Description User Name Enter the user name provided by your ISP for the Telstra Big Pond connection. Password Enter the password provided by your ISP for the Telstra Big Pond connection. User decide login Check this box if you want to assign the IP of Telstra Big server manually... - Page 57 PURE NETWORKING 802.11G WIRELESS ROUTER Figure 5-10. DNS screen. Table 5-9 lists the router’s DNS options. Table 5-9. DNS parameters. Parameters Description Domain Name Server This is the ISP’s DNS server IP address provided, or (DNS) Address specify your own preferred DNS server IP address. Secondary DNS (This is optional.) You can enter another DNS server’s IP Address (optional)
-
Page 58: Ddns
CHAPTER 5: General Setup 5.2.8 DDNS DDNS (see Figure 5-11) allows you to map the static domain name to a dynamic IP address. To get to this screen, click on DDNS from the menu on the left side of the screen shown in Figure 5-7. -
Page 59: Lan
PURE NETWORKING 802.11G WIRELESS ROUTER Table 5-10 (continued). DDNS parameters. Parameters Description Account/E-mail The account that your DDNS service provider assigned to you. Password/Key The password you set for the DDNS service account above. Apply button Click on this button to save your changes. Cancel button Click on this button to cancel your changes. - Page 60 CHAPTER 5: General Setup Figure 5-12. LAN settings screen. Table 5-11 lists the router’s LAN settings options.
- Page 61 PURE NETWORKING 802.11G WIRELESS ROUTER Table 5-11. LAN settings parameters. Parameters Default Description LAN IP IP address 192.168.2.1 This is the router’s LAN port IP address (your LAN client’s default gateway IP address). IP Subnet Mask 255.255.255.0 Specify a subnet mask for your LAN segment.
-
Page 62: Wireless
CHAPTER 5: General Setup Table 5-11 (continued). LAN settings parameters. Parameters Default Description IP Address Pool Select a particular IP address Start IP 192.168.1.100 range for your DHCP server to End IP 192.168.1.200 issue IP addresses to your LAN clients. Domain Name None Specify a domain name for your... - Page 63 PURE NETWORKING 802.11G WIRELESS ROUTER Figure 5-13. Wireless settings screen. Table 5-12 describes the router’s access point’s wireless settings options. Table 5-12. Wireless settings parameters. Parameters Default Description Enable or disable Enable Enable or disable the router’s wireless wireless module access point module.
-
Page 64: Basic Settings
CHAPTER 5: General Setup 5.4.1 B ASIC ETTINGS To get to the Basic Settings screen (see Figure 5-14), click on Basic Settings in the menu on the left in Figure 5-13. From the Basic Settings screen, you can set the wireless router to AP, bridge, and AP bridge-WDS, AP bridge point-to-point, or AP bridge point-to-multipoint modes. - Page 65 PURE NETWORKING 802.11G WIRELESS ROUTER Table 5-13. Basic settings parameters. Parameters Default Description Mode — Select from AP, bridge, AP bridge- WDS, AP bridge point-to-point, or AP bridge point-to-multipoint. ESSID default This is the name of the wireless LAN. All the devices in the same wireless LAN should have the same ESSID.
- Page 66 CHAPTER 5: General Setup Figure 5-15. AP bridge-point to point mode settings page. Table 5-14 lists the router’s AP bridge-point to point or multipoint options. Table 5-14. AP bridge-point to point or multipoint mode parameters. Parameter Description Mode Select from AP, bridge, AP bridge-WDS, AP bridge point- to-point, or AP bridge point-to-multipoint.
- Page 67 PURE NETWORKING 802.11G WIRELESS ROUTER Table 5-14 (continued). AP bridge-point to point or multipoint mode parameters. Parameter Description MAC Address If you want to bridge more than one wired Ethernet network together with a wireless LAN, set this access point to AP bridge-point-to-point mode, AP bridge-point- to-multipoint mode, or AP bridge-WDS mode.
- Page 68 CHAPTER 5: General Setup Figure 5-17. AP bridge-WDS mode settings page. Table 5-15 lists the router’s AP bridge-WDS mode options. Table 5-15. AP bridge-WDS mode settings parameters. Parameter Description Mode Select from AP, bridge, AP bridge-WDS, AP bridge point- to-point, or AP bridge point-to-multipoint. ESSID The ESSID (up to 31 printable ASCII characters) is the unique name identified in a WLAN.
- Page 69 PURE NETWORKING 802.11G WIRELESS ROUTER Table 5-15 (continued). AP bridge-WDS mode settings parameters. Parameter Description Associated Clients Click on the Show Active Clients button, then the Active Wireless Client Table (see Figure 5-19) will appear. You can see the status of all active wireless stations that are connecting to the access point.
- Page 70 CHAPTER 5: General Setup Figure 5-18. WDS security setup screen. Table 5-16 lists the router’s security options. Table 5-16. Security parameters. Parameters Description Enable WEP Security Check this box to enable the WEP encryption between wireless routers and access points that join the bridging job.
- Page 71 PURE NETWORKING 802.11G WIRELESS ROUTER Table 5-16 (continued). Security parameters. Parameters Description Key Format For example: ASCII characters: guest (continued) Hexadecimal digits: 12345abcde Default Tx Key Select one of the four keys to encrypt your data. Only the key you select in the default key will take effect. Encryption Keys The WEP keys are used to encrypt data transmitted in the 1–4...
- Page 72 CHAPTER 5: General Setup Figure 5-19. Active wireless client table screen. Table 5-17 lists the active wireless client’s options. Table 5-17. Active wireless client table parameters. Parameters Description MAC Address MAC address of this active wireless station. Tx Packet The number of transmitted packets that are sent out from this active wireless station.
-
Page 73: Advanced Settings
PURE NETWORKING 802.11G WIRELESS ROUTER Table 5-17 (continued). Active wireless client table parameters. Parameters Description Expired Time This is the time in seconds before dissociation. If the wireless device stays idle longer than the expired time, this wireless router will dissociate it. The wireless client station has to associate again when it becomes active. - Page 74 CHAPTER 5: General Setup Table 5-18 lists the wireless advanced settings options. Table 5-18. Wireless advanced settings parameters. Parameters Description Authentication Type There are three authentication types: open system, shared key, and auto. When you select open system, wireless stations can associate with this wireless router without WEP encryption.
-
Page 75: Security
PURE NETWORKING 802.11G WIRELESS ROUTER Table 5-18 (continued). Wireless advanced settings parameters. Parameters Description Broadcast ESSID If you enable broadcast ESSID, every wireless station located within this router’s coverage can discover the access point easily. If you are building a public wireless network, enable this feature. - Page 76 CHAPTER 5: General Setup Figure 5-21. Security screen. Table 5-19 lists the router’s security options. Table 5-19. Security parameters. Parameters Description Encryption Select the WEP key length for encryption (64-bit, 128-bit, or 152-bit). A larger WEP key length will provide a higher level of security, but the throughput will be lower.
- Page 77 PURE NETWORKING 802.11G WIRELESS ROUTER Then the router can receive any packets encrypted by one of the four keys. Figure 5-22. WEP encryption key security screen. Table 5-20 lists the router’s encryption options. Table 5-20. Encryption parameters. Parameters Description Encryption Select WEP from the drop-down menu.
- Page 78 CHAPTER 5: General Setup Table 5-20 (continued). Encryption parameters. Parameters Description Key Format Select ASCII characters (alphanumeric format) or hexadecimal digits (in the A–F, a–f, and 0–9 range) to be the WEP Key. For example: ASCII characters: guest Hexadecimal digits: 12345abcde Default Tx Key Select one of the four keys to encrypt your data.
- Page 79 PURE NETWORKING 802.11G WIRELESS ROUTER 802.1x IEEE 802.1x is an authentication protocol. Every user must use a valid account to login to the router before accessing the wireless LAN. The authentication is processed by a RADIUS server. You can use an external RADIUS server or use the RADIUS server built into the router.
- Page 80 CHAPTER 5: General Setup Table 5-21 (continued). 802.1x parameters. Parameter Description RADIUS Server Port The external RADIUS server’s service port. RADIUS Server The password used by the external RADIUS server. Password Apply button Click on this button to save your changes. Cancel button Click on this button to cancel your changes.
- Page 81 PURE NETWORKING 802.11G WIRELESS ROUTER Figure 5-24. 802.1x WEP static key screen. Table 5-22 lists the router’s 802.1x WEP static key options. Table 5-22. 802.1x WEP static key parameters. Parameter Description Encryption Select 802.1x WEP static key from the drop-down menu. Key Length You may select 64-bit or 128-bit to encrypt transmitted data.
- Page 82 CHAPTER 5: General Setup Table 5-22 (continued). 802.1x WEP static key parameters. Parameter Description Default Tx Key Select one of the four keys to encrypt your data. Only the key you select as the default key will take effect. Encryption The keys are used to encrypt data transmitted in the Key 1–4 wireless network.
- Page 83 PURE NETWORKING 802.11G WIRELESS ROUTER WPA pre-shared key Wi-Fi Protected Access (WPA) is an advanced security standard. You can use a pre- shared key to authenticate wireless stations and encrypt data during communication. It uses TKIP to change the encryption key frequently. This can improve security.
- Page 84 CHAPTER 5: General Setup Table 5-23. WPA pre-shared key parameters. Parameter Description Encryption Select WPA Pre-Shared Key from the drop-down menu. WPA Unicast Cipher Check the TKIP box to change the encryption key Suite frequently to enhance the wireless LAN’s security. Check the AES box for an efficient and highly secure encryption algorithm that can enhance the wireless LAN’s security.
- Page 85 PURE NETWORKING 802.11G WIRELESS ROUTER WPA RADIUS Wi-Fi Protected Access (WPA) is an advanced security standard. You can use an external RADIUS server to authenticate wireless stations and provide the session key to encrypt data during communication. It uses TKIP to change the encryption key frequently.
-
Page 86: Access Control
CHAPTER 5: General Setup Table 5-24. WPA RADIUS setup screen parameters. Parameter Description Encryption Select WPA radius from the drop-down menu. WPA Unicast Check the TKIP box to change the encryption key Cipher Suite frequently to enhance the wireless LAN security. The AES option is not available. - Page 87 PURE NETWORKING 802.11G WIRELESS ROUTER Figure 5-27. Wireless access control screen. Table 5-25 lists the router’s wireless access control options. Table 5-25. Wireless access control parameters. Parameters Description Enable Wireless Check this box to enable wireless access control. Access Control MAC Address Type in the MAC address for the wireless station to be added.
-
Page 88: Nat
CHAPTER 5: General Setup Table 5-25 (continued). Wireless access control parameters. Parameters Description Clear If you make a typing error before clicking on Apply Changes and want to retype it, click on the Clear button. Both the MAC Address and Comment fields will be cleared. - Page 89 PURE NETWORKING 802.11G WIRELESS ROUTER Figure 5-28. NAT settings screen. Table 5-26 lists the router’s NAT settings options. Table 5-26. NAT settings parameters. Parameter Description Port Forwarding Different services (for example, email, FTP, Web, etc.) can apply to different service servers/clients in your LAN. Select the port forwarding option from the vertical menu on the left side of the screen to allow you to redirect a particular range of service port numbers (from the...
- Page 90 CHAPTER 5: General Setup Table 5-26 (continued). NAT settings parameters. Parameter Description Virtual Server Different services (for example, email, FTP, Web, etc.) can apply to different service servers/clients in your LAN. The virtual server option allows you to redirect a particular service port number (from the Internet/WAN port) to a particular LAN IP address and its service port number.
-
Page 91: Port Forwarding
PURE NETWORKING 802.11G WIRELESS ROUTER Click on one of the NAT selections and proceed to the manual’s relevant sub- section (5.5.1, 5.5.2, 5.5.3, 5.5.4, or 5.5.5). 5.5.1 P ORWARDING The Port Forwarding screen (see Figure 5-29) allows you to redirect a particular range of service port numbers (from the Internet/WAN ports) to a particular LAN IP address. - Page 92 CHAPTER 5: General Setup Table 5-27 (continued). Port forwarding parameters. Parameter Description Type This is the protocol type to be forwarded. You can choose to forward either TCP or UDP packets or both. Port Range The range of ports to be forwarded to the private IP. Comment The description of the port range setting.
-
Page 93: Virtual Server
PURE NETWORKING 802.11G WIRELESS ROUTER 5.5.2 V IRTUAL ERVER Use the Virtual Server function (see Figure 5-30) when you want different servers/clients in your LAN to handle different services/applications from the Internet (for example, email, FTP, Web server, etc.). Computers use port numbers to recognize a particular service/Internet application. - Page 94 CHAPTER 5: General Setup Table 5-28 (continued). Virtual server parameters. Parameters Description Private Port This is the port number (of the previously mentioned private IP host) that the public port number will be changed to when the packet enters your LAN (to the LAN Server/Client IP).
- Page 95 For the virtual server to work properly, Internet/remote users must know your global IP address. (For Web sites, you will need to have a fixed/static global/public IP address.) Pure Networking 802.11g Wireless Router (LW6005A) ADSL or cable modem Internet request...
-
Page 96: Special Applications
CHAPTER 5: General Setup 5.5.3 S PECIAL PPLICATIONS Some applications (such as Internet games, videoconferencing, and Internet telephony) require multiple connections. In this section, you can configure the router to support multiple connections for these types of applications. Figure 5-32. Special Applications screen. Table 5-29 lists the router’s special applications options. - Page 97 PURE NETWORKING 802.11G WIRELESS ROUTER NOTE Individual port numbers are separated by a comma (for example, 47624, 5775, 6541, etc.). Type in a port range, and use a dash to separate the port number range (for example, 2300–2400). Table 5-29 (continued). Special Applications parameters. Parameters Description Public Port...
- Page 98 CHAPTER 5: General Setup Table 5-29 (continued). Special Applications parameters. Parameters Description Delete All If you want to remove all special application settings from the table, press this button. Reset Clears your current selections. Click on the Add button to save the configuration described in the top half of Figure 5-32.
-
Page 99: Upnp Settings
PURE NETWORKING 802.11G WIRELESS ROUTER 5.5.4 UP ETTINGS Selecting UPnP (see Figure 5-33) enables plug-and-play operation. With UPnP, a device can dynamically join a network, obtain an IP address, convey its capabilities, and learn about the presence and capabilities of other devices—all automatically when you plug in the device. -
Page 100: Alg Settings
CHAPTER 5: General Setup Table 5-31 (continued). UPnP parameters. Parameters Description Apply Click on this button to save your changes. Cancel Click on this button to cancel your changes. Click on the Apply button at the bottom of the screen to save the above configurations. -
Page 101: Firewall
PURE NETWORKING 802.11G WIRELESS ROUTER Table 5-32 lists the router’s ALG parameters. These are used to configure the router at the OSI’s Application layer. Typical applications include FTP servers and IP phones. Table 5-32. ALG parameters. Parameters Description Enable Check this box to enable Application Layer Gateway. The router will then let that application correctly pass though the NAT gateway. - Page 102 CHAPTER 5: General Setup Figure 5-35. Firewall settings screen. Table 5-33 lists the firewall menu options (not visible in Figure 5-35, but on your screen they will appear under the Firewall entry on the left side of the Security Settings [Firewall] screen [Figure 5-35]). Select a menu option, then click on Enable or Disable.
-
Page 103: Access Control
PURE NETWORKING 802.11G WIRELESS ROUTER Table 5-33 (continued). Firewall options. Parameters Description The DMZ function allows you to redirect all packets going to your WAN port IP address to a particular IP address in your LAN. Click on one of the firewall selections (listed on the left side of the Firewall Settings screen) and proceed to the manual’s relevant sub-section (5.6.1, 5.6.2, 5.6.3, or 5.6.4). - Page 104 CHAPTER 5: General Setup Table 5-34 lists the router’s access control options. Table 5-34. Access Control parameters. Parameters Description Add PC Click on this button to add an access control rule (this will restrict user access) via IP addresses. Delete Selected If you want to remove a PC from the IP Filtering Table, select the PC you want to remove, then click on this button.
- Page 105 PURE NETWORKING 802.11G WIRELESS ROUTER Add PC screen To get to the Add PC screen, from the Security Settings Firewall screen (see Figure 5-35), click on the Access Control option in the menu on the left of the screen. Figure 5-36 will appear. Then press the Add PC button and Figure 5-37 will appear. Figure 5-37.
- Page 106 CHAPTER 5: General Setup Table 5-35. Add PC parameters. Parameters Description Enable IP Filtering Check this box to activate IP filtering. Client PC Description The client PC’s configured access rules. (Access rules restrict user access to Web sites via IP addresses.) Client PC IP The access control rule will allow/deny the PC’s access to Address...
-
Page 107: Url Blocking
80 and 999. See Figure 5-38. Configuration Configuration Private IP: 192.168.2.3 Private IP: 192.168.2.2 Port: 80–999 Port: 80 Pure Networking 802.11g Wireless Router (LW6005A) ADSL or cable modem Internet Web site Client B Client A server 198.168.2.3 198.168.2.2... - Page 108 CHAPTER 5: General Setup Figure 5-39. URL blocking screen. Table 5-36 describes the URL blocking options. Table 5-36. URL blocking parameters. Parameters Description Enable URL Blocking Check this box to enable/disable URL blocking. Add button Type in the URL/Keyword, then click on this button. You can enter the full URL address or the keyword of the Web site you want to block.
-
Page 109: Denial Of Service (Dos)
PURE NETWORKING 802.11G WIRELESS ROUTER Table 5-36 (continued). URL blocking parameters. Parameters Description Delete Selected If you want to remove a URL keyword from the Current URL Blocking Table, select the URL keyword, then click on this button. Delete All If you want remove all URL keywords from the table, click on this button. - Page 110 CHAPTER 5: General Setup Figure 5-40. Denial of Service screen. Table 5-37 describes options for DoS, which is one type of intrusion detection. Table 5-37. Denial of Service parameters. Parameters Description Denial of Service (DoS) Feature Ping of Death Protects from Ping of Death attack. Discard Ping From WAN The router’s WAN port will not respond to any ping requests.
-
Page 111: Dmz
PURE NETWORKING 802.11G WIRELESS ROUTER Table 5-37 (continued). Denial of Service parameters. Parameters Description Apply Click on this button to save your changes. Cancel Click on this button to cancel your changes. Click on Apply at the bottom of the screen to save the above configurations. You can now configure other advance sections or start using the router (with the advanced settings in place). - Page 112 CHAPTER 5: General Setup Figure 5-41. DMZ screen. NOTE If there is a conflict between the virtual server and the DMZ setting, the virtual server function will have priority over the DMZ function. Table 5-38 explains the DMZ options. Table 5-38. DMZ parameters. Parameters Description Enable DMZ...
- Page 113 PURE NETWORKING 802.11G WIRELESS ROUTER Table 5-38 (continued). DMZ parameters. Parameters Description Client PC IP Address Type in the IP address of a particular host in your LAN that will receive all the packets originally going to the WAN port/public IP address above. Apply Click on this button to save your changes.
-
Page 114: Status Information
CHAPTER 6: Status Information 6. Status Information The Status section allows you to monitor the current status of your router. You can use the Status screen to monitor the connection status of the router’s WAN/LAN interfaces, the current firmware and hardware version numbers, any illegal attempts to access your network, and information on all DHCP client PCs currently connected to your network. -
Page 115: Status And Information
PURE NETWORKING 802.11G WIRELESS ROUTER 6.1 Status and Information The status and information section (see Figure 6-1) allows you to view the router’s system information. Figure 6-1. Status and information screen. Table 6-2 lists the system information displayed in Figure 6-1. Table 6-2. -
Page 116: Internet Connection
CHAPTER 6: Status Information 6.2 Internet Connection View the router’s current Internet connection status and other related information. See Figure 6-2. Figure 6-2. Internet connection screen. Table 6-3 lists the options you can view in Figure 6-2. Table 6-3. Internet connection parameters. Parameter Description Internet Connection... -
Page 117: Device Status
PURE NETWORKING 802.11G WIRELESS ROUTER 6.3 Device Status View the router’s current configuration settings (see Figure 6-3). The Device Status screen displays the configuration settings you’ve configured in the Quick Setup Wizard/General Setup section. Figure 6-3. Device status screen. Table 6-4 lists the device status options displayed in Figure 6-3. -
Page 118: Security Log
CHAPTER 6: Status Information Table 6-4. Device status parameters. Parameters Description Device Status This page shows the router’s current device settings. It displays the router LAN port’s current LAN IP address and subnet mask, as well as the default gateway. It also shows whether the DHCP server is enabled/disabled and lists the MAC address. - Page 119 PURE NETWORKING 802.11G WIRELESS ROUTER Table 6-5 describes the security log options. Table 6-5. Security log parameters. Parameters Description Security Log This page shows the router’s current security log. It displays any illegal attempts to access your network. At the bottom of the page, click on Save to save the security log to a local file for further processing.
-
Page 120: Active Dhcp Client Table
CHAPTER 6: Status Information 6.5 Active DHCP Client Table View your LAN client’s information that is currently linked to the router’s DHCP server. See Figure 6-5. Figure 6-5. Active DHCP client table screen. Table 6-6 describes the DHCP options shown in Figure 6-5. Table 6-6. -
Page 121: Statistics
PURE NETWORKING 802.11G WIRELESS ROUTER 6.6 Statistics View the statistics of packets sent and received on WAN, LAN, and wireless LAN. See Figure 6-6. Figure 6-6. Statistics screen. Table 6-7 explains the statistics values shown in Figure 6-6. Table 6-7. Statistics parameters. Parameter Description Statistics... -
Page 122: Tools
CHAPTER 7: Tools 7. Tools The Tools screen includes the basic configuration tools, such as Configuration Tools (save or restore configuration settings), Firmware Upgrade (upgrade system firmware), and Reset. See Figure 7-1. Figure 7-1. Tools screen. Table 7-1 lists the available Tools options. Table 7-1. -
Page 123: Configuration Tools
PURE NETWORKING 802.11G WIRELESS ROUTER Select one of the three Tools settings and proceed to the relevant text (Section 7.1, 7.2, or 7.3). 7.1 Configuration Tools The Configuration Tools screen (see Figure 7-2) allows you to save (backup) the router’s current configuration setting. Saving the configuration settings provides an added protection and convenience if problems occur with the router and you have to reset it to factory default. - Page 124 CHAPTER 7: Tools Table 7-2. Configuration Tools parameters. Parameters Description Backup Settings Use the Backup tool to save the router’s current configuration to a file named config.bin on your PC. Save Click on this button to save your changes. Restore Settings Use the Restore tool to restore the saved configuration to the router.
-
Page 125: Firmware Upgrade
PURE NETWORKING 802.11G WIRELESS ROUTER 7.2 Firmware Upgrade This screen allows you to upgrade the router’s firmware. See Figure 7-3. Figure 7-3. Firmware upgrade screen. Table 7-3 describes the options shown in Figure 7-3. Table 7-3. Firmware upgrade parameters. Parameters Description Upgrade Method This tool allows you to upgrade the router’s system... -
Page 126: Reset
CHAPTER 7: Tools Table 7-3 (continued). Firmware upgrade parameters. Parameters Description Apply Click on this button to save your changes. Cancel Click on this button to cancel your changes. Once you’ve selected the new firmware file, click on the Apply button to start the upgrade process. - Page 127 PURE NETWORKING 802.11G WIRELESS ROUTER Table 7-4 describes the buttons in the router’s Reset screen. Table 7-4. Reset parameters. Parameters Description Apply To perform the reset, click on this button. You will be asked to confirm your decision. The reset is finished when the power light stops blinking.
-
Page 128: Troubleshooting
• Package it carefully. We recommend that you use the original container. • If you are shipping the router for repair, make sure you include everything that came in the original package. Before you ship, contact Black Box to get a Return Authorization (RA) number. -
Page 129: Appendix. How To Manually Find Your Pc's Ip And Mac Address
PURE NETWORKING 802.11G WIRELESS ROUTER Appendix. How to Manually Find Your PC’s IP and MAC Address 1. In Windows, open the Command Prompt program. See Figure A-1. Figure A-1. Command prompt screen. 2. Type Ipconfig /all and press Enter. Figure A-2 will appear. - Page 130 APPENDIX: How to Manually Find Your PC’s IP and MAC Address Figure A-2. Configuration screen. Your PC’s IP address is the one entitled IP Address (192.168.1.77). The router’s IP address is the one entitled Default Gateway (192.168.1.254). Your PC’s MAC address is the one entitled Physical Address (00-50-FC-FE-02-DB).
-
Page 131: Glossary
PURE NETWORKING 802.11G WIRELESS ROUTER Glossary Bridge: A bridge is an intelligent internetworking device that forwards or filters packets between different networks based on Data Link layer (MAC) address information. Default Gateway (Router): Every non-router IP device needs to configure a default gateway’s IP address. - Page 132 GLOSSARY The IP address is a 32-bit binary pattern that can be represented as four cascaded decimal numbers separated by a period. For example, aaa.aaa.aaa.aaa, where each “aaa” can be anything from 000 to 255, or as four cascaded binary numbers separated by a period: bbbbbbbb.bbbbbbbb.bbbbbbbb.bbbbbbbb, where each “b”...
- Page 133 PURE NETWORKING 802.11G WIRELESS ROUTER Port: Network Clients (LAN PC) uses port numbers to distinguish one network application/protocol over another. Below is a list of common applications and protocol/port numbers: Application Protocol Port Number Telnet SMTP POP3 H.323 1720 SNMP SNMP Trap HTTP PPTP...
- Page 134 GLOSSARY TCP/IP, UDP: Transmission Control Protocol/Internet Protocol (TCP/IP) and Unreliable Datagram Protocol (UDP). TCP/IP is the standard protocol for data transmission over the Internet. Both TCP and UDP are Transport layer protocols. TCP performs proper error detection and error recovery, and thus is reliable. UDP, on the other hand, is not reliable.
Need help?
Do you have a question about the LW6005A and is the answer not in the manual?
Questions and answers