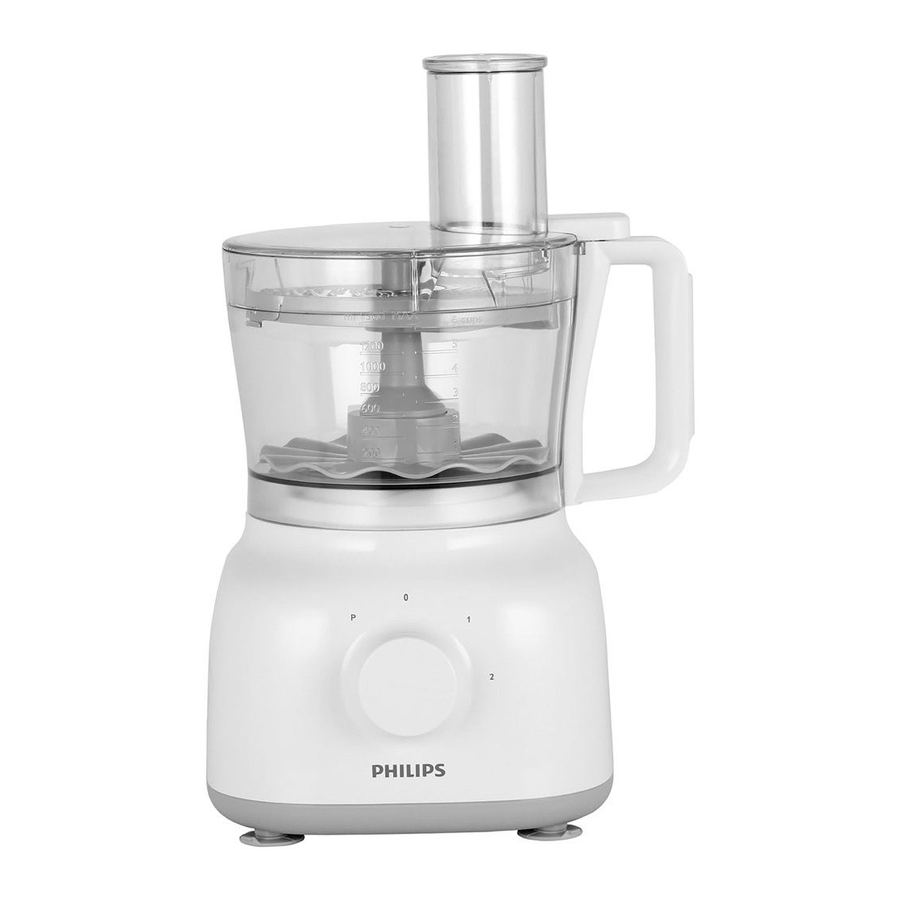
Philips HR7627 User Manual
Hide thumbs
Also See for HR7627:
- User manual (11 pages) ,
- Quick start manual (4 pages) ,
- User manual (6 pages)
Advertisement
Table of Contents
Register your product and get support at
www.philips.com/welcome
HR7627
HR7628
HR7629
EN User manual
LV Lietotāja rokasgrāmata
BG Ръководство за потребителя
PL Instrukcja obsługi
CS Příručka pro uživatele
RO Manual de utilizare
ET Kasutusjuhend
SK Príručka užívateľa
HR Korisnički priručnik
SL
Uporabniški priročnik
HU Felhasználói kézikönyv
SR Korisnički priručnik
KK Қолданушының нұсқасы
UK Посібник користувача
LT Vartotojo vadovas
Specifications are subject to change without notice
© 2014 Koninklijke Philips N.V.
All rights reserved.
3140 035 28933
English
1 Important
Congratulations on your purchase and welcome to Philips! To fully benefit from the support
that Philips offers, register your product at www.philips.com/welcome.
Read this user manual carefully before you use the appliance, and save the user manual for
future reference.
Danger
Do not immerse the motor unit in water nor rinse
•
it under the tap.
Warning
Never use your fingers or an object to push
•
ingredients into the feeding tube while the appliance
is running. Only use the pusher.
Before you connect the appliance to the power,
•
make sure that the voltage indicated on the bottom
of the appliance corresponds to the local power
voltage.
Never connect this appliance to a timer switch, to
•
avoid a hazardous situation.
Do not use the appliance if the power cord, the
•
plug, protecting cover, rotating sieve or any other
parts are damaged or has visible cracks.
If the power cord is damaged, you must have it
•
replaced by Philips, a service center authorized
by Philips, or similarly qualified persons to avoid a
hazard.
This appliance shall not be used by children. Keep
•
the appliance and its cord out of reach of children.
This appliance can be used by persons with reduced
•
physical, sensory or mental capabilities or lack of
experience and knowledge if they have been given
supervision or instruction concerning use of the
appliance in a safe way and if they understand the
hazards involved.
For their safety, do not allow children to play with
•
the appliance.
Never let the appliance run unattended.
•
If food sticks to the wall of the blender jar or bowl,
•
switch off the appliance and unplug it. Then use a
spatula to remove the food from the wall.
Be careful when you are emptying the bowl, handle
•
or clean the discs, the blade units and the juicer
sieve. The cutting edges are very sharp.
Do not touch the blades, especially when the
•
appliance is plugged in. The blades are very sharp.
If the blades get stuck, unplug the appliance before
•
you remove the ingredients that block the blades.
Be careful if hot liquid is poured into the food
•
processor or blender as it can be ejected out of the
appliance due to a sudden steaming.
This appliance is intended for household use only.
•
1
P
1
(MAX)
(MAX)
(MAX)
(MAX)
5 x 1 sec
500 g
P
5 x 1 sec
500 g
P/2
30 sec
50 g
P
60 sec
250 g
2
45 sec
250 g
2
30 sec
200 g
2
2-3 min
500 g
1
360 ml
60-180 sec
350 ml
1
60-180 sec
4 pcs
1
30 sec
500 g
1
30 sec
500 g
1
30 sec
2 pcs
1
(HR7627, HR7628)
30 sec
300 g
1
1
30 sec
500 g
30 sec
200 g
1
(HR7629)
1
30 sec
2 pcs
30 sec
500 g
1
4 min
1 kg
1
20 sec
500 g
1
(HR7629)
1 min
1 L
2
1 min
1 L
2
1 min
1 L
2
6 x
P
P x 9
400 g
(HR7628, HR7629)
3 min
2
600 ml
Caution
Never switch off the appliance by turning the
•
blender jar, the bowl, or their lids. Always switch off
the appliance by turning the speed selector to 0 or
OFF.
Unplug the appliance immediately after use.
•
Always wait until the moving parts stop running,
•
then switch off and unplug the appliance before
opening the lid and reaching into any of the parts
that move in use.
Always switch off and unplug the appliance if it is left
•
unattended, and before assembling, disassembling,
cleaning and changing accessories, or approaching
parts that move in use.
Thoroughly clean the parts that come into contact
•
with food before you use the appliance for the first
time. Refer to the instructions and table for cleaning
given in this manual.
Never use any accessories or parts from other
•
manufacturers that Philips does not specifically
recommend. If you use such accessories or parts,
your guarantee becomes invalid.
Do not exceed the maximum level indication on
•
the bowl or the jar. Follow the quantities, processing
time and speed as indicated in the user manual.
Let hot ingredients cool down (< 80ºC) before
•
processing them.
Always let the appliance cool down to room
•
temperature after each batch that you process.
Certain ingredients such as carrots may cause
•
discolorations on the surface of the parts. This
does not have a negative effect on the parts. The
discolorations usually disappear after some time.
Noise level: Lc = 85 dB [A]
•
Electromagnetic fields (EMF)
This Philips appliance complies with all applicable standards and regulations regarding
exposure to electromagnetic fields (EMF). If handled properly and according to the
instructions in this user manual, the appliance is safe to use based on scientific evidence
available today.
Recycling
Your product is designed and manufactured with high quality materials and
components, which can be recycled and reused.
When you see the crossed-out wheel bin symbol attached to a product, it means
the product is covered by the European Directive 2002/96/EC:
Never dispose of your product with other household waste. Please inform yourself
about the local rules on the separate collection of electrical and electronic products.
The correct disposal of your old product helps prevent potentially negative
consequences on the environment and human health.
2 Introduction
Congratulations on your purchase and welcome to Philips! To fully benefit from the support
that Philips offers, register your product at www.philips.com/welcome.
This appliance is equipped with a built-in safety lock. You can only switch on the appliance
after you correctly assemble the following parts on the motor unit:
•
the food processor bowl and its lid, or
•
the blender jar and its lid (HR7628, HR7629 only), or
•
the citrus press (HR7629 only)
If these parts are assembled correctly, the built-in safety lock is unlocked.
For recipes to use with your food processor, go to www.philips.com/kitchen
2
3
4
5
6
7
8
3 Food processor
Warning
•
Never use your fingers or an object to push ingredients into the feeding tube while the appliance is
running. Only use the pusher.
Blade unit
Before you start, make sure you assemble according to Fig. 2.
You can use the blade unit to chop, mix, blend, or puree ingredients. You can also use it to
mix and blend cake batters.
Caution
•
Do not use the blade unit to chop hard ingredients, like coffee beans, turmeric, nutmeg, and ice
cubes, as this may cause the blade to get blunt.
Note
•
Do not let the appliance run too long when you chop (hard) cheese or chocolate. Otherwise these
ingredients become too hot, start to melt, and turn lumpy.
•
Precut large pieces of food into pieces of approx. 3 x 3 x 3 cm.
1
Turn the the bowl clockwise to fix it on the motor unit, and then put the tool holder in
the bowl.
» When the bowl is fixed correctly, you hear a click.
2
Put the blade unit on the tool holder.
3
Put the ingredients in the bowl.
4
Put the lid on the bowl, and then turn the lid clockwise to fix it.
» When the lid is assembled correctly, you hear a click and the lid is fixed to the bowl
handle.
5
Put the pusher into the feeding tube.
6
Connect the power plug to the power supply.
7
Check the preparation time, the maximum amount and the speed setting required for
the ingredients in Table 1. Turn the knob to the desired speed setting.
8
After use, turn the knob to 0, and then unplug the appliance.
Tip
•
When you chop onions, turn the knob to P a few times to prevent the onions from becoming too
finely chopped.
•
How to remove food that sticks to the blade or to the inside of the bowl? 1. Switch off the appliance,
and then unplug it. 2. Remove the lid from the bowl. 3. Remove the ingredients from the blade or
from the side of the bowl with a spatula.
Kneading accessory
Before you start, make sure you assemble according to Fig. 3.
You can use the kneading accessory to knead yeast dough for bread and pizzas. You need to
adjust the amount of liquid to form the dough according to the humidity and temperature
condition.
Note
•
Do not use the kneading accessory to blend cake batters. Use the blade unit for this job.
•
Always put the kneading accessory in the bowl before you add the ingredients.
1
Turn the the bowl clockwise to fix it on the motor unit, and then put the tool holder in
the bowl.
» When the bowl is fixed correctly, you hear a click.
2
Put the kneading accessory on the tool holder.
3
Put the ingredients in the bowl.
4
Put the lid on the bowl, and then turn the lid clockwise to fix it.
» When the lid is assembled correctly, you hear a click and the lid is fixed to the bowl
handle.
5
Put the pusher into the feeding tube.
6
Connect the power plug to the power supply.
7
Turn the knob to the 1 position.
8
Check the preparation time, the maximum amount and the speed setting required for
the ingredients in Table 1.
9
After use, turn the knob to 0, and then unplug the appliance.
9
10
11
12
P
1
Discs and Inserts
Before you start, make sure you pick your desired disc from following and assemble according
to Fig. 4 and Fig. 5.
•
Emulsifying disc
•
Insert for fine (HR7627 and HR7628 only)
•
Insert for granulating (HR7627 and HR7628 only)
•
Reversible slicing / shredding disc (coarse) (HR7629 only)
Caution
•
Be careful when you handle the slicing blade of disc. It has a very sharp cutting edge.
•
Never use the disc to process hard ingredients, like ice cubes.
•
Do not exert too much pressure on the pusher when you press ingredients into the feed tube.
Note
•
Precut large ingredients into chunks that fit in the feeding tube.
1
Turn the bowl clockwise to fix it on the motor unit, and then put the tool holder in the
bowl.
» When the bowl is fixed correctly, you hear a click.
2
Put the disc on the shaft. For inserts (HR7627 and HR7628 only), place an insert in the
insert holder as indicated below, then place the insert holder with insert on the shaft.
Place the opening of the insert over the shaft of the insert holder.
Push the opening of the insert over the projection on the shaft.
Press the insert onto the insert holder until it locks in position with a click.
3
Put the lid on the bowl, and then turn the lid clockwise to fix it.
» When the lid is assembled correctly, you hear a click and the lid is fixed to the bowl
handle.
4
Put the ingredients into the feeding tube with the pusher. Fill the feeding tube evenly for
the best results. When you have to process a large amount of ingredients, process small
batches and empty the bowl between batches.
5
Connect the power plug to the power supply.
6
Check the preparation time, the maximum amount and the speed setting required for
the ingredients in Table 1. Select the speed that matches the color of the accessory.
7
After use, turn the speed selector to 0, and then unplug the appliance.
Citrus press (HR7629 only)
Before you start, make sure you assemble according to Fig. 6.
You can use the citrus press to squeeze citrus fruits.
1
Turn the the bowl clockwise to fix it on the motor unit, and then put the tool holder in
the bowl.
» When the bowl is fixed correctly, you can hear a click .
2
Put the sieve for citrus press on the tool holder in the bowl. Make sure that the
projection on the sieve is locked in the slot of the bowl handle.
» When the sieve is fixed correctly, you can hear a click .
3
Put the cone on the sieve.
4
Connect the power plug to the power supply.
5
Check the maximum amount required for the ingredients in Table 1. Turn the knob to
speed 1.
» The cone starts rotating.
6
Press the citrus fruit onto the cone.
7
Stop pressing from time to time to remove the pulp from the sieve. When you finish
pressing or when you want to remove the pulp, turn the knob to 0 and remove the bowl
from the appliance with the sieve and cone on it.
Blender (HR7628 and HR7629 only)
Before you start, make sure you assemble according to Fig. 7.
The blender is intended for:
•
Blending fluids, like dairy products, sauces, fruit juices, soups, mixed drinks, and shakes.
•
Mixing soft ingredients, like pancake batter.
•
Pureeing cooked ingredients, like baby food.
•
Crushing ice.
Note
•
Do not exert too much pressure on the handle of the blender jar.
•
Never open the lid to put your hand or any object in the jar while the blender is running.
•
Always assemble the sealing ring onto the blade unit before you attach the blade unit to the blender jar.
•
To add liquid ingredients during processing, pour them into the blender jar through the feeding hole.
•
Precut solid ingredients into small pieces before you process them.
•
If you want to prepare a large quantity, process small batches of ingredients instead of a large
quantity at once.
•
To avoid spillage: When you process a liquid that is hot or tends to foam (for example, milk), do not
put more than 1 liter of liquid in the blender jar.
•
If you are not satisfied with the result, switch off the appliance and stir the ingredients with a spatula.
Remove some of the contents to process a smaller quantity or add some liquid.
1
Turn the blade unit on the blender jar.
2
Place the blender jar on the motor unit and turn it clockwise to fix it.
» When the jar is fixed correctly, you hear a click.
3
Put the ingredients in the blender jar within the maximum level indication.
4
Place the lid on the blender jar, and then turn it clockwise to fix it.
5
Connect the power plug to the power supply.
6
Check the preparation time, the maximum amount and the speed setting required for
the ingredients in Table 1. Turn the knob to the desired speed setting. To crush ice, turn
the knob to P. Press the button again to stop.
7
After use, turn the knob to 0, and then unplug the appliance.
Tip
•
How to remove the ingredients that stick to the side of the blender jar? 1. Switch off the appliance,
and then unplug it. 2. Open the lid, and then use a spatula to remove the ingredients from the side of
the jar. 3. Keep the spatula at least 2 cm from the blade.
Mini Chopper accessory (Optional)
You can order a mini chopper (under service code number 9965 100 57198/9965 100
52997) from your Philips dealer or a Philips service center as an extra accessory.
You can use the mini chopper to chop coffee beans, peppercorns, nuts, herbs etc. Use speed
2 and process for 30 sec. Do not exceed the maximum level indicated on the mini chopper.
For best results when processing beef, please use refrigerated beef cubes. Use max of 100g
beef cubes at speed P for 5 sec.
Quick cleaning
You can follow the following steps to clean the food processor bowl and blender jar easier.
Note
•
Make sure that the blade is assembled in the bowl if you clean the food processor bowl.
1
Pour lukewarm water (not more than 0.5 liters) and a few drops of washing-up liquid
into the food processor bowl or blender jar.
2
Place the lid on the food processor bowl or blender jar, and then turn it clockwise to fix
it.
3
Turn the knob to P. Let the appliance run for 30 seconds or until the food processor
bowl or blender jar is clean.
4
After use, turn the knob to 0, and then unplug the appliance.
5
Detach the blender jar or food processor bowl and rinse it with clean water.
Cleaning and storage
Warning
•
Before you clean the appliance, unplug it.
Caution
•
Make sure that the cutting edges of the blades and discs do not come into contact with hard objects.
This may cause the blade to get blunt.
•
The cutting edges are sharp. Be careful when you clean the blade unit of the food processor, the
blade unit of the blender and the discs.
1
Clean the motor unit with a moist cloth.
2
Clean the other parts in hot water (< 60ºC) with some washing-up liquid or in a
dishwasher.
3
Store the product in a dry place.
4 Guarantee and service
If you have a problem, need service, or need information, see www.philips.com/support or
contact the Philips Consumer Care Center in your country. The phone number is in the
worldwide guarantee leaflet. If there is no Consumer Care Center in your country, go to
your local Philips dealer.
Български
1 Важно
Поздравления за вашата покупка и добре дошли във Philips! За да се възползвате
изцяло от предлаганата от Philips поддръжка, регистрирайте продукта си на адрес
www.philips.com/welcome.
Преди да използвате уреда, прочетете внимателно това ръководство за потребителя и
го запазете за справка в бъдеще.
Опасност
В никакъв случай не потапяйте задвижващия
•
блок във вода и не го изплаквайте с течаща вода.
Предупреждение
Никога не натискайте продуктите в улея за
•
подаване с пръсти или предмети, докато уредът
работи. Използвайте само тласкача.
Преди да включите уреда в електрически
•
контакт, проверете дали напрежението, показано
на дъното на уреда, отговаря на напрежението
на местната електрическа мрежа.
За да избегнете евентуална опасност, никога не
•
свързвайте този уред към таймерен ключ.
Не използвайте уреда, ако захранващият кабел,
•
щепселът, предпазващият капак, въртящото се
сито или други компоненти са повредени или
имат видими пукнатини.
С оглед предотвратяване на опасност, при
•
повреда в захранващия кабел той трябва да бъде
сменен от Philips, оторизиран от Philips сервиз
или квалифициран техник.
Този уред не бива да се използва от деца.
•
Пазете уреда и кабела далече от достъп на деца.
Този уред може да се използва от хора с
•
намалени физически възприятия или умствени
недостатъци или без опит и познания, ако са под
наблюдение или са инструктирани за безопасна
употреба на уреда и са разбрали евентуалните
опасности.
За тяхната безопасност не позволявайте на деца
•
да си играят с уреда.
Никога не оставяйте уреда да работи без
•
наблюдение.
Ако по стените на купата или каната на пасатора
•
полепнат продукти, изключете уреда и извадете
щепсела от контакта. След това отстранете
продуктите с лопатка.
Бъдете внимателни, когато изпразвате купата,
•
използвате или почиствате дисковете, режещия
блок и ситото на сокоизстисквачката. Режещите
ръбове са много остри.
Не докосвайте остриетата, особено когато
•
уредът е включен в контакта. Ножовете са много
остри.
Ако ножовете заседнат, изключете уреда от
•
контакта, преди да отстранявате продуктите,
блокирали ножовете.
Бъдете внимателни, ако наливате горещи
•
течности в кухненския робот или пасатора, тъй
като поради изпаренията може ненадейно да
пръсне течност навън.
Този уред е предназначен само за битови цели.
•
Внимание
Никога не се опитвайте да изключвате уреда
•
чрез завъртане на каната на пасатора, купата
или капаците им. Винаги изключвайте уреда чрез
завъртане на селектора за скорост на 0 или
ИЗКЛЮЧЕНО.
Веднага след употреба изваждайте щепсела от
•
контакта.
Винаги изчаквайте движещите части да спрат
•
движението си, след което изключете уреда
и извадете щепсела от контакта, преди да
отворите капака и да докосвате която и да е
от частите, които се движат, когато уредът е в
употреба.
Винаги изключвайте уреда от бутона и от
•
захранването, ако е оставен без надзор и преди
сглобяване, разглобяване, почистване и смяна на
аксесоарите или приближаване до части, които
се движат при употреба.
Преди да използвате този уред за пръв път,
•
добре почистете частите, които влизат в контакт
с храна. Вижте инструкциите и таблицата за
почистване, предоставени в това ръководството
за потребителя.
Никога не използвайте принадлежности или
•
части от други производители или такива, които
не са специално препоръчвани от Philips. При
използване на такива аксесоари или части вашата
гаранция става невалидна.
1/4
Advertisement
Table of Contents

Related Manuals for Philips HR7627


Summary of Contents for Philips HR7627
- Page 1 » When the bowl is fixed correctly, you hear a click. имат видими пукнатини. Put the disc on the shaft. For inserts (HR7627 and HR7628 only), place an insert in the insert holder as indicated below, then place the insert holder with insert on the shaft.
-
Page 2: Kuchyňský Robot
Po použití otočte ovladač do polohy 0 a přístroj vytáhněte ze zásuvky. Оставете горещите продукти да се охладят Сложете капака на купата и след това завъртете капака по часовниковата стрелка, Společnost Philips Vám gratuluje ke koupi a vítá Vás! Chcete-li využívat všech výhod podpory • за да го фиксирате. - Page 3 » Kada se poklopac pravilno pričvrsti, začut ćete "klik" i poklopac će se fiksirati na ukopčan. Rezači su vrlo oštri. www.philips.com/kitchen. ili se obratite centru za potrošače tvrtke Philips u svojoj državi. Broj telefona nalazi se u » Kui kann on korralikult kinnitatud, kuulete klõpsu. ručku zdjele.
-
Page 4: Konyhai Robotgép
Нәтиже қанағаттандырмаса, құралды өшіріп, азықтарды күрекшемен араластырыңыз. Азырақ • meg azokat a részeket, amelyek az étellel érintkezni Helyezze a tárcsát a tengelyre. Betétek esetén (csak HR7627 és HR7628 típusnál): көлемін өңдеу немесе сұйықтық қосу үшін, кішкене бөлігін алып тастаңыз. салатын түтікке ингредиенттерді салу үшін... - Page 5 • Varat veikt tālāk norādītās darbības, lai viegli iztīrītu virtuves kombaina bļodu un blendera izvairītos no bīstamām situācijām. Uždėkite diską ant veleno. Naudodami įdedamąsias dalis (tik HR7627 ir HR7628 ), įdėkite Ielieciet bīdni padevējcaurulē. krūku. judančias dalis, visada išjunkite prietaisą ir ištraukite įdedamųjų...
-
Page 6: Robot Kuchenny
Po zakończeniu pracy ustaw pokrętło w pozycji 0 i wyjmij wtyczkę urządzenia z gniazdka • Nu exercitaţi o presiune prea mare asupra mânerului vasului blenderului. Felicitări pentru achiziţie şi bun venit la Philips! Pentru a beneficia pe deplin de asistenţa elektrycznego. Zaraz po zakończeniu korzystania z urządzenia •... -
Page 7: Kuchynský Robot
Kým je mixér v činnosti, nikdy neotvárajte veko, aby ste následne do vnútra vložili ruku alebo iný predmet. » Ko je pokrov pravilno nameščen, zaslišite klik, pokrov pa je pritrjen na ročaj posode. Čestitamo na kupovini i dobro došli u Philips! Da biste najbolje iskoristili podršku koju nudi •... - Page 8 Uvek montirajte zaptivni prsten na jedinicu sa sečivima pre nego što jedinicu sa sečivima postavite na Будьте обережні, коли наливаєте гарячу рідину Čestitamo na kupovini i dobro došli u Philips! Da biste na najbolji način iskoristili podršku koju Увага! posudu blendera.
Need help?
Do you have a question about the HR7627 and is the answer not in the manual?
Questions and answers