Table of Contents
Advertisement
Advertisement
Table of Contents

Related Manuals for Titan TI-7700


Summary of Contents for Titan TI-7700
- Page 1 Instruction Manual TI-7700...
-
Page 2: Table Of Contents
Thank you for purchasing the TI-7700 Massage Chair. Before using your massage chair, please read the contents of this instruction manual and refer to it when needed. Table of Contents Luxury Features ........... 2 Safety Precautions ..........3-4 Chair Components ..........5-6 Chair Installation &... -
Page 3: Luxury Features
Luxury Features The operation of massage chair is controlled by a microcomputer that performs various intelligent massage methods and combinations, like Kneading, Tapping, Shiatsu, Rolling, and Air massage. All these methods massage accurately on the acupressure points, to effectively alleviate fatigue, promote metabolism and improve blood circulation. -
Page 4: Safety Precautions
Safety Precautions When using the massage chair, basic precautions should always be followed to reduce the risk of electric shock, burns, fire or injury to persons. Please read the following precautions before using the massage chair. ● Make sure the power plug is securely inserted into a proper electrical outlet to reduce the risk of short-circuit and fire. - Page 5 ● If you find any rips or tears in the fabric of the massage chair, contact the service department and stop using the chair immediately. ● This massage chair is designed for household use and should not be used in non-residential settings.
-
Page 6: Chair Components
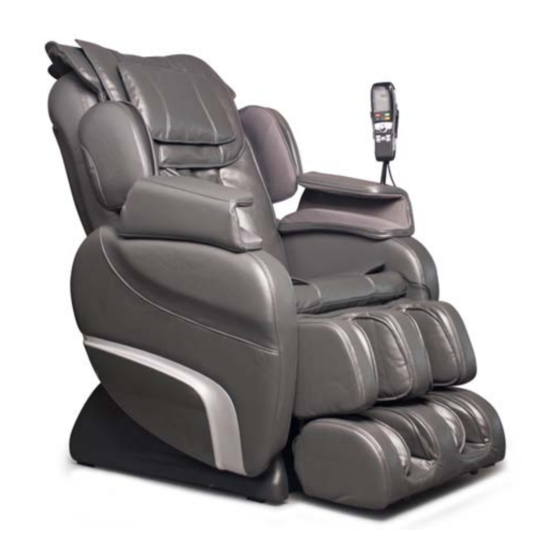
Chair components Pillow Pad Shoulder massager Controller Backrest Arm massager Backrest Pad Side Panel Seat Pad Wheels Footrest... - Page 7 Massage Position 2 Air bags Roller 8 Air bags Heater Vibration 2 Air bags 8 Air bags 8 Air bags...
-
Page 8: Chair Installation & Moving
Chair Installations Ensure sufficient spaces around massage chair, please leave 24” of spaces behind the backrest and 24” of spaces at the front of massage chair when recline backrest and elevate leg rest. at least 24” at least 24” Step 1: ●... - Page 9 ● Lift the backrest and find the air hose at the bottom of the backrest, and then insert the air hose into the cable tie which binds all air hoses, finally, connect the air hose with the air connector underneath the seat part. Note: 2 people are required to attach the air hoses connectors on the backrest, one person steadies the backrest and to avoid it fall down, the other person to connect the connectors.
- Page 10 Step 2: Attach the connecting rod and the U stay fork of the reclining actuator with the flat head rivet and secure with a split pin as demonstrated. A. Connecting rod ( on the backrest ) B. U stay fork of reclining actuator ( on the seat ) C.
- Page 11 Step 4: Unfold the backrest until you hear a “click” sound. Note: To refold the backrest, press the “stopper” as demonstrated in PIC 1. PIC 1 Step 5: Install Shoulder Panels ● Align shoulder panel to base plate. ● Attach closely the shoulder panel to base plate by tightening with screws (3pcs) while you could see the unblocked hole as shown in PIC 2.
- Page 12 Step 6: Attach the backrest pad and the pillow A: Attach the backrest pad with the zipper. B: Attach the pillow pad using the hook and loop fasteners.
- Page 13 Step 7: Install the remote controller stand by tightening the screws as demonstrated in PIC 6 PIC 5...
- Page 14 Step 8: Connect the wire plug. Step 9: Remove the spare pad located in the backrest cover for a deeper massage.
-
Page 15: Moving The Chair
Moving the Chair Lift up the footrest then recline the chair to approximate 45°to easily move the chair around the house with a slight pull of push. Caution! 1. Before moving the chair, please put the footrest back into the original position. Otherwise,injuries might occur in the process of moving. -
Page 16: Grounding Instructions
Grounding Instructions This product must be grounded. If it should malfunction or break down, grounding provides a path of least resistance for the electric current to reduce the risk of electric shock. This product is equipped with a cord with an equipment-grounding conductor and a grounding plug. -
Page 17: Chair Specifications
Chair Specifications Specifications Description Model No. TI-7700 110-120V ~ Rated Voltage Rated Frequency 50/60Hz Rated Power Consumption 150W 5/10/15/25/30 minutes Timer Max Time Rate 30 minutes Dimensions(LxWxH) Product carton: 48.4” x 30.3" x 33.9" Product gross weight: 205 lbs Weight Product net weight: 181 lbs Controller wire: 1.3m... -
Page 18: Controller Diagram
Controller Diagram... - Page 19 Connect to the power supply, and turn the power switch to “—” position, the chair is now in idle mode. During the idle mode, only five functions are available:” ON/OFF, Recline Backrest, Raise Backrest, Elevate Leg rest, Recline Leg rest” and Pause. CONTROL BUTTONS FOR THE MASSAGE CHAIR 1.
- Page 20 5/6. Recline/Restore Angle Adjustment Control Button for Backrest Press this button continually to adjust the backrest to a comfortable position. Loose the button to confirm the position. 7/8. Elevate/Restore Footrest Angle Adjustment Control Button for Footrest Press this button continually to adjust the footrest to a comfortable position. Loose the button to confirm the position.
- Page 21 Manual Back Massage Programming 15. Kneading & Swedish Tapping and Swedish Functions Start/Stop Control Button Press this button once to activate the kneading function for a full back massage. Press the button again to activate the Swedish 1 function for a full back massage. Press the button the third time to activate the Swedish 2 function for a full back massage.
- Page 22 Setting Spot or Localized Back Massage 20. Spot The Spot or Localize Back Massage This button allows user to select Spot massage for any part on the back. Press this button once to activate spot massage while the original massage mode continues to run at the original position.
- Page 23 Setting Air Massage 24. Shoulder Shoulder Air Squeeze Start/Stop Control Button – 5 levels of intensity Press this button once to activate the shoulder air squeeze function. Press the button again to stop the shoulder air squeeze function. 25. Seat Seat Air Squeeze Start/Stop Control Button –...
-
Page 24: Troubleshooting & Product Maintenance
Troubleshooting & Product Maintenance This massage chair is controlled by a microcomputer and is susceptible to power surges of +10 to –15%. The following situations may display in the event of a power surge: Situation Solution 1. Check to see that the plug is well The massage chair is connected connected and working. -
Page 25: Warnings
Warnings ● Do not use water and other cleaning detergents on the massage chair. ● Do not stack, stab, slit or harshly pull on the surface of the massage chair. ● Gently press the buttons during operation and avoid hitting the buttons with hard objects.
Need help?
Do you have a question about the TI-7700 and is the answer not in the manual?
Questions and answers