Table of Contents
Advertisement
Safe Operation Practices • Set-Up • Operation • Maintenance • Service • Troubleshooting • Warranty
OPERATOR'S MANUAL
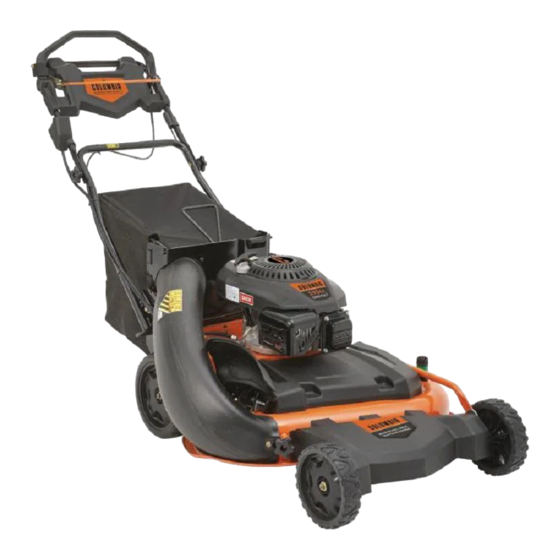
28" Rear Wheel Drive Self Propelled Mower
WARNING
READ AND FOLLOW ALL SAFETY RULES AND INSTRUCTIONS IN THIS MANUAL
BEFORE ATTEMPTING TO OPERATE THIS MACHINE.
FAILURE TO COMPLY WITH THESE INSTRUCTIONS MAY RESULT IN PERSONAL INJURY.
MTD PRODUCTS LIMITED, 97 KENT AVENUE, KITCHENER, ONTARIO N2G 4J1
MTD LLC, P.O. BOX 361131 CLEVELAND, OHIO 44136-0019
Printed In USA
769-11360
12.17.15
Advertisement
Table of Contents

Related Manuals for Columbia 12ABW32G897


Summary of Contents for Columbia 12ABW32G897
- Page 1 Safe Operation Practices • Set-Up • Operation • Maintenance • Service • Troubleshooting • Warranty OPERATOR’S MANUAL 28” Rear Wheel Drive Self Propelled Mower WARNING READ AND FOLLOW ALL SAFETY RULES AND INSTRUCTIONS IN THIS MANUAL BEFORE ATTEMPTING TO OPERATE THIS MACHINE. FAILURE TO COMPLY WITH THESE INSTRUCTIONS MAY RESULT IN PERSONAL INJURY.
-
Page 2: Table Of Contents
To The Owner Thank You Thank you for purchasing your new equipment. It was carefully The manufacturer reserves the right to change product engineered to provide excellent performance when properly specifications, designs and equipment without notice and operated and maintained. without incurring obligation. -
Page 3: Important Safe Operation Practices
Important Safe Operation Practices WARNING: This symbol points out important safety instructions which, if not followed, could endanger the personal safety and/or property of yourself and others. Read and follow all instructions in this manual before attempting to operate this machine. Failure to comply with these instructions may result in personal injury. - Page 4 A missing or damaged discharge cover can cause blade When starting engine, pull cord slowly until resistance contact or thrown object injuries. is felt, then pull rapidly. Rapid retraction of starter cord (kickback) will pull hand and arm toward engine faster than Many injuries occur as a result of the mower being pulled you can let go.
- Page 5 After stopping engine, remove Electric Start Push Key (if Check the blade and engine mounting bolts at frequent intervals for proper tightness. Also, visually inspect blade equipped) and keep it in a safe place out of the reach of children. for damage (e.g., bent, cracked, worn) Replace blade with the original equipment manufacture’s (O.E.M.) blade only, Service...
-
Page 6: Spark Arrestor
Notice Regarding Emissions Spark Arrestor Engines which are certified to comply with California and federal WARNING: This machine is equipped with an EPA emission regulations for SORE (Small Off Road Equipment) internal combustion engine and should not be used are certified to operate on regular unleaded gasoline, and on or near any unimproved forest-covered, brush may include the following emission control systems: Engine covered or grass-covered land unless the engine’s... -
Page 7: Safety Symbols
Safety Symbols This page depicts and describes safety symbols that may appear on this product. Read, understand, and follow all instructions on the machine before attempting to assemble and operate. Symbol Description READ THE OPERATOR’S MANUAL(S) Read, understand, and follow all instructions in the manual(s) before attempting to assemble and operate DANGER —... - Page 8 2 — i ection mportant peration racticeS...
-
Page 9: Assembly & Set-Up
Assembly & Set-Up Contents of Carton • Lawn Mower (1) • Grass Catcher (1) • Bottle of Oil (1) • Lawn Mower Operator’s Manual (1) • Engine Operator’s Manual (1) • Side Discharge Chute (1) • Electric Start Push Key † •... - Page 10 Attaching the Grass Catcher Open the rear discharge door using the door handle. (If Equipped) See Figure 3-6. Follow steps below to assemble the grass catcher. Make certain bag is turned right side out before assembling (warning label will be on the outside). Place bag over frame so that its black plastic side is Handle at the bottom.
- Page 11 Figure 3-10 Figure 3-8 Attaching Grass Catcher Chute Remove the vinyl cap on the deck stud in front of the discharge opening. See Figure 3-9. Figure 3-11 Figure 3-9 On the side of the mowing deck, lift the mulch plug. See Figure 3-10.
- Page 12 Adjustments Attaching Side Discharge Chute Your mower is shipped as a mulcher. To convert to side discharge, Cutting Height (Standard Wheel) make sure grass catcher is off the unit and mower rear discharge door is closed. There is a cutting height adjustment lever located above the rear left wheel.
- Page 13 Set-Up Remove wing nut (a) from axle bolt (b). Slide axle bolt from the assembly and select a cutting height. Gas and Oil Fill-Up Reinsert axle bolt in the square hole desired through wheel assembly and secure w ith wing nut removed in Step 1. Refer to the separate engine owner’s manual for additional engine information.
-
Page 14: Controls And Features
Controls and Features Premium Drive Single Lever Cutting Control Height Adjustment Blade Control Lever † Lockout Lever ON/OFF Switch † Rear Wheel Cutting Height Recoil Starter Electric Starter Adjustment Push Key † Lever † Grass Catcher † Deck Wash Side Discharge Chute Mulch Plug Caster Wheel... -
Page 15: Recoil Starter
Controls and Features Rear Wheel/ Caster Wheels (If Equipped) Refer to engine manual for help with the engine. Electric Start The rear wheel cutting height adjustment lever is located above the rear left wheel. The caster wheels adjust by moving the Insert plastic electric start push key into starter housing wheel bolts to the desired position. - Page 16 While continuing to hold the blade and drive controls together, push the drive control forward to propel mower. See Figure 4-5. The farther the control is pushed forward, the faster the mower will propel. ON/OFF Switch * Electric Start Model Shown Figure 4-3 Using Your Lawn Mower Be sure lawn is clear of stones, sticks, wire, or other objects...
-
Page 17: Operating On Slopes
Operating on Slopes • For best results, it is recommended that the first two laps be cut with the discharge thrown towards the center. Refer to the Slope Gauge on page 8 to help determine slopes After the first two laps, reverse the direction to throw the where you may operate the mower safely. -
Page 18: Service
Service Maintenance Front Caster Wheels (If Equipped) Each of the front wheel axles and casters is equipped with General Recommendations a grease fitting. See Figure 4-3. Lubricate with a No. 2 multi- • Always observe safety rules when performing any purpose grease applied with a grease gun after every 25 hours of mower operation or once a season. - Page 19 Position the hose back over the deck and press the hose Changing the Engine Oil back into place on the deck. WARNING! If the engine has been recently run, the Refill the engine with new oil. Refer to the Engine engine, muffler and surrounding metal surfaces will Operator’s Manual for information regarding the volume be hot and can cause burns to the skin.
- Page 20 Push and hold the ON/OFF switch until the mower engine stops. Turn the water OFF and detach the deck wash nozzle from the water port on your deck’s surface. After cleaning your deck with the Smart Jet system, start the mower’s engine, return to the operator’s position and engage the blades.
- Page 21 WARNING: An unbalanced blade will cause excessive vibration when rotating at high speeds. It may cause damage to mower and could break (+) Positive causing personal injury. Terminal Slide the blades (b) onto the spindle shafts with the side (-) Negative marked “Grass Side”...
- Page 22 NOTE: If you frequently stop and restart the mower during each cut throughout the season (for instance when bagging), more frequent charging may be necessary. After charging, disconnect charger plug from outlet first, then disconnect charger lead from battery and reattach cover seal.
-
Page 23: Troubleshooting
Troubleshooting Problem Cause Remedy Engine Fails to start 1. Spark plug boot disconnected. 1. Connect wire to spark boot. 2. Fuel tank empty or stale fuel. 2. Fill tank with clean, fresh gasoline. 3. Engine not primed (if equipped with primer). 3. - Page 24 Problem Cause Remedy Mower will not 1. Wet grass. 1. Do not mow when grass is wet; wait until mulch grass later to cut. 2. Excessively high grass. 2. Mow once at a high cutting height, then mow again at desired height or make a narrower cutting path.
-
Page 25: Replacement Parts
634-05220 Front Wheel 634-05196 Rear Wheel 731-10510A Discharge Chute 942-05130 Mulching Blade 942-05235 High Lift Blade 664-05060 Grass Bag (Columbia) 954-05090 Drive Belt 954-05106 Deck Belt 725-04903 Battery 731-09728 Push Key If equipped † NOTE: Download a complete Parts Manual, refer to customer support on page 2. Be sure to have your model number and serial... -
Page 26: Warranty (Canada)
For equipment purchased in Canada only. THREE YEAR LIMITED WARRANTY The limited warranty set forth below is given by MTD Products Limited with respect to new merchandise purchased and used in Canada and/or its territories and possessions (either entity respectively, “MTD”). MTD warrants this product (excluding its normal wear parts as described below) against defects in material and workmanship for a period of three (3) years commencing on the date of original purchase and will, at its option, repair or replace, free of charge, any part found to be defective in materials or workmanship. -
Page 27: Warranty (U.s.)
THREE YEARS- 120 Hrs. LIMITED WARRANTY For three (3) years-120 hrs. whichever come first, from the date of original purchase of COLUMBIA products, COLUMBIA will either repair or replace, at its option, free of charge, F.O.B. factory or authorized service firm, any part found to be defective in material and workmanship. - Page 28 Notes...
Need help?
Do you have a question about the 12ABW32G897 and is the answer not in the manual?
Questions and answers
Where can I find the model number for the engine of this mower? They are saying I need that to order filters.