Roland V-Combo VR-09 Owner's Manual
Hide thumbs
Also See for V-Combo VR-09:
- Workshop manual (15 pages) ,
- Workshop manual (17 pages) ,
- Reference manual (65 pages)
Table of Contents
Advertisement
Quick Links
Owner's Manual
(this document)
Read this irst. It explains the basic things you need to know in order to use the VR-09.
PDF Manual
(download from the Web)
• Data List
This is a list of the sounds, drum kits, rhythm patterns, and sound efects
built into the VR-09.
• MIDI Implementation
This is detailed information about MIDI messages.
To obtain the PDF manual
1.
Enter the following URL in your computer.
http://www.roland.com/manuals/
2.
Choose "V-Combo VR-09" as the product
name.
Advertisement
Table of Contents

Related Manuals for Roland V-Combo VR-09


Summary of Contents for Roland V-Combo VR-09
- Page 1 This is a list of the sounds, drum kits, rhythm patterns, and sound efects Enter the following URL in your computer. built into the VR-09. http://www.roland.com/manuals/ • MIDI Implementation This is detailed information about MIDI messages. Choose “V-Combo VR-09” as the product name.
-
Page 3: An Overview Of The Vr-09
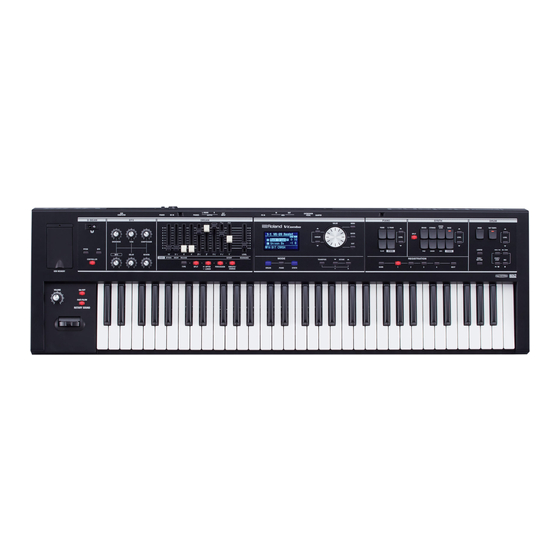
An Overview of the VR-09 Sound Sections The VR-09 has three sound sections—organ, piano, and synthesizer—and each section occupies a separate area of the panel. You can also play two sounds simultaneously, or divide the keyboard into two regions and play diferent sounds in the left and right regions. Organ section Piano section Synthesizer section... -
Page 4: Table Of Contents
Owner’s manual in its entirety. This manual should be saved and kept on hand as a convenient reference. Copyright © 2013 ROLAND CORPORATION All rights reserved. No part of this publication may be reproduced in any form without the written permission of ROLAND CORPORATION. - Page 5 Contents Detailed Settings for All Functions (Menu) ......42 Connections with Other Equipment ......51 Basic Menu Operations .
-
Page 6: Panel Descriptions
USB lash drives. * Carefully insert the USB lash drives all the way in—until it is irmly in place. * Use USB Flash Memory sold by Roland. We cannot guarantee operation if other products are used. - Page 7 Panel Descriptions Number Name Explanation Page Use these to select parameters. — CURSOR [ ] buttons [VALUE] dial Use this to modify a value. — [MENU] button Accesses the menu screen. p. 42 [ENTER] button Conirms a value or executes an operation. —...
-
Page 8: Rear Panel (Connecting Devices)
Panel Descriptions Rear Panel (Connecting Devices) DAMPER jack EXPRESSION PEDAL jack PK IN connector You can connect a pedal switch or a damper Connect an expression pedal (EV series; sold Connect a pedalboard (PK-6, PK-9; sold pedal (DP series; sold separately) here. separately) to this jack. -
Page 9: Getting Ready
Getting Ready While pressing the tabs of the battery compartment cover Installing Batteries on the VR-09’s bottom panel, remove the cover. If eight commercially available rechargeable Ni-MH batteries (AA, HR6) are installed, you’ll be able to play the VR-09 without connecting the AC adaptor. -
Page 10: Placing The Vr-09 On A Stand
Getting Ready Placing the VR-09 on a Stand Be careful not to pinch your ingers when setting up the stand. If you place the VR-09 on a stand, you must use the KS-18Z or the KS-12. Place the instrument on the stand as follows. * If using a pedalboard (PK-9;... -
Page 11: Turning The Power On/Of
Getting Ready Turning the Power On/Of Listening to the Demo Songs Here’s how to listen to the demo songs. Turning the Power On Turn the power on. Press the [ ] (START/STOP) button. NOTE The demo screen is shown in the display. * Once everything is properly connected (p. -
Page 12: Selecting Sounds
REFERENCE For details about the sounds, refer to “Sound List” in the “Data List” (PDF). You can download the “Data List” (PDF) from the Roland website. http://www.roland.com/manuals/ MEMO • You can play the keyboard to audition the sound at which the Selecting Organ Sounds cursor is located. -
Page 13: Selecting Piano Sounds
Selecting Sounds Selecting Piano Sounds Selecting Synthesizer Sounds Press the MODE [PIANO] button. Press the MODE [SYNTH] button. The MODE [PIANO] button will light. The MODE [SYNTH] button will light. Sound variation Sound variation Sound Sound Volume Volume (PIANO LEVEL [ ] [ ] button) (SYNTH LEVEL [ ] [ ] button) Octave (p. -
Page 14: Selecting Your Favorite Sounds (Registration)
Selecting Sounds Selecting Your Favorite Sounds Switching Registration Banks (Registration) Switching banks (Banks 1–4) You can assign a name to your favorite organ, piano, and synthesizer sounds (or combination of sounds), and store it as a Press the [BANK] button. “registration. -
Page 15: Storing A Registration
Refer to “Drum Kit List” in the “Data List” (PDF) for details on the percussion instrument sounds that are assigned to each key. You can download the “Data List” (PDF) from the Roland website. http://www.roland.com/manuals/ Press the [DRUM] button to make it light. -
Page 16: Modifying The Organ Sound
Modifying the Organ Sound Using the Harmonic Bars The harmonic bars are assigned to sounds of diferent footage Harmonic bars and the pitch of the sound (pitch). You can create a wide variety of organ sounds by layering these sounds. When the middle C (C4) note is pressed, each harmonic bar will sound the following notes. -
Page 17: Upper Part
Modifying the Organ Sound When you’ve selected “Transistor Organ” as the organ sound The footage structure will be diferent for Transistor organ. You’ll be able to operate the following harmonic bars. The other harmonic bars will be unavailable. Part Harmonic bars that can be operated Upper part 16’... -
Page 18: Setting Example Of Harmonic Bars
Modifying the Organ Sound Setting Example of Harmonic Bars Hard rock Rock Here’s a typical setting for hard rock of the ‘70s. Here’s a typical setting for rock of the ‘70s. As desired, you can add a bit of 2’ (the 2-foot bar). Add the overdrive (p. -
Page 19: Using The Rotary Efect
Modifying the Organ Sound Using the Rotary Efect Using Twin Rotary By using the multi-efect “TWIN ROTARY” in conjunction with This efect adds modulation to the sound as if you were using a the rotary efect, you can obtain a more powerful and three- rotary speaker. -
Page 20: Using Percussion
Modifying the Organ Sound Using Percussion Parameter Value Explanation The percussion sound will decay immedi- ately, producing a sharper attack. This adds an attack to the beginning of each note, making the Volume sound more crisp and percussive. Short decay time Press the [PERCUSSION] button to make it light. -
Page 21: Using Vibrato/Chorus
Modifying the Organ Sound Using Vibrato/Chorus Here’s how to apply vibrato (cyclic modulation of the pitch). You can also apply chorus, which mixes vibrato sound with unprocessed sound to produce greater depth and spaciousness. Press the [VIBRATO/CHORUS] button to make it light. The VIBRATO/CHORUS screen appears. -
Page 22: Modifying The Synthesizer Sound
Modifying the Synthesizer Sound The VR-09 lets you use the top panel harmonic bars to modify the When you operate a bar, the current value is shown in the screen. character of the synthesizer sound. MEMO • If you’re playing two sounds (split or dual) (p. 27), the settings will determine which sound is afected. -
Page 23: Adding Efects To The Sound
Adding Efects to the Sound Applying Efects (EFX) You can apply efects to the sounds you play. The VR-09 contains 7 efect processors; each can be set independently. For the six efects other than rotary, you can use “global control” to conveniently apply each efect in an appropriate way. MEMO •... -
Page 24: Modifying The Sound / Producing Sound Efects
For details about the sound efects, refer to “Sound Efect List” in the * Pitch will not apply to organ sounds and drum “Data List” (PDF). sounds. You can download the “Data List” (PDF) from the Roland website. [SFX] button A sound efect will be produced. http://www.roland.com/manuals/... -
Page 25: Changing The Pitch/Applying Vibrato
Adding Efects to the Sound Changing the Pitch/Applying Vibrato Making the Pitch Change Smoothly (Pitch Bend/Modulation Lever) (Portamento) While playing the keyboard, move the lever toward the left to lower Portamento is an efect that produces a smooth change in pitch the pitch, or toward the right to raise the pitch. -
Page 26: Changing The Key Range
Changing the Key Range Raising or Lowering the Range in Transposing the Key (Transpose) Octaves (Octave) You can transpose the pitch of the keyboard. Hold down the [TRANSPOSE] button and press the [–] or You can change the pitch of the keyboard in steps of one octave. [+] button. -
Page 27: Combining Two Sounds
Combining Two Sounds Layering Two Sounds (Dual) Combining an Organ Sound with a Piano Sound or Synthesizer Sound “Dual” refers to settings in which two sounds are layered. * You can’t layer two organ sounds. Organ sound Part 1 Piano sound/Synthesizer sound Part 2 Simultaneously press the MODE [ORGAN] button and a sound button in the piano section or the synthesizer... -
Page 28: Playing Diferent Sounds In The Left And Right Hands (Split)
Combining Two Sounds Playing Diferent Sounds in the Left Combining Two Organ Sounds and Right Hands (Split) “Split” refers to settings that let you play diferent sounds with your left and right hand. Organ sound Organ sound The keyboard will be divided into two regions; the right is called the “upper part, ”... - Page 29 Combining Two Sounds Playing the pedal sound with your left hand MEMO • The [PERCUSSION] button is valid only for the organ sound of (manual bass) the upper part. • When the organ type is Rock Organ or Jazz Organ, you can “Manual bass”...
-
Page 30: Combining A Piano Sound And Synthesizer Sound
Combining Two Sounds Combining a Piano Sound and Combining an Organ Sound with a Piano Synthesizer Sound Sound or Synthesizer Sound Piano sound/ Piano sound/ Piano sound/ Organ sound Synthesizer sound Synthesizer sound Synthesizer sound Select a piano sound or a synthesizer sound (p. 13). Press the SYNTH [SPLIT] button to make it light. -
Page 31: Playing Drum Sounds In The Lower Part
Combining Two Sounds Playing Drum Sounds in the Lower Part Cancelling Split You can play drum sounds in the lower part while playing a Press the [EXIT] button or the lit [SPLIT] button to make it diferent sound in the upper part. go dark. -
Page 32: Performing With Rhythm Pattern
You can adjust the volume of the rhythm pattern. in the “Data List” (PDF). This setting speciies the volume of the following functions. You can download the “Data List” (PDF) from the Roland website. • The volume of drum sounds and sound efects http://www.roland.com/manuals/ •... -
Page 33: Recording Your Performance
* In order to use recording, you must connect a USB lash drive (sold separately) to the USB MEMORY port (p. 6). * Use USB Flash Memory sold by Roland. We cannot guarantee operation if other products are used. SMF and audio recording... -
Page 34: Playing A Song
Recording Your Performance Press the [ENTER] button or the MODE [SYNTH] (Save) Press the [ ] (START/STOP) button. button. The song will stop playing. The song will be saved. MEMO * If you recorded in audio format and an identically-named song •... -
Page 35: Renaming A Song
Recording Your Performance Renaming a Song Deleting a Song Here’s how to rename a song. Here’s how to delete a song that you’ve saved on a USB lash drive. Connect a USB lash drive (sold separately) to the USB Connect a USB lash drive (sold separately) to the USB MEMORY port (p. - Page 36 Recording Your Performance Data saved on a USB lash drive The following data can be saved on a USB lash drive. • Songs recorded on the VR-09 (p. 33) • Phrases recorded by the looper (p. 37) • Registration sets (p. 39) Root folder (top level) Song iles Songs recorded on the VR-09 and phrases recorded by the looper are saved in the root...
-
Page 37: Using The Looper
Using the Looper The looper is a function that lets you overdub while recording and playing back in real time. You can take advantage of various performance possibilities, such as performing or adjusting the efects while playing back recorded phrases as a backing. -
Page 38: Recording While A Rhythm Pattern Plays
Using the Looper Recording While a Rhythm Pattern Plays Saving a Phrase A phrase you record using the looper can be saved as audio data on Press the [SONG/RHYTHM] button several times to access your USB lash drive. the RHYTHM screen. * To save a phrase recorded using the looper, you must irst connect your USB lash drive to the USB MEMORY port. -
Page 39: Convenient Functions
Convenient Functions Making the Power Automatically Saving Registrations to a USB Flash Turn Of After a Time (Auto Of) Drive (Save Registration) With the factory settings, the unit’s power will automatically be All registrations stored in the VR-09 can be saved to your USB lash switched of a certain amount of time after you stop playing or drive as a set (registration set). -
Page 40: Loading Saved Registrations From A Usb Flash Drive (Load Registration)
Convenient Functions Loading Saved Registrations from a Deleting Saved Registrations from a USB Flash Drive (Load Registration) USB Flash Drive (Delete Registration) Here’s how a registration set saved on a USB lash drive can be Here’s how a registration set saved on a USB lash drive can be loaded into the VR-09. -
Page 41: Formatting A Usb Flash Drive (Format Usb)
Convenient Functions Formatting a USB Flash Drive Restoring the Factory Settings (Format USB) (Factory Reset) “Formatting” is the operation of preparing a USB lash drive for use If desired, you can restore all of the VR-09’s settings to their factory- with the VR-09. -
Page 42: Detailed Settings For All Functions (Menu)
Detailed Settings for All Functions (Menu) Basic Menu Operations The menu allows you to edit the performance and sound settings. Press the [MENU] button. The menu screen appears. Turn the [VALUE] dial to select a category. Press the [ENTER] button. Use the CURSOR [ ] [ ] buttons to select the parameter that you want to edit. -
Page 43: (Organ High Gain)
For details about how to make menu Detailed Settings for All Functions (Menu) settings, see p. 42. Category Parameter Value Explanation Specifying the Low-frequency Boost/Cut (Organ Low Gain) Organ Low Gain This speciies the amount of boost/cut for the low-frequency region. -12–12 Organ Specifying the High-frequency Boost/Cut (Organ High Gain) -
Page 44: Selecting The Multi-Efect Type (Mfx Type)
This is a virtual tape echo that produces a realistic tape delay sound. It simulates the tape echo TAPE ECHO section of a Roland RE-201 Space Echo. REVERSE DELAY This is a reverse delay that reverses the input sound and adds it after a delay. -
Page 45: Changing The Wall Type (Wall Type)
For details about how to make menu Detailed Settings for All Functions (Menu) settings, see p. 42. Category Parameter Value Explanation Changing the Wall Type (Wall Type) By changing the reverb type you can experience the feeling of performing in various diferent locations, and by changing the wall type (the material of the walls) you can make further adjustments to the way in which reverberation occurs. -
Page 46: Changing The Function Of The Expression Pedal (Expression Assign)
For details about how to make menu Detailed Settings for All Functions (Menu) settings, see p. 42. Category Parameter Value Explanation Changing the Function of the Expression Pedal (Expression Assign) You can select the function that’s assigned to the expression pedal or the pedal switch connected to the EXPRESSION PEDAL jack. EXPRESSION Use as a damper pedal. -
Page 47: Using The Modulation Lever To Turn The Rotary Efect On/Of (Modulation Lever)
For details about how to make menu Detailed Settings for All Functions (Menu) settings, see p. 42. Category Parameter Value Explanation Using the Modulation Lever to Turn the Rotary Efect On/Of (Modulation Lever) Controller Modulation Lever You can select whether the modulation lever will turn the rotary efect on/of. * This applies only when you’re playing organ sounds. -
Page 48: Preventing The Rhythm Pattern Tempo From Changing Automatically (Auto Std Tempo)
For details about how to make menu Detailed Settings for All Functions (Menu) settings, see p. 42. Category Parameter Value Explanation Preventing the Rhythm Pattern Tempo from Changing Automatically (Auto Std Tempo) Auto Std Tempo This lets you prevent the tempo setting from changing automatically when you switch rhythm patterns. When the rhythm pattern is stopped, the tempo settings are not changed automatically when the rhythm patterns are changed. -
Page 49: Controlling Video Devices (Visual Control)
Control can be connected to electronic musical instruments via MIDI in order to control video equipment in tandem with a performance. What is V-LINK? V-LINK is Roland’s proprietary speciication that allows visual expression to be linked with musical performance. Video equipment that is compatible with V-LINK can be connected to electronic musical instruments via their MIDI ports, making it easy to enjoy a variety of visual efects that are linked with the performance. -
Page 50: Matching The Pitch With Other Instruments (Master Tune) .49 Performing In Atelier Mode (Atelier Mode)
For details, refer to “Making the Power Automatically Turn Of After a Time (Auto Of )” (p. 39). REFERENCE Performing in Atelier Mode (ATELIER Mode) This setting makes the VR-09 behave similarly to the Roland Music Atelier (Atelier Mode). System ATELIER Mode... -
Page 51: Connections With Other Equipment
Connect the external MIDI device to the MIDI IN connector with an optional MIDI cable. The notes played on the keyboard, movements For details on operating requirements, refer to the Roland website. of the Damper pedal, Expression data, data http://www.roland.com/ indicating that a REGISTRATION button, etc.,... -
Page 52: About The Wireless Lan Function
For information on whether the Wireless USB Adapter can be Icons in the display used in your country, please contact the nearest Roland Service Center, or an authorized Roland distributor, as listed on the “Information” page. -
Page 53: Wireless Lan Function Settings
About the Wireless LAN Function Wireless LAN Function Settings Other Settings (Options) Make settings for Wireless ID or Ad-Hoc mode (Ad-Hoc Mode). You can view or edit the wireless settings. Select the “Options” from the wireless menu, and press the [ENTER] button (p. 53). Wireless Menu (Wireless) The Options screen appears. - Page 54 About the Wireless LAN Function On the iPad or other wireless device that you want to Connecting in Ad-Hoc mode (Ad-Hoc Mode) connect, select the Ad-Hoc SSID shown in the above screen to make the connection. (For example, on an iPad, choose [Settings] g [Wi-Fi] g [Choose a Network] to Here’s how to connect in Ad-Hoc mode.
-
Page 55: Troubleshooting
Troubleshooting If you suspect a malfunction, please read this section irst. Power does not turn on Problem Cause Action Page AC adaptor is not connected correctly. Connect the AC adaptor is correctly. p. 8 When you press the [POWER] switch, the power doesn’t come on The batteries are exhausted. - Page 56 Troubleshooting Problem Cause Action Page Modulation is applied even when the rotary Either turn the [MFX] knob to minimize the efect, “TWIN ROTARY” is selected as the multi-efect type. p. 23 efect is of or change the multi-efect type. Hold down the [TRANSPOSE] button and press the Transpose is in efect.
-
Page 57: Other Problems
VR-09 does not support. Other problems Problem Cause Action Page Are you using Roland USB Flash Memory (sold We cannot guarantee operation if any other USB Can’t read/write USB lash drive — separately)? lash drive is used. Problems when connecting to a wireless LAN * For problems related to communication, refer also to the owner’s manual of your wireless LAN access point. -
Page 58: Error Messages
Make sure that the USB lash drive is inserted correctly (p. 6). Failed to load data from USB lash drive. Also make sure that you’re using a USB Flash Memory sold by Roland. It may be that the ile is damaged. -
Page 59: Specifying The Woofer's Slow Rotation Speed Stored Settings
Stored Settings Settings That Are Stored After the Power Is Turned Of Setting Explanation Page Registration Shift Registration shift p. 47 Damper Assign Damper pedal function p. 45 Expression Assign Expression pedal function p. 46 Expression Curve Expression curve p. 46 D-BEAM Sensitivity D-BEAM sensitivity p. -
Page 60: Specifying The Woofer's Fast Rotation Speed Main Speciications
USB Flash Memory * Use USB Flash Memory sold by Roland. We cannot guarantee operation if other products are used. * In the interest of product improvement, the speciications and/or appearance of this unit are subject to change without prior notice. -
Page 61: Specifying The Tweeter's Fast Rotation Speed Index
Index Volume ......7 Tonewheel brake ..... 24 Symbols Pitch bend/Modulation lever . -
Page 62: Using The Unit Safely
If you Refer all servicing to your retailer, Precautions regarding placement of this unit on a experience any hearing loss or ringing the nearest Roland Service Center, or stand in the ears, you should immediately an authorized Roland distributor, as... - Page 63 AC adaptor from the outlet, and charger. request servicing by your retailer, Evaluate safety issues before using stands the nearest Roland Service Center, or • When using rechargeable Even if you observe the cautions an authorized Roland distributor, as batteries and a charger, use only given in the owner’s manual, certain...
-
Page 64: Important Notes
IMPORTANT NOTES CAUTION CAUTION CAUTION Unplug the AC adaptor from the outlet before Take care so as not to get ingers pinched Handle leaking batteries carefully cleaning When handling the following moving • If luid has leaked from a battery, parts, take care so as not to get make sure not to touch it with your Before cleaning the unit, turn it of... - Page 65 • Do not leave the device where it can be subjected to direct sunlight. the data, and Roland assumes no liability concerning such loss of data. Do not leave the device in locations such as a closed vehicle.
- Page 66 For EU Countries For China...
- Page 67 For C.A. US ( Proposition 65 ) WARNING This product contains chemicals known to cause cancer, birth defects and other reproductive harm, including lead. VR-09 Digital Organ Roland Corporation U.S. 5100 S. Eastern Avenue Los Angeles, CA 90040-2938 (323) 890-3700...
Need help?
Do you have a question about the V-Combo VR-09 and is the answer not in the manual?
Questions and answers
can you select piano from the Mode section. My keyboard doesn't toggle or light up