Table of Contents
Advertisement
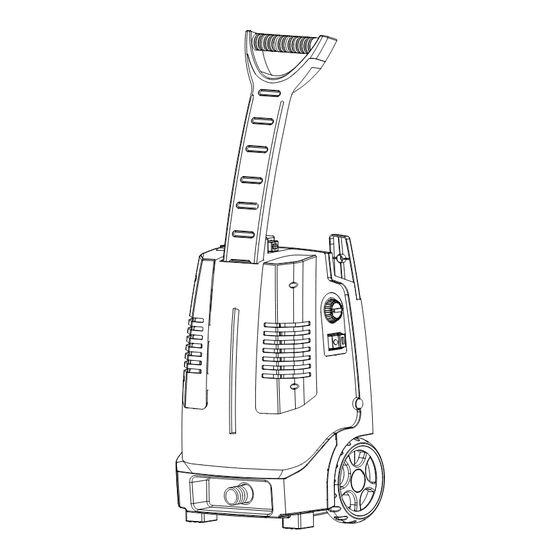
MODEL NO.: XE03
SKU: 39-8508-6
1600
PSI ELECTRIC PRESSURE WASHER
Owner's Manual
QUESTIONS, PROBLEMS, MISSING PARTS?
Before returning to your retailer, visit our web site or call our customer service at
www.activeproducts.com / 1-866-924-7626
PLEASE KEEP THE ORIGINAL BOX, PACKAGING AND RECEIPT. BEFORE OPERATING
THIS UNIT, PLEASE READ THIS MANUAL THOROUGHLY AND RETAIN IT FOR FUTURE
REFERENCE. IF YOU MUST STORE YOUR PRESSURE WASHER IN A PLACE WHERE
THE TEMPERATURE IS BELOW 5ºC, YOU MUST APPLY WINTERIZING PROCEDURE TO
PROTECT IT. FAILURE TO WINTERIZE THE UNIT MAY PERMANENTLY DAMAGE PUMP
AND VOID THE WARRANTY.
Purchase Date:___________________
Serial #: __________________
03_12/2008_
.2
VERSION XE
REV
Advertisement
Table of Contents

Related Manuals for Active Products XE03


Summary of Contents for Active Products XE03
- Page 1 MODEL NO.: XE03 SKU: 39-8508-6 1600 PSI ELECTRIC PRESSURE WASHER Owner’s Manual QUESTIONS, PROBLEMS, MISSING PARTS? Before returning to your retailer, visit our web site or call our customer service at www.activeproducts.com / 1-866-924-7626 PLEASE KEEP THE ORIGINAL BOX, PACKAGING AND RECEIPT. BEFORE OPERATING THIS UNIT, PLEASE READ THIS MANUAL THOROUGHLY AND RETAIN IT FOR FUTURE REFERENCE.
-
Page 2: Table Of Contents
TABLE OF CONTENTS Technical specifications ......................1 Warranty ..........................2 Important precautions – Read first! ..................3 Safety features and electrical power information ..............5 Parts and diagram list ......................6 Assembly and operating instructions..................7 Using the accessories ....................11 Working with detergents .....................11 Shutting down and cleaning up ..................13 Taking a break ......................13... -
Page 3: Warranty
The warranty does NOT cover: implied warranty. manual. chemicals/detergents that are not approved by or recommended by Active Products. Active Products. Any such tampering will void the implied warranty. tive product. borne in full by the end user. -
Page 4: Important Precautions - Read First
IMPORTANT PRECAUTIONS – READ FIRST Warnings When using this product, basic precautions should always be followed: the controls. electric spark could cause an explosion or fire. placed as far as possible from the cleaning site during operation. electrical outlets. part of the equipment. If replacement of the plug or cord is needed, use only identical replacement parts. - Page 5 IMPORTANT PRECAUTIONS – READ FIRST means for grounding be added to the product. Servicing a double-insulated done only by qualified service personnel. Replacement parts of a double-insulated product must be identical to the parts they re-...
-
Page 6: Safety Features And Electrical Power Information
SAFETY FEATURES & ELECTRICAL POWER INFORMATION The pressure washer is equipped with a stop device that will sense when the trigger on washer motor to stop. The motor will start again when the trigger is pulled. WARNING DANGER observe all of the warnings and instructions listed below: Maximum cable length: 50’... -
Page 7: Parts And Diagram List
PARTS AND DIAGRAM LIST Turbo nozzle XE03-020-0001 Adjustable spray nozzle XE03-020-0002 Spray gun XE03-020-0003 High-pressure hose XE03-020-0004 Water filter XE03-030-0001 Quick-connect coupling XE03-030-0003 Inlet adapter XE03-030-0002 Detergent bottle and cap XE03-020-0006 Wheels XE03-000-0002 Needle (for nozzle cleaning) XE03-062-0002 pressure washer. -
Page 8: Assembly And Operating Instructions
ASSEMBLY AND OPERATING INSTRUCTIONS toys or outdoor furniture. Ensure that all doors and windows are closed tightly. Only draw water through the unit. For use with cold water supply only. Water hose must GPM (gallons per minute) [9.1 lpm (litres per minute)]. Flow rate can be determined by temperature must not exceed 104°... - Page 9 ASSEMBLY AND OPERATING INSTRUCTIONS Attach high pressure hose to the gun assembly Insert choice of wand to the gun and twist (hand tighten only). ¼ turn to lock in position. Attach the inlet adapter to the machine’s water inlet. Hand tighten only. (Some models come with inlet adapter pre-assembled.
- Page 10 ASSEMBLY AND OPERATING INSTRUCTIONS Attach garden hose to water supply and turn water on. Make sure the ON/OFF switch is on the OFF position. Completely unwind power cord and plug the unit into an outlet.
- Page 11 ASSEMBLY AND OPERATING INSTRUCTIONS Delicate Medium High Select desired pressure setting from the pressure dial. Depress trigger until there is a steady stream of water. CAUTION Drain unit after each use (for storage): remove water connec- a few seconds and press gun trigger to bleed remaining water in the pump.
-
Page 12: Using The Accessories
ASSEMBLY AND OPERATING INSTRUCTIONS USING THE ACCESSORIES 360 degree rotation of the nozzle: High (+) & low (-) pressure sprays: The spray nozzle can be adjusted between high and low pressure by to desired angle by turning the nozzle with turning the nozzle as shown. - Page 13 ASSEMBLY AND OPERATING INSTRUCTIONS and fill with detergent. Push containers back into storage position. Turn on the pressure washer. Pull trigger to operate unit. The liquid detergent will automati- Allow detergent to remain on the surface for a short time before rinsing. Do not allow detergent to dry on surface.
-
Page 14: Shutting Down And Cleaning Up
ASSEMBLY AND OPERATING INSTRUCTIONS SHUTTING DOWN AND CLEANING UP detergent bottle and rinse it thoroughly. Disconnect the garden hose from the water inlet on the unit. Press trigger to release any remaining water pressure. Unplug the power cord from the outlet. Engage gun safety lock. -
Page 15: Winterizing And Long-Term Storage
WINTERIZING AND LONG-TERM STORAGE Winterizing your pressure washer will help protect and prolong its life. We strongly from freezing. 1. Connect Pressure Washer Pump Saver hose onto the adaptor and quick-connect coupling. 2. Depress button on top of Pump Saver container. 4. -
Page 16: Cleaning And Maintenance
CLEANING AND MAINTENANCE Connections Connections on pressure washer hoses; gun and spray wand should be cleaned regularly and lubricated with non-water soluble grease. Clogging of the spray tips causes the pump pressure to be too high and cleaning is im- mediately required. -
Page 17: Troubleshooting
TROUBLESHOOTING Disconnect the machine from the power source before making any repairs. Cause Motor will not start. On/Off switch is in the ( | ) position. Power cord is not plugged in. Plug in power cord. Extension cord is too long. Replace extension cord Extension cord is not with either a 25’... - Page 18 TROUBLESHOOTING Cause Output pressure varies high Discharge nozzle is obstructed. and low. (continued) with a fine needle. Run distilled vinegar power nozzle. through detergent tank. Detergent not working. Detergent container is empty. Add more detergent. Detergent bottle or suction Check connections. tube not properly connected.
- Page 19 TROUBLESHOOTING Cause Motor buzzes but fails to run. Supply voltage Verify that only the pres- below minimum. sure washer is running on this circuit. System has residual pressure. trigger on spray wand to Voltage loss due to Unplug any extension cords extension cord.
Need help?
Do you have a question about the XE03 and is the answer not in the manual?
Questions and answers