Advertisement
Quick Links
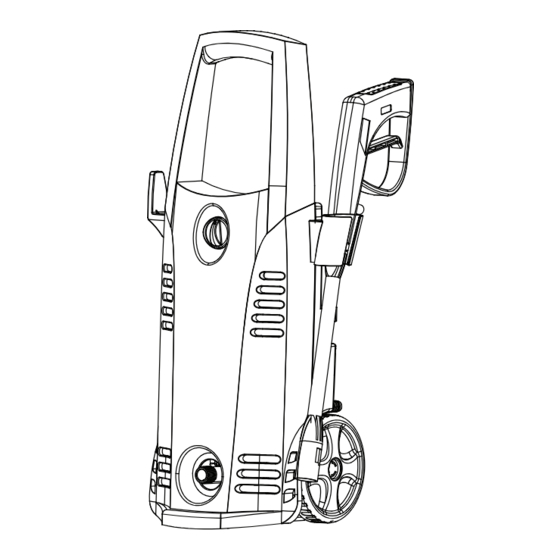
EVERYDAY PRESSURE WASHER
ITEM: 39-8603-8
MODEL NO.: ZE03
CAUTION !
BEFORE OPERATING THIS UNIT, PLEASE READ THIS MANUAL THOROUGHLY
AND RETAIN IT FOR FUTURE REFERENCE.
IF YOU MUST STORE YOUR PRESSURE WASHER IN A PLACE WHERE TEMPERATURE IS
BELOW 41ºF (5ºC), YOU MUST APPLY WINTERIZING PROCEDURE TO PROTECT IT. FAILURE
TO WINTERIZE THE UNIT MAY PERMANENTLY DAMAGE PUMP AND VOID THE WARRANTY.
SEE PAGE 10 FOR WINTERIZING PROCEDURE.
QUESTIONS, PROBLEMS, MISSING PARTS?
Before returning to your retailer, visit our website or call our customer service at
www.activeproducts.com / 1-866-924-7626
PURCHASE DATE: _______________ SERIAL#: ___________________________________
PLEASE KEEP THE ORIGINAL BOX, PACKAGING AND RECEIPT.
WARRANTY REGISTRATION BY INTERNET, WWW.ACTIVEPRODUCTS.COM.
TM
ZE03_04/2007_REV.1
Advertisement

Related Manuals for Active Products ZE03


Summary of Contents for Active Products ZE03
- Page 1 EVERYDAY PRESSURE WASHER ITEM: 39-8603-8 MODEL NO.: ZE03 CAUTION ! BEFORE OPERATING THIS UNIT, PLEASE READ THIS MANUAL THOROUGHLY AND RETAIN IT FOR FUTURE REFERENCE. IF YOU MUST STORE YOUR PRESSURE WASHER IN A PLACE WHERE TEMPERATURE IS BELOW 41ºF (5ºC), YOU MUST APPLY WINTERIZING PROCEDURE TO PROTECT IT. FAILURE TO WINTERIZE THE UNIT MAY PERMANENTLY DAMAGE PUMP AND VOID THE WARRANTY.
- Page 2 TABLE OF CONTENTS ............Technical specifications .
-
Page 3: Safety Warnings
IMPORTANT SAFETY INSTRUCTIONS - READ FIRST! • Before servicing, cleaning or removal of any Safety Warnings parts, shut “OFF” power and relieve pressure. When using this product, basic precautions • Do not spray electrical apparatus and wiring. should always be followed: If connection is made to a portable water Read all the instructions before using the •... - Page 4 SAFETY FEATURES AND ELECTRICAL POWER INFORMATION The pressure washer is equipped with a stop Extension Cords device that will sense when the trigger on the gun If possible, do not use extension cords with this is released. It will open the power circuit to the motor product.
- Page 5 REPLACEMENT PARTS AND DIAGRAM Parts List Item no. Quantity Part Name Parts No. Main Unit Cable & Hose Hook ZE03-000-0001 Gun Holder ZE03-000-0002 Adjustable Wand ZE01-090-0003 Turbo Wand ZE01-090-0004 Gun Assembly ZE03-090-0001 Detergent Bottle & Wand ZE03-090-0005 High - Pressure Hose...
- Page 6 ASSEMBLY AND OPERATING INSTRUCTIONS Assembly Time: 2 minutes / Tools Required: None Surface Preparation Before starting any cleaning task, it is important to inspect the area for objects which could create a hazard. Remove from the workarea which could be tripped over, such as toys or outdoor furniture. Ensure that all doors and windows are closed tight.
- Page 7 ASSEMBLY AND OPERATING INSTRUCTIONS – continued Step 4 Attach the high-pressure hose to the water outlet. Twist tightly to avoid leakage. Fig. 5 Fig.6 Step 5 Step 6 Attach garden hose to water supply and turn Plug the unit into an outlet. water on.
- Page 8 ASSEMBLY AND OPERATING INSTRUCTIONS – continued Fig.7 Step 7 Before turning the unit ON, depress the trigger to bleed any trapped air out of the pump and hose. O / OFF O / OFF I/ON I/ON Step 8 Start the pressure washer by turning ON/OFF switch to ON.
- Page 9 USING THE ACCESSORIES Fig. 9 Adjusting The Spray Caution The adjustable spray nozzle can be adjusted Jet spray adjustment is very aggressive. Do from fan to jet. The spray is adjusted from jet not adjust while spraying. We recommend to fan spray by turning the nozzle as shown that for most cleaning applications a 20º...
- Page 10 WORKING WITH DETERGENTS Using the detergent Fig.10 Working with detergent ensures a quick soaking of the dirt, and allows the high-pressure water to penetrate and remove the dirt more effectively. Always spray detergent on a dry surface, do not pre-soak area. Wetting the surface first dilutes the detergent andreduces its cleaning ability Caution Make sure the gun safety lock is engaged...
- Page 11 SHUTTING DOWN AND CLEANING UP Step 1 Step 4 Turn the switch to “OFF” (0) position and Disconnect the garden hose from the water unplug cord from outlet. inlet on the unit. Step 2 Step 5 Turn off the water supply. Disconnect the the high-pressure hose from the high-pressure outlet and engage the gun Step 3...
- Page 12 WINTERIZING AND LONG-TERM STORAGE Optimum Winterizing Procedure Alternative Procedure Material required: Pump saver If you cannot perform the Optimum Winterizing procedure, you can still protect your pressure Winterizing your pressure washer will help washer from winter-damage: protect and prolong its life. It is strongly recom- mend you follow the below steps using a pump Disconnect all water connections.
- Page 13 USER MAINTENANCE Connections Connections on pressure washer hoses, gun and spray wand should be cleaned regularly and lubricated with non-water soluable grease. Fig.13 Adjustable Nozzle Water Filter Screen When the nozzle is clogged, it will cause the The pressure washer is equipped with a water pump to build pressure and may cause the unit inlet filter that prevents debris going into the to surge.
- Page 14 TROUBLESHOOTING Symptom Cause Solution Motor will On/Off switch is in the Turn switch to the “ON” ( | ) position. not start. “OFF” (O) position. Power cord is not plugged in. Plug in power cord. Extension cord is too long. Replace extension cord with a 50’...
- Page 15 TROUBLESHOOTING – continued Symptom Cause Solution Garden hose Loose fittings. Tighten fittings. connection leaks. Missing/worn rubber washer. Insert new washer. Spray wand, or Spray nozzle not properly attached. Insert the spray nozzle into the trigger extension, or gun. Carefully press in against the nozzle leaks.
- Page 16 All decisions of Active Products with regard to this limited warranty shall be final. NO RETURNS or REFUNDS will be allowed by the retailer or manufacturer.
Need help?
Do you have a question about the ZE03 and is the answer not in the manual?
Questions and answers