Table of Contents
Advertisement
Advertisement
Table of Contents

Related Manuals for Blade Night 230 S


Summary of Contents for Blade Night 230 S
- Page 1 Instruction Manual Bedienungsanleitung Manuel d’utilisation Manuale di Istruzioni...
-
Page 2: Safety Precautions And Warnings
NOTICE All instructions, warranties and other collateral documents are subject to change at the sole discretion of Horizon Hobby, LLC. For up-to-date product literature, visit horizonhobby.com and click on the support tab for this product. Meaning of Special Language The following terms are used throughout the product literature to indicate various levels of potential harm when operating this product: NOTICE: Procedures, which if not properly followed, create a possibility of physical property damage AND a little or no possibility of injury. -
Page 3: Table Of Contents
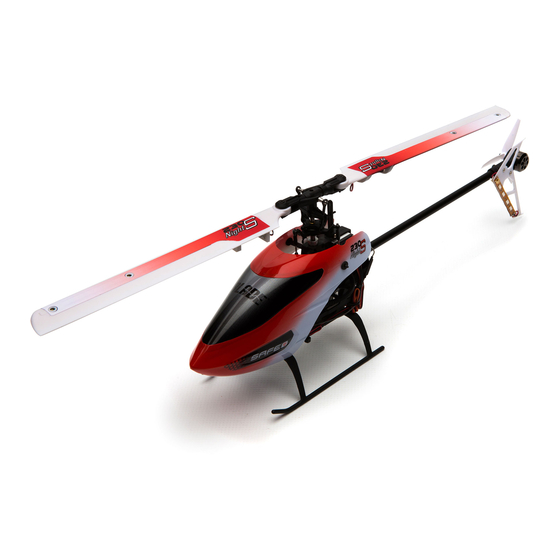
21.10in (536mm) Main Rotor Diameter Box Contents ® • Blade Night 230 S • 2, 150mAh 1S 3.7V 25C LiPo Batteries • 1S 300 mA USB LiPo Charger Needed to Complete • Minimum 800mAh 3S 11.1V LiPo • 3S LiPo Charger •... -
Page 4: First Flight Preparation
First Flight Preparation Flying Checklist • Remove and inspect contents ❏ Always turn the transmitter on fi rst • Begin charging the fl ight and LED batteries ❏ Install the LED batteries • Program your computer transmitter ❏ Plug the fl ight battery into the lead from the ESC •... -
Page 5: Transmitter Setup Table
Transmitter Setup Table DX6i SETUP LIST ADJUST LIST Model Type HELI TRAVEL ADJ D/R & Expo 1 servo Channel Travel Chan Sw Pos Expo Swash Type Normal THRO 100/100 AILE AILE 100/100 REVERSE ELEV 100/100 Channel Direction ELEV RUDD 100/100 THRO GYRO 100/100... - Page 6 FUNCTION LIST SYSTEM SETUP Model Type HELI Servo Setup Chan Travel Reverse Chan Travel Reverse Swash Type Normal 100/100 Normal 100/100 Normal F-Mode Setup 100/100 Normal 100/100 Normal Switch 1 Switch B 100/100 Normal 100/100 Normal Switch 2 Inhibit D/R & Expo Throttle Curve Hold Switch Switch H...
-
Page 7: Installing The Flight Battery (Not Included)
Installing the Flight Battery (not included) 1. Lower the throttle stick to the lowest position. 6. Connect the battery connector to the ESC, noting correct polarity. 2. Power ON the transmitter. 3. Center all trims. For the included Spektrum DXe CAUTION: Connecting the battery to the ESC transmitter (RTF only), the trims are centered when with reversed polarity will cause damage to the... -
Page 8: Safe Technology
To bind your Spektrum DXe transmitter, follow the directions below. DXe Binding Procedure 1. Disconnect the fl ight battery from the helicopter. 2. Lower the throttle stick to the lowest position. Set all trims to the center position. 3. Power off the transmitter. 4. -
Page 9: Throttle Hold
Throttle Hold Throttle hold is used to prevent the motor from powering Throttle hold is also used to turn off the motor quickly if the on inadvertently. For safety, turn throttle hold ON any time helicopter is out of control, in danger of crashing, or both. you need to touch the helicopter or check the direction The blades will continue to spin briefl... -
Page 10: Understanding The Primary Flight Controls
Understanding the Primary Flight Controls If you are not familiar with the controls of your 230 S, take a few minutes to familiarize yourself with them before attempting your fi rst fl ight. Collective Left Side View Left Side View Descend Climb Throttle up... -
Page 11: Flying The 230 S
Flying the 230 S Consult your local laws and ordinances before choosing a Hovering location to fl y your aircraft. Making small corrections on the transmitter, try to hold We recommend fl ying your aircraft outside in calm winds the helicopter in one spot. If fl ying in calm winds, the or inside a large gymnasium. - Page 12 4. Cyclic Response (Default 100%) 6. Tailrotor I Gain Adjustment (Default 100%) Higher cyclic response will result in a more aggressive Higher gain results in the tail remaining still. If the gain is cyclic response. raised too far, low speed oscillations may occur. Lower cyclic response will result in a less aggressive Lower gain will result in the tail drifting in fl...
-
Page 13: Servo Adjustment
The current gain value for the selected parameter is Swash Position Gain Value indicated on the Flight Log screen and by the angle of the Full backward swashplate (forward or backward) as shown in the table 50% backward at the right. Level forward and backward 100% Move the cyclic stick forward or backward to adjust the... -
Page 14: Trim Flight
Trim Flight Perform this procedure if the model is not performing well or has been recently rebuilt from a crash. The trim fl ight procedure was performed during the factory test fl ight and only needs to be performed if you notice the model is not returning to level consistently or if the model does not remain still during stationary pirouettes. -
Page 15: Calibration Procedure
Calibration Procedure If the Blade 230 S is experiencing drift issues after completing the trim fl ight procedure located at www.bladehelis.com, perform the following calibration. The calibration procedure may also be needed following crash repairs. To perform the calibration procedure below, the Spektrum™ AR636 receiver installed in the Blade 230 S must have the most recent fi... -
Page 16: Post-Flight Inspection And Maintenance Checklist
Replace damaged parts before fl ying. Verify both main rotor Rotors blades have the correct and equal tension in the blade grips. When the helicopter is held up sideways, the main blades should support their own weight. When the helicopter is shaken lightly, the blades should fall. - Page 17 Helicopter vibrates or Damaged rotor blades, spindle or Check main rotor blades and blade grips for cracks or shakes in fl ight blade grips chips. Replace damaged parts. Replace bent spindle Verify the receiver is properly attached to the helicopter.
-
Page 18: Exploded View
2 BLH1502 Spindle set 20 BLH4502 Main Rotor Blade Grips 3 BLH1504 Main rotor head linkage set 21 BLH4503 Main Rotor Blade Mounting Screw & Nut (2) 4 BLH1505 Swashplate 22 BLH4504 Main Grip Bearing Kit 5 BLH1506 Main Shaft... -
Page 19: Optional Parts
DX7s DSMX 7-Channel Transmitter Only BLH1505A Swashplate, Aluminum DX6 DSMX 6-Channel Transmitter Only BLH1519A Blade Grips, Aluminum DX7 DSMX 7-Channel Transmitter Only BLH1579C Landing Gear Set, Carbon Fiber DX8 DSMX 8-Channel Transmitter Only EFLB1501S45 150mAh 1S 3.7V 45C LiPo Battery... -
Page 20: Warranty And Service Contact Information
NOTICE: Do not ship Li-Po batteries to Horizon. If you your item submitted for service. Non-warranty service esti- have any issue with a Li-Po battery, please contact the mates will be billed a minimum of ½ hour of labor. In addition appropriate Horizon Product Support office. -
Page 21: Fcc Information
FCC Information This equipment has been tested and found to comply with Antenna Separation Distance the limits for Part 15 of the FCC rules. These limits are When operating your designed to provide reasonable protection against harmful Spektrum transmitter, interference in a residential installation. This equipment please be sure to maintain generates uses and can radiate radio frequency energy and, a separation distance of at... - Page 22 ©2016 Horizon Hobby, LLC Blade, E-fl ite, Bind-N-Fly, the BNF logo, DSM, DSM2, DSMX, AS3X, SAFE, the SAFE logo and ModelMatch are trademarks or registered trademarks of Horizon Hobby, LLC. The Spektrum trademark is used with permission of Bachmann Industries, Inc.
Need help?
Do you have a question about the Night 230 S and is the answer not in the manual?
Questions and answers