Table of Contents
Advertisement
Advertisement
Table of Contents

Related Manuals for Rinnai REU-16FUA-E Infinity 16 i


Summary of Contents for Rinnai REU-16FUA-E Infinity 16 i
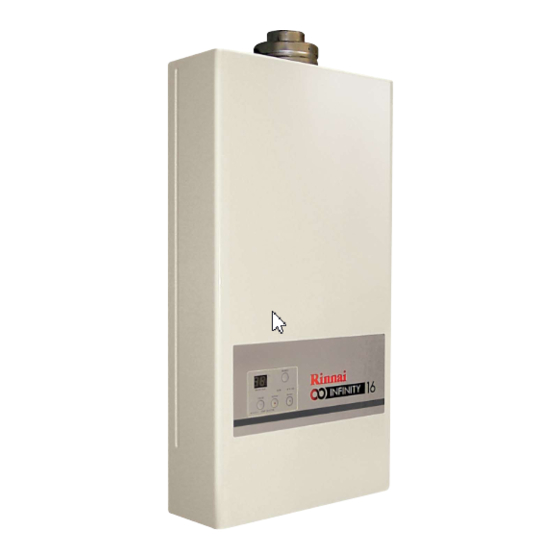
- Page 1 Installation and User Manual REU - 16 FUA - E “Infinity 16 i” “Infinity 16 i” Continuous Flow Water Heater Important. Read these instructions carefully before attempting installation or use of this appliance. All work must be carried out by competent persons.
-
Page 3: Table Of Contents
CONTENTS USERS INSTRUCTIONS FEATURES AND BENEFITS IMPORTANT INFORMATION OPERATION WITHOUT REMOTES TEMPERATURE CONTROLS CARING FOR THE INFINITY ERROR MESSAGES RESTARTING THE RINNAI WATER HEATER INSTALLATION INSTRUCTIONS UK INSTALLATION INSTRUCTIONS UNPACKING RINNAI WATER HEATER OPERATION MAIN COMPONENTS INSTALLATION INSTRUCTIONS FLUE REQUIREMENTS... -
Page 4: Users Instructions
The user must not use the appliance in any way that it was not meant to be used. The user may only use the heater as detailed in the User portion of this manual. Interference with a sealed component is not permitted. In case of defect parts only use genuine Rinnai components for replacement. -
Page 5: Features And Benefits
Congratulations on purchasing the Technologically Advanced, Temperature Controlled, Rinnai Hot Water System. The Rinnai Infinity 16i will NEVER RUN OUT of hot water. As long as electricity, water, and gas supplies are connected, hot water is available when hot water taps are open. -
Page 6: Important Information
Do make sure that the tap is turned off tightly. This approach can be extremely valuable because it requires a Do consider setting your Rinnai one time action for a long term Infinity at a maximum temperature of reduction in risks of scalds. - Page 7 IMPORTANT INFORMATION Always check water temperature before Hot water may go cold without warning at use. very low water flows (less than 3 l/min.) Refer to warning about hot water on page 16 for important safety information. The Infinity 16i controls the water tem- If freezing temperatures perature automatically.
-
Page 8: Operation Without Remotes
Turn On by opening the hot water tap COLD The Rinnai Infinity 16i water heater has a built in controller on the front cover for adjusting the temperature. Additional remote controllers are available to locate near the points of use, and give precise digital temperature control. -
Page 9: Temperature Controls
TEMPERATURE CONTROLS The purpose of a Temperature Controller is to enable the user to have complete control over the hot water supply. Used correctly, the Infinity will supply hot water at the temperature selected, even when the water flow is varied, or when more than one tap is used. - Page 10 TEMPERATURE CONTROLS - OPERATING Remote temperature controllers are a feature that provides control over the water temperature. The Rinnai Infinity 16i water heater can be operated with 1, 2, or 3 temperature controllers. The controller MC-45-SR-EU comes as standard with this water heater installed into the front panel.
- Page 11 TEMPERATURE CONTROLS - OPERATING Using the Temperature Controllers. Press the ON/OFF button on a temperature controller. The system will become active, the temperature will default to 40 C and the controller that turned the system on will have priority. The temperature setting on the controller will light up.
- Page 12 TEMPERATURE CONTROLS - OPERATING Using 2 or more Temperature Controllers. Switching the system ON. The hot water system and all controllers can be switched ON and OFF from any controller by pressing the ON/OFF button as shown. When the system is turned ON the water temperature display will be lit.
- Page 13 The Digital Monitor will go out. If hot water taps are opened when the Rinnai Infinity is off, cold water will flow from the taps. If the system is to be left off over the winter be sure to drain it down if there is a possibility of freezing temperatures.
- Page 14 TEMPERATURE CONTROLS - INFORMATION Do not push the ON/OFF button on the Temperature priority can not be switched Master controller after transferring priority to another controller when the water is of temperature selection to a Secondary flowing through the water heater. controller as the system will shut down.
-
Page 15: Caring For The Infinity
UK that all gas appliances are serviced every year by a certified gas engineer. This is to ensure continued safety of the gas appliance. If you need a recommended service engineer contact Rinnai or your supplier. Care When the appliance casing, operation panel, and remote controls surfaces become dirty gently wipe them clean with a soft, damp cloth. -
Page 16: Error Messages
ERROR MESSAGES Rinnai water heaters have the ability to check their own operation continuously. If a fault occurs, an error code will flash on the Digital Display if you have temperature controllers installed. This assists with diagnosing the fault, and may enable you to overcome a problem without a service call. - Page 17 Troubleshooting without controllers If you have not installed temperature controllers and experience the following symptoms, please carry out the suggestions below. If symptoms continue, please contact Rinnai for advice. Heater does not attempt Check the power is on at the heater.
-
Page 18: Restarting The Rinnai Water Heater
If following the above procedure does not reset the heater switch it on and off at its main supply, and then go through these steps again. If heater is still not working call your local service agent or Rinnai for assistance. -
Page 19: Installation Instructions
If the information in this manual is not followed exactly a fire or explosion could result. This manual must be read in its entirety before installing the appliance. If you are unsure of any point contact Rinnai or your supplier. -
Page 20: Uk Installation Instructions
Please be sure that you are fully aware of your obligations and responsibilities under these regulations. In case of defective parts only use genuine Rinnai components for replacement failure to do so will invalidate any warranty. Disposal Information: Under the laws and local regulations, this product must be disposed separately from house- hold waste. -
Page 21: Unpacking Rinnai Water Heater
UNPACKING RINNAI WATER HEATER After unpacking the appliance check for damage, if the heater is damaged or ap- pears to have any defects contact your supplier immediately. DO NOT install a damaged appliance before checking with your supplier. Check that the appliance supplied is the correct gas type for the installation. Refer... -
Page 22: Operation
OPERATION PRINCIPLE HOT WATER SUPPLY OPERATION Ignition Press ON/OFF Button of Remote Controller to turn on unit and the remote control- ler display and priority LED will light up. When a hot water tap is opened the Water Flow Sensor revolves and sends a pulse signal to the Printed Circuit Board (PCB.) When the PCB detects water flow it be- gins the ignition process with the Combustion Fan Motor starting first. -
Page 23: Main Components
MAIN COMPONENTS 1. Gas Control Unit 1.1 Modulating Valve This device is used by the PCB to adjust the volume of gas to the burner in proportion to the volumetric flow rate of water in order to maintain a supply of constant temperature hot water amid changes in water flow rates and incoming temperatures. - Page 24 MAIN COMPONENTS 3. Thermal Fuse The thermal fuse is an electric link which must be intact for the unit to operate. If the thermal fuse reaches a set temperature it will melt and the unit will shut down. The ther- mal fuse must be replaced if it melts.
-
Page 25: Installation Instructions
'flow and return system' which minimises the waiting time for hot water delivery. Alternatively, multiple appliances can be strategically placed to service outlet points with minimal delay time. Contact Rinnai or your supplier for further information. - Page 26 Contact Rinnai or your supplier for 'gravity fed' or 'low pressure' hot water installations. Water pipe sizing and layout should be designed correctly to ensure the given water flows from the appliance are available.
- Page 27 UK INST. INSTRUCTIONS - CONNECTIONS Water Connection. For all closed systems (with flow and return or tank) the system must incorporate an un- vented kit with the components shown below. The safety relieve valve must discharge safely into a suitable drain via tundish. Expansion Safety Vessel...
- Page 28 INSTALLATION INSTRUCTIONS - SCHEMATICS...
- Page 29 The Rinnai Infinity 16i is a room sealed appliance. Ventilation requirements of BS 5440 allow room sealed appliances to be installed in spaces and rooms, including bedrooms, without ventilation. If the Rinnai Infinity 16i is installed in a compartment it must have the following amount of permanent ventilation. Ventilation from compartment to room:...
-
Page 30: Flue Requirements
The drain pipe should be run in 22mm PVC, uPVC, or ABS pipe, copper is not recom- mended. The drain pipe MUST be trapped. A trap with pipe is available from Rinnai or your supplier. Although the flue and appliance have been specially designed to prevent condensation in the flue for short runs (under 1.5m) care should be given to the placement of the... - Page 31 The following flue manufacturers with their specific brands listed below are approved for use with the Rinnai Infinity 16i water heater. 1. UBBINK The following combinations of flue materials may be used with the Rinnai water heater Rolux® flue system Roof terminal black T200 L =1000 mm...
- Page 32 UK FLUE REQUIREMENTS - INSTALLING The Rinnai Infinity 16i is for internal installation in conjunction with the Rinnai flue system The flue must be installed in accordance with: Manufacturers Installation Instructions British Standards including BS5440 Gas Safety (Installation and Use) Regulations IGE/UP/10 Part1 Edition 2.
- Page 33 UK FLUE REQUIREMENTS - POSITIONING t i s Directly below an opening, air brick, opening windows, etc. 300mm Above an opening, air brick , opening window, etc. 300mm Horizontally to an opening, air brick , opening window, etc. 300mm c i t .
-
Page 34: Temperature Controls
TEMPERATURE CONTROLS - INSTALLATION When deciding on the best position for the temperature controls, the following points should be taken into account. Fit the controls out of reach of children (suggested height from the floor 1.5m.) Avoid positions where the controllers will become hot. Do not fit them near stoves or ovens, or above radiators or heaters. - Page 35 TEMPERATURE CONTROLS - INSTALLATION Temperature Controller MC-45-SR-EU / BC-45-SR-EU / BSC-45-SR-EU 1. Determine the most suitable position for the temperature controller. 2. Drill 3 holes in the wall as shown in fig. 1, one for the cable and two for the securing screws. Ensure holes are drilled deep enough.
- Page 36 TEMPERATURE CONTROLS - INSTALLATION Connecting the Controllers to the Infinity 1. Isolate the power supply. Fig. 1 2. Remove the front cover from the Appliance (2 screws) Fig. 1. 3. Thread the cable through the cable access hole at the base of the appliance. 4.
-
Page 37: Testing
TESTING 1. Purge gas, hot water and cold water supply lines before making the final connection of the water heater. Swarf in either the gas or water supplies may cause damage. 2. Turn on gas and cold water supplies. 3. Test for water leaks and gas escapes near the unit. 4. -
Page 38: Gas Pressure Setting
Wait for the unit to light. Fig. 3 10.Set the Rinnai Infinity to 'Forced Low' combustion by setting No. 7 dipswitch to 'ON'. (Fig. 3) * Note: Simply changing the position of the dip switches will not convert the unit from one gas type to the other. - Page 39 Fig. 4 1.8 mbar Adjustment Point 2.2 mbar 2.2 mbar 13. Set the Rinnai Infinity to 'Forced High' combustion by setting no. 7 and no. 8 dipswitches to 'ON'. (Fig.5) Ensure maximum water flow. 14. Check the burner test point pressure.
-
Page 40: Dip Switch Setting
DIP SWITCH SETTING Dip Switch Positions Explained OFF ON SW Gas Type LEGEND: Gas Type Black Section indicates Computer Programming position of dip switch. Computer Programming Computer Programming OFF ON OFF ON Max. Temperature Combustion Combustion Dip Switches Explained GAS TYPE COMBUSTION NAT GAS NORMAL... -
Page 41: Dimensions
DIMENSIONS... -
Page 42: Technical Details
TECHNICAL DETAILS Infinity Model Infinity 16i Units Installation Internal G20 Nat Gas Press Low mbar G20 Nat Gas Press High mbar G25 Nat Gas Press Low mbar G25 Nat Gas Press High mbar G30 LPG (Butane) Press Low mbar G30 LPG (Butane) Press High 11.4 mbar G31 LPG (Propane) Press Low... -
Page 43: Flow Chart
FLOW CHART... -
Page 44: Wiring Diagram
WIRING DIAGRAM... -
Page 45: Diagnostic Points
DIAGNOSTIC POINTS Determination (normal figure) Measurement point Flow Chart Component Upper : Voltage Remark Wire Color Lower : Resistance, Current B-Br AC power AC200 AC240V GEARED Drive power DC11 13V MORTOR 10 30 R-Bk Control power DC11 13V Y-Bk Below DC1V(limiter ON) Full open limiter Below DC4 6V(limiter OFF) Br-Bk... -
Page 46: Letter Of Compliance
LETTER OF COMPLIANCE... -
Page 47: Ce Certificate
CE CERTIFICATE... -
Page 48: Commissioning Check List
COMMISSIONING CHECK LIST The water heater is not subject to corrosive compounds in the air. □ □ The water supply does not contain chemicals or exceeds total hardness that will damage the heat exchanger. □ Clearances from the water heater unit are met. □... -
Page 49: Commissioning Sheet
COMMISSIONING SHEET... -
Page 50: Service Record
SERVICE RECORD... -
Page 51: Uk Warranty
CONTACT Rinnai Rinnai UK LTD. 9 Christleton Court Manor Park Runcorn Cheshire WA7 1ST Tel. 01928 531870 Fax. 01928 531880 E-mail. info@rinnaiuk.com Web. www.rinnaiuk.com... -
Page 52: Product Fiche
TECHNICAL DETAILS PRODUCT FICHE Supplier’s Name Rinnai UK Ltd Model Name REU-16FUA Declared Load Profile on Energy Label Energy Efficiency Class Water Heating Efficiency η 77.0% Annual Electricity Consumption AEC (kWh/annum) Annual Fuel Consumption AFC (GJ/annum) Second Load Profile Energy Efficiency Class Water Heating Efficiency η...
Need help?
Do you have a question about the REU-16FUA-E Infinity 16 i and is the answer not in the manual?
Questions and answers