
Related Manuals for Philips X200


Summary of Contents for Philips X200
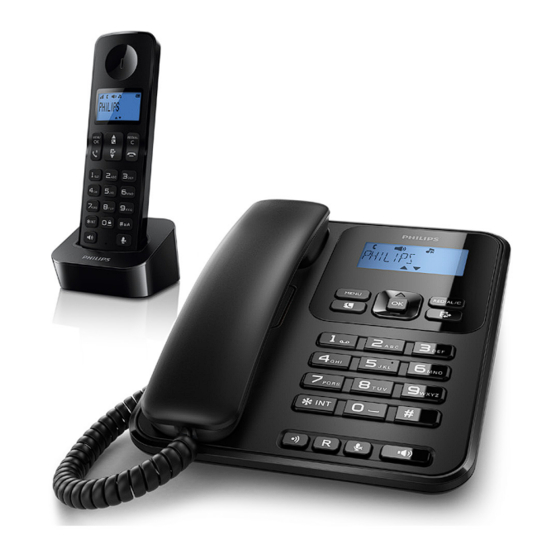
- Page 1 Always there to help you Register your product and get support at www.philips.com/welcome X200 Question? Contact Philips Extended user documentation...
-
Page 3: Table Of Contents
Contents 7 Text and numbers Enter text and numbers Switch between uppercase and 1 Important safety instructions lowercase 2 Your phone 8 Phonebook What is in the box View the phonebook Overview of the cordless handset Search a record Overview of the base unit Call from the phonebook Access the phonebook during a call Add a record... - Page 4 Select the recall duration Dial mode Auto clock Register additional handsets Unregister the handsets Restore default settings 13 Technical data 14 Notice Use GAP standard compliance Compliance with EMF Disposal of your old product and batteries 15 Frequently asked questions 16 Appendix Text and number input tables...
-
Page 5: Important Safety Instructions
1 Important safety • Handsfree activation could suddenly increase the volume in the earpiece to a very high level: make sure instructions the handset is not too close to your ear. • Do not allow the product to come into contact with liquids. -
Page 6: Your Phone
2 Your phone Cordless handset charger** Congratulations on your purchase and welcome to Philips! To fully benefit from the support that Philips offers, register your product at www.philips. Power adapter** com/welcome. What is in the box Line cord* Coil cord... -
Page 7: Overview Of The Cordless Handset
• Press and hold to switch the handset Overview of the cordless on or off. handset • Press to enter a space during text editing. • Press and hold to lock/unlock the keypad in standby mode. • Press and hold to enter a pause when making a call. -
Page 8: Overview Of The Base Unit
Overview of the base unit • Press and hold to make an intercom call (for multi-handset version only). • Set the dial mode (pulse mode or temporary tone mode). Press to enter a space during text editing. Access the phonebook. n MENU •... -
Page 9: Get Started
3 Get started Caution • Make sure that you have read the safety instructions in the 'Important safety instructions' section before you connect and install your handset. Connect the base station Warning Connect the coil cord to the base unit and •... -
Page 10: Insert The Supplied Batteries Of The Cordless Handset
Caution • Risk of explosion! Keep batteries away from heat, sunshine or fire. Never discard batteries in fire. • Use only the supplied batteries. • Risk of decreased battery life! Never mix different brands or types of batteries. Note • Charge the batteries for 8 hours before first use. -
Page 11: Charge The Cordless Handset
Select a language, then press OK to » The cordless handset starts charging. confirm. » The setting is saved. Note • Charge the batteries for 8 hours before first use. Set the date and time • If the cordless handset becomes warm when the batteries are being charged, it is normal. -
Page 12: Check The Signal Strength Of The Cordless Handset
• Press and hold OK to switch between the cordless handset name and date and time display. Check the signal strength of the cordless handset The number of bars indicates the connection status between the cordless handset and base unit. The more bars are shown, the better the connection is. -
Page 13: Display Icons
4 Display icons It is displayed when you scroll up / down a list or increase / decrease the volume. There are more digits on the right. In standby mode, the icons shown on the main Press REDIAL/C to read. screen tell you what features are available on ECO+ The ECO+ mode is activated. -
Page 14: Calls
5 Calls Note • The talk time of your current call is displayed on the call timer. • If you hear warning tones, the phone is almost out of battery or out of range. Charge the battery or move the phone close to the base station. •... -
Page 15: Adjust The Earpiece/Speaker Volume
• On the cordless handset, press Answer a second call place it to the charger. Note Adjust the earpiece/speaker • This service is network dependent. volume When there is a periodical beep to notify you of an incoming call, you can answer the call in Press to adjust the volume during a call. -
Page 16: Switch Between Calls
6 Intercom and Switch between calls conference calls Press and hold to switch between the outside call and the intercom call. An intercom call is a call to another handset Transfer a call that shares the same base station. A conference call involves a conversation between you, Note another handset user and the outside callers. -
Page 17: During The Conference Call
Press on the cordless handset or hang up the phone on the base unit to end the conference call. Note • Press on the cordless handset or on the base unit to join an ongoing conference with another handset if [Services] > [Conference] is set to [Auto]. During the conference call Press and hold to put the external call... -
Page 18: Text And Numbers
7 Text and numbers You can enter text and numbers for handset name, phonebook records, and other menu items. Enter text and numbers Press once or several times on the alphanumeric key to enter the selected character. Press REDIAL/C to delete a character. Press and hold REDIAL/C to delete all characters. -
Page 19: Phonebook
8 Phonebook • press press MENU. Press • to select [Phonebook] > [View], then press OK to confirm. This phone has a phonebook that stores up to Press to scroll through the 50 records. You can access the phonebook from phonebook list. -
Page 20: Add A Record
Select a contact, then press OK to confirm. Add a record » A confirmation request is displayed. Press OK to confirm. Note » The record is deleted. • If your phonebook memory is full, the handset displays a notification message. Delete some records to add new ones. -
Page 21: Call Log
9 Call log Select an option, then press OK to confirm. The call log stores the call history of all missed View the call records or received calls. The incoming call history includes the name and number of the caller, Press call time and date. -
Page 22: Delete All Call Records
to select [Delete], then press Press OK to confirm. » A confirmation request is displayed. Press OK to confirm. » The record is deleted. Delete all call records Press » The incoming call log is displayed. Press OK to enter the options menu. to select [Delete all], then Press press OK to confirm. -
Page 23: Redial List
10 Redial list Select a record. Press MENU. to select [Delete], then press Press OK to confirm. The redial list stores the call history of dialed » A confirmation request is displayed. calls. It includes the names and/or numbers you have called. -
Page 24: Phone Settings
11 Phone settings to select [Phone setup] > Press [Sounds] > [Key tone], then press OK to confirm. Select [On]/[Off], then press OK to You can customize the settings to make it your confirm. own phone. » The setting is saved. Sound settings Set the docking tone Set the handset's ringtone volume... -
Page 25: Eco+ Mode
[Language], then press OK to confirm. • Make sure that all the handsets registered to the base Select a language, then press OK to unit are X200 in order to have the ECO+ feature confirm. functioning properly. » The setting is saved. -
Page 26: Services
12 Services Network type Note The phone supports a number of features that • This is a country dependent feature. It only applies to help you handle and manage the calls. models with network type support. Call list type Press MENU. to select [Services] >... -
Page 27: Select The Recall Duration
Enter the detect number, then press OK Set the dial mode to confirm. Enter the prefix number, then press OK to Press MENU. confirm. to select [Services] > [Dial Press » The setting is saved. mode], then press OK to confirm. Select a dial mode, then press OK to confirm. -
Page 28: Unregister The Handsets
0000). Press REDIAL/C to remove the number. Select the handset number to be unregistered. Press OK to confirm. » The handset is unregistered. • The handset number is displayed beside the handset name in standby mode. Philips 6 is assigned on the base unit. -
Page 29: Technical Data
Call log with 20 entries • Caller identification standard support: FSK, DTMF Battery • Philips: 2 x AAA Ni-MH 1.2V 550 mAh rechargeable batteries Power adapter Base and charger • Philips: MN-A102-E130, input: 100-240 V~, 50/60 Hz 200 mA, output: 6 Vdc 400 mA •... -
Page 30: Notice
14 Notice Use GAP standard When this crossed-out wheeled bin symbol is attached to a product it means that the product compliance is covered by the European Directive 2002/96/ EC. Please inform yourself about the local The GAP standard guarantees that all DECT™ separate collection system for electrical and GAP handsets and base stations comply with electronic products. -
Page 31: Frequently Asked Questions
15 Frequently No docking tone • The handset is not placed properly on the asked questions base unit/charger. • The charging contacts are dirty. Disconnect the power supply first and clean the contacts with a damp cloth. No signal bar is displayed on the cordless I cannot change the settings of my voice mail, handset screen. - Page 32 Note • If the above solutions do not help, disconnect the power supply from both the handset and base station. Try again after 1 minute.
-
Page 33: Appendix
16 Appendix Text and number input tables Upper case characters (for English/ French/ German/ Italian/Turkish/ Portuguese/Spanish/Dutch/Danish/ Finnish/Norwegian/ Swedish/Romanian/ Polish/Czech/Hungarian/Slovakian/ Slovenian/Croatian/Lithuanian/Estonian/ Latvian/Bulgarian) Space . 0 , / : ; " ' ! ¡ ? ¿ * + - % \^ ~| 1 @ _ # = <... - Page 34 2013 © WOOX Innovations Limited. All rights reserved. Philips and the Philips’ Shield Emblem are registered trademarks of Koninklijke Philips N.V. and are used by WOOX Innovations Limited under license from Koninklijke Philips N.V. UM_X200_90_EN_V1.0 WK1404...
Need help?
Do you have a question about the X200 and is the answer not in the manual?
Questions and answers