Table of Contents
Advertisement
Available languages
Available languages
Quick Links
KN3E11/I
Italiano
IT
Istruzioni per l'uso
CUCINA E FORNO
Sommario
Istruzioni per l'uso,1
Descrizione dell'apparecchio- Vista d'insieme,2
Descrizione dell'apparecchio- Pannello di controllo,3
English
GB
Operating Instructions
COOKER AND OVEN
Contents
Operating Instructions,1
Description of the appliance-Overall view,2
Description of the appliance-Control Panel,3
Installation,12
PT
Português
Instruções para a utilização
FOGÃO E FORNO
Índice
Instruções para a utilização,1
Descrição do aparelho-Vista de conjunto,2
Descrição do aparelho-Painel de comandos,3
Instalação,20
Utilização do plano de cozedura,25
Nederland
NL
Gebruiksaanwijzing
FORNUIS EN OVEN
Inhoud
Gebruiksaanwijzing,1
Beschrijving van het apparaat-Aanzichttekening,2
Beschrijving van het apparaat-Bedieningspaneel,3
Installatie, 28
De kookzones,33
Deutsch
DE
Bedienungsanleitungen
HERD UND OFEN
Inhalt
Bedienungsanleitungen,1
Beschreibung des Geräts-Übersicht,2
Beschreibung des Geräts-Schalttafel,3
Installation,36
Inbetriebnahme und Benutzung,38
Gebrauch des Ofens,38
Vorsichtsmaßnahmen und Tipps,41
Pflege und Wartung,42
Hilfe,42
BG
Български
Инструкции за употреба
ЕЛЕКТРИЧЕСКА ПЕЧКА И ФУРНА
Резюме
Инструкции за употреба,1
Описание на уреда-Общ преглед,2
Описание на уреда- Управляващ панел,3
Инсталиране,43
Kотлони,48
Предпазни мерки и препоръки,49
Поддръжка и почистване,50
Техническо обслужване,50
Advertisement
Table of Contents

Related Manuals for Indesit KN3E11/I


Summary of Contents for Indesit KN3E11/I
-
Page 1: Table Of Contents
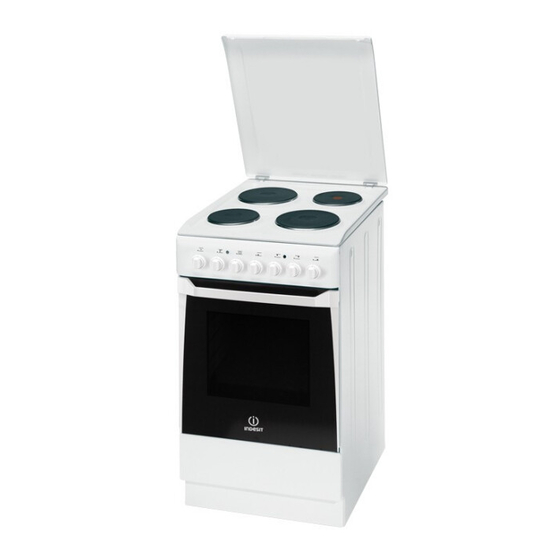
KN3E11/I Italiano Nederland Gebruiksaanwijzing Istruzioni per l’uso FORNUIS EN OVEN CUCINA E FORNO Inhoud Sommario Gebruiksaanwijzing,1 Istruzioni per l’uso,1 Beschrijving van het apparaat-Aanzichttekening,2 Descrizione dell’apparecchio- Vista d’insieme,2 Beschrijving van het apparaat-Bedieningspaneel,3 Descrizione dell’apparecchio- Pannello di controllo,3 Installatie, 28 Installazione, 4... - Page 2 Aanzichttekening Aanzichttekening 1. Elektrische kookplaat 2. Bedieningspaneel Ovenrek 4. Lekplaat of bakplaat 5. Plaat voor opvangen van overkooksel 6. Geleidersvan de roosters 7. stand 5 8. stand 4 Descrizione dell’apparecchio 9. stand 3 Vista d’insieme 10. stand 2 11. stand 1 1.PIASTRE ELETTRICHE 12.
- Page 3 Aanzichttekening Descrizione dell’apparecchio Bedieningspaneel Panello di controllo 1.Knop TIMER 2.Controlelampje THERMOSTAAT 1.Manopola Contaminati 3.THERMOSTAATKNOP 2.La spia termostato forno 4.PROGRAMMAKNOP 3.Manopola termostato 5.Controlelampje WERKING KOOKPLATEN 4.Manopola di selezione forno 6. Knoppen KOOKPLATEN 5.La spia di funzionamento delle piastre elettriche 6.Manopole di comando delle piastre elettriche Beschreibung des Gerätes Description of the appliance Bedienfeld...
-
Page 4: Installazione
Installazione Le gambe* fornite in dotazione ! È importante conservare questo libretto per poterlo si montano a incastro sotto la consultare in ogni momento. In caso di vendita, di base della cucina. cessione o di trasloco, assicurarsi che resti insieme all’apparecchio. - Page 5 fermacavo. TARGHETTA CARATTERISTICHE 6. chiudere il coperchio della morsettiera avvitando la vite V. Dimensioni 34x39x44cm Forno HxLxP Allacciamento del cavo di alimentazione alla rete lt. 58 Volume Montare sul cavo una spina normalizzata per il larghezza cm 42 Dimensioni utili carico indicato nella targhetta caratteristiche posta profondità...
-
Page 6: Avvio E Utilizzo
Avvio e utilizzo Uso del forno Programmi di cottura ! Alla prima accensione fare funzionare il forno a vuoto ! Per tutti i programmi è impostabile una temperatura per almeno un’ora con il termostato al massimo e a tra 50°C e MAX, tranne per il programma GRILL, per il porta chiusa. - Page 7 Vano inferiore* Sotto al forno è presente un vano che puo essere utilizzato per il deposito di accessori o casseruole. Per aprire lo sportello ruotarlo verso il basso (vedi fi gura). Consigli pratici di cottura ! Nelle cotture GRILL, disporre la leccarda in posizione 1 per raccogliere i residui di cottura (sughi e/o grassi).
-
Page 8: Utilizzo Del Piano Cottura
Utilizzo del piano cottura vetroceramica Consigli pratici per l’uso del piano cottura ! Prima di utilizzarle per la prima volta, è necessario • Adoperare pentole con fondo piatto e di elevato riscaldare le piastre di cottura alla massima temperatura spessore, per essere certi che aderiscano per circa 4 minuti, senza pentola. - Page 9 Tabella cottura in forno Posizione Cibo da cucinare Peso Posizione di Tempo di pre- Posizione Tempo di manopola (Kg) cottura ripiani riscaldamento manopola cottura selezione dal basso (minuti) termostato (minuti) 65-75 1 Statico Anatra Arrosto di vitello o manzo 70-75 Arrosto di maiale 70-80 Biscotti (di frolla)
-
Page 10: Precauzioni E Consigli
Precauzioni e consigli ! L’apparecchio è stato progettato e costruito in conformità alle norme internazionali di sicurezza. • In caso di guasto, in nessun caso accedere ai Queste avvertenze sono fornite per ragioni di sicurezza meccanismi interni per tentare una riparazione. e devono essere lette attentamente. -
Page 11: Manutenzione E Cura
Manutenzione e cura • L’acciaio inox può rimanere macchiato se a contatto Escludere la corrente elettrica per lungo tempo con acqua fortemente calcarea o con detergenti aggressivi (contenenti fosforo). Prima di ogni operazione isolare l’apparecchio dalla Si consiglia di sciacquare abbondantemente ed rete di alimentazione elettrica. -
Page 12: Installation
Installation ! Before operating your new appliance please read Levelling this instruction booklet carefully. It contains important If it is necessary to level the information concerning the safe installation and appliance, screw the adjustable operation of the appliance. feet into the places provided on each corner of the base of the ! Please keep these operating instructions for future cooker (see fi gure). - Page 13 TABLE OF CHARACTERISTSICS Dimensions N and as shown in the diagram (see fi gure) and 34x39x44 Oven HxDxW proceed with the connection process, tightening the terminal screws as far as possible. Volume 58 l 4. Position the remaining wires on terminals 1-2-3 and Useful tighten the screws.
-
Page 14: Start-Up And Use
Start-up and use Using the oven THERMOSTAT indicator light When this is illuminated, the oven is generating heat. ! The first time you use your appliance, heat the empty It switches off when the inside of the oven reaches oven with its door closed at its maximum temperature the selected temperature. -
Page 15: Cooking Modes
Cooking modes Lower compartment There is a compartment underneath ! A temperature value can be set for all cooking the oven that may be used to store modes between 50°C and MAX, except for the GRILL oven accessories or deep dishes. To programme, for which only the MAX power level is open the door pull it downwards (see recommended. -
Page 16: Using The Hob,16
Using the electric hob Practical advice on using the hob Practical advice on using the electric • Use pans with a thick, flat base to ensure that they hotplates adhere perfectly to the cooking zone. To avoid heat loss and damage to the hotplates use pans with a flat base, whose diameter is no less than that of the hotplate itself. - Page 17 Cooking advice table for the oven Selector knob Food to be cooked Weight Cooking rack Preheating time Thermostat Cooking setting (in kg) position from (minutes) knob time bottom setting (minutes) 1 Convection Duck 65-75 Roast veal or beef 70-75 Pork roast 70-80 Biscuits (short pastry) 15-20...
-
Page 18: Precautions And Tips
Precautions and tips ! The appliance was designed and manufactured in • Do not rest heavy objects on the open oven door. compliance with international safety standards. • If the cooker is placed on a pedestal, take the necessary The following warnings are provided for safety reasons and precautions to prevent the same from sliding off the must be read carefully. -
Page 19: Care And Maintenance
Care and maintenance Switching the appliance off • Stainless steel can be marked by hard water that has been left on the surface for a long time, or by aggressive detergents containing phosphorus. Disconnect your appliance from the electricity supply After cleaning, rinse well and dry thoroughly. -
Page 20: Instalação
Instalação As pernas* fornecidas devem ! É importante guardar este folheto para poder ser encaixadas na base do consultá-lo a qualquer momento. No caso de venda, fogão. cessão ou mudança, assegure-se que o mesmo permaneça com o aparelho. ! Leia com atenção as instruções: nas quais há informações importantes sobre a instalação, a utilização e a segurança. - Page 21 5. Prenda o cabo de alimentação no respectivo grampo. PLACA DAS CARACTERÍSTICAS 6. Feche a tampa da caixa de bornes atarraxando o Medidas do Forno HxLxP 34x39x44 parafuso V. Volume Litros 58 largura 42 cm Ligação do cabo de alimentação à rede eléctrica. Medidas úteis da gaveta profundidade 44 cm estufa...
-
Page 22: Início E Utilização
Início e utilização Utilização do forno Se estiver ligado signifi ca que o forno está a funcionar. Desliga-se quando no interior do forno for alcançada a temperatura seleccionada. A esta altura, o indicador ! Quando o acender pela primeira vez, aconselhamos começa a piscar indicando que o termostato está... - Page 23 Programas de cozedura Grill Posição do botão do termostato: Max. Forno Estático Acende-se o elemento aquecedor superior central. A temperatura muito alta e directa do grill possibilita Posição do botão do termostato: Entre 60°C e Max. corar imediatamente a superfície dos alimentos que, Nesta posição acendem-se os dois elementos como obstruem a saída dos líquidos, mantém o interior aquecedores o inferior e o superior.
- Page 24 Conselhos práticos para cozedura não permanecer constantemente acesa: o seu funcionamento é controlado por um termóstato; ! Nas cozeduras de GRILL, coloque a bandeja PIZZA pingadeira na posição 1 para recolher os resíduos de cozedura (molhos e/ou gordura). • Utilize uma forma de alumínio leve, apoie-a na grelha do forno.
-
Page 25: Utilização Do Plano De Cozedura
Utilização do plano de cozedura eléctrico Ligar e desligar as zonas de cozedura Conselhos práticos para utilização do plano de cozedura Para ligar uma zona de cozedura, rodar no sentido • Empregue panelas com fundo chato e elevada horário o selector correspondente. espessura, para ter a certeza que haverá... -
Page 26: Precauções E Conselhos
Precauções e conselhos • Se houver avarias, em nenhum caso mexa nos ! Este aparelho foi projectado e fabricado em mecanismos internos para tentar repará-las. conformidade com as normas internacionais de Contactar a Assistência. segurança. Estas advertências são fornecidas por •... -
Page 27: Manutenção E Cuidados
Manutenção e cuidados Desligar a corrente eléctrica Verifi cação das guarnições do forno Verifi que periodicamente o estado da guarnição ao redor da porta do forno. Se houver danos, contacte Antes de realizar qualquer operação, desligue o o Centro de Assistência Técnica mais perto. É aparelho da alimentação eléctrica. -
Page 28: Installatie
Installatie ! Bewaar dit instructieboekje zorgvuldig voor Waterpas zetten Indien het nodig is het apparaat eventuele raadpleging in de toekomst. In het geval u te nivelleren, kunnen de het apparaat verkoopt, weggeeft of wanneer u verhuist, bijgeleverde stelvoetjes in de moet het boekje bij het apparaat bewaard worden. - Page 29 zich aan de onderkant van de klemmenstrook. 3. Plaats de geleiders N en zoals aangegeven in het schema (zie afbeelding) en stel een verbinding tot stand door de schroeven van de klemmetjes goed vast TABEL EIGENSCHAPPEN te draaien. breedte 44 cm Afmetingen hoogte 34 cm 4.
-
Page 30: Starten En Gebruik
Starten en gebruik Timer Gebruik van de oven Voor het activeren van de Timer gaat u als volgt te ! Wij raden u aan bij het eerste gebruik de oven werk: minstens een uur leeg te laten functioneren, op 1. draai de TIMERKNOP bijna 360° rechtsom om de maximum temperatuur en met de deur dicht. - Page 31 Grill Het centrale bovenste verwarmingselement gaat aan. De hoge en rechtstreekse hitte bruint de oppervlakten van het vlees onmiddellijk zodat er geen vocht verloren gaat en de binnenkant mals blijft. Het koken onder de grill is vooral aan te raden voor gerechten die een hoge temperatuur aan de buitenkant nodig hebben: biefstuk, entrecôte, filet, hamburger etc...
- Page 32 Kooktabel oven Positie Gerecht Gewicht Positie Voorverwarmen Positie Kooktijd keuzeknop (kg) ovenrekken (minuten) thermostaatknop (minuten) beneden af Eend 65-75 1 Statisch Braadstuk 70-75 Varkensrollade 70-80 Koekjes (kruimeldeeg) 15-20 Taarten 30-35 Lasagne 35-40 Lamsvlees 50-60 Makreel 30-35 Plum-cake 40-50 Soesjes 30-35 Cake 20-25 Quiche...
- Page 33 Gebruik van de glaskeramische kookplaat De kookzones in- en uitschakelen Programma Snelle of normale elektrische plaat Dicht Voor het inschakelen van een kookzone drukt u de Voor het bereiden van groenten en vis bijbehorende knop rechtsom. Om hem uit te schakelen draait u de knop linksom tot Voor het bereiden van aardappelen (op stoom), soep, erwten, bonen aan “0”.
-
Page 34: Voorzorgsmaatregelen En Advies
Voorzorgsmaatregelen en advies • ! Dit apparaat is ontworpen en vervaardigd volgens de • Controleer altijd dat de knoppen in de stand staan geldende internationale veiligheidsvoorschriften. als het apparaat niet gebruikt wordt. Deze aanwijzingen zijn geschreven voor uw veiligheid • Trek nooit de stekker aan het snoer uit het en u dient ze derhalve goed door te nemen. -
Page 35: Onderhoud En Verzorging
Onderhoud en verzorging De elektrische stroom afsluiten Het controleren van de afdichtingen van de oven Controleer regelmatig de staat van de afdichtingen Sluit altijd eerst de stroom af voordat u tot enige rondom de ovendeur. In het geval de afdichting handeling overgaat. -
Page 36: Installation
Installation Ausrichtung ! Bewahren Sie diese Bedienungsanleitung bitte sorgfältig auf, damit Sie sie jederzeit zu Rate ziehen Muss das Gerät ausgerichtet können. Sorgen Sie dafür, dass sie im Falle eines werden, nehmen Sie Verkaufs, einer Übergabe oder eines Umzugs dem die mitgelieferten, Gerät stets beiliegen. - Page 37 2. Die Brücke A (siehe ! Das Netzkabel darf nicht geknickt oder eingeklemmt Abbildung) gemäß oben aufgeführtem werden. Anschlussschema ! Das Netzkabel muss regelmäßig kontrolliert werden positionieren. Das Klemmengehäuse ist und darf nur durch autorisiertes Fachpersonal werkseitig für einen ausgetauscht werden. ! Der Hersteller weist jegliche Verantwortung zurück, falls diese Vorschriften nicht eingehalten werden sollten.
- Page 38 Inbetriebsetzung und Gebrauch Garprogramme ! Bei erstmaliger Inbetriebnahme sollte der leere Backofen für etwa eine Stunde bei Höchsttemperatur und geschlossener Backofentür in Betrieb genommen ! Für alle Programme kann eine Gartemperatur von werden. Schalten Sie das Gerät dann aus, öffnen 60°...
- Page 39 • Es empfiehlt sich, die höchste Energiestufe zu Der Kurzzeitwecker verwenden. Im Übrigen ist es bei dieser Funktion Zur Inbetriebnahme des Kurzzeitweckers muss das völlig normal, dass das obere Heizelement nicht Läutewerk durch eine fast vollständige Umdrehung ständig rot glüht: Es wird durch einen Thermostaten gesteuert.
-
Page 40: Gebrauch Des Kochfeldes
Anleitungen zum Einsatz des Elektrisches Kochfeldes Kochzonenschalter Praktische Hinweise zum Gebrauch des Kochfeldes • Verwenden Sie Kochgeschirr mit dickem und ebenem Boden, um sicher zu sein, dass dieser Die Herde können mit Standard-, Schnellaufheiz- perfekt auf der Kochzone aufliegt; und Automatik-Kochzonen in unterschiedlichen Kombinationen, bestückt sein (die Schnellaufheizkochzone ist durch einen roten Punkt gekennzeichnet, die Automatik-Kochzone durch eine... - Page 41 Vorsichtsmaßregeln und Hinweise • Bei etwaigen Störungen versuchen Sie bitte in ! Das Gerät wurde entsprechend den internationalen Sicherheitsvorschriften entworfen und gebaut. keinem Fall, Innenteile selbst zu reparieren. Wenden Sie sich an den Kundendienst. Nachstehende Hinweise werden aus Sicherheitsgründen geliefert und sollten aufmerksam •...
- Page 42 Reinigung und Pflege Abschalten des Gerätes vom Stromnetz Kontrolle der Backofendichtungen Kontrollieren Sie in regelmäßigen Abständen den Vor jeder Reinigung und Pflege ist das Gerät vom Zustand der Dichtung rund um die Backofentür. Stromnetz zu trennen. Wenden Sie sich im Falle einer Beschädigung dieser Dichtung an die nächstgelegene Kundendienststelle.
- Page 43 Инсталиране Нивелиране ! Важно е да съхранявате тази книжка, за да може Ако уредът трябва да да я използвате за справка във всеки момент. бъде нивелиран, завиите При продажба на уреда, при прекратяване на регулационните крачета, използването му или при преместване се уверете, които...
- Page 44 2 и 3 са свързани една към друга; мостът 4-5 е разположен в долната зона на клемната кутия. 3. Поставете проводниците N и съгласно схемата (виж фигура) и свържете, като затегнете докраи винтовете на клемите. 4. фиксираите останалите проводници към клеми 1-2-3 и...
-
Page 45: Пуск И Експлоатация
Пуск и експлоатация Използване на фурната Светлинен индикатор ТЕРМОСТАТ Включването му показва, че фурната работи. ! При първото включване на фурната тя трябва да Изгасва, когато вътре във фурната се достигне поработи празна за наи-малко половин час при избраната температура. При това положение термостат... - Page 46 Долно чекмедже Статична фурна Положение на терморегулатора: по избор между Под фурната се намира чекмедже, което може да бъде 50°C и Max използвано за съхранение на аксесоари или тигани. За отварянето му е необходимо Включват се осветлението на фурната и горният и да...
- Page 47 Таблица за печене във фурна П о ло же н и е на Ни во на програ ма тора р ешетка та Вр ем е за П о ло же н и е на Вр ем е за Тег ло (превк...
- Page 48 Използване на стъклокерамичния готварски плот Включване и изключване на зоните за Ïîçèöèÿ Íîðìàëåí èëè áúðç êîòëîí готвене çàãàñåí Âàðåíå íà çàëåí÷óöè, ðèáà За да включите зона за печене, завъртете съответния превключвател по посока на часовата Âàðåíå íà êàðòîôè(íà ïàðà), ñóïè, ãðàõ, стрелка.
- Page 49 Предпазни мерки и препоръки • Ако уредът се повреди, никога не се опитваите ! Този уред е произведен в съответствие с да го поправите сами. Ремонтът, извършен международните норми за безопасност при работа. от неквалифицирани лица, може да причини Тези предупреждения са дадени от съображения повреди...
- Page 50 Поддръжка и почистване Изключете уреда варовита вода или с препарати за почистване, съдържащи фосфор. Препоръчва се да се изплаква Преди да извършите операции по уреда, тои трябва обилно и внимателно да се изсушава. да бъде изключен от мрежата за електрическо захранване.
- Page 52 12/2011 - 195087040.02 XEROX FABRIANO...
Need help?
Do you have a question about the KN3E11/I and is the answer not in the manual?
Questions and answers