Table of Contents
Advertisement
Available languages
Available languages
Quick Links
K3C51/FR S
KN3C51/FR S
KN3C55/FR S
Français
FR
Mode d'emploi
CUISINIERE ET FOUR
Sommaire
Mode d'emploi,1
Description de l'appareil-Vue d'ensemble, 5
Description de l'appareil-Tableau de bord, 5
Mise en marche et utilisation,7
English
GB
Operating Instructions
COOKER AND OVEN
Contents
Operating Instructions,1
W
arning,2
Description of the appliance-Overall view,5
Description of the appliance-Control Panel,5
Installation,15
BG
Български
Инструкции за употреба
Инструкции за употреба
Инструкции за употреба
ЕЛЕКТРИЧЕСКА ПЕЧКА И ФУРНА
ЕЛЕКТРИЧЕСКА ПЕЧКА И ФУРНА
ЕЛЕКТРИЧЕСКА ПЕЧКА И ФУРНА
Резюме
Резюме
Резюме
Инструкции за употреба,1
,2
ВНИМАНИЕ
Описание на уреда-Общ преглед,5
Описание на уреда- Управляващ панел,5
Инсталиране,25
Kотлони,31
Предпазни мерки и препоръки,30
Поддръжка и почистване,31
Техническо обслужване,32
Advertisement
Table of Contents

Subscribe to Our Youtube Channel
Related Manuals for Indesit K3C51/FR S


Summary of Contents for Indesit K3C51/FR S
-
Page 1: Table Of Contents
K3C51/FR S KN3C51/FR S KN3C55/FR S Français Български Mode d’emploi Инструкции за употреба Инструкции за употреба Инструкции за употреба CUISINIERE ET FOUR ЕЛЕКТРИЧЕСКА ПЕЧКА И ФУРНА ЕЛЕКТРИЧЕСКА ПЕЧКА И ФУРНА ЕЛЕКТРИЧЕСКА ПЕЧКА И ФУРНА Sommaire Резюме Резюме Резюме Mode d’emploi,1 Attention,2 Инструкции... -
Page 2: Attention
ATTENTION ATTENTION ATTENTION Ne pas utiliser de produits abrasifs ni ATTENTION : cet appareil ainsi que de spatules métalliques coupantes ses parties accessibles deviennent très pour nettoyer la porte du four en verre, chauds pendant leur fonctionnement. sous peine d’érafler la surface et de briser le verre. - Page 3 WARNING WARNING The internal surfaces of the WARNING: The appliance and its compartment (where present) may accessible parts become hot during become hot. use. Never use steam cleaners or pressure Care should be taken to avoid cleaners on the appliance. touching heating elements.
- Page 4 ВНИМАНИЕ ВНИМАНИЕ ВНИМАНИЕ ВНИМАНИЕ: Уредът и неговите Не използвайте абразивни продукти открити части се нагряват много при и остри метални шпатули за употреба. почистване на стъклената вратичка на фурната, защото може да надраскат Бъдете особено внимателни и не повърхността, което да доведе до докосвайте...
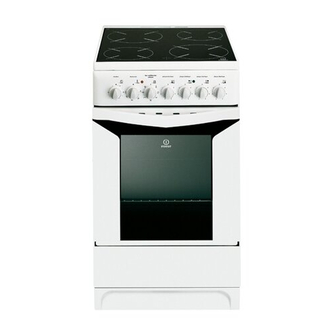
- Page 5 Description de l’appareil Tableau de bord 1.Manette du MINUTEUR* 2.PROGRAMMATEUR DE CUISSON ELECTRONIQUE 3.Voyant lumineux thermostat 4.Manette du THERMOSTAT 5.Manette PROGRAMMES 6.Voyant de fonctionnement de la plaque électrique 7.Manette de la plaque électrique *N’existe que sur certains modèles Description of the appliance Control panel 1.TIMER knob* 2.Electronic cooking programmer*...
-
Page 6: Installation
Installation ! Conservez ce mode d’emploi pour pouvoir le (voir fi gure). consulter à tout moment. En cas de vente, de Montage des pieds* cession ou de déménagement, veillez à ce qu’il suive fournis avec l’appareil par encastrement sous la base. l’appareil. - Page 7 5. fixez le câble d’alimentation dans le serre-câble prévu. 6. fermez le couvercle du bornier et vissez la vis V. CARACTERISTIQUES TECHNIQUES Dimensions du 39x41x34 cm Branchement du câble d’alimentation au réseau four HxLxP électrique Volume l 56 largeur 42 cm Dimensions Montez sur le câble une fiche normalisée adaptée à...
-
Page 8: Utilisation Du Four
Utilisation du four ! Pour les modèles équipés d’une grille de réduction, n’utiliser cette dernière que pour le brûleur auxiliaire, en cas d’utilisation de casseroles ayant moins de 12 cm de diamètre. Utilisation du four ! Lors de son premier allumage, faire fonctionner ! Lors de l’introduction de la grille, s’assurer que la butée le four à... - Page 9 Programmes de cuisson Programme DOUBLE GRIL ! Pour tous les programmes, vous pouvez sélectionner Un gril plus grand que d’habitude et au design novateur qui augmente de 50% les performances de cuisson et une température comprise entre 50°C et MAX., sauf pour : qui supprime les zones d’angle où...
- Page 10 Fonction minuterie Minuteur* Pour accéder à cette fonction, appuyez sur la touche Pour actionner le Minuteur procéder comme suit : 1. tourner le bouton MINUTEUR et faire un tour , l'écran affiche le symbole . A chaque pression presque complet dans le sens des aiguilles d’une de la touche + correspond un avancement de 10 montre ...
- Page 11 Tableau de cuisson Programmes Aliments Poids Niveau Préchauffage Température Durée (Kg) enfourne (minutes) préconisée cuisson ment (minutes) Canard 65-75 Roast-beef 70-75 Rôti de porc 70-80 Statique Biscuits 15-20 Tartes 30-35 Pizza (sur 2 niveaux) 2 e 4 15-20 Lasagnes 30-35 Agneau 40-45 Poulet rôti + pommes de terre...
-
Page 12: Utilisation Du Plan De Cuisson,12
Utilisation du plan de cuisson vitrocéramique ! La colle utilisée pour les joints laisse des traces Conseils d’utilisation du plan de cuisson • Utiliser des casseroles à fond plat et de forte de graisse sur le verre. Nous conseillons de les épaisseur pour qu’elles adhèrent parfaitement à... -
Page 13: Précautions Et Conseils
Précautions et conseils ! Cet appareil a été conçu et fabriqué conformément • Ne stockez pas de matériel inflammable dans la niche de rangement du bas ou dans le four : si aux normes internationales de sécurité. l’appareil était par inadvertance mis en marche, il Ces conseils sont fournis pour des raisons de sécurité... -
Page 14: Nettoyage Et Entretien
Nettoyage et entretien Mise hors tension • Si la table est sale, frottez avec un produit Avant toute opération de nettoyage ou d’entretien coupez d’entretien adapté au verre vitrocéramique, rincez et l’alimentation électrique de l’appareil. essuyez. ! Ne nettoyez jamais l’appareil avec des nettoyeurs •... -
Page 15: Installation
Installation ! Before operating your new appliance please read appliance fit into the slots on this instruction booklet carefully. It contains important the underside of the base of the information concerning the safe installation and cooker. operation of the appliance. ! Please keep these operating instructions for future reference. - Page 16 TECHNICAL DATA 5. Fix the power supply cable in place by fastening the cable clamp screw. Oven dimensions 34x38x44 cm 6. Close the terminal board cover by tightening the (HxWxD) screws V. 56 l Volume Useful width 42 cm measurements Connecting the supply cable to the mains depth 44 cm relating to the oven...
-
Page 17: Start-Up And Use
Start-up and use ! The first time you use your appliance, heat the empty oven with its door closed at its maximum temperature for at least half an hour. Ensure that the room is well ventilated before switching the oven off and opening the oven door. -
Page 18: Cooking Modes
Cooking modes mode DOUBLE GRILL ! A temperature value can be set for all cooking modes The top heating element and the rotisserie spit will be activated. between 50°C and Max, except for the following modes This provides a larger grill than the normal grill setting •... - Page 19 Lower compartment* Timer feature There is a compartment This function may be accessed by pressing the underneath the oven that button, after which the display will show the symbol may be used to store . Every time the button is pressed it corresponds oven accessories or deep to a time increase of 10 seconds, until it reaches 99...
- Page 20 Oven cooking advice table Cooking Recommended Cooking Weight Rack Preheating time modes Foods Temperature time (in kg) position (min) (°C) (minutes) Duck 65-75 Roast veal or beef 70-75 Static Roast pork 70-80 Biscuits (shortcrust pastry) 15-20 Tarts 30-35 Pizza (on 2 racks) 2 and 4 15-20 Lasagne...
-
Page 21: Using The Hob
Using the glass ceramic hob ! The glue applied on the gaskets leaves traces of Setting Normal or Fast Plate grease on the glass. Before using the appliance, we recommend you remove these with a special non- abrasive cleaning product. During the first few hours Cooking vegetables, fish of use there may be a smell of rubber which will Cooking potatoes (using steam) soups,... -
Page 22: Precautions And Tips
Precautions and tips • Never perform any cleaning or maintenance work ! This appliance has been designed and manufactured in compliance with international safety standards. without having disconnected the appliance from the The following warnings are provided for safety reasons electricity mains. -
Page 23: Care And Maintenance
Care and maintenance as soon as possible, without waiting for the appliance Switching the appliance off to cool, to avoid residues forming crusty deposits. You Disconnect your appliance from the electricity supply can obtain excellent results by using a rustproof steel before carrying out any work on it. - Page 24 Catalitic Cleaning* In some models, the most exposed internal vertical sides of the oven are coated with porous enamel, which is called catalytic enamel. When heated, this enamel destroys fat particles given off by the food. This „oxidation” of the fat particles occurs when the temperature of the sides exceeds 170°C.
- Page 25 Инсталиране Нивелиране ! Важно е да съхранявате тази книжка, за да може Ако уредът трябва да да я използвате за справка във всеки момент. бъде нивелиран, завиите При продажба на уреда, при прекратяване на регулационните крачета, използването му или при преместване се уверете, които...
- Page 26 2 и 3 са свързани една към друга; мостът 4-5 е ТАБЛИЦА С ХАРАКТЕРИСТИКИ разположен в долната зона на клемната кутия. дължина 44 cm 3. Поставете проводниците N и съгласно Размери височина 34 cm дълбочина 38 cm схемата (виж фигура) и свържете, като затегнете докраи...
-
Page 27: Пуск И Експлоатация
Пуск и експлоатация Таимер* Използване на фурната За да задеиствате Таимера (Брояча на минути), ! При първото включване на фурната тя трябва да направете следното: поработи празна за наи-малко половин час при 1. Завъртете превключвателят ТАИМЕР по посока термостат на максимум и затворена врата. След на... - Page 28 и точки, можете да печете едновременно различни Функция “Размразяване” ястия и да използвате двете нива на фурната Вентилаторът, разположен в дъното едновременно. Могат да се ползват максимум на фурната, принуждава въздухът в две решетки за едновременно печене, като е обема на фурната да циркулира при необходимо...
- Page 29 5. Вентилиран двоен грил Долно отделение* - Позиция на ключа : и Под фурната се намира - Ключа на термостата : между 50°C и Max отделение, което може Обединява еднопосочното термично греене да бъде използвано усилена циркулация на въздуха във фурната в...
- Page 30 Използване на стъклокерамичния готварски плот ! Лепилото, използвано при поставяне на Ïîçèöèÿ Íîðìàëåí èëè áúðç êîòëîí уплътненията, оставя маслени следи върху çàãàñåí стъклото. Препоръчва се, преди да използвате Âàðåíå íà çàëåí÷óöè, ðèáà уреда, да отстраните тези следи със специфичен продукт за поддържане, които не е абразивен. През Âàðåíå...
- Page 31 Предпазни мерки и препоръки • Ако уредът се повреди, никога не се опитваите ! Този уред е произведен в съответствие с да го поправите сами. Ремонтът, извършен международните норми за безопасност при работа. от неквалифицирани лица, може да причини Тези предупреждения са дадени от съображения повреди...
- Page 32 Поддръжка и почистване XEROX FABRIANO 05/2012- 195103698.00 Изключете уреда Преди да извършите операции по уреда, тои трябва за почистване на петна и продукти против ръжда, да бъде изключен от мрежата за електрическо почистващи препарати на прах и гъби с абразивна захранване.
Need help?
Do you have a question about the K3C51/FR S and is the answer not in the manual?
Questions and answers