Table of Contents
Advertisement
Advertisement
Table of Contents

Related Manuals for Gorenje w7223


Summary of Contents for Gorenje w7223
- Page 1 DETAILED INSTRUCTIONS HOW TO USE YOUR WASHING MACHINE www.gorenje.com...
- Page 2 We thank you for your trust and the purchase of our washing machine. Your new washing machine complies with the requirements of modern laundry care. Your laundry will be impeccably white even at low temperatures, owing to special washing programs like Ultra White. SensoCare technology allows simple control of the washing machine.
-
Page 3: Table Of Contents
Table of contents INTRODUCTION SAFETY PRECAUTIONS WASHING MACHINE Technical information 10 Front panel 12 INSTALLATION AND CONNECTION PREPARING 12 Removal of transport brackets APPLIANCE 13 Selecting the room FOR THE FIRST 13 Installation 15 Water inlet connection 16 Aqua-stop 16 Total aqua - stop 17 Water outlet connection 18 Connect the appliance to the mains supply 19 Moving and transport... -
Page 4: Safety Precautions
SAFETY PRECAUTIONS Please, do not use the washing machine Door may not be open during the washing without reading and understanding these cycle. instructions or use first. We recommend running the self-cleaning program before the first wash in order to Be sure to remove transport brackets prior first use of the appliance. - Page 5 Rating plate with basic information is The appliance is intended exclusively located above the opening of the machine. for use in households. If the appliance is used for professional purposes, for profit, Leave any repairs and similar tasks or for purposes beyond regular use in a on the washing machine to an expert.
- Page 6 CHILDREN UNDER 3 YEARS SHOULD BE KEPT AWAY FROM THE MACHINE UNLESS THEY ARE NOT CONSTANTLY SUPERVISED AT ALL TIMES. THE APPLIANCE IS MANUFACTURED IN COMPLIANCE WITH ALL RELEVANT SAFETY STANDARDS. THIS APPLIANCE CAN BE USED BY CHILDREN AGED FROM 8 YEARS AND ABOVE AND PERSONS WITH REDUCED PHYSICAL, SENSORY OR MENTAL CAPABILITIES OR LACK OF EXPERIENCE AND KNOWLEDGE IF THEY HAVE BEEN GIVEN SUPERVISION...
- Page 7 BEFORE CONNECTING THE WASHING MACHINE Carefully read the instructions for use before connecting the washing machine. Repair or any warranty claim resulting from incorrect connection or use of the washing machine shall not be covered by the warranty. The appliance is to be connected to the water mains using new hose-sets and that old hosesets should not be reused.
-
Page 8: Washing Machine
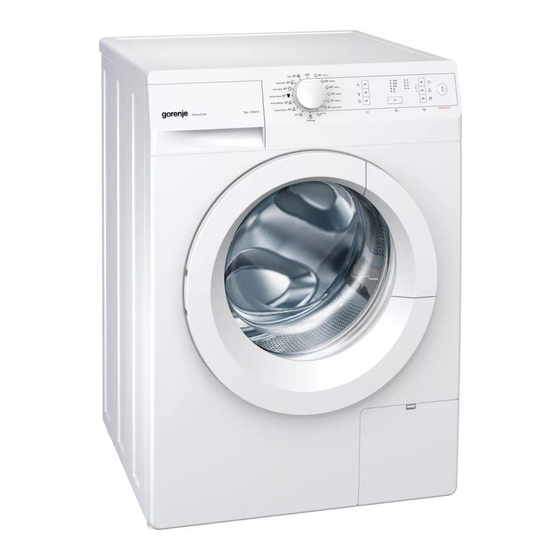
WASHING MACHINE (WASHING MACHINE DESCRIPTION) FRONT Front panel Dispenser Door Filter BACK Water inlet pipe Power cord Water discharge pipe Adjustable feet... -
Page 9: Technical Information
TECHNICAL INFORMATION (DEPENDING ON THE MODEL) The rating plate with the basic information on the washing machine is located under the washing machine door. Maximum load See rating plate See rating plate (SLIM) Width 600 mm 600 mm Height 850 mm 850 mm Depth 600 mm... -
Page 10: Front Panel
FRONT PANEL Washing machine ON/ a , b, c WASHING STYLE OFF and program keys SELECTOR DIAL 2a ECOcare 2b ALLERGYcare 2c TIMEcare... - Page 11 START|PAUSE SPINNING RPM / PUMP Lights indicating the START/PAUSE key / STOP PUMP washing stage, or child Use this key to start or lock light stop the program. 3a SIGNAL LIGHTS for displaying the SPINNING When the machine is turned RPM/PUMP OPERATION a , b, c ADDITIONAL on, the signal light on the...
-
Page 12: Installation And Connection
INSTALLATION AND CONNECTION REMOVAL OF TRANSPORT BRACKETS Move the pipes. Loosen screws at the rear of the machine. Remove the brackets. Slide brackets into the groove on the blocking rod - the right one should be turned around. Use the brackets to rotate blocking rods Close the openings with attached plastic... -
Page 13: Selecting The Room
SELECTING THE ROOM The appliance should be placed on a surface with concrete base; the surface should be dry and clean in order to prevent slipping. The adjustable feet should also be cleaned before installation. INSTALLATION Use a water scale and spanner No. 32 (for feet) and 17 (for the nut). Put the appliance in horizontal position by turning... - Page 14 If you have a tumble dryer of the same dimensions, you can place it on top of the washing machine by using the vacuum feet or side by side. Before connecting the appliance, let it warm up to room temperature (wait at least two hours).
-
Page 15: Water Inlet Connection
WATER INLET CONNECTION Insert the gasket with a filter net into the straight inlet hose attachment nut and AQUASTOP screw the nut onto the water tap (with some models, the gasket with filter net is already fitted and any additional fitting into the nut on the straight attachment is not required). -
Page 16: Aqua-Stop
AQUA-STOP (CERTAIN MODELS ONLY) In case of damage on the interior pipe, leaking is prevented by automatic closing system which stops water inlet to the machine. In such cases display (A) turns red. Inlet pipe must be replaced. TOTAL AQUA - STOP (CERTAIN MODELS ONLY) In case of damage on the interior pipe, leaking is prevented by automatic closing system which stops water inlet to the machine. -
Page 17: Water Outlet Connection
WATER OUTLET CONNECTION Fix the drain hose to run into the sink or the bathtub, or connect it directly to the wall drain outlet (diameter min. 4 cm). The end Outlet hose of outlet hose should be placed between minimum 60 cm and can be led into maximum 100 cm above the floor level. -
Page 18: Connect The Appliance To The Mains Supply
CONNECT THE APPLIANCE TO THE MAINS SUPPLY After it is installed for the first time, the washing machine should be left to stand still for two hours before it is connected to the power mains. Use the power cord to connect the washing machine to the power mains through a power outlet. -
Page 19: Moving And Transport
MOVING AND TRANSPORT After transport, the washing machine should be left to stand still for at least two hours before it is connected to the power mains. We recommend that installation and connection should be done by a qualified person. Before connecting the appliance, read the instructions for use. -
Page 20: Before The Use
BEFORE THE USE Open the door of the unplugged washing machine by pulling the lever towards you. Clean the washing machine drum before using the appliance for the first time. Use a damp cloth and a mild cleaning agent, or run the self- cleaning program (SterilTub). -
Page 21: Washing Steps
WASHING STEPS (1 - 7) 1. STEP: CHECK THE TAGS ON YOUR LAUNDRY Normal wash Max. Max. Max. Max. Manual Washing Delicate wash washing washing washing washing washing allowed 95°C 60°C 40°C 30°C Whitening Whitening in cold water Whitening not allowed Dry cleaning Dry cleaning in Perchloret-... -
Page 22: Step: Preparing The Washing Process
2. STEP: PREPARING THE WASHING PROCESS Sort the laundry by type of fabric, colour, soiling, and allowed washing temperature (see Program table). Close the buttons and zippers, tie any ribbons, and turn the pockets inside-out; remove any metal clips that could damage the laundry and washing machine interior, or clog the drain. -
Page 23: Loading The Washing Machine
SWITCHING ON THE WASHING MACHINE Connect the washing machine to the power mains using the power cord, and connect it to water supply. To light up the drum (certain models only), rotate the program selector dial to any position. LOADING THE WASHING MACHINE Open the door of the washing machine by pulling the lever towards you. -
Page 24: Step: Choosing A Programme
3. STEP: CHOOSING A PROGRAMME To select a program, rotate the program selector dial to the left or to the right (according to the type or how soiled the laundry is). See Program Table. During operation, the dial will not rotate automatically. Washing programs are entire programs that include all washing stages, including conditioning and spinning. -
Page 25: Program Table
PROGRAM TABLE Program: Max. load Type of laundry Possible combinations 7 kg/ Non-sensitive cotton and linen • spinning Cotton laundry (towels, underwear, T-shirts, • pump stop 6 kg 20°C - 95°C terry towelling and underwear, • normal stockinette, tablecloths, kitchen •... - Page 26 Partial programs these are independent programs. Use them when you feel you do not need the entire washing program. Before selecting a new program, the washing machine has to be switched to "OFF" position for 1 second). Decrease spinning speed by pressing the (3) key.
-
Page 27: Step: Choosing The Settings
4. STEP: CHOOSING THE SETTINGS Each program features basic settings which, however, can be changed. To change a setting, press the relevant key (before pressing the START/PAUSE key). Some functions cannot be selected with some programs; a flashing light will indicate of such cases (see Program Table). - Page 28 Spinning To change the spinning rate by steps, from the rpm rate that was preset on the selected program down to (pumping the water, without spinning). The last setting is "stop pump" – the laundry remains soaked in water from the last rinse. Use this option if you wish to prevent creasing of the laundry when you know you do not have the time to take it from the washing machine immediately after the washing program is completed.
-
Page 29: Step: Selecting Additional Functions
5. STEP: SELECTING ADDITIONAL FUNCTIONS To activate/deactivate a function, press the relevant key (before pressing the START/PAUSE key). Some functions cannot be selected with some programs; a flashing light will indicate of such cases (see Program Table). Prewash Washing heavily soiled laundry, particularly with stubborn superficial stains. -
Page 30: Standby Mode
After disconnecting the appliance from the power mains, all settings will be reset to their default factory values, except for the child lock setting. STANDBY MODE If no program is started or no other action is taken after the washing machine is switched on, the signal lights on the keys and the lights indicating the stages of the washing cycle will switch off after 5 minutes. -
Page 31: Step: Program Start
6. STEP: PROGRAM START Press the (6) key START/PAUSE. Indicator lights on selected keys and indicator lights for washing stages will be lit. 7. STEP: END OF WASHING PROGRAM Washing stage indicator lights will blink. Open the washing machine door. Take the laundry from the drum. -
Page 32: Cleaning And Maintenance
CLEANING AND MAINTENANCE Disconnect the washing machine from the mains before cleaning! Do not allow children to clean the appliance or perform any maintenance tasks without proper supervision! CLEANING THE DETERGENT DISPENSER If necessary, clean the detergent dispenser. Pull it out from its casing completely by pressing the flap. Wash it under running water using a brush, and... -
Page 33: Cleaning The Dispenser Housing, Inlet Hose Screen And Door Rubber Gasket
CLEANING THE DISPENSER HOUSING, INLET HOSE SCREEN AND DOOR RUBBER GASKET Clean the water inlet hose screen frequently under running water. Clean the entire rinsing area of the washing machine with a brush, especially the nozzles on the upper side of the rinsing chamber. -
Page 34: Cleaning The Filter
CLEANING THE FILTER During cleaning, some water may leak. Therefore, we recommend spreading an absorbent cloth on the floor before starting. Open the filter lid using flat screwdriver or similar tool. Remove the water outlet funnel before cleaning the filter. Gradually rotate the filter in the counter-clockwise... -
Page 35: Cleaning The Washing Machine
CLEANING THE WASHING MACHINE The casing should be cleaned with soft cloth and mild detergent. Disconnect the washing machine from the mains before cleaning! Additional equipment and accessories for maintenance can be viewed on our website at: www.gorenje.com... -
Page 36: Inerrupting And Chanching The Program
INERRUPTING AND CHANCHING THE PROGRAM Manual (physical) termination FAULTS The program can be cancelled / terminated In case of a fault, the program will be by rotating the program selector dial (1) to interrupted. the position. “0FF” position. This is indicated by flashing signal lights If there is water in the machine, select the (see chapter Troubleshooting). -
Page 37: What To Do
WHAT TO DO ...? Washing machine automatically controls the operation of individual functions during the washing program. In case of error or failure, the error is indicated by both signal lights flashing in a particular rhythm. Number of times the signal lights will blink in a flashing pattern depends on the type of error. -
Page 38: Troubleshooting Table
TROUBLESHOOTING TABLE Failure Possible cause What to do...? The machine does not work. • Machine is not powered. Check if: • power in the socket, • the fuse is OK, • plug is in the socket. Water is leaking from the •... - Page 39 Failure Possible cause What to do...? Softener is not completely • Sucking cover is not • Clean the dispenser and correctly positioned or is firmly fix the cover to its rinsed, or water is left in the clogged. place. dispenser dish. Unpleasant smell in the •...
-
Page 40: Recommendations For Washing And Economic Use Your Washing Machine
RECOMMENDATIONS FOR WASHING AND ECONOMIC USE YOUR WASHING MACHINE Wash new coloured garments separately to the washing temperature and selected the first time. washing program. Wash heavily soiled laundry in smaller If water hardness level exceeds 14°dH amounts, with more detergent or a prewash degrees, the use of water conditioner is cycle. - Page 41 Hardness scale Degree of hardness °dH (°N) m mol/l °fH(°F) p.p.m. 1 - soft < 8,4 < 1,5 < 15 < 150 2 - medium 8,4 - 14 1,5 - 2,5 15 - 25 150 - 250 3 - hard >...
-
Page 42: Grandma's Advice For Natural Stain Removal
GRANDMA'S ADVICE FOR NATURAL STAIN REMOVAL Before using special-purpose stain removers, try using the natural methods that do not harm the environment on less stubborn stains. However, prompt action is required! Soak the stain with an absorbent sponge or a paper towel; then, rinse with cold (lukewarm) water - but never with hot water! Stain Stain removal... - Page 43 Stain Stain removal Glue soak in spirit/denatured alcohol (or a mixture of vinegar and water); rinse Make-up use a glass cleaner and a paper towel Butter rinse with hot soapsuds (if the fabric permits); tablecloth – sprinkle with baking soda, brush after a while wool –...
-
Page 44: Disposal
DISPOSAL Our appliances are packed in environmentally friendly materials which may be recycled, deposited or decomposed without any threat to the environment. To this end all wrappings are marked accordingly. The symbol on the product or on its packaging indicates that this product may not be treated as household waste. -
Page 45: Time Table
TIME TABLE NORMAL ECOLOGICAL TIME ALLERGY Temp. Programs [°C] Washing Time [min] Switched OFF Cotton Cotton Cotton Cotton Cotton Quick Wash 17' Rinse Softening Spin Mix/Synthetics Mix/Synthetics Perfect black Ultra white Hand wash Wool We reserve the rights to make any changes or mistakes in these operation instructions. -
Page 46: Typical Consumption Table
TYPICAL CONSUMPTION TABLE Program Cotton (A-30%) ECO* 7 / 3,5** 600-1400 80-53 0,84 / 0,73** (A-30%) ECO* 7 / 3,5** 600-1400 80-53 0,67 / 0,58** (A-30%) ECO* 6 / 3** 600-1400 80-53 0,70 / 0,67** (A-30%) ECO* 6 / 3** 600-1400 80-53 0,66 / 0,54**... - Page 48 PS10 BASIC en (12-14)
Need help?
Do you have a question about the w7223 and is the answer not in the manual?
Questions and answers