Sign In
Upload
Download
Table of Contents
Contents
Add to my manuals
Delete from my manuals
Share
URL of this page:
HTML Link:
Bookmark this page
Add
Manual will be automatically added to "My Manuals"
Print this page
×
Bookmark added
×
Added to my manuals
Manuals
Brands
H3C Manuals
Switch
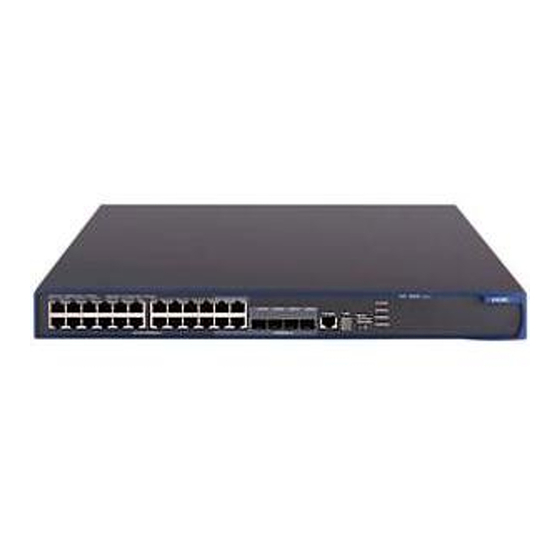
S5500-28 C-EI-DC
Installation manual
H3C S5500-28 C-EI-DC Installation Manual
S5500-ei series ethernet switches
Hide thumbs
1
2
3
4
5
Table Of Contents
6
7
8
9
10
11
12
13
14
15
16
17
18
19
20
21
22
23
24
25
26
27
28
29
30
31
32
33
34
35
36
37
38
39
40
41
42
43
44
45
46
47
48
49
50
51
52
53
54
55
56
57
58
59
60
61
62
63
64
65
66
67
68
69
70
71
72
73
74
75
76
77
78
79
80
81
82
83
84
85
86
87
88
89
90
91
92
93
94
95
page
of
95
Go
/
95
Contents
Table of Contents
Troubleshooting
Bookmarks
Table of Contents
About this Manual
Documentation Feedback
Obtaining Documentation
Related Documentation
Table of Contents
1 Product Overview
Overview
S5500-52C-Ei··································································································································1
Introduction to S5500-EI Series Ethernet Switches
S5500-28C
S5500-28C-Ei
S5500-28C-Pwr
S5500-52C-Pwr
S5500-28F
Ports
Console Port
10/100/1000Base-T Ethernet Port
SFP Port
Combo Port
Leds
System Status LED
Hot Swappable Power Module Status Leds
S5500-28F-Ei ··································································································································1
RPS Status LED
Port Mode LED
Seven-Segment LED
Ports ······················································································································································1
10/100/1000Base-T Auto-Sensing Ethernet Port Status LED
Leds······················································································································································1
SFP Port Status LED
Interface Module Status LED
Optional Interface Modules
Dual-Port GE SFP Interface Module
Short-Haul Dual-Port 10 GE CX4 Interface Module
Dual-Port 10 GE SFP+ Interface Module
Dual-Port 10 GE XFP Interface Module
One-Port 10 GE XFP Interface Module
Description of Leds of Interface Modules
2 Preparing for Installation
Safety Precautions
Installation Site
Temperature/Humidity
Cleanness
Electromagnetic Susceptibility
Laser Safety
Installation Tools
3 Installing the Switch
Installation Flow of the Switch
Installing the Switch into a 19-Inch Rack Using Mounting Brackets
Installation Modes
Introduction to Mounting Bracket
Introduction to Guide Rail
Use Front Mounting Brackets to Install a Switch
Use Front Mounting Brackets and a Tray to Install a Switch
Use Front and Rear Mounting Brackets to Install a Switch
Use Front Mounting Brackets and Guide Rails to Install a Switch
Mounting the Switch on a Workbench
Connecting the Grounding Cable
When a Grounding Strip Is Available
Where a Grounding Conductor Can be Buried
In Other Installation Sites
Installing a Power Module
Installing the Power Module
Removing the Power Module
Connecting the Power Cords
Connecting the AC Power Cord
Connecting the -48V DC Power Cord
Connecting the RPS Power Cord
Installing an Interface Module
Installing an Interface Card
Removing an Interface Module
Installing Dedicated CX4/SFP+ Cable
Removing Dedicated CX4/SFP+ Cable
Installing Switches for an IRF
Installation Flow for an IRF
Drawing a Plan for an IRF with Switches
Verifying the Installation
4 Starting and Configuring the Switch
Setting up the Configuration Environment
Connecting the Console Cable
Console Cable
Connection Procedure
Setting Terminal Parameters
Booting the Switch
Checking before Powering on the Switch
Powering on the Switch
Changing the Startup Mode
5 Boot ROM and Host Software Loading
Introduction to Loading Modes
Loading Software through the Boot ROM Menu
Boot Menu
Loading Software Using XMODEM through Console Port
Loading Software Using TFTP through Ethernet Port
Loading Software Using FTP through Ethernet Port
Loading Software through CLI
Loading Software Using FTP
Loading Software Using TFTP
6 Maintenance and Troubleshooting
Software Loading Failure
Password Missing Failure
Missing User Password
Missing Boot ROM Password
Power Supply Failure
Fixed Power Module Failure
Hot Swappable Power Module Failure
Fan Failure
Configuration System Failure
Appendix A Lightning Protection of the Switch
Advertisement
Quick Links
1
S5500-52C-Pwr
Download this manual
H3C S5500-EI Series Ethernet Switches
Installation Manual
Hangzhou H3C Technologies Co., Ltd.
http://www.h3c.com
Manual Version: 20090726-C-1.02
Table of
Contents
Previous
Page
Next
Page
1
2
3
4
5
Advertisement
Table of Contents
Need help?
Do you have a question about the S5500-28 C-EI-DC and is the answer not in the manual?
Ask a question
Questions and answers
Related Manuals for H3C S5500-28 C-EI-DC
Switch H3C S5500-28C-EI Installation Manual
S5500-ei series ethernet switches (96 pages)
Switch H3C S5500-EI Series Quick Start Manual
(91 pages)
Switch H3C S5500-EI Series Installation Manual
(69 pages)
Switch H3C A5500-24G Quick Start Manual
S5500-ei series, s5500-si series (9 pages)
Switch H3C LS-5500-28C-PWR-SI-OVS Installation Manual
S5500-si complete series (86 pages)
Switch H3C S5500-HI Switch Series Installation Manual
S5500-hi switch series (89 pages)
Switch H3C S5500-HI Series Quick Start Installation
(4 pages)
Switch H3C S5500-HI Series Command Reference Manual
Network management and monitoring command reference (311 pages)
Switch H3C S5500-EI Series Operation Manual – Port Security
(24 pages)
Switch H3C S5500-EI Series Operation Manual
(41 pages)
Switch H3C S5500-SI Series Operation Manual
Qinq-bpdu tunnel (15 pages)
Switch H3C S5500-SI Series Operation Manual
(7 pages)
Switch H3C S5500-SI Series Operation Manual
(33 pages)
Switch H3C S5500-SI Series Configuration Manual
Ethernet switches (130 pages)
Switch H3C S5560S-EI Series Configuration Manual
Mce configuration (47 pages)
Switch H3C S5560S-SI Installation Manual
(99 pages)
This manual is also suitable for:
S5500-28c-ei
S5500-28c-pwr-ei
S5500-28f-ei
S5500-52 c-ei
S5500-52c-pwr-ei
Table of Contents
Print
Rename the bookmark
Delete bookmark?
Delete from my manuals?
Login
Sign In
OR
Sign in with Facebook
Sign in with Google
Upload manual
Upload from disk
Upload from URL


Need help?
Do you have a question about the S5500-28 C-EI-DC and is the answer not in the manual?
Questions and answers