Advertisement
Available languages
Available languages
Quick Links
Download this manual
See also:
User Manual
TP-LINK TECHNOLOGIES CO., LTD.
Specifications are subject to change without notice. TP-LINK is a registered
trademark of TP-LINK TECHNOLOGIES CO., LTD. Other brands and product
names are trademarks or registered trademarks of their respective
holders.
No part of the specifications may be reproduced in any form or by any
means or used to make any derivative such as translation, transformation,
or adaptation without permission from TP-LINK TECHNOLOGIES CO., LTD.
Copyright © 2015 TP-LINK TECHNOLOGIES CO., LTD. All rights reserved.
www.tp-link.com
7106505239 REV1.0.0
Quick Installation Guide
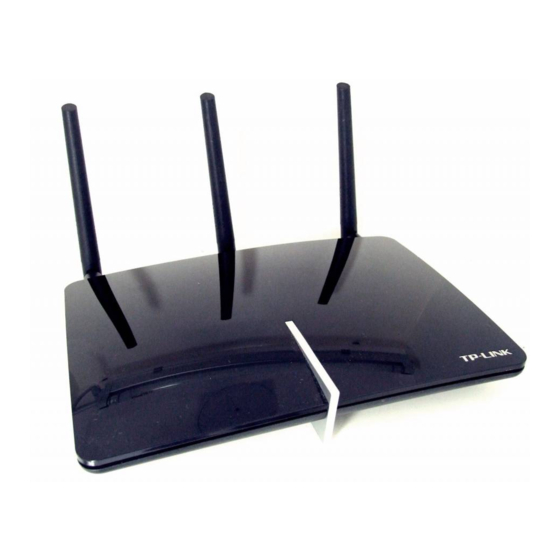
AC750 Wireless Dual Band Gigabit
ADSL2+ Modem Router
MODEL NO. Archer D2
English
Français
Advertisement

Related Manuals for TP-Link Archer D2


Summary of Contents for TP-Link Archer D2
- Page 1 TP-LINK TECHNOLOGIES CO., LTD. Specifications are subject to change without notice. TP-LINK is a registered Quick Installation Guide trademark of TP-LINK TECHNOLOGIES CO., LTD. Other brands and product names are trademarks or registered trademarks of their respective holders. AC750 Wireless Dual Band Gigabit...
-
Page 2: Connect The Hardware
English Connect the Hardware 1. Connect the splitter and power adapter as follows. Then press the POWER ON/OFF button. Phone Jack LINE Splitter PHONE MODEM Note: If you don’t need the phone service, just directly connect the ADSL port to the Phone Jack with a phone cable. - Page 3 1. Connect your computer to the modem router (Wired or Wireless). Ethernet cable Connect wirelessly by using the default network name Wireless Password /PIN Model:Archer D2 ver:1.0 (SSID) and password on the S/No.:XXXXXXXXXXXXX product label printed on the MAC:XXXXXXXXXXXX bottom of the modem router.
- Page 4 English http://tplinkmodem.net admin admin Login b. Choose in the main menu and then click Next to start Zone from the drop-down list, and then click Next. Quick Setup-Region and Time Zone Region XXXXXX XXXXXXXXXX Time Zone Back Next c. Select to auto detect your connection type and then click Next to continue.
- Page 5 English Quick Setup-PPPoE Auto-detection has succeeded! DSL PVC: 8/35 Encapsulation Mode: LLC Connection Type: PPPoE Username: XXXXXX Password: XXXXXX Confirm Password: XXXXXX Back Next e. Click Next to continue. Note: You may rename your 2.4GHz/5GHz wireless network name and create your own password.
- Page 6 Note: If you are using a computer that cannot run the mini CD, please refer to Method 1 1. Insert the TP-LINK Resource CD into the CD-ROM drive. 2. Choose your language and select Archer D2. Then click Note: Choose your language:...
- Page 7 FINISH Tether App After connecting to the Internet via Web Browser or via CD Setup Wizard, TP-LINK's Tether App lets you manage the modem router on smart devices. You can: • View the information about clients. • Block or Unblock client's access to the Internet.
- Page 8 You can also remotely by connecting to the Internet. Note: To learn more about the USB features, please visit http://tp-link.com/app/usb, retrieve Resource CD or simply scan the QR code. USB sharing port Remote...
- Page 9 English A1. Check your cables and make sure they are all plugged in correctly, including the telephone line, Ethernet cables and power adapter. A2. Check to see if you can log on to the Web-Management page of the modem router. The default address of the Web-Management page is http://tplinkmodem.net.
- Page 10 Management page, go to Wireless->Wireless Security to obtain or reset your password. Note: If your questions are not answered here, please refer to http://www.tp-link.com/en/ support/faq and click Contact Technical Support for further assistance. It turns on when a wireless device has been successfully connected to the network via WPS.
- Page 11 English On: The wireless 2.4GHz/5GHz band is working properly. The wireless function is disabled. Internet On: The network is available with a successful Internet connection. There is no successful Internet connection or the modem router is operating in Bridge mode. On: ADSL line is synchronized and ready to use.
-
Page 12: Connexion Du Matériel
Français Connexion du matériel 1. Connectez le splitter et branchez l'adaptateur en suivant les instructions. Appuyez ensuite sur l'interrupteur marche/arrêt. Jack téléphone Ligne téléphonique Splitter Téléphone Modem Remarque: Si vous n'avez pas besoin du service de téléphonie, connectez directement le jack téléphonique sur le port ADSL à l'aide d'un câble téléphonique. 2. - Page 13 Français • Filaire Câble Ethernet Activez la connexion sans fil avec le nom du réseau Wireless Password /PIN Model:Archer D2 ver:1.0 (SSID) et le mot de passe S/No.:XXXXXXXXXXXXX par défaut figurant sur MAC:XXXXXXXXXXXX l'étiquette du produit, au dos du modem routeur.
- Page 14 Français http://tplinkmodem.net admin admin Login b. Sélectionnez Quick Setup principal, puis, cliquez sur Next et Time Zone sur Next Quick Setup-Region and Time Zone Region XXXXXX XXXXXXXXXX Time Zone Back Next c. Sélectionnez Yes type de connexion, puis cliquez sur Next continuer.
- Page 15 Français Quick Setup-PPPoE Auto-detection has succeeded! DSL PVC: 8/35 Encapsulation Mode: LLC Connection Type: PPPoE Username: XXXXXX Password: XXXXXX Confirm Password: XXXXXX Back Next e. Cliquez sur Next Remarque: votre propre mot de passe. 2.4GHz & 5GHz Wireless Network Name and Password Wireless Network Name: TP-LINK_XXGHz_XXXXXX Channel:...
- Page 16 Remarque: Si vous utilisez un ordinateur qui ne peut pas lire le mini CD, veuillez vous reporter à la Méthode 1. 1. Insérez le CD de ressources TP-LINK dans le lecteur CD-ROM. 2. Sélectionnez votre langue, puis Archer D2. Cliquez ensuite sur Start Setup données dans la vidéo pour connecter vos périphériques.
- Page 17 Une fois que vous êtes connecté à Internet via un navigateur Web ou à l'aide du CD Assistant d'installation, l'application Tether de TP-LINK vous permet de gérer le modem routeur sur vos périphériques intelligents. Vous pouvez : • Bloquer ou accepter les demandes d'accès à Internet des clients.
-
Page 18: Questions Fréquemment Posées (Faq)
FTP de façon à accéder à vos fichiers à distance en vous connectant à Internet. Remarque: Pour en savoir plus sur les fonctionnalités USB, rendez-vous sur la page http://tp-link.com/app/usb, reprenez le CD de ressources ou scannez simplement le code QR. - Page 19 Français branchées, sans oublier la ligne de téléphone, les câbles Ethernet et l'adaptateur secteur. R2. Vérifiez que vous pouvez vous connecter à l'interface de gestion en ligne du modem routeur.L'adresse par défaut est http://tplinkmodem. net. Si vous arrivez à vous connecter, suivez les étapes décrites ci- après.
-
Page 20: Indicateurs Lumineux
R1. Le mot de passe par défaut est indiqué sur l'étiquette du produit, sous le modem routeur. ou le réinitialiser. Remarque: Si vous avez d’autres questions, reportez-vous à la page http://www.tp-link. com/fr/support/faq et cliquez sur Contacter l'Assistance technique. Indicateurs lumineux Marche/Arrêt: Il s’allume quand un périphérique sans... - Page 21 Français Fixe: correctement. Éteinte: Internet Fixe: Le réseau est disponible et la connexion Internet est bonne. Éteinte: La connexion Internet ne fonctionne pas ou le modem routeur fonctionne en mode Pont. ADSL On: ADSL line is synchronized and ready to use. Flash: The ADSL negotiation is in progress.
Need help?
Do you have a question about the Archer D2 and is the answer not in the manual?
Questions and answers