Table of Contents
Advertisement
Quick Links
Advertisement
Table of Contents

Related Manuals for Atlantis Land NET POWER 302AV


Summary of Contents for Atlantis Land NET POWER 302AV
- Page 2 For more detailed instructions on configuring and using this device, please refer to the online manual. FRANCAIS Ce produit est couvert par une garantie Atlantis Land de 2 ans. Pour des informations plus détaillées, référez-vous svp au site Web www.atlantis-land.com. DEUTSCH Dieses Produkt ist durch die Atlantis Land 2 Jahre Garantie gedeckt.
-
Page 3: Table Of Contents
INDEX 1. Introduction ... 9 2. Package Contents ... 9 3. System Requirements ... 10 3.1 System Required for Utility ... 10 4. Device Design ... 11 5. Hardware Installation ... 13 6. SYNC Button ... 15 6.1 Application Scenarios ... 15 7. - Page 5 Windows™ 98SE/2000/ME/XP/VISTA are trademarks of Microsoft® Corp. Pentium is trademark of Intel. All copyright reserved. The Atlantis Land logo is a registered trademark of Atlantis Land. All other names mentioned mat be trademarks or registered trademarks of their respective owners.
- Page 6 Declaration of Conformity Hereby, Sidin SpA, declares that this product is in compliance to all relevant essential requirements of the Electromagnetic Compatibility Directive 2004/1008/CE and Safety (2006/95/CE). CE Declaration is available on the web site www.atlantis-land.com. Important information for the correct recycle/treatment procedures of this equipment The mentioned information are reported herewith in compliance with directive 2002/95/CE, 2002/96/CE and 2003/108/CE which requires a separate collection...
-
Page 7: Important Safety Instructions
Important Safety Instructions Please read these instructions carefully: Unplug the PowerLine HD Ethernet Adapter from the wall outlet before cleaning. Do not use liquid cleaners or aerosol cleaners. Use a damp cloth for cleaning. Do not use the PowerLine HD Ethernet Adapter near water. ... - Page 8 Check voltage before connecting to the power supply. Connecting to the wrong voltage will damage the equipment. High voltage is used in the equipment. Do not open enclosure, service, or change any part of the equipment. Service can only be carried out by qualified technical specialists.
-
Page 9: Introduction
Congratulations on your purchase of this Net Power 302 AV. This manual helps to get familiar with the Adapter. This manual contains detailed instructions in operation of this product. Please keep this manual for future reference. 1. Introduction NetPower 302AV utilizes the existing electrical wiring in the house as a path to create a secured network of computers and Ethernet devices. -
Page 10: System Requirements
At least 256MB hard disk space and memory .NET Framework Your computer or the device to which you want to connect the Powerline HD Ethernet Adapter must have an Ethernet port, i.e. a network card or a network adapter. -
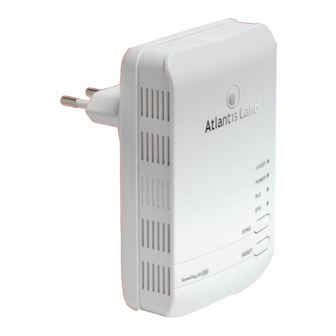
Page 11: Device Design
4. Device Design NetPower 302AV has 4 lights indicator (LEDs), 2 buttons and an Ethernet port: 1.0 DECT Blinking when detecting other HomePlug 1.0 devices that have the transmission rate of 14 or 85 Mbps. POWER Lit when the device is power on. Blinking when the device enters power saving mode. - Page 12 Lit when detected and connected with another PowerLine Adapter within the network. Blinking during data transfer. Lit when connected to an Ethernet device. Blinking when data is transmitted or received via Ethernet port. BUTTON SYNC Press to create or join a HomePlug AV network. It can also be used to reset the Private Network Name to a random key.
-
Page 13: Hardware Installation
5. Hardware Installation Refer to the following diagrams and direction to install the clip with NetPower 302 AV. Please DO NOT remove or disassemble the socie clip frequently as this may cause serious damage to your NetPower 302AV. - Page 14 Plug the Powerline HD Ethernet Adapter into an AC outlet (Do not plug device into a power strip or surge protector). Plug one end of an ETHERNET cable into the Powerline HD Ethernet Adapter and plug the other end to a PC or device. Plug the second Powerline HD Ethernet Adapter into an AC outlet (Do not plug device into a power strip or surge protector).
-
Page 15: Sync Button
6. SYNC Button Sync Button is used to add a HomePlug device to a Powerline network or enable it to join a network by pressing the Sync Button of the device to turn it into Broadcast state or Join state. There are 3 types of Sync Button trigger states: Broadcast State: Enable NetPower 302 AV device to provide information for another NetPower 302 AV device to join its powerline network group... - Page 16 Scenario 2: A NetPower 302AV device wants to join an existing network group BC. Device A wants to join a network group “BC” currently consisting of device B and device C. Any devices within the “BC” group can become the “Broadcast State” and device A will be the “Join State”.
-
Page 17: Utility
7. Utility Insert the Resource CD that comes with NetPower 302AV into the CD-ROM drive. Click the Utility button, and then click Run. In the Run dialog box, type D:\A02-PL302Kit\Utility\Net Power 302 AV Utility\Setup.exe (where D: is your CD-ROM drive), and then click OK. Follow the instructions on the installation wizard. -
Page 18: Opening Net Power 302 Av Utility
7.1 Opening Net Power 302 AV Utility Two ways to open HomePlug AV Utility: Right-click the Net Power 302 AV Utility desktop shortcut Open. Click the Start button, click Programs, click Net Power 302 AV Utility and then click Net Power 302 AV Utility. The User Interface The HomePlug AV Utility user interface is divided into tabs. - Page 19 Main The Main Tab screen lists all the powerline devices that are connected to the host computer when the utility is running. The top left window panel shows all the local HomePlug devices that are connected to the computer’s NIC (Network Interface Card). Normally, only one device will be seen on the list.
- Page 20 connect button will indicate with a message "NO HOMEPLUG ADAPTERS DETECTED". The bottom window panel displays all the HomePlug remote devices that are detected on the current network. The total number of remote devices connected on the same network can be found on top of the Remote device panel. Within this panel, you can also find some useful informations of each remote device such as its password, the connection quality, transfer rate and MAC address.
- Page 21 Password Setup Instructions: This feature grants users the access level to change the Private Network Name of both the local & the remote HomePlug devices. Password is required if one is to change the Private Network Name of each devices within the powerline network in order for all devices to be able to communicate &...
- Page 22 Privacy TAB Privacy Tab allows user the convenience to manage the security of the private powerline network. In addition, user can also uitlize this feature to add a new HomePlug device to the private network instead of manually adding the device using its Sync button.
- Page 23 “NetPower302AV” as the network name or by clicking on the Use Default button. Set Local Device Only button can be used to change the Private Network Name of the local device. If a new Private Network Name is entered, all associated devices seen on the Main Tab previously will no longer be present in the new network, thus causing the local device unable to communicate with other devices which were in the network previously.
- Page 24 Diagnostics The Diagnostics Tab screen shows System information and a history of all remote devices seen over a period of time. The Upper panel shows technical data concerning software and hardware present on the host computer which were used for communication via HomePlug device on the Powerline network.
- Page 25 Identify versions of all Driver DLLs and Libraries used (NDIS) and optionally Firmware FINALC) MAC addresses of all devices connected locally to the host Version of the Configuration Utility (V5.0 Build 1.6) Microprocessor The Lower panel contains a history of all remote devices seen on the computer over a certain period of time.
- Page 26 Quality of Service This function allows user the flexibility to manage the bandwidth usage for each HomePlug device. The higher the QoS priority the more bandwidth usage is allocated to that particular device. QoS is not enabled by default. To set the QoS priority of each device: ...
- Page 27 About The About screen shows the software version (1.00f). Under the Preferences panel, user can check the AutoScan box to turn on the Auto Scan function or check off the box to turn off the Auto Scan function.
-
Page 28: Support
For technical questions and support, please contact our help-desk by ticket on http://www.atlantis-land.com/ita/supporto.php. For generic informations, please send an e-mail to info@atlantis-land.com For presales informations, please send an e-mail to prevendite@atlantis-land.com. Atlantis Land Via Pelizza da Volpedo, 59 20092 Cinisello Balsamo (MI) - Italy Tel: +39. 02.00.632.300 Fax: +39. 02.66.016.666 Website: http://www.atlantis-land.com... -
Page 29: Appendix A: Frequently Asked Questions
APPENDIX A: Frequently Asked Questions Can I use HomePlug AV with older HomePlug versions? All HomePlug AV versions can communicate with each other. HomePlug AV, however, is not backward compatible with HomePlug 1.0 releases. If you will use different versions of HomePlug AV in a single network, you need to use the HomePlug AV Utility software to create a Private Network Name for all devices. - Page 30 intend to manually change the Private Network Name or view the connection rate. How many devices do I need to create a HomePlug AV network? At least two devices are needed to create a HomePlug AV network. Is HomePlug AV suitable for triple play like the simultaneous use of data, voice, and video applications? Yes, triple play is supported.
- Page 31 What is the maximum range of HomePlug AV? The maximum range is 200 meters. If one HomePlug AV is connected to a LAN switch, is it possible for other computers in the switch to communicate with other HomePlug AV devices? Yes.
- Page 32 Do I need electrical grounding for the device? HomePlug AV does not require electrical grounding. After a blackout, will HomePlug AV switch on automatically? Yes. If you experience connection issues, unplug the device and plug it back.
-
Page 33: Appendix B: Technical Features
APPENDIX B: Technical Features Physical Interface - 1 Electrical Power plug - 1 RJ45 for 10/100 Ethernet (AutoMDI/MDI-X) - 2 Push Botton (SYNC and Reset) - LEDs: (DECT1.0, Power, PLC Link status, Ethernet) Chipset - Chipset: Intellon INT6400® Integrated Single-chip Powerline Network Transceiver Frequency Band - 2Mhz to 30Mhz band Modulation Support... -
Page 34: Advanced Features
- ToS and CoS Packet Classifier - Supports IGMP managed multicast session Platform Support - OS Independent with TCP/IP protocol installed Advanced Features - Push Button(SYNC): Setup network password automatically Physical and Environmental - Temperature (Operating): 0°~32°C - Temperature (Storage): -10°~65°C - Humidity (Operating): 30% - 80% RH, no condensation - Humidity (Storage): 30% - 95% RH, no condensation - Weight: Approx 155g... - Page 35 Via Pelizza da Volpedo, 59 Cinisello Balsamo – MI – Italy info@atlantis-land.com...
Need help?
Do you have a question about the NET POWER 302AV and is the answer not in the manual?
Questions and answers