Interlogix truvision 20 Quick Start Manual
Hide thumbs
Also See for truvision 20:
- User manual (155 pages) ,
- Quick start manual (84 pages) ,
- User manual (160 pages)
Table of Contents
Advertisement
Quick Links
Download this manual
See also:
Quick Start Manual
TruVision NVR 20 Quick Start Guide
Content
Playback 9
Contact information
For contact information, see our Web sites:
www.utcfireandsecurity.com, www.interlogix.com or
www.utcfssecurityproducts.eu.
Package contents
The TruVision NVR 20 (TVN 20) is shipped with the
following items:
•
TruVision NVR 20
•
Separately packaged hard drives
•
AC power cord (USA: USA power cord; EMEA:
Europe Main and UK power cords)
•
Plastic bag with terminal blocks for alarm
input/output connectors
•
Plastic bag with rack ears and screws
•
TruVision NVR 20 Quick Start Guide
•
•
•
•
•
Installation environment
Refer to the user manual for detailed information, but
observe these important requirements:
•
•
•
The normal expectation is that this will be mounted in a
19" equipment rack as Users cannot access the unit
directly to view live or playback video. Rack ears are
provided and suitable to mount the unit without any
additional support.
Key documents
In addition to this Quick Start documentation, it is
strongly recommended that you review the following
documents to insure a proper installation:
•
•
Installing the TruVision NVR 20
To quickly put the NVR 20 into operation:
1. Unpack the TVN 20 unit from the shipping box.
2. Unpack the TVN 20 HDD box(s) from the shipping
© 2011 UTC Fire & Security. All rights reserved.
TruVision NVR 20 User Manual
IP Camera Compatibility document
WEE Compliance Declaration
Battery Declaration
The TruVision NVR 20 product documentation CD
which includes the following items:
•
Capacity and storage calculator
•
IP Camera Compatibility document
•
TruVision Device Finder
Place the TruVision in a secure location.
Ensure that the TruVision is in a well-ventilated area.
Do not expose the unit to rain or moisture.
TVN 20 IP Camera Compatibility Chart
User Manual: TVN 20 System Basics section
box.
P/N 1070713• REV 01.00 • ISS 17JUN11
Advertisement
Table of Contents

Related Manuals for Interlogix truvision 20


Summary of Contents for Interlogix truvision 20
-
Page 1: Table Of Contents
Rack ears are Contact information provided and suitable to mount the unit without any additional support. For contact information, see our Web sites: www.utcfireandsecurity.com, www.interlogix.com or www.utcfssecurityproducts.eu. Key documents In addition to this Quick Start documentation, it is Package contents... -
Page 2: Configuring The Nvr 20 Summary
5. Define any alarm output behaviors, local unit audible rest of the hard drives. alerts, local-unit relay outputs as well as notifications to Interlogix’s TruVision Navigator video software. Figure 3: Insert the hard drive 6. All hard drives are pre-configured into a single... -
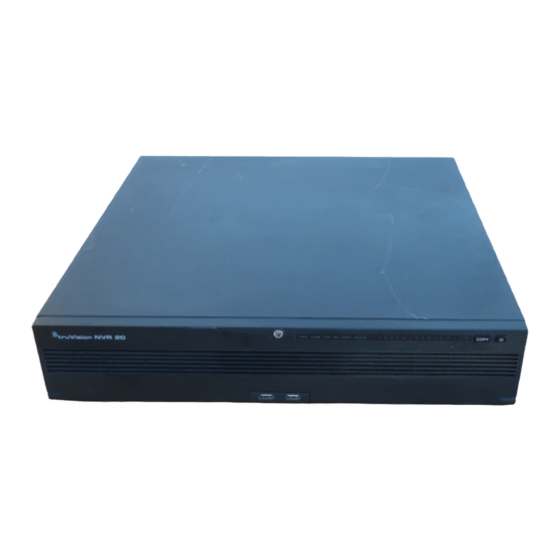
Page 3: Tvn 20 Front And Back Panels
TVN 20 front and back panels Figure 4: TVN 20 front panel Table 1: Front panel elements Element Description LED Status Light Power LED Shows that unit is powered Color = Normal Alarm LED Shows if there are any alerts RED = Fault OFF = Normal TX/RX LED... -
Page 4: Truvision Device Finder - Ip Addressing
Figure 5: TVN 20 back panel Table 2: Back panel elements Element Description Reset Resets unit to factory defaults RS-232 Used for connecting PC for troubleshooting 10/100/1000Mbps UTP Ethernet interface eSATA For future use RS-485 Switch For future use RS-485 For future use Connectors Alarm In... -
Page 5: Tvn 20 Browser - Login
TVN 20 Browser - Login 6. The application will return a listing of “discovered” TruVision devices located on your network along Suggested PC specifications for using the TVN 20 with their current IP address. Browser vary depending on the use of multi-window (9- Up/16-Up) displays combined with megapixel cameras. -
Page 6: Tvn 20 Browser - Adding Ip Cameras
6. The display will show all of the “discovered” IP cameras. The TVN 20 supports a wide variety of Interlogix IP cameras including a single channel encoder in addition 7. Click the checkbox next to each of the cameras you to a variety of IP cameras supplied by other wish to add to this specific TVN 20 unit. -
Page 7: Time Synchronization
To customize the settings for each camera press the • To the TVN 20 Browser PC’s time OR Configuration parameters text to enter into the full • To a NTP (Network Time Server) configuration mode for the TVN 20. Please refer to the To setup time synchronization: TVN 20 User Manual in the TVN 20 System Basics section for complete instructions. - Page 8 PTZ control. This will become available in a subsequent firmware release. Please check Stops Recording Stops manual recording of the displayed with your Interlogix representative or business streams. partner for the latest firmware capabilities. Picture Controls These camera controls are only available for...
-
Page 9: Playback
Playback When you first log into the TVN 20, the default page is on the Live view tab. To move to the Playback page, click on the Playback tab at the near the top of the TVN Browser page. The various buttons are explained in Figure 7 below. -
Page 10: Video Search - Playback
Video search - Playback Local USB Archive via COPY button All actions are completed locally at the unit without the The process for searching for video is: need of a computer. Video files are automatically copied 1. Select the camera that you wish to search for video off newest to oldest. -
Page 11: Turning Off The Tvn 20
1. Insert a USB device into either one of the two USB ports on the front of the TVN 20. 2. Via the TVN 20 Browser go to the Playback tab. 3. Select the desired Date from the calendar of the 2. - Page 12 EN - 12 TruVision NVR 20 Quick Start Guide...