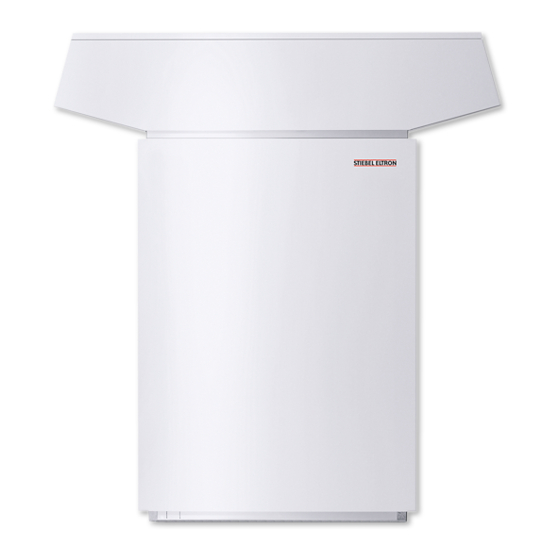
STIEBEL ELTRON WPL 33 Installation Instructions Manual
Compact air/water heat pump
Hide thumbs
Also See for WPL 33:
- Installation instructions manual (24 pages) ,
- Manual (32 pages) ,
- Installation instructions manual (25 pages)
Table of Contents
Advertisement
WPL 33
Compact air/water heat pump
Installation instructions
The installation (water and electrical work) and commissioning, as well as the maintenance of this
equipment, must only be carried out by an authorised qualified contractor in accordance with these
instructions.
Index
1
General
1.1 Equipment description
1.2
Function
1.3
Correct operation
1.4
Incorrect operation
1.5 Regulations and standards
1.6 Standard delivery and accessories
2
Specification
2.1 Specification
2.2
Performance diagram
2.3
Performance diagram
3
Installation, connection, sound emissions
and commissioning
3.1
Transport
3.2
Installation location
3.3
Noise emissions
3.4 Installing the base unit
3.5
Base unit assembly
3.6 Heating water connection
3.7
Circulation pump
3.8 Condensate drain
3.9
Buffer cylinder
3.10 Second heat source
3.11 Checking the fan
3.12 Casing components
3.13 Installing the air hoses
4
Electrical connection
4.1 Power supply company
4.2 Power switch
4.3 Terminals inside the HP
4.4 IWS
4.5
Circulation pump
4.6
Stand-alone operation
4.7 External installation
4.8 Internal installation
5
Commissioning
6
Operation and control
7
Maintenance and cleaning
7.1 Maintenance
7.2
Cleaning
8
Fault remedies
Information for the owner of the
heat pump heating system
Keep these operating instructions safely and
pass them on to any new user, should the
equipment change hands. Let your contractor
check their content in conjunction with re-
quired maintenance or repair work.
Risk of injury
Where children or persons with
limited physical, sensory or mental capa-
bilities are to be allowed to control this
appliance, ensure that this will only happen
under supervision or after appropriate in-
structions by a person responsible for their
safety.
Children should be supervised to ensure
that they do not play with the appliance.
2
2
2
2
2
2
2
3
3
4
5
6
6
6
6
7
7
7
9
9
9
9
10
10
10
11
11
11
11
11
11
11
11
11
16
16
16
16
16
17
Advertisement
Table of Contents

Related Manuals for STIEBEL ELTRON WPL 33


Summary of Contents for STIEBEL ELTRON WPL 33
-
Page 1: Installation Instructions
WPL 33 Compact air/water heat pump Installation instructions Index General 1.1 Equipment description Function Correct operation Incorrect operation 1.5 Regulations and standards 1.6 Standard delivery and accessories Specification 2.1 Specification Performance diagram Performance diagram Installation, connection, sound emissions and commissioning... -
Page 2: Equipment Description
–20 °C. 1.6 Standard delivery and accessories function and all safety equipment. Type WPL 33 Standard delivery – external installation Part no. safety functions through the WPM heat pump manager (required accessory, part no. -
Page 3: Specification
2 Specification (check details on the rating plate) 2.1 Specification (equipment information) Heat pump Type WPL 33 Order no. 18 53 48 Type and operating mode Type Compact/split/open version Compact Operating mode mono-mode alternative dual-mode parallel dual-mode Dimensions, weights, connection dimensions... - Page 4 2.2 Output diagram for heat pump WPL 33 (both compressors) Flow temperature 35°C Flow temperature 50°C Flow temperature 60°C Inlet temperature of the WQA (= heat source system) medium [°C] Fig. 1a...
- Page 5 2.3 Output diagram for heat pump WPL 33 (single compressor) Flow temperature 35°C Flow temperature 50°C Flow temperature 60°C Inlet temperature of the WQA (= heat source system) medium [°C] Fig. 1b...
-
Page 6: Installation Location
3 Installation, connection and External installation sound emissions 1280 3.1 Transport Protect the heat pump against severe impact. Short tipping to one of its longitudinal sides is permissible. The casing, cover (in case of external installa- tions) and the cover with air hose connections (for internal installation) are separate shipping units, which will only be assembled to the base unit on site. -
Page 7: Installing The Base Unit
Foundation for external installation Recess screed and impact sound insulation. Main wind direction Luftaustrittseite Hauptwindrichtung Air outlet side when using pressure hoses 1390 1 Impact sound installation Dimensions in mm 2 Floating screed Lufteintrittseite Air inlet side Fig. 4 Fig. 6 Main wind direction Curb stones for external Protect the flow and return pipes in external... - Page 8 operational reliability of the heat pump, and Water and electrical connections in external installations can lead to a blocking of the evaporator. 3.6.5 Venting the heating system Air pockets in the system are detrimental to the heat pump function. Vent the pipework thoroughly. For this, also activate the air vent valve integrated into the heating flow.
-
Page 9: Circulation Pump
Use a condensate pump if there is insufficient 3.7 Circulation pump 3.8 Condensate drain fall. Install the heat pump approx. 100 mm higher, 3.8.1 At the factory, a ¾“ hose is fitted to the 3.7.1 Circulation pump in the heat pump circuit if the condensate pump PK 9 (part no. -
Page 10: Checking The Fan
3.11 Checking the fan 2. Position the lid onto the equipment and cores into each other (approx. 30 cm). secure with one quick-release fitting at each The total length of hoses on the air inlet and The fan must rotate in the correct direction. side. -
Page 11: Electrical Connection
4 Electrical connection 4.4 IWS 4.8 For internal installation The IWS (abbreviation for Integrated heat route the electrical cables through the cable pump control unit [German]) is a PCB fitted entry at the top into the heat pump, and 4.1 Power supply company as standard into the heat pump control panel. - Page 12 Mains impedance: Zmax ≤ 0.296 : 3/PE~400/50 3/N/PE~400/50 1/N/PE~230/50 Mains supply Heat pump (compressor) L1, L2, L3, PE Supplementary heater Plombendraht N, L1, L2, L3, PE durch die Schraubenköpfe 58907/1-2/10.84 Connected Terminal load assignment 2,6 kW 3,0 kW 3,2 kW 5,6 kW 5,8 kW 6,2 kW...
- Page 13 Wiring diagram for heat pumps WPL 33 Fig. 14...
- Page 14 Electrical connection diagram for heat pumps WPL 33 with heat pump manager WPM II Heat Pump Manager WPM II max. 2 A gl 1/N/PE ~ 50Hz 230V 16 A gl Supply from the domestic meter 4 x 1,5 mm Time switch for power OFF periods...
-
Page 15: Operation And Control
5 Commissioning 7 Maintenance and cleaning 7.1 Maintenance See the operating instructions for the heat pump manager WPM II. The heat pump operates under automatic con- trol and requires no specific maintenance. Set parameter 35 HEAT PUMP DHW STAGES either to 01 or to 02 if DHW Keep the air inlet and outlet openings of the heating/loading is required. -
Page 16: Troubleshooting
2, subject to the heat Switch ON: STAND ALONE operation can recommence 10 minutes after the fault has pump type WPL 33. Should the WPM develop a fault, the heat been removed; the LED goes out. - Page 21 Note...
- Page 22 Note...
- Page 23 Note...
Need help?
Do you have a question about the WPL 33 and is the answer not in the manual?
Questions and answers