Table of Contents
Advertisement
How to get the best from
Your Range
Contents
Aluminum Foil
5, 15, I 7-19
Anti-Tip Device
2,3,29,38
Appliance Registration
Care and Cleaning
Clock and Timer
Consumer Services
Important Phone Numbers 47
Converting to LP or
Natural Gas
Features
Installation Instructions 28-38
Air Adjustment
Flooring Under Range
Leveling
Model and Serial Numbers 2
Oven
Broiling, Broiling Guide
Control Settings
Door Removal
Light; Bulb Replacement 12,24
Oven Bottom
Oven Vents
Roasting, Roasting Guide 17, 18
2
Shelves
Power Outage
Problem Solver
47
Thermostat Adjllstment-
Safety Instructions
Surface Cooking
(i, 7
Burners
Control Settings
30
Cookware Tips
Flame Size
Lighting Instructions
Warranty
14, Is
12
25
800.626.2000
Use and Care
13,27
&Installation
13, 17
12
44,45
3–5
9-11
10
9
Back Cover
of Models
RGB524
RGB525
RGB526
RGB527
RGB528
RGB532
RGB533
RGB535
RGB628
RGB630
Advertisement
Table of Contents

Related Manuals for Hotpoint RGB508


Summary of Contents for Hotpoint RGB508
- Page 1 How to get the best from Your Range Contents Use and Care Aluminum Foil 5, 15, I 7-19 Oven Vents 13,27 Anti-Tip Device 2,3,29,38 Roasting, Roasting Guide 17, 18 &Installation Appliance Registration Shelves 13, 17 Care and Cleaning Power Outage of Models Clock and Timer Problem Solver...
- Page 2 (include your phone number): — Do not store or use gasoline or other Consumer Affairs flammable vapors and liquids in the Hotpoint vicinity of this or any other appliance. Appliance Park Louisville, KY 40225 — WHAT TO IX) 11’ YOU SMELL GAS Write down the model and serial numbers.
-
Page 3: Using Your Range
NOTE: Need to buy kit WB28KO085 to convert Fluorescent light bulbs and safety valves on the top burners of the RGB508, standing pilot ranges contain mercury. If your model has these features, they must be recycled After prolonged use of a range, high floor according to local, state and federal codes. -
Page 4: Important Safety Instructions
IMPORTANT SAFETY INSTRUCTIONS (continued) CAUTION: ITEMS OF INTEREST TO Surface Cooking CHILDREN SHOULD NOT BE STORED IN Always use the LITE position (on electric CABINETS ABOVE A RANGE OR ON THE ignition models) or the HI position (on standing BACKSPLASH OF A RANGE—CHILDREN pilot models) when igniting the top burners CLIMBING ON THE RANGE TO REACH make sure the burners have ignited. -
Page 5: Cleaning Your Range
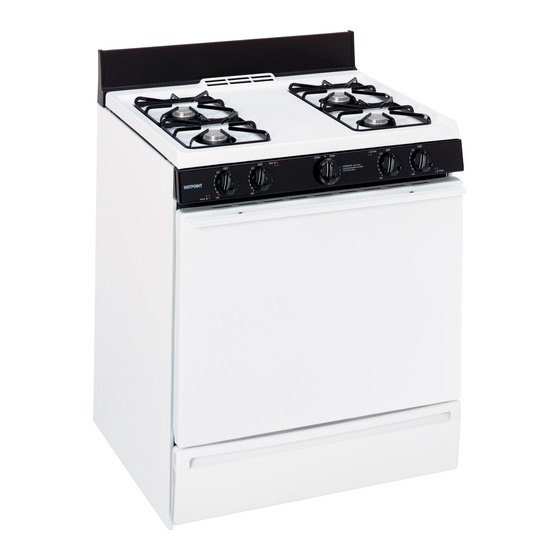
If a combination of oils or fats will be used Keep the oven free from grease buildup. in frying, stir together before heating or as fats Place the oven shelves in the desired position melt slowly. while the oven is cool. Use a deep fat thermometer whenever possible to Stand away from the range when opening the prevent overheating fat beyond the smoking point. - Page 6 FEATURES OF YOUR RANGE Your range is equipped with one of the two types of surface burners shown above.
- Page 7 page Feature Index (Not all models have all features. Appearance of features varies.) I Clock and Timer (on solne models) 4,5, 13,27 4,5, 9- I 1, 4 Surface Burner Control Knobs 4, 10, I 1, 24 5 (lven Control Knob 17, 19,24 6 oven Shelf”...
-
Page 8: Clock And Timer
CLOCK AND TIMER (on wme models) the directions below if your range has the clock and timer shown at the right. You have the choice of having the timer show the time counting down or the time of day. In either case, end of the thmer period to the timer will signal at the the time is up. - Page 9 Your new cooktop has gas burners. If you are used The best types of cookware to use, plus heat-up to cooking with induction or other electric surface cool-down times, depend upon the type of burner or units, yOLI will notice some differences when you use surface unit you have.
- Page 10 SURFACE COOKING (continued) Lighting Instructions for Standing Pilot Models ports The surface burners with a match. on these ranges have NOTE: lt’ the pilot is too high or low. you can acijust must be lit initially. it. Sce the Adjust the Suri’acc Burner Pilots If’ Necessary section of the Installation lnstruc[ions, 1.
- Page 11 After Lighting a Burner time without cookware cm the grate. The finish on the chip without cookware to absorb the heat. Check to be sure the burner you turned on is the one yell W:lllt to USe. place your hand, a pot holder, cleaning cloths or other materials on them.
-
Page 12: Using Your Oven
USING YOUR OVEN Before Using Your Oven Be sure you understand how to set the controls properly. Practice removing and replacing the shelves while the oven is cool. Read the information and tips on the following pages. Keep this guide h~ndy where you can rci”er to it, especially during the first weeks of’... - Page 13 Oven Shelves To remove a shelf — The shelves are from the oven, pull it designed with stop- locks so when placed correctly on the shelf supports, they will stop replace, completely out of the shelf 011 the shcii’ support > oven and will not tilt with the stop-locks when you are removing...
-
Page 14: Pan Placement
BAKING Your oven temperature is controlled very accurately using an oven control system. It is recommended that the Oven Thermostat section. It gives easy Do It operate the oven for a number of weeks to Yourself instructions on how to adjust the thermostat. become familiar with your new oven’s performance. - Page 15 Baking Guides When mixes, follow using prepared baking package recipe or for best baking results. instructions Cookies Aluminum Foil Never entirely cover cookie sheets (without sides) foil. This will disturb produce bet[cr-looking the heat circulation and cookies. Cookies result in poor baking, A smaller sheet of foil pan (short sides [ill may bc used to catch u...
-
Page 16: Do It Yourself
ADJUST THE OVEN THERMOSTAT— DO IT YOURSELF! You may feel that your new oven cooks differently To Adjust the Thermostat: than the one it replaced. We recommend that you use your new oven for a few weeks to become more familiar with it, following the times given in your recipes as a guide. - Page 17 Roasting temperatures, which should be low and oven is working properly,) (R) position stand in: time for roasts is 1 () to 20 minutes. This when carve. Intcrndl temperu[ure will rise about 5“ to 1 ()(’F. needed. Ii)r example, It’ you wish to compensate for temperature rise, when ro:lsti ng a lmge remove the roast from the oven when its intcrnu] this posi[ion.”...
-
Page 18: Roasting Guide
ROASTING (continued) Questions and Answers Is it necessary to check for doneness with a meat thermometer? A. Checking the finished internal temperature a( the A. 1( is not necessary 10 pt”chca( youl” oven completion of cooking time is recommended. Temperatures tire shown in Rmts[ing Guide. For that would help me cook it more evenly? roasts over 8 lbs., check with thermometer at half- A. - Page 19 Broil in: is cooking food by Llirec[ beat fr(>m above the Both the oven and broiler compartment doors food. Most fish and [endcr cuts of meat cim be broiled. should be closed during broiling. Turn most foods once during cooking (the exception to a minimum.
-
Page 20: Broiling Guide
BROILING GUIDE The oven and broiler compartment doors must be closed during broiling. broiling. Or brush with barbecue sauce the last 5 to lo-minutes only. Always the hi Ier pm rack tha[ comes with your t%lge. 11 is design&i to minimize smoking and When arranging the food on the pan, do not let tatty spattering by trapping .ju ices in the shielded lower over the sides because dripping fat could... -
Page 21: Sealed Burner Assemblies
care and c]eaning are important so your range Wil] give efficient proper yoLI help assure safe and proper maintenance. SURE ELECTRICAL POWER IS DISCONNECTED BEFORE CLEANING ANY PART OF YOUR RANGE. CAUTION: DO NOT OPERATE THE BURNER WITHOUT ALL BURNER PARTS AND DRIP PANS (IF SO EQUIPPED) IN PLACE. - Page 22 CARE AND CLEANING (continued) Burner Heads (on sea]ed burners on]y, The holes in the burners of your range, and the spark For more stubborn stains, use o electrodes, must be kept clean at all times cleanser like Soft Scrub(”) brand or “l/.
-
Page 23: Burner Grates
Burner Grates ) UIXC. al’tcr spi 1 lc~vers. in a oven 1’01”:1 [’CW Ini I1lIILX. [>011+[ pLlt (hc g2teS Although they’re durable, the grates will gradually lose their shine, regardless of” the best care you can This is high tenlpcr:MLlres. To prevent rusting on cast iron grates, apply n light time without cookware on the grate. -
Page 24: Control Panel And Knobs
CARE AND CLEANING (continued) Oven Light Bulb (011 SOIIW IIIOLICIS) oven. replacing your oven 1 ight bulb, disctmncc{ the electrical power to the rimgc at [he mtiin fuse or removing it. Replace the bulb with :i 40 watt ilppl iance bulb only. - Page 25 Lift-Off’ Oven Door TO CLEAN THE DOOR: The oven door is rcmovabie but it is heavy. You may (Do not immerse dom- in water. ) need help removing and replucing the door. Inside of door: To remove the door, Allow to coo] bcl’ore clctin i ng. F-or 1 ight soi 1, wipe cooking me:it).
- Page 26 CARE AND CLEANING (continued) Special Care of Continuous-Cleaning Oven some models) The Continuous-Cleaning Oven cleans itself while To Clean the Continuous-Cleaning Oven: cooking. The oven walls are finished with a 1. Let range parts cool before handling. We recommend that cannot be cleaned in the usual manner with rubber gloves be worn when cleaning.
-
Page 27: Oven Air Vents
Oven Shelves Clean the shelves with an abrasive cleanser or steel wool. After cleaning, rinse the shelves with Lift-up Cooktop (on especially grease, may catch on fire. To make cleaning easier, the cooktop m;iy be 1. Be sure burners are turned oil’. 2. - Page 28 INSTALLATION INSTRUCTIONS FOR YOUR SAFETY IMPORTANT If you smell gas: Remove all packing material and literature from oven before connecting 1. Open windows. gas and electrical supply to range. 2. Don’t touch electrical switches. 3. Extinguish any open flame. 4. Immediately call your gas supplier. DIMENSIONS AND CLEARANCES Provide adequate clearances between tllcI range>...
- Page 29 IMPORTANT SAFETY INSTRUCTIONS If cabinets are placed above the range, allow a minimum clearance of 30” between the cooking Installation of this range must conform with surface and the bottom of unprotected cabinets. with the National Fuel Gas Code, ANSI If a 30”...
- Page 30 INSTALLATION INSTRUCTIONS (continued) GENERAL TOOLS YOU WILL NEED See Dimensions and Clearances in this section Phillips and flat-blade screwdrivers for all rough-in and spacing dimensions. These Pencil and ruler dimensions must be met for safe use of your range. Two pipe wrenches (one for backup) The location of the electrical outlet and pipe opening (see Gas Pipe and Electric Outlet Locations) may Nut drivers or wrenches: 3/16”...
- Page 31 Gas Pipe and Electric Outlet Locations pROvlDE ADEQUATE GAS WPPIV Your range is designed to operate at a pressure for Models Equipped with $euled Bur~ of 4“ of water column on natural gas or, if designed for 1.1’ gas (propane or butane), lo’” of water column.
- Page 32 INSTALLATION INSTRUCTIONS (continued) Flexible Connector and Rigid Pipe Hookups for CONNECT THE RANGE TO GAS (continued) Models Equipped with Standard Twin Burners Flexible Connector Hookup for Models Equipped with Sealed Burners Pressure Regulator “ “ (provided) Flex Connector Adapter (6 ft. max.) Adapter Installer: Inform the consumer of the...
- Page 33 1. Install a manual gas line shut-off valve in the gas line in an easily accessed location outside of Electrical Requirements the range. Make sure everyone operating the 120-volt, 60 Hertz, properly grounded branch range knows where and how to shut off the gas circuit protected by a 15-amp or 20-amp circuit supply to the range.
- Page 34 INSTALLATION INSTRUCTIONS ELECTRICAL CONNECTIONS (continued) Usage Situations where Appliance Power Cord will be Disconnected Frequently. Do not use an adapter plug in these situations Power Cord will be Disconnected Infrequently. because disconnecting of the power cord places undue strain on the adapter and leads to An adapter maybe used only on a 15-amp circuit.
- Page 35 SEAL THE OPENINGS Seal any openings in the wall behind the range and in the floor under the range when hookups are completed. (for Models Equipped with Standing Pilots) The range should be installed in its permanent position before any pilots are lit or adjusted. Light the Surface Burner Pilots CAUTION: Make sure the surface burner of the manifold panel.
- Page 36 INSTALLATION INSTRUCTIONS (continued) Quality of Flames Light the Pilots (continued) The combustion quality of burner flames needs to be determined visually. Heater Pilot Flame U 4. ‘l’urn the OVEN CONTROL” knob to a setting Yellow tips on above 200°fZ The pilot flame will increase in size outer cones—...
- Page 37 ADJUSTING THE AIR ADJUSTMENT SHUTTER burning properly, first remove the oven bottom ‘\&b / “ “ With the baffle removed, properly adjusted flames should have approximately 1“ blue cones and, if range is supplied with natural gas, should ../- Oven Bottom burn with no yellow tipping.
- Page 38 9 LEVELING THE RANGE 1. Remove the storage drawer, broiler drawer or kick panel. 2. Use a 3/16” open-end socket wrench to back out both rear leveling legs approximately two turns. 3. Use a 1%” open-end or adjustable wrench to back out the front leveling legs two turns.
- Page 39 — and orifices in case you want to convert back to Gas Flow natural gas. NOTE: Need to buy kit WB28K0085 to convert the top burners of model RGB508. close TOOLS REQUIRED: TO OPEN. T-lo ‘1’orxdriver (for sealed burners) If it is this regulator: 1/2”...
- Page 40 CONVERTING TO LP GAS (continued) HOW TO CONVERT THE RANGE FOR USE Orifice Spuds for Convetiingto uGas: WITH 1P GAS OR NATURAL (continued) LP orifice spuds are in a small plastic bag packed with this Use and Care Guide. LP orifice spuds have a 2-digit number and the letter “L”...
- Page 41 5. To prevent leakage, make sure the orifice CONVERTING SURFACE BURNERS ON spuds are securely screwed into the gas inlet MODELS EQUIPPED WITH STANDARD TWIN tubes. Use a small wrench to hold the inlet tube BURNERS (See Step 3 if range is equipped with hex to prevent it from twisting.
- Page 42 SHUTTER(S) IR ADJUSTMENT For LP gas, loosen the Phillips head screw and rotate the shutter to the open position. With Screw full (for Models Equipped with Standin Pilots) baffle in place, flames 1. Remove the OVEN CON knob. TROL should have approximately 2.
- Page 43 CHECK QUALITY OF FLAMES The combustion quality of burner flames needs NOTE: Only valves to be determined visually. with these types of knobs are adjustable. Yellow tips on outer cones— Normal for LP gas 1. Turn all top burners to LOW. Remove (C) Soft blue flames- “\\...
- Page 44 QUESTIONS? USE THIS PROBLEM SOLVER PROBLEM POSSIBLE CAUSE OVEN WILL NOT WORK Plug on the range is not completely inserted in the electrical outlet. The circuit breaker in your h(}llse has been tripped, or a fuse has been blown. Oven controls not properly set, Make sure electrical p] ug is p] ugged into a Ii ve power outlet.
- Page 45 PROBLEM POSSIBLE CAUSF; SURFACE BURNERS The oven gas shut oft’ valve Inay have accidentally been moved during LIGHT BUT OVEN cleaning or moving. DOES NOT models, raise check the oven gas shut off valve cm standard twin burner the cooktop and look for the gas shut off lever at the extreme right rear corner. models, remove check the oven gas shut off’...
- Page 46 NOTES...
- Page 47 With the Hotpoint appliance, receive the assurance that if you ever purchase ofyour new call—toll-free! have to do is In-Home Re~ak Service scheduled at a (ire > [h:/ [’s c(mvenienl fbryou. ,Manv(;E a. In. to 7:()() p. n). 800626.2000 ( knit’r service is available to help: Your call-and answered pronlpl Iy an(l coLlrleously.”...
- Page 48 Staple sales slip or cancelled check YOUR HOTPOINT GAS RANGE here. Proof of original purchase date WARRANTY under warranty. WHAT IS COVERED FULL ONE-YEAR WARRANTY This warranty original purchaser succeeding For one year from date of original owner products purchased...
Need help?
Do you have a question about the RGB508 and is the answer not in the manual?
Questions and answers