
Related Manuals for Daewoo DTD 1600


Summary of Contents for Daewoo DTD 1600
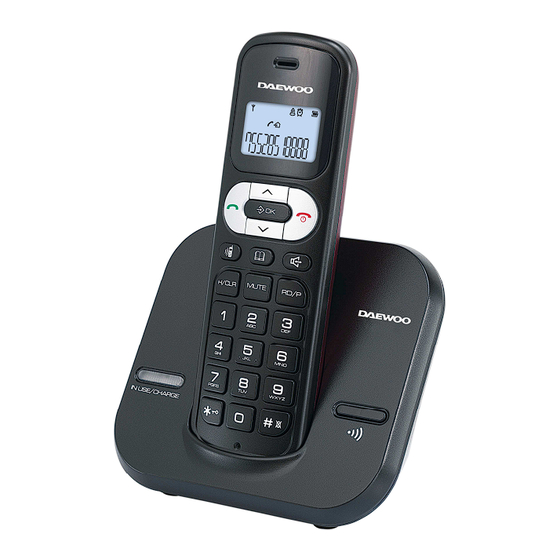
- Page 1 DTD 1600 Teléfono DECT DECT phone Téléphone DECT Telefone DECT MANUAL DE INSTRUCCIONES USER MANUAL MANUEL D’INSTRUCTIONS MANUAL DE INSTRUÇÕES...
- Page 2 INTRODUCCIÓN Este manual le ayudará a familiarizarse con su nuevo teléfono DECT DTD-1600. Para obtener el máximo provecho del teléfono, le recomendamos que lea detenidamente este manual de instrucciones antes de utilizar el teléfono. Nota importante : 1. Cargue la batería durante 12 horas como mínimo antes del primer uso. 2.
- Page 3 DESCRIPCIÓN DE LA PANTALLA LCD/MAPA LCD/TECLADO Pantalla LCD La pantalla LCD tiene 3 líneas, la primera y la segunda se utilizan para los iconos y la tercera permite mostrar 12 números con 14 segmentos. A continuación se muestra el mapa LCD: Mapa LCD Icono Descripción...
-
Page 4: Manos Libres
El icono aparece cuando usted revisa un número que tiene más de 12 Derecha dígitos. MANOS LIBRES Este icono aparece al pulsar la tecla IND_BATERÍA El icono de la batería indica al usuario el nivel de carga y el estado actual de la batería. - Page 5 Icono Descripción Función Hablar En modo de espera, pulsar una vez para descolgar el teléfono. En modo de espera, pulsar una vez para activar en el terminal el modo de manos libres. Acceder a las funciones del menú desde el modo de reposo. AJUSTAR/ Confirmar selecciones y acciones.
-
Page 6: Instalación
MÉTODO DE ENTRADA dos tres cuatro cinco seis número de pulsaciones tecla “ ‘ espacio 0 INSTALACIÓN 1) Conecte la toma de corriente a la parte inferior de la unidad base. 2) Enchufe el adaptador a la toma de corriente con el interruptor de la toma apagado. 3) Conecte la corriente eléctrica a la toma. - Page 7 Función 1 del menú del terminal: AGENDA Cada terminal tiene su propia agenda, independiente de las agendas de los otros terminales, con un máximo de 50 entradas, cada nombre puede tener hasta 12 caracteres, cada número un máximo de 20 dígitos y se puede seleccionar una melodía entre 1 y 10.
- Page 8 y utilice las teclas ∧ ∧ ∧ ∧ o ∨ ∨ ∨ ∨ para seleccionar entre AÑ. Cuando se muestra el registro, pulse la tecla A AGENDA, ¿BORRAR? o ¿BORRAR TODOS? A continuación pulse para confirmar. AÑ. A AGENDA: Permite al usuario añadir a la agenda una entrada de la lista de llamadas entrantes. ¿BORRAR?: Permite al usuario eliminar la entrada seleccionada de la lista de llamadas entrantes.
-
Page 9: Modifica Pin
MODIFICA PIN Algunas funciones (incluidas la eliminación de terminal y el restablecimiento de la configuración de fábrica de la base) requieren un código PIN. El PIN por defecto es 0000, pero puede modificarlo e introducir el número PIN de 4 dígitos que desee. para confirmar. - Page 10 6) Tras seleccionar la hora de la alarma, pulse , se presentará al usuario una opción adicional de seleccionar ENCENDER o APAGAR para activar o desactivar la función de repetición de la alarma. 7) Pulse la tecla para confirmar su selección. 8) Cuando la alarma está...
- Page 11 CONF TONO El usuario puede cambiar el tono del terminal. y utilice ∧ ∧ ∧ ∧ o ∨ ∨ ∨ ∨ para seleccionar la opción CONF TONO. 1) Pulse la tecla 2) Pulse la tecla para entrar. 3) Pulse ∧ ∧ ∧ ∧ o ∨ ∨ ∨ ∨ para seleccionar TONO TECLA, BATERÍA BAJA o ALARMA ALCAN. 4) Pulse la tecla para confirmar.
-
Page 12: Fecha Y Hora
Cuando la restricción de llamadas está ajustada en “ENCENDER”, no se podrán marcar aquellos números que empiecen por los dígitos programados y en la pantalla LCD aparecerá LLAM. RESTRING. . Utilice ∧ ∧ ∧ ∧ o ∨ ∨ ∨ ∨ para seleccionar RESTRICCIÓN. 1) Pulse la tecla 2) Pulse y el usuario deberá... - Page 13 REINICI. TLF Esta función permite al usuario restablecer la configuración de fábrica. y utilice ∧ ∧ ∧ ∧ o ∨ ∨ ∨ ∨ para seleccionar la opción REINICI. TLF. 1) Pulse la tecla 2) Pulse la tecla para confirmar. 3) En la pantalla aparece PIN?, introduzca el código PIN (por defecto, 0000). 4) Pulse la tecla para confirmar.
- Page 14 Silenciar el micrófono Durante una llamada, pulse una vez la tecla MUTE para silenciar el micrófono y en la pantalla LCD aparecerá “MUTE” . Vuelva a pulsar la tecla MUTE para volver a la llamada y “MUTE” desaparecerá de la pantalla. Identificación de llamadas –...
- Page 15 Revisar /eliminar/volver a llamar a números salientes Revisar Con el teléfono colgado, pulse una vez la tecla ∨ ∨ ∨ ∨ y luego utilice ∧ ∧ ∧ ∧ o ∨ ∨ ∨ ∨ para desplazarse por los números salientes y revisarlos, y mantenga pulsada la tecla para revisar la información restante del número seleccionado.
- Page 16 Transferencia de llamada a un teléfono interno Durante una llamada, es posible transferir la llamada a otro terminal en la misma línea. 1) Durante una llamada telefónica, pulse una vez la tecla y seleccione el número del terminal interno con el que quiere conectarse. 2) El terminal de destino sonará...
-
Page 17: Declaración De Conformidad
APÉNDICE ÁRBOL DE MENÚ DEL TERMINAL AGENDA LISTA NUEVA ENTR. EDIT. REGIS. BORR. REGIS. BORRAR TODOS ESTADO MEM REG. LLAM. PERDIDAS RECIBIDO REALIZADAS AJUSTES BASE ELIMINAR TLF MODO MARC. TONOS PULSO TIEMPO FLASH 100/300/600/1000MS MODIFICA PIN por defecto, 0000 RESET BASE por defecto, 0000 AJUSTES TLF. - Page 18 INTRODUCTION This manual is designed to familiarize you with your new Dect phone Daewoo DTD-1600 . To get the maximum use from the phone, we suggest that you read this instruction manual carefully before using. Important Notice : 1. Please charge the battery for at least 12 hours before using.
-
Page 19: Lcd Display/Lcd Map/Key Pad Description
LCD DISPLAY/LCD MAP/KEY PAD DESCRIPTION LCD display The LCD displays in 3 lines, 1 and 2 lines for ICON, 3 line 12 numbers with 14-segment. The LCD map is shown below: LCD Map Icon Description Function The antenna icon will always be shown on the LCD, it indicates ANTENNA for signal strength, flashes when the handset is out of range, disappear when registration to base is lost. - Page 20 HANDSFREE The icon will be displayed when press BATTERY_IND The battery icon will provide both a charging indication and an indication of the current battery status to the user. MENU The icon will be displayed when you enter the menu settings The icon will be displayed when making an internal call EXTERNAL The icon will be displayed when making an external call...
- Page 21 Icon Description Function Definition In standby mode press once to take the handset into off hook Talk mode. In standby mode press once to take the handset to hand free mode. Entry to the menu functions from idle mode; SET/OK Confirming selections &...
-
Page 22: Input Method
INPUT METHOD press three four five six times “ ‘ space 0 INSTALLATION 1) Plug the main power lead into the bottom of the base unit. 2) Plug the main adapter into mains socket with the switch on the socket set to off. 3) Switch on main power at the socket. - Page 23 Handset Menu function1: PHONE BOOK Each individual Handset has its own phonebook, independent of each other handset, with a maximum of 50 entries, each name a maximum of 12 characters, each number a maximum of 20 digits and a melody selected from 1 to 10.
-
Page 24: Delete Handset
Handset Menu function 3: BS SETTINGS key and use ∧ ∧ ∧ ∧ or ∨ ∨ ∨ ∨ key to The user is able to change the base setting in base settings item, press select this item. Then you can do below: DELETE HANDSET This function allows the user to delete a handset registration from the base. -
Page 25: Base Default
5) The display shows REPEAT, input the new PIN code again. 6) Press to confirm, the code will be stored and a tone sounded. BASE DEFAULT This function allows the user to restore the base setting to the factory default. key, then using ∧... -
Page 26: Ring Setup
2. If the SNOOZE is set OFF, the alarm will sound for 45 seconds once. RING SETUP The user is able to change the handset ringing on internal calls and external calls. There are 10 ringer melodies and 5 different volume levels can be set. key, then using ∧... -
Page 27: Handset Name
key, then using ∧ ∧ ∧ ∧ or ∨ ∨ ∨ ∨ key to select LANGUAGE item. 1) Press 2) Press key to enter. 3) Press ∧ ∧ ∧ ∧ or ∨ ∨ ∨ ∨ key to select the language. Each language will display in its own native translation. 4) Press key to confirm your selection. -
Page 28: Select Base
CONTRAST key. Using ∧ ∧ ∧ ∧ or ∨ ∨ ∨ ∨ key to select CONTRAST 1) Press 2) Press key, LCD will display CONTRAST 5 3) Using ∧ ∧ ∧ ∧ or ∨ ∨ ∨ ∨ key to select appropriate contrast 4) Press key to confirm. -
Page 29: Operation
OPERATION Speakerphone operation & volume control Press key once to obtain a dial tone, dial your number, when you hear the called party answers the phone. You can also answer an incoming call by pressing the key once. During the speakerphone operation, the user can adjust the speaker volume level by pressing the ∧ ∧ ∧ ∧ or ∨ ∨ ∨ ∨ key .Total 6 levels for selection. - Page 30 Review /delete /call back incoming numbers Review In on hook state, press ∧ ∧ ∧ ∧ key once and then use ∧ ∧ ∧ ∧ or ∨ ∨ ∨ ∨ key to scroll and review the incoming numbers, then press key continuously to review the rest information about the current number.
- Page 31 Intercom The intercom feature is activated by pressing the key. 1. In idle mode, press key once. 2. The user will be prompted to select the number of the internal handset with which you wish to connect. 3. The destination handset will ring. Once the call is connected, the display will be shown on both handsets.
-
Page 32: Handset Menu Tree
APPENDIX HANDSET MENU TREE PHONE BOOK LIST NEW ENTRY EDIT RECORD DEL RECORD DELETE ALL MEM STATUS CALL LOG MISSED RECEIVED DIALED BS SETTINGS DELETE HS DIAL MODE TONE PULSE FLASH TIME 100/300/600/1000MS MODIFY PIN default 0000 BS DEFAULT default 0000 HS SETTINGS ALARM ON (SNOOZE ON/OFF) -
Page 33: Caractéristiques
INTRODUCTION Ce manuel vous aidera à vous familiariser avec cet téléphone . Pour tirer le meilleur parti du téléphone, nous vous recommandons de lire attentivement ce manuel d’instructions avant de l’utiliser. Note importante : 1. Chargez la batterie pendant 12 heures minimum avant de sa première utilisation. 2. - Page 34 DESCRIPTION DE L’ÉCRAN LCD/PLAN LCD/CLAVIER Écran LCD L’écran LCD se compose de 3 lignes, la première et la seconde s’utilisent pour les icônes et la troisième permet d’afficher 12 numéros avec 14 segments. A continuation le plan LCD s’affiche: Plan LCD Icône Description Fonction...
-
Page 35: Mains Libres
Droite MAINS LIBRES Cette icône s’affiche lorsqu’on appui sur la touche IND_BATTERIE L’icône de la batterie indique à l’utilisateur le niveau de charge et l’état actuel de la batterie. MENU Cette icône s’affiche sur l’écran lorsqu’on accède aux réglages du menu. - Page 36 Icône Description Fonction En mode attente, appuyez une fois pour décrocher le Parler téléphone. En mode attente, appuyez une fois pour activer sur le combiné le mode mains libres. Accéder aux fonctions du menu depuis le mode repos. AJUSTER/ Confirmer sélections et actions. ACCEPTER En mode de conversation, appuyez une fois pour raccrocher l’appel.
- Page 37 METHODE D’ENTRÉE deux trois quatre cinq sis numéro de pulsations touche “ ‘ espace INSTALLATION 1) Connectez la prise de courant à la partie inférieure de l’unité base. 2) Branchez l’adaptateur à la prise de courant avec l’interrupteur de la prise éteint. 3) Connectez le courant électrique à...
- Page 38 Fonction 1 du menu du combiné: AGENDA Chaque combiné à son propre agenda, indépendamment des agendas des autres combinés, avec un maximum de 50 entrées, chaque nom peut avoir jusqu’à 12 caractères, chaque numéro un maximum de 20 digits et on peut sélectionner une mélodie parmi 10. .
- Page 39 et utilisez les touches ∧ ∧ ∧ ∧ ou ∨ ∨ ∨ ∨ pour Lorsque le registre s’affiche, appuyez sur la touche sélectionner entre AJ. A AGENDA, EFFACER? ou TOUT EFFACER? A continuation appuyez sur pour confirmer. AJ. A AGENDA: Permet à l’utilisateur d’ajouter à l’agenda une entrée de la liste d’appels entrants. EFFACER?: Permet à...
- Page 40 et utilisez ∧ ∧ ∧ ∧ ou ∨ ∨ ∨ ∨ pour sélectionner l’option TEMPS FLASH. 1. Appuyez sur la touche 2. Appuyez sur pour entrer. 3. Appuyez sur les touches ∧ ∧ ∧ ∧ ou ∨ ∨ ∨ ∨ pour sélectionner le temps flash souhaité parmi 100ms, 300ms, 600ms et 1000ms.
- Page 41 2. Appuyez sur la touche pour confirmer. 3. Appuyez sur ∧ ∧ ∧ ∧ ou ∨ ∨ ∨ ∨ pour sélectionner ALLUMER ou ETEINDRE, appuyez sur pour confirmer. Si vous sélectionnez ETEINDRE, l’alarme se déconnectera et l’utilisateur reviendra au menu ALARME;...
- Page 42 3) Appuyez sur la touche pour confirmer votre sélection. Si vous sélectionnez VOLUME, 4) Appuyez sur la touche pour confirmer. 5) Appuyez sur ∧ ∧ ∧ ∧ ou ∨ ∨ ∨ ∨ pour sélectionner le volume que vous souhaitez comme sonnerie, 1- 5, ou sélectionnez SILENCE si vous souhaitez déconnecter la sonnerie.
-
Page 43: Date Et Heure
. Utilisez les touches ∧ ∧ ∧ ∧ ou ∨ ∨ ∨ ∨ pour sélectionner NOMBRE TEL. 1. Appuyez sur 2. Appuyez sur et sur l’écran s’affichera un curseur clignotant sur la ligne du nom. 3. Introduisez le nom du combiné. 4. - Page 44 CONTRASTE . Utilisez ∧ ∧ ∧ ∧ ou ∨ ∨ ∨ ∨ pour sélectionner CONTRASTE. 1. Appuyez sur la touche 2. Appuyez sur et sur l’écran LCD s’affichera CONTRASTE 5. 3. Utilisez les touches ∧ ∧ ∧ ∧ ou ∨ ∨ ∨ ∨ pour sélectionner le contraste adéquat. 4.
- Page 45 Si on ne trouve pas la base, le combiné reviendra à l’état de registre antérieur. S’il y a plusieurs combinés, répétez les pas antérieurs pour enregistrer un autre combiné, et les combinés qui s’enregistrent correctement s’afficheront comme HS2 ou HS3 sur l’écran LCD selon la séquence de registre.
- Page 46 1. En mode repos, introduisez le numéro que vous souhaitez composer. Pendant que vous l’introduisez vous pouvez appuyer sur la touche R/CLR pour corriger le numéro si besoin. 2. Appuyez une fois sur la touche , l’unité composera le numéro qui s’affiche sur l’écran. Fonction de rappel 1.
- Page 47 7. Appuyez sur la touche pour confirmer la mélodie et sauvegardez le numéro sur votre agenda. Voir et composer les numéros de téléphone depuis l’agenda L’agenda permet de sauvegarder 50 entrées, chacune d’elles jusqu’à 12 caractères et 20 digits. 1. Lorsque le téléphone est décroché, appuyez sur la touche 2.
- Page 48 Conférence téléphonique 1. Lorsqu’il y a un appel, appuyez sur (HS1). 2. À continuation appuyez une fois sur (HS1) et sélectionnez le numéro du combiné interne avec lequel vous souhaitez connecter. 3. Le combiné récepteur sonnera. 4. Appuyez sur (HS2) pour accepter l’appel. 5.
-
Page 49: Déclaration De Conformité
APPENDICE ARBRE DU MENU DU COMBINÉ AGENDA LISTE NOUVELLE ENTR. EDIT. REGIS. EFFAC. REGIS. TOUT EFFACER ETAT MEM REG. APP. MANQUÉ REÇU REALISÉ REGLAGES BASE ELIMINER TEL MODE NUM. TONALITÉ PULSATION TEMPS FLASH 100/300/600/1000MS MODIFIER PIN par défaut, 0000 RESET BASE par défaut, 0000 REGLAGES TEL. - Page 50 INTRODUÇÃO Este é o modelo base de telefone sem fios DECT. O manual foi concebido para que o utilizador se familiarize com o telefone. Para obter o máximo rendimento do telefone, sugerimos que leia este manual de instruções atentamente antes de o utilizar. Nota Importante : 1.
- Page 51 DESCRIÇÃO ECRÃ LCD / MAPA LCD / TECLADO Ecrã LCD O ecrã LCD tem 3 linhas: as primeiras duas linhas apresentam os ÍCONES e a terceira linha consiste num espaço para 12 números e 14 segmentos. O Mapa LCD é mostrado abaixo: Mapa LCD Ícone Descrição...
- Page 52 O ícone será apresentado quando estiver a visualizar um número Direita com mais de 12 dígitos. MÃOS-LIVRES O ícone será mostrado ao premir a tecla INDICADOR DE Este ícone indica quando o aparelho está em carregamento, CARGA assim como o estado actual da bateria. MENU O ícone será...
- Page 53 Ícone Descrição Definição da Função Em modo de espera, prima uma vez para colocar o fone em Atender modo de comunicação. Em modo de espera, prima uma vez para colocar o fone em Mãos-Livres modo mãos-livres. Permite o acesso às funções do menu em modo inactivo; CONFIG./OK Confirmação de selecções e acções.
- Page 54 MÉTODO DE INTRODUÇÃO premir duas três quatro cinco seis vezes tecla “ ‘ space 0 INSTALAÇÃO 1) Ligue o cabo de alimentação à parte de baixo da base. 2) Ligue a ficha do cabo de alimentação à tomada, com o aparelho desligado. 3) Ligue a alimentação eléctrica.
- Page 55 NOTA: O sistema sairá da Configuração quando passarem 30 segundos sem que uma tecla seja premida. Função 1 do Menu Fone: AGENDA Cada Fone individual tem uma agenda telefónica própria e independente dos outros fones, com uma capacidade máxima de 50 entradas; a agenda tem um limite de 12 caracteres para o nome, 20 dígitos para o número e uma selecção de 10 melodias (1-10).
- Page 56 3) Prima as teclas ∧ ou ∨ para consultar outro registo. e utilize as teclas ∧ ∧ ∧ ∧ ou ∨ ∨ ∨ ∨ para seleccionar ADIC. Quando o registo for apresentado, prima a tecla AGENDA? APAGAR? APAGAR TUDO? Depois prima para confirmar.
- Page 57 MODIFICAR PIN Algumas funções (como apagar fones e predefinição da base) exigem a introdução de um código PIN. O código predefinido é 0000, mas pode modificar o seu código PIN pessoal. para confirmar. Utilize as teclas ∧ ∧ ∧ ∧ ou ∨ ∨ ∨ ∨ para seleccionar a opção MODIF. PIN. 1) Prima a tecla 2) Prima a tecla para confirmar;...
- Page 58 8) Depois de configurar o alarme, o ícone será mostrado no ecrã. Iniciar alarme: Em modo inactivo, o alarme toca à hora configurada. Interromper alarme: Quando o alarme está a tocar, pode desligá-lo premindo qualquer tecla da base; quando uma chamada é recebida, o alarme também será...
-
Page 59: Atendimento Automático
2) Prima a tecla para aceder. 3) Prima as teclas ∧ ∧ ∧ ∧ ou ∨ ∨ ∨ ∨ para seleccionar a configuração de TOM TECLAS, BAT. FRACA, SEM SINAL. 4) Prima a tecla para confirmar. 5) Prima as teclas ∧ ∧ ∧ ∧ ou ∨ ∨ ∨ ∨ para LIGAR ou DESLIGAR o som. 6) Prima a tecla para confirmar a selecção. -
Page 60: Data & Hora
0000). para confirmar. Depois, utilize as teclas ∧ ∧ ∧ ∧ ou ∨ ∨ ∨ ∨ para activar (LIGADO) ou 3) Prima a tecla desactivar (DESLIGADO); prima a tecla para confirmar. 4) Se estiver ligado, o ecrã mostra NÚMERO 1; prima ∧ ∧ ∧ ∧ ou ∨ ∨ ∨ ∨ para seleccionar NÚMERO 1-4. 5) Prima depois para confirmar. - Page 61 3) Quando o ecrã mostrar a indicação PIN?, introduza o código PIN (predefinição: 0000). 4) Prima a tecla para confirmar. Se o código PIN for validado, todas as configurações de fábrica do fone serão retomadas. Função 5 do Menu Fone: REGISTRO Esta função permite efectuar o registo do fone a uma base específica.
- Page 62 Temporizador automático O temporizador inicia-se automaticamente quando ouve a linha telefónica. Flash (R) Prima a tecla R/CLR para retomar a linha sem deixar o fone. Pausa Prima a tecla RD/P para introduzir um período de 3,6 segundos numa sequência de discagem. Pré-marcação O aparelho possui uma função de pré-marcação, que permite aceder e editar o número antes de o marcar.
- Page 63 O utilizador pode armazenar o número que envias a mensagem na agenda telefónica do seguinte modo: 1) Prima a tecla ∧ ∧ ∧ ∧ uma vez; o LCD mostra o último registo recebido. 2) Prima ∧ ∧ ∧ ∧ ou ∨ ∨ ∨ ∨ parar seleccionar a mensagem. 3) Prima e seleccione “ADIC.
- Page 64 Transferência de chamada para outro número de telefone Este aparelho permite transferir uma chamada para outro número de telefone ou para outra extensão, quando ligado a uma central telefónica. 1. Durante a chamada, prima a tecla R/CLR uma vez e ser-lhe-á pedido para marcar o número do telefone com o qual deseja estabelecer a ligação.
-
Page 65: Declaração De Conformidade
APÊNDICE MENU DO FONE AGENDA LISTAR NOVO REG. EDIT. REG. APAGAR REG. APAGAR TUDO ESTADO MEM LISTA CHAM. NÃO ATEND. RECEBIDAS ORIGINADAS CONF. BASE CANC. REGIST. MODO DISC. PULSO CONF. FLASH 100/300/600/1000MS MODIF. PIN Predefinição: 0000 RET.CONF.FAB Predefinição: 0000 CONF. MONOF ALARME LIGADO (SONECA LIG./DESL.) DESLIGADO... - Page 66 GARANTIA FLAMAGAS, en cumplimiento con lo establecido por la Ley de Protección al Consumidor (Ley 23/2003 de 10 /07/2003), ofrece Garantía al Cliente en España y Portugal (Península y Baleares), para todos sus productos de la marca bajo las siguientes condiciones: A.
Need help?
Do you have a question about the DTD 1600 and is the answer not in the manual?
Questions and answers