Table of Contents
Advertisement
Quick Links
welcome
Thank you for buying a Chord Electronics product
Before you start to enjoy using your Chord Electronics product, please take a couple of
minutes to read how to connect your audio equipment and loudspeakers to your Chord
Choral product and how to maximise your listening experience.
user guide for
phono stage
SYMPHONIC
1
Advertisement
Table of Contents

Related Manuals for Chord SYMPHONIC


Summary of Contents for Chord SYMPHONIC
- Page 1 Thank you for buying a Chord Electronics product Before you start to enjoy using your Chord Electronics product, please take a couple of minutes to read how to connect your audio equipment and loudspeakers to your Chord Choral product and how to maximise your listening experience.
-
Page 2: Phono Stage
SYMPHONIC The phono stage provides the vital conditioning needed for a signal coming from the stylus of your turntable and hugely amplifies the signal before it is fed to your pre-amplifier. Combining high performance and ease of use, the phono stage is an important component... - Page 3 We want you to be confident using your new Chord Electronics product. You are probably an audiophile with extensive knowledge of audio equipment. However, you may not be! So in the following section we explain a few basics to help you get started, or get you back...
-
Page 4: Connecting Your Equipment
Chord amplifiers are supplied with and designed to be connected using balanced inputs. The interconnecting cables you use will depend on the available input and output sockets on your other equipment. We have installed unbalanced inputs on all Chord equipment, thus enabling you to mix Chord Electronics and other manufacturer’s equipment. -
Page 5: When Setting Up
Your Chord product should have at least 5cm of clear space all around it to ensure a free flow of air at all times. We do not recommend that you place your Chord product directly on a carpet as this can damage the equipment through blocked ventilation. - Page 6 safety warnings It is important that your equipment is earthed at all times via its own mains lead. Failure to do this may be hazardous. The power supply components within the units are designed to be operated at lethal voltages and energy levels. Circuit designs that embody these components conform with applicable safety requirements.
-
Page 7: Mains Connection
mains connection The mains connector of your Choral product is at the back of the unit. Plug the female end (socket) of the mains cable into the power connector of your Choral product, and the male end (plug) of the mains cable into mains wall socket or mains extension socket. The mains connector type will differ slightly for each Choral product. - Page 8 PRIMA or any other model of pre-amplifier. Ensure that you connect the left output on the SYMPHONIC to your left input on your pre-amplifier. Also the right output on the SYMPHONIC should be connected to the right input on your pre-amplifier.
- Page 9 SYMPHONIC You need to connect the outputs on the back of your SYMPHONIC to a pre-amplifier, which in turn will feed a signal to a power amplifier in order to drive your loudspeakers. All Chord equipment is designed to be used with balanced connections to maximise audio signal quality.
- Page 10 SYMPHONIC phono stage. connecting to your phono stage Use the XLR style input connectors to connect your SYMPHONIC to the XLR style output connectors of your turntable. Ensure that you connect the left output of your turntable to the left input on your SYMPHONIC.
- Page 11 Use the phono style input connectors to connect your SYMPHONIC to the phono style output connectors of your turntable. Ensure that you connect the left output of your turntable to the left input on your SYMPHONIC. Also the right output on the turntable should be connected to the right input on your SYMPHONIC.
- Page 12 SYMPHONIC Use the earthing point on your SYMPHONIC to connect to the earth connection on your turntable. The earthing point is situated just above the right phono output on the SYMPHONIC phono stage.
- Page 13 SYMPHONIC Above the input and output connectors on the back of the SYMPHONIC are a set of 12 selector switches. These are used to select balanced or unbalanced inputs, set the input impedance, set the input gain and select an optional rumble filter.
- Page 14 These multiple options are very useful when you are adjusting the input impedance on the SYMPHONIC in order to match with the performance of the output stages of your turntable. To add a particular input impedance into the signal path, press the appropriate switch in.
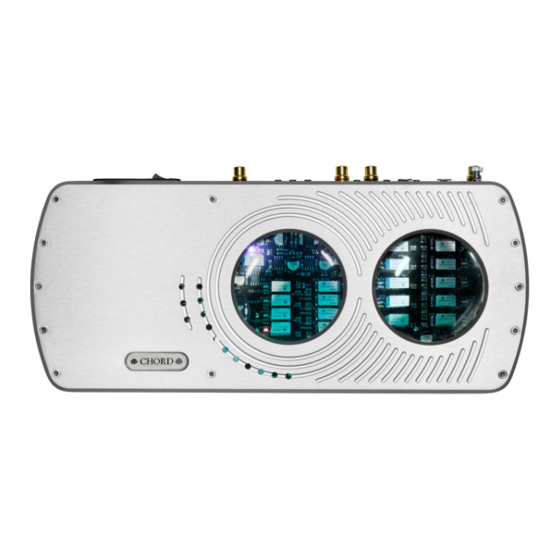
- Page 15 SYMPHONIC. For each setting that you make on the selector switches on the back of the SYMPHONIC, a pair of coloured LEDs will light on the boards below the glass domes on the top panel of the SYMPHONIC.
- Page 16 To clean finger marks and other blemishes from your phono stage spray clear glass cleaner onto a soft lint free cloth and then use the cloth to gently clean your Chord product. servicing There are no user serviceable parts in your Chord product, and it should only be serviced...
-
Page 17: Frequently Asked Questions
Use the balanced input selection switch on the back of the SYMPHONIC by pressing the selector switch in to select balanced inputs.
Need help?
Do you have a question about the SYMPHONIC and is the answer not in the manual?
Questions and answers