Hobie WAVE Assembly Manual
Hide thumbs
Also See for WAVE:
- Assembly manual (36 pages) ,
- Parts manual (2 pages) ,
- Assembly manual (20 pages)
Table of Contents
Advertisement
Quick Links
Advertisement
Table of Contents

Related Manuals for Hobie WAVE


Summary of Contents for Hobie WAVE
- Page 2 Report any such power lines to your local power authority and SAIL ELSEWHERE. We take pride in presenting the Wave to you and hope that you'll take as much pride in owning her. Fair winds and good sailing!
-
Page 3: Table Of Contents
HOBIE Wave. This manual will help you understand each part in detail. For more informa- tion refer to the Wave assembly video tape and your Hobie Cat dealer. Setting up your Wave PAGE Wave terminology.........2... -
Page 4: Wave Terminology
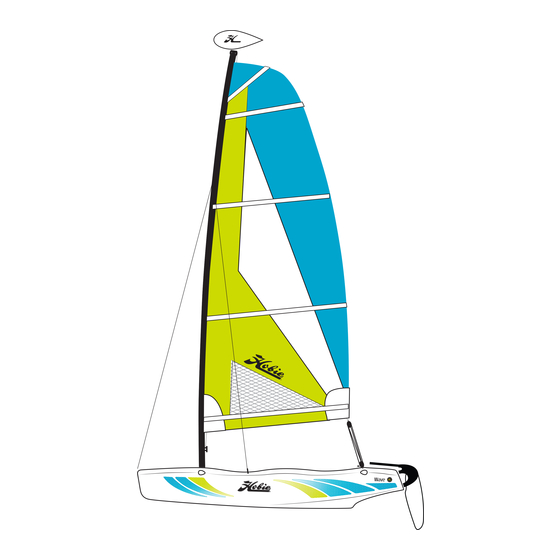
Wave Terminology MAST FLOAT BATTENS MAST SAIL FORESTAY SHROUD FORESTAY / BRIDLE ADJUSTER SAIL CLEW BRIDLE MAIN SHEET SYSTEM TILLER ARM DOWNHAUL RUDDER CASTINGS RUDDER HULL... -
Page 5: List Of Parts
PARTS Check the boat and parts carefully to be sure that all of the parts are present and that the boat is in good order. LIST OF PARTS You should have: (2) Hulls with hardware (1) Front cross bar (1) Rear cross bar (1) Trampoline (1) Box of small parts (1) Sail, battens and sail bag... -
Page 6: Knots To Use
ASSEMBLY INSTRUCTIONS KNOTS TO USE FIGURE 8 KNOT AT END OF LINE FIGURE 8 KNOT BOWLINE KNOT HALYARD KNOT CLEATING OFF A LINE 1. THE HULLS Lay the hulls on the ground on their sides with the bot- toms to the center (graphics down) as in figure 1. A tarp or pads may be desirable under the hull if the ground surface is rough. - Page 7 Upon first time assembly, you will need to feed the tram- FIGURE 2d(4) poline into the front cross bar. Remove one of the eye straps and block fittings with Bring the Webbing back cable located near each end of around the rear bar in the the forward cross bar (figure opposite direction.
-
Page 8: Tensioning The Trampoline
Pass the two trampoline cables from the front crossbar To tension the trampo- through the trampoline side loops to the rear crossbar. line, you will use the mainsheet system (block Cross bar and tackle). Find the Pulley block stop mainsheet system locat- ed with the small parts. -
Page 9: Mast Assembly
Attach the multi-hole adjuster to the forestay as shown in figure 4. MAST ASSEMBLY 5b with the clevis pin and ring at the end hole of the adjuster The mast is in two sections. The bottom section is alu- (top of the 7 holes). This is the minum and displays the warnings against sailing and loose adjustment for first assembling near overhead wires and power lines. - Page 10 As shown in figure 6a(3) below, pass the long pin Check wires to be sure they are not crossed and that they through the mast base. There is a small spring loaded are free to allow the mast to swing to the upright position. ball lock that will keep the pin captive in the mast base.
- Page 11 The halyard line should be 7. INSTALLING running from the top of the THE SAIL BATTENS mast directly to the bow fitting. Carefully let go of mast to be Unfold the sail and lay it out on the trampoline. There sure that it will stay upright.
-
Page 12: Sail
8. RAISING THE SAIL DOWNHAUL ADJUSTMENTS Place the sail in the center of the trampoline with the The downhaul should be tensioned just enough to exposed batten ends to the rear. The front of the sail remove the horizontal wrinkles in the sail luff (forward has what is called a "luff rope"... -
Page 13: Tiller Crossbar
Please read the sections in the follow- As shown in figure CLUB2 on the following page, the Club Wave uses seven hole adjusters at the base of the ing pages regarding safety and sailing shrouds and the hull connection rather than the hooks the Wave. - Page 14 FIGURE CLUB1 FIGURE CLUB2...
-
Page 15: Sailing Your Wave
SAILING YOUR WAVE Safe and sane guideline for the beginner; an easy review for the experienced. Always wear a life jacket when boating. BALANCING THE BOAT When sailing, sit on the upwind side of the boat (wind on your back) just in front of the tiller facing the sail. -
Page 16: Righting The Boat
will be sailing. Note the "can't sail zone". You cannot sail into deep enough water to lower the rudders. It is possi- in this direction due to the fact that the sail will luff con- ble to launch in shallow water with the rudders partly up. stantly when pointed into the wind. -
Page 17: Rudder Tuning
You may adjust the rake of your rudder blades on your when it is righted. Climb aboard and continue sailing. Hobie Wave. The amount of rake in a rudder blade affects the "feel" at the tiller. Basically, more forward DOCKING blade rake neutralizes the pull on the tiller and less for- ward rake increases the pull on the tiller. -
Page 18: Car Topping/Trailering
Screw heavy loads. Choose an accessory roof rack with weight ratings that will handle the Wave or parts. If in doubt check with the Sketch C manufacturer. 6) Hobie Cat rudder Make sure the roof rack manufacturer's blades are preset to break weight limitations are followed. - Page 19 Not all racks are designed to carry a load the size of the until boat is in the water. Back trailer to the left if possi- Wave. Some racks may require carrying only a por- ble; backing left gives better launching visibility. Avoid tion of the boat parts on the roof and the remaining dunking wheel bearings wherever possible.
-
Page 20: Safety Tips
Contact with a power line could be fatal. • Sail to your experience. Do not try to do more than you can. Do not take the Wave out in the surf and do not head out for the ocean unless you are a real professional.
Need help?
Do you have a question about the WAVE and is the answer not in the manual?
Questions and answers