Mitsubishi Electric PCFY-P40VKM-E Operation Manual
Hide thumbs
Also See for PCFY-P40VKM-E:
- Technical & service manual (36 pages) ,
- Operation manual (32 pages) ,
- Installation manual (64 pages)
Table of Contents
Advertisement
Available languages
Available languages
Air-Conditioners For Building Application
INDOOR UNIT
PKFY-P·VBM-E / PKFY-P·VHM-E
PCFY-P·VKM-E / PFFY-P·VKM-E(2) / PMFY-P·VBM-E
OPERATION MANUAL
For safe and correct use, please read this operation manual thoroughly before operating the air-conditioner unit.
BEDIENUNGSHANDBUCH
Zum sicheren und einwandfreien Gebrauch der Klimaanlage dieses Bedienungshandbuch vor Inbetriebnahme
gründlich durchlesen.
MANUEL D'UTILISATION
Pour une utilisation correcte sans risques, veuillez lire le manuel d'utilisation en entier avant de vous servir du
climatiseur.
BEDIENINGSHANDLEIDING
Voor een veilig en juist gebruik moet u deze bedieningshandleiding grondig doorlezen voordat u de
airconditioner gebruikt.
MANUAL DE INSTRUCCIONES
Lea este manual de instrucciones hasta el final antes de poner en marcha la unidad de aire acondicionado
para garantizar un uso seguro y correcto.
ISTRUZIONI DI FUNZIONAMENTO
Leggere attentamente questi istruzioni di funzionamento prima di avviare l'unità, per un uso corretto e sicuro
della stessa.
ΕΓΧΕΙΡΙΔΙΟ ΟΔΗΓΙΩΝ ΧΡΗΣΕΩΣ
Για ασφάλεια και σωστή χρήση, παρακαλείστε διαβάσετε προσεχτικά αυτό το εγχειρίδιο χρήσεως πριν θέσετε
σε λειτουργία τη μονάδα κλιματισμού.
MANUAL DE OPERAÇÃO
Para segurança e utilização correctas, leia atentamente o manual de operação antes de pôr a funcionar a uni-
dade de ar condicionado.
Işletme Elkitabı
Emniyetli ve doğru biçimde nasıl kullanılacağını öğrenmek için lütfen klima cihazını işletmeden önce bu
elkitabını dikkatle okuyunuz.
РУКОВОДСТВО ПО ЭКСПЛУАТАЦИИ
Для обеспечения правильного и безопасного использования следует ознакомиться с инструкциями, указанными в
данном руководстве по эксплуатации, тщательным образом до того, как приступать к использованию кондиционера.
FOR USER
FÜR BENUTZER
POUR L'UTILISATEUR
VOOR DE GEBRUIKER
PARA EL USUARIO
PER L'UTENTE
ΓΙΑ ΤΟΝ ΧΡΗΣΤΗ
PARA O UTILIZADOR
KULLANICI İÇİN
ДЛЯ ПОЛЬЗОВАТЕЛЯ
English (GB)
Deutsch (D)
Français (F)
Nederlands (NL)
Español (E)
Italiano (I)
Ελληνικά (GR)
Português (P)
Türkçe (TR)
Русский (RU)
Advertisement
Table of Contents

Related Manuals for Mitsubishi Electric PCFY-P40VKM-E


Summary of Contents for Mitsubishi Electric PCFY-P40VKM-E
-
Page 1: Indoor Unit
Air-Conditioners For Building Application INDOOR UNIT PKFY-P·VBM-E / PKFY-P·VHM-E PCFY-P·VKM-E / PFFY-P·VKM-E(2) / PMFY-P·VBM-E OPERATION MANUAL FOR USER English (GB) For safe and correct use, please read this operation manual thoroughly before operating the air-conditioner unit. BEDIENUNGSHANDBUCH FÜR BENUTZER Deutsch (D) Zum sicheren und einwandfreien Gebrauch der Klimaanlage dieses Bedienungshandbuch vor Inbetriebnahme gründlich durchlesen. -
Page 2: Table Of Contents
2006/66/EC Article 20 Information for end-users and Annex II. Your MITSUBISHI ELECTRIC product is designed and manufactured with high quality materials and components which can be recycled and/or reused. This symbol means that electrical and electronic equipment, batteries and accumulators, at their end-of- life, should be disposed of separately from your household waste. -
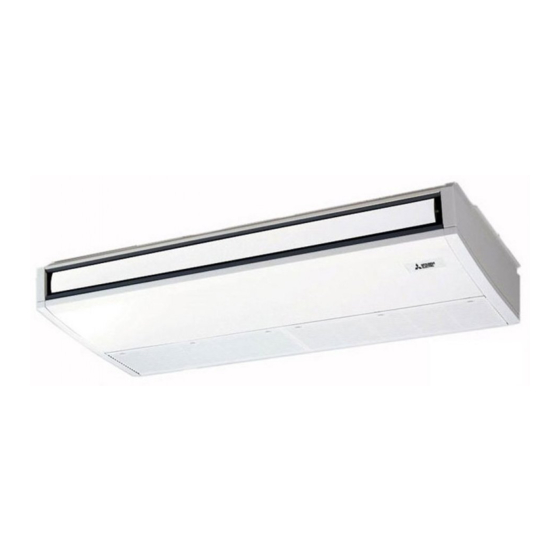
Page 3: Parts Names
2. Parts Names Indoor Unit PKFY-P·VBM-E PKFY-P·VHM-E PCFY-P·VKM-E PMFY-P·VBM-E PFFY-P·VKM-E(2) Fan speed 4 speed 3 speed+ Auto* 4 speed+ Auto* 4 speed 4 speed Steps 4 steps 5 steps 5 steps 4 steps 4 steps Vane Auto swing Louver Manual Manual Manual Manual... -
Page 4: Operation Section
2. Parts Names Wired Remote-Controller “Sensor” indication Day-of-Week Displays when the remote controller Display Section sensor is used. Shows the current day of the week. For purposes of this explana- Time/Timer Display tion, all parts of the display are “Locked” indicator Shows the current time, unless the simple or Auto shown. - Page 5 2. Parts Names Wireless Remote-Controller Transmission area Transmission indicator Remote controller display Timer indicator * For explanation purposes, all of the items that appear in the display are shown. * All items are displayed when the Reset button is pressed. Operation areas ON/OFF button Set Temperature buttons...
-
Page 6: Screen Configuration
3. Screen Configuration <Screen Types> For details on setting the language for the remote controller display, refer Function Selection of remote controller Set Day/Time to section 8. Function Selection. TIME SUN The initial language setting is English. Function Selection of remote controller: Set the functions and ranges available to the remote controller (timer functions, operating restrictions, etc.) -
Page 7: Mode Select
5. Operation 5.2. Mode select Note: The number of available fan speeds depends on the type of unit Press the operation mode ( ) button and select the op- connected. Note also that some units do not provide an “Auto” eration mode setting. -
Page 8: Timer
5. Operation <[Manual] To Change the Airflow’s Left/Right Direction> Note: * The louver button 7 cannot be used. Available directions depend on the type of unit connected. Note • Stop the unit operation, hold the lever of the louver, also that some units do not provide an “Auto” setting. and adjust to the desired direction. - Page 9 6. Timer 6.1.2. Simple Timer <Setting the Weekly Timer> 5. Press the appropriate Set Time button 1 as necessary to set the de- You can set the simple timer in any of three ways. sired time (at 5). • Start time only: * As you hold the button down, the time first increments in minute in- The air conditioner starts when the set time has elapsed.
- Page 10 6. Timer 7. After completing steps 3 to 6 above, press the Filter button 4 to Example 2: Start the timer with OFF time set earlier than ON time lock in the value. ON Setting : 5 hours Note: OFF Setting: 2 hours Your new settings will be cancelled if you press the Mode (Return) button 2 before pressing the Filter button 4.
-
Page 11: Other Functions
6. Timer <Checking the Current Auto Off Timer Setting> 6.2. For Wireless Remote-controller Timer Setting TIMER AFTER AUTO OFF 1. Be sure that the “Auto Off” is visible on the screen (at 1). 2. Hold down the Timer Menu button 2 for 3 seconds so that “Monitor” is indicated on the screen (at 4). -
Page 12: Function Selection
7. Other Functions 7.2. Error Codes indication ERROR CODE ON lamp ON/OFF (Blinking) Error Code Unit No. If you have entered contact number to be called in the event of a problem, the screen displays this number. (You can set this up under Function Selection of remote controller. For information, refer to section 8.) If the ON lamp and error code are both blinking: This means that the air conditioner is out of order and operation has been stopped (and cannot resume). - Page 13 8. Function Selection [Function selection flowchart] Normal display (Display when the air conditioner is not running) Setting language (English) Hold down the button and press the button for 2 seconds. Press the operation mode button. Hold down the button and press the button for 2 seconds.
- Page 14 8. Function Selection [Detailed setting] [4]–3. Mode selection setting (1) Remote controller main/sub setting [4]–1. CHANGE LANGUAGE setting • To switch the setting, press the [ ON/OFF] button D. The language that appears on the dot display can be selected. 1 Main: The controller will be the main controller.
- Page 15 8. Function Selection [Dot display table] Selecting language English German Spanish Russian Italian Chinese French Japanese Waiting for start-up Operation mode Cool Heat Auto Auto(Cool) Auto(Heat) Ventilation Stand by (Hot adjust) Defrost Set temperature Fan speed Not use button Check (Error) Test run Self check Unit function selection...
-
Page 16: Emergency Operation For Wireless Remote-Controller
9. Emergency Operation for Wireless Remote-controller When the remote-controller cannot be used When the batteries of the remote controller run out or the remote control- ler malfunctions, the emergency operation can be done using the emer- gency buttons. A DEFROST/STAND BY lamp B Operation lamp C Emergency operation switch (heating) D Emergency operation switch (cooling) - Page 17 10. Care and Cleaning PCFY-P·VKM-E PFFY-P·VKM-E(2) 1 Open the intake grille. 2 Hold the knob on the filter then pull the filter up in the direction of an arrow. To replace the filter after cleaning, be sure to insert the filter far enough until it fits into the stopper.
-
Page 18: Trouble Shooting
11. Trouble Shooting Having trouble? Here is the solution. (Unit is operating normally.) Air conditioner does not heat or cool well. Clean the filter. (Airflow is reduced when the filter is dirty or clogged.) Check the temperature adjustment and adjust the set temperature. Make sure that there is plenty of space around the outdoor unit. - Page 19 11. Trouble Shooting Having trouble? Here is the solution. (Unit is operating normally.) Noise is louder than specifications. The indoor operation sound level is affected by the acoustics of the par- ticular room as shown in the following table and will be higher than the noise specification, which was measured in an echo-free room.
-
Page 20: Specifications
12. Specifications PCFY-P·VKM-E Series Model P100 P125 Power source (Voltage<V>/Frequency) <Hz> ~/N 220-230-240/50, 220/60 Capacity (Cooling/Heating) <kW> 4.5/5.0 7.1/8.0 11.2/12.5 14.0/16.0 Dimension (Height) <mm> Dimension (Width) <mm> 1280 1600 Dimension (Depth) <mm> Net weight <kg> Fan Airflow rate (Low-Middle2-Middle1-High) <m /min>... - Page 21 Содержание 1. Меры предосторожности ............. 175 7. Прочие функции ................184 2. Наименование деталей ..............176 8. Выбор функции ................185 3. Конфигурация дисплея ............... 179 9. Работа пульта дистанционного управления в аварийном режиме ... 189 4. Установка дня недели и времени ..........179 10.
- Page 22 2. Наименование деталей Внутренний прибор PKFY-P·VBM-E PKFY-P·VHM-E PCFY-P·VKM-E PMFY-P·VBM-E PFFY-P·VKM-E(2) Скорость вращения вентилятора 4-х скоростная 3-х скоростная + Авто* 4-х скоростная + Авто* 4-х скоростная 4-х скоростная Операции 4 шага 5 шага 5 шага 4 шага 4 шага Лопатка Автоотклонение Жалюзи...
- Page 23 2. Наименование деталей для проводные пульты дистанционного управления Индикатор датчика Дисплей Отображается в случае использования д а т ч и к а п у л ь т а д и с т а н ц и о н н о г о В...
- Page 24 2. Наименование деталей для беспроводного пульта дистанционного управления Область передачи Индикатор передачи Дисплей пульта дистанционного управления Индикатор таймера * В целях объяснения показаны все пункты, которые появляются на дисплее. * Все пункты отображаются при нажатии кнопки Reset (Сброс). Области работы Кнопка...
- Page 25 3. Конфигурация дисплея <Типы экранов отображения> Настройку языка дисплея можно изменить на русский язык при Выбор функции Установка дня/времени помощи выбора функции на пульте дистанционного управления. TIME SUN См. пункт [4]-1, раздела 8 для изменения установки языка. Начальный установленный язык – английский. Выбор...
- Page 26 5. Эксплуатация 5.2. Выбор режима Примечание: Число доступных скоростей вращения вентилятора зависит от ) 2 и выберите режим Нажмите кнопку выбора режима ( типа подключенного устройства. Некоторые устройства не имеют эксплуатации возможности настройки параметра “Auto” (Авто). В следующих случаях действительная скорость вентилятора устройства Режим...
- Page 27 5. Эксплуатация 5.6. Вентиляция (Для серии PFFY-P·VKM) Для серии PFFY-P·VKM направление воздушного потока, отображаемое Для комбинации LOSSNAY на пульте дистанционного управления, отличается от фактического 5.6.1. для проводные пульты дистанционного управления направления воздушного потока. См. следующую таблицу. Для начала работы вентилятора вместе с внутренним устройством: Нажмите...
- Page 28 6. Таймер <Настройка недельного таймера> 6.1.2. Простой таймер 5.Нажмите с оответствующ ую кнопк у настройки времени 1 Вы можете настроить простой таймер тремя способами: необходимое число раз для установки времени ( • Только время включения: * Пока вы удерживаете кнопку нажатой, временные интервалы кондиционер...
- Page 29 6. Таймер 7. После выполнения действия с 3 по 6 нажмите кнопку “Filter” (Фильтр) Пример 2. 4 для сохранения значения. Запустите таймер (время выключения должно предшествовать времени включения) Примечание: Время включения: 5 часов Новые настройки будут отменены, если перед кнопкой “Filter” (Фильтр) Время...
- Page 30 6. Таймер 6.2. Для беспроводного пульта дистанционного <Проверка текущих настроек таймера автоматического выключения> управления Настройка таймера TIMER AFTER AUTO OFF 1. Убедитесь, что на экране отображается “Auto Off” (Выкл. автоматический режим) ( 2. Удерживайте нажатой кнопку таймера “Menu” 2 в течение 3 секунд до появления...
- Page 31 7. Прочие функции 7.2. Индикация кодов ошибок ERROR CODE Лампа ON/OFF включения (Мигает) Код ошибки № устройства Если вы настроили номер телефона вызова в случае возникновения проблем, этот номер будет отображен на экране. (Вы можете выполнить установку номера телефона на экране выбора...
- Page 32 8. Выбор функции Нормальный режим индикации (индикация, Normal display [Схема выбора функции] отображаемая при выключенном кондиционере) Удерживая нажатой кнопку , нажмите кнопку и удерживайте ее две секунды. (Display when the air conditioner is not running) Hold down the button and press the button for 2 seconds.
- Page 33 8. Выбор функции [Детальная настройка] [4]-3 Настройка выбора режима (1) Настройка пульта дистанционного управления (основной/ [4]-1 Настройка CHANGE LANGUAGE (выбор языка) дополнительный) Можно выбрать язык, на котором отображаются индикации на дисплее. • Чтобы включить настройку, нажмите кнопку [ ON/OFF] D. MENU] G, чтобы...
- Page 34 8. Выбор функции [Таблица точечного дисплея] Настройка языка English German Spanish Russian Italian Chinese French Japanese Ожидание запуска Режим Режим работы охлаждения Режим сушки Режим отопления Автоматический режим Автоматический режим (охлаждение) Автоматический режим (отопление) Режим вентилятора Вентиляция Ожидание (Горячая настройка) Оттаивание...
- Page 35 9. Работа пульта дистанционного управления в аварийном режиме Если пульт дистанционного управления использовать нельзя Если батарейки пульта дистанционного управления разрядились или в нем имеется неисправность, аварийный режим можно включить с помощью аварийных кнопок. A Лампа DEFROST/STAND BY (РАЗМОРАЖИВАНИЕ/ОЖИДАНИЕ) B Лампа работы C Переключатель...
- Page 36 10. Уход и чистка PCFY-P·VKM-E PFFY-P·VKM-E(2) 1 Откройте воздухозаборную решетку. 2 Удерживайте рукоятку фильтра, затем потяните его вверх в направлении стрелки. При установке фильтра после чистки 1 Снимите катехиновый воздушный фильтр. убедитесь, что он вставлен достаточно глубоко - до стопора. A Откройте...
- Page 37 11. Исправление неполадок Возникла проблема? Вот решение. (Прибор работает нормально.) Кондиционер не обеспечивает должный обогрев или охлаждение. Очистите фильтр. (При загрязнении или закупорке фильтра поток воздуха уменьшается.) Проверьте регулировку температуры и отрегулируйте заданную температуру. Убедитесь, что вокруг наружного прибора достаточно места. Не заблокирован...
- Page 38 11. Исправление неполадок Возникла проблема? Вот решение. (Прибор работает нормально.) Уровень шума превышает уровень, указанный в технических Уровень шума работающего кондиционера зависит от акустики характеристиках. конкретного помещения (см. таблицу ниже). Он может быть выше, чем указано в спецификации, поскольку тестовый замер проводился в безэховом...
- Page 39 12. Технические характеристики Серия PCFY-P·VKM-E Модель P100 P125 Электропитание (Напряжение<В>/Частота) <Гц> ~/N 220-230-240/50, 220/60 Мощность (Охлаждение/Обогрев) <кВт> 4,5/5,0 7,1/8,0 11,2/12,5 14,0/16,0 Габариты (Высота) <мм> Габариты (Ширина) <мм> 1280 1600 Габариты (Глубина) <мм> Масса Нетто <кг> Скорость движения воздушного потока в вентиляторе (Низкая-Средняя2-Средняя1-Высокая) <м...
- Page 40 Please be sure to put the contact address/telephone number on this manual before handing it to the customer. HEAD OFFICE: TOKYO BLDG., 2-7-3, MARUNOUCHI, CHIYODA-KU, TOKYO 100-8310, JAPAN RG79D837H01 Printed in Japan...
Need help?
Do you have a question about the PCFY-P40VKM-E and is the answer not in the manual?
Questions and answers