
Related Manuals for Kaco Powador


Summary of Contents for Kaco Powador
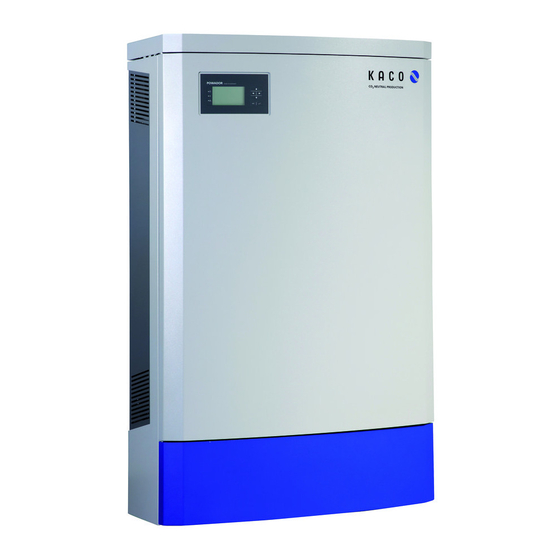
- Page 1 Powador 30.0 TL3 M/XL | 33.0 TL3 M/XL 36.0 TL3 M/XL | 39.0 TL3 M/XL 40.0 TL3 M/XL | 48.0 TL3 Park 60.0 TL3 M/XL | 72.0 TL3 Park Operating Instructions English translation of German original...
-
Page 3: Table Of Contents
..............56 Opening the connection area ......18 Lay the electrical lines ........19 Making the electrical connection ....19 Connecting the interfaces.........24 Sealing the connection area ......28 Starting up the inverter........29 Operating Instructions for Powador 30.0-72.0 TL3_EN Page 3... -
Page 4: General Information
CAUTION Low-risk hazard Failure to observe this warning will lead to minor or moderate bodily injury. CAUTION Risk of damage to property Failure to observe this warning will lead to property damage. Page 4 Operating Instructions for Powador 30.0-72.0 TL3_EN... -
Page 5: Safety
• When working on the PV generator, it is also necessary to switch off the DC voltage with the DC isolator switch in addition to disconnecting the PV generator from the grid. Operating Instructions for Powador 30.0-72.0 TL3_EN Page 5... -
Page 6: Proper Use
Operation outside the specifications intended by the manufacturer, • Islanding operation. Protection features For your safety, the following monitoring and protective functions are integrated into Powador inverters: • Overvoltage conductors/varistors to protect the power semiconductors from high-energy transients on the grid and generator side •... -
Page 7: Description
Disconnecting the inverter from the PV generator Switch the DC isolator switches from 1 (ON) to 0 (OFF). Connecting the inverter to the PV generator Switch the DC isolator switches from 0 (OFF) to 1 (ON). Operating Instructions for Powador 30.0-72.0 TL3_EN Page 7... - Page 8 Powador protect. For information on the installation and use see this manual, the Powador protect manual and the instructions for use of the Powador protect on the KACO web site.
- Page 9 The feed-in meter is specified and installed by the power supply company. Some power supply companies also allow the installation of your own calibrated meters. Selective main switch If you have any questions about the selective main switch, contact your power supply company. Operating Instructions for Powador 30.0-72.0 TL3_EN Page 9...
-
Page 10: Technical Data
98 / 4.4 Internal consumption: standby [W] < 30 Internal consumption: night [W] ~1.5 Feed-in starts at [W] Circuit design IGBT, self-commutated, transformerless Grid monitoring Country-specific CE conformity Table 1: Electrical data Page 10 Operating Instructions for Powador 30.0-72.0 TL3_EN... - Page 11 98 / 4.4 Internal consumption: standby [W] < 30 Internal consumption: night [W] ~1.5 Feed-in starts at [W] Circuit design IGBT, self-commutated, transformerless Grid monitoring Country-specific CE conformity Table 2: Electrical data Operating Instructions for Powador 30.0-72.0 TL3_EN Page 11...
-
Page 12: Mechanical Data
Degree of contamination DC isolator switch Built-in Housing Steel plating H x W x D [mm] 1360 x 840 x 355 Total weight [kg] 151 (30.0-48.0 TL3), 173 (60.0-72.0 TL3) Table 3: Mechanical data Page 12 Operating Instructions for Powador 30.0-72.0 TL3_EN... -
Page 13: Preparation
3. Send a damage report to the shipping company immediately. The damage report must be received by the shipping company in writing within six days following receipt of the inverter. We will be glad to help you if necessary. Operating Instructions for Powador 30.0-72.0 TL3_EN Page 13... -
Page 14: Position And Secure The Device
5. Raise the device. 6. Transport to the place of assembly (keep an eye on the centre of gravity!) Lash the device securely on the ground. » Install and secure the inverter. Page 14 Operating Instructions for Powador 30.0-72.0 TL3_EN... -
Page 15: Mounting The Inverter
Take care to ensure sufficient ventilation of the inverter. › Immediately remove dirt, especially on vents. › Failure to observe these warnings may lead to inverter damage which is not covered by the KACO new energy GmbH manufacturer warranty. Operating Instructions for Powador 30.0-72.0 TL3_EN Page 15... - Page 16 Use only the supplied mounting parts. › Only install inverter in an upright position. › For wall mounting: Mount the inverter on a vertical wall only. › For upright installation outdoors: Weather-proof base required Page 16 Operating Instructions for Powador 30.0-72.0 TL3_EN...
-
Page 17: Installing And Securing The Inverter
Place the hood on the top side of the housing. 2. Secure the hood to the inverter housing from the inside using the enclosed fastening screws. » Install the side housing covers. Operating Instructions for Powador 30.0-72.0 TL3_EN Page 17... -
Page 18: Installing The Inverter
Opening the connection area You have completed assembly. Unlock the two door locks with the control cabinet key. 2. Open the doors. 3. Remove the cover of the connection area. » Make the electrical connection. Page 18 Operating Instructions for Powador 30.0-72.0 TL3_EN... -
Page 19: Lay The Electrical Lines
NOTE If the device is going to be installed outdoors, we recommend that an additional plinth panel is fitted in the socket area at the back end of the housing. (accessory item from KACO new energy) Making the electrical connection Make the connection to the PV generator as well as the grid connection via the PCB terminals in the connection area of the inverter. - Page 20 Figure 13: Powador 30.0-48.0 TL3 - XL- F* Figure 14: Powador 60.0 TL3 - M Figure 15: Powador 60.0 TL3 - XL Figure 16: Powador 60.0 TL3 - XL - F* Figure 17: Powador 72.0 TL3 - M Figure 18: Powador 72.0 TL3 - XL* Figure 19: Powador 72.0 TL3 - XL - F*...
- Page 21 If a residual current circuit breaker is necessary due to the installation specification, a type A residual current circuit breaker must be used. For questions regarding the appropriate type, please contact the installer or our KACO new energy customer service.
- Page 22 If the string fuses are too large, the PV generator can be damaged by excessive current. Select suitable string fuses depending on possible short-circuit currents and the cable cross-sections used. Refer to this when using the string fuses supplied. Page 22 Operating Instructions for Powador 30.0-72.0 TL3_EN...
- Page 23 4. Close the fuse holders. » Continue connecting the PV generator. 7.3.2.3 Recommended standard connection for Powador 39.0 TL3 XL/72.0 TL3 XL DANGER Risk of fatal injury due to electric shock (electric arc)! Wrong assignment of MPP trackers will seriously damage the inverter.
-
Page 24: Connecting The Interfaces
All interfaces are located on the connection circuit board in the upper area of the inverter door. Use the cable fit- tings provided and connect the connection cables to the circuit board. Page 24 Operating Instructions for Powador 30.0-72.0 TL3_EN... - Page 25 Use a suitable category 5 network cable. The maximum length of a network segment is 100 m. Ensure that the cable is correctly assigned. The Ethernet connection of the inverter supports auto-sensing. You can use both crossed and 1:1 protectively-wired Ethernet connection cables. Operating Instructions for Powador 30.0-72.0 TL3_EN Page 25...
- Page 26 Calculating efficiency by measuring the current and voltage values can lead to misleading results due to the tolerances of the measurement devices. The sole purpose of these measured values is to monitor the basic operation of the system. Page 26 Operating Instructions for Powador 30.0-72.0 TL3_EN...
- Page 27 6. Activate the terminating resistor on the terminal unit. NOTE When using the RS485 bus system, assign a unique address to every bus device (inverter, sensor) and terminate the terminal units (see the “Settings” menu) . Operating Instructions for Powador 30.0-72.0 TL3_EN Page 27...
-
Page 28: Sealing The Connection Area
Connecting "Inverter off" digital input (optional) NOTE The Powador-protect digital output can only be used with suitable KACO inverters. When using devices from other manufacturers or in combination with KACO inverters, bus coupler circuit-break- ers as a minimum must be used for shutting down devices from other manufacturers. -
Page 29: Starting Up The Inverter
Connect the grid voltage using the external circuit breakers. 2. Connect the PV generator using DC isolator switch (0 » The inverter begins to operate. » During the initial start-up: Follow the instructions of the New Connection Wizard. Operating Instructions for Powador 30.0-72.0 TL3_EN Page 29... -
Page 30: Configuration And Operation
The inverter feeds into the grid. * The waiting period is used for network monitoring and ensures that all network parameters are in the permissi- ble range. For country-specific waiting periods, see our website at http://www.kaco-newenergy.de/. Page 30 Operating Instructions for Powador 30.0-72.0 TL3_EN... - Page 31 If you are in the menu and do not touch the control buttons for two minutes, the inverter returns to the desktop. For initial commissioning, see section 8.2 on page 33. Figure 28: Desktop Current date Status bar Current power Current time Menu indicator Feed-in indicator Daily yield Annual yield Operating Instructions for Powador 30.0-72.0 TL3_EN Page 31...
-
Page 32: Control Buttons
Selecting an option Use the right and left arrow buttons. Changing an option/the value of an input field Use the up and down arrow buttons. Saving changed settings Press the OK button. Page 32 Operating Instructions for Powador 30.0-72.0 TL3_EN... -
Page 33: Initial Start-Up
Display on the LCD Figure 29: Main menu Selected menu item Menu items of the active menu level Name of the active menu level Menu items of the next lower menu level Operating Instructions for Powador 30.0-72.0 TL3_EN Page 33... - Page 34 Menu level (0, 1, 2, 3) Submenu available Display menu Country-specific setting Option menu DE MSp. Country and grid type-specific setting Password protected menu (password can be requested from KACO Service) Coun- menu Display/ Action in this menu/meaning try-spec. level...
- Page 35 You have connected a USB storage device to the inverter. Save to USB Select the data to be exported (year, month or day). 2. Press the OK button. » The inverter writes the data to a connected USB storage device. Operating Instructions for Powador 30.0-72.0 TL3_EN Page 35...
- Page 36 Set the time between two log data recordings. The inverter supports the backing up of all recorded yield data to a connected USB storage device. Log data backup Activate or deactivate log data backup. Page 36 Operating Instructions for Powador 30.0-72.0 TL3_EN...
- Page 37 Set the port at which the web server can be reached. On: The inverter attempts to connect to the Pow- ador-web web portal. Powador-web Off: The connection to Powador web is deactivated. Connection status Indicates the status of the network connection: Operating Instructions for Powador 30.0-72.0 TL3_EN...
- Page 38 2. Confirm the entry with the OK button. Country 3. Set the desired country setting. NOTE: This option influences the country-specific operating settings of the inverter. Please consult KACO service for further information. Grid type/guide- Select the grid type for the inverter’s installation line location.
- Page 39 Set value for constant voltage control (200 - 800 V). NOTE: For voltages below the minimal MPP voltage the possible input power is reduced. The input current is limited to 34 A per input. Operating Instructions for Powador 30.0-72.0 TL3_EN Page 39...
- Page 40 3. Specify the limit value for maximum feed-in power. 4. Confirm the entry with the OK button. Configures the support for grid shutdown by a Powador protect connected to the digital input of the inverter. For Auto/On: A Powador protect is operating in the photovoltaic system and is connected to the inverter at the digital input/output.
- Page 41 To show the last 5 grid fault messages, select the “Display” key. Display of essential protection parameters. CH, BE, CY, Protection param- To show the protection parameters, select the “Dis- DE-NSp eters play” key. Operating Instructions for Powador 30.0-72.0 TL3_EN Page 41...
- Page 42 Displays the serial number of the inverter. Displays the selected country setting. Display country Optional: Displays the grid type if a grid type has been selected. "Manufacturer" The display shows information about the unit manufac- menu turer. Page 42 Operating Instructions for Powador 30.0-72.0 TL3_EN...
-
Page 43: Monitor Inverter
8.4.2.2 Using the web server To avoid problems with incompatibility, use the most recent version of your Internet browser. JavaScript must be enabled in the browser settings to display the web server correctly. Operating Instructions for Powador 30.0-72.0 TL3_EN Page 43... - Page 44 4. Save the file. NOTE Regardless of the display data selected in the “Select display” area, an export file always contains all measurement data and yield data available for the selected period. Page 44 Operating Instructions for Powador 30.0-72.0 TL3_EN...
-
Page 45: Performing A Software Update
Do not remove the USB stick during a software update. Preparing for the software update Download the software update file from the KACO web site and store it on your hard disk. 2. Extract the update file (.ZIP) completely onto the USB stick. -
Page 46: Maintenance/Troubleshooting
Destruction of the DC connection The connection terminals can be destroyed by arcing if disconnected while still live. › It is absolutely essential that the shutdown sequence is carried out in the correct order. Page 46 Operating Instructions for Powador 30.0-72.0 TL3_EN... -
Page 47: Faults
B = Action of the operator E = The indicated work may only be carried out by an authorised electrician. K = The indicated work may only be carried out by a service employee of KACO new energy GmbH! Fault... - Page 48 (after the start-up period is complete), the invert- ware. er’s hardware is probably damaged. Contact KACO Service to test the hardware. The inverter dis- Faults in the grid. The inverter continues to operate as normal without losses to plays an impos- the yield, even when an erroneous daily peak value is displayed.
-
Page 49: Fault" Messages On The Display/Led
The following table lists the possible status and fault signals that the inverter shows on the LCD and the LEDs. BS = operating status, FS = fault status; B = Action of the operator Operating Instructions for Powador 30.0-72.0 TL3_EN Page 49... - Page 50 Maintenance/Troubleshooting E = The indicated work may only be carried out by an authorised electrician. K = The indicated work may only be carried out by a service employee of KACO new energy GmbH! Status Display Explanation Action OS 1...
- Page 51 Power reduction starts at a frequency of 50.2 Hz. OS 64 Measured values Output current limiting: The AC current is limited once the specified maximum value has been reached. Table 6: Operating status and fault messages on the display Operating Instructions for Powador 30.0-72.0 TL3_EN Page 51...
- Page 52 HW gate disconnected the device to protect it electrician / KACO driver/ against damage. Service HW buffer-free. Complete disconnection of the device. Table 6: Operating status and fault messages on the display Page 52 Operating Instructions for Powador 30.0-72.0 TL3_EN...
-
Page 53: Service
Operating status and fault messages on the display Service If you need help solving a technical problem with one of our KACO products, please contact our service hotline. Please have the following information ready so that we can help you quickly and efficiently: •... -
Page 54: Shutdown/Disassembly
Only then remove the wall and floor fastenings. Shut down the inverter. Uninstall the inverter. Remove the inverter fastening. 2. Securely pack up the inverter if it is to be used later have the inverter disposed of professionally. Page 54 Operating Instructions for Powador 30.0-72.0 TL3_EN... -
Page 55: Disposal
Unit: Do not dispose of faulty inverters or accessories together with household waste. Ensure that the old unit and any accessories are disposed of in a proper manner. Packaging: Ensure that the transport packaging is disposed of properly. Operating Instructions for Powador 30.0-72.0 TL3_EN Page 55... -
Page 56: Appendix
Powador 30.0 TL3 - XL - F - INT Powador 39.0 TL3 - XL - F - INT Powador 30.0 TL3 - XL - F - INT - SPD 1+2 Powador 39.0 TL3 - XL - F - INT - SPD 1+2 Powador 33.0 TL3 - M - INT... - Page 57 Powador 72.0 TL3 - XL - F - INT - Park Powador 48.0 TL3 - XL - F - SPD 1+2 - Park Powador 72.0 TL3 - XL - F - SPD 1+2 - Park This is to confirm that the units listed above comply with the protection requirements set forth in the Directive of the Council of the European Union of 15th December 2004 on the harmonisation of the laws of the member states relating to Electromagnetic Compatibility (2004/108/EC) and the Low Voltage Directive (2006/95/EC).
- Page 58 Page 58 Operating Instructions for Powador 30.0-72.0 TL3_EN...
- Page 60 Carl-Zeiss-Strasse 1 · 74172 Neckarsulm · Germany · Phone +49 7132 3818-0 · Fax +49 7132 3818-703 · info@kaco-newenergy.de · www.kaco-newenergy.de...
Need help?
Do you have a question about the Powador and is the answer not in the manual?
Questions and answers