Table of Contents
Advertisement
Chapter 1 Introduction
Chapter 2 Important Safety
Instructions
Chapter 3 Installing the
Software
Chapter 4 Connecting the
Scanner
Chapter 5 Placing
Documents
Chapter 6 Scanning with
CaptureOnTouch
Chapter 7 Scanning with
CapturePerfect
Chapter 8 Setting the
Scanner Driver
Chapter 9 Special Scanning
Chapter 10 Regular
Maintenance
Chapter 11 Removing and
Attaching the Rollers and
Document Holding Guide
Chapter 12 Uninstalling the
Software
Chapter 13
Troubleshooting
Chapter 14 Appendix
CE-IM-880-
E1.00
Advertisement
Table of Contents

Related Manuals for Canon image Formula DR-C130


Summary of Contents for Canon image Formula DR-C130
- Page 1 Chapter 1 Introduction Chapter 2 Important Safety Instructions Chapter 3 Installing the Software Chapter 4 Connecting the Scanner Chapter 5 Placing Documents Chapter 6 Scanning with CaptureOnTouch Chapter 7 Scanning with CapturePerfect Chapter 8 Setting the Scanner Driver CE-IM-880- Chapter 9 Special Scanning E1.00 Chapter 10 Regular Maintenance...
-
Page 2: Chapter 1 Introduction
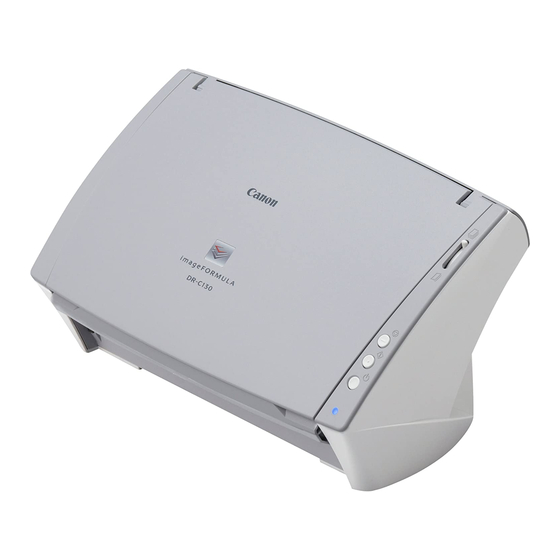
HOME > Chapter 1 Introduction... - Page 3 Chapter 1 Introduction Thank you for purchasing the Canon imageFORMULA DR-C130 Document Scanner. In order to fully understand the features of this scanner and use them more effectively, please read this manual and the manuals shown below thoroughly before using the product. After reading, store the manual in a safe place for future reference.
- Page 4 HOME > "Chapter 1 Introduction" > About This Manual...
-
Page 5: About This Manual
About This Manual Manuals for the Scanner Documentation for this scanner consists of the following manuals. ● Setup Guide This provides complete and comprehensive information about the scanner. ● User Manual (this manual) This manual contains complete explanations for operations on the scanner. - Page 6 HOME > "Chapter 1 Introduction" > Features of the Scanner...
-
Page 7: Features Of The Scanner
Features of the Scanner The main features of the DR-C130 document scanner are described below. ● Compact Size The dimensions of the scanner are as follows: 298 mm (W) x 160 mm (H) x 160 mm (W) (11.7" x 6.3" x 6.3") (with the feed tray and eject tray closed) . - Page 8 HOME > "Chapter 1 Introduction" > Names and Functions of Parts...
-
Page 9: Names And Functions Of Parts
Names and Functions of Parts This section describes the name and function of each part. Make sure to read this section and familiarize yourself with the parts of the scanner before using the scanner. Front View/Right-Side View (1) Document Feed Tray Open to place documents. - Page 10 HOME > "Chapter 1 Introduction" > Regulations...
- Page 11 Canon U.S.A. Inc. One Canon Plaza, Lake Success NY 11042, U.S.A. Tel. No. (516)328-5000 RADIO INTERFERENCE REGULATIONS (For 120 V models) This digital apparatus does not exceed the Class B limits for radio noise emissions from digital apparatus as set out in the interference-causing equipment standard entitled "Digital...
- Page 12 HOME > "Chapter 1 Introduction" > Trademarks...
- Page 13 Trademarks ● Canon and the Canon logo are registered trademarks, of Canon Inc. in the United States and may also be trademarks or registered trademarks in other countries. ● imageFORMULA is a trademark of CANON ELECTRONICS INC. ● Microsoft, Windows, Windows Vista, PowerPoint, and SharePoint are registered trademarks or trademarks of Microsoft Corporation in the United States and other countries.
-
Page 14: Chapter 2 Important Safety Instructions
HOME > Chapter 2 Important Safety Instructions... - Page 15 Chapter 2 Important Safety Instructions To ensure the safe operation of this scanner, be sure to read the safety warnings and precautions described below. "Installation Location" "AC Adapter" "Moving the Scanner" "Handling" "Disposal" "When sending the scanner for repairs"...
- Page 16 HOME > "Chapter 2 Important Safety Instructions" > Installation Location...
-
Page 17: Installation Location
Installation Location The performance of this scanner is affected by the environment in which it is installed. Make sure that the location where the scanner installed meets following environmental requirements. ● Provide adequate space around the scanner for operation, maintenance, and ventilation. ●... - Page 18 HOME > "Chapter 2 Important Safety Instructions" > AC Adapter...
- Page 19 ● Do not use an AC adapter other than the one provided with the scanner. Do not use the AC adapter provided with the scanner with other products. ● If you have any questions regarding the power supply, contact your local authorized Canon dealer or service representative for further information.
- Page 20 HOME > "Chapter 2 Important Safety Instructions" > Moving the Scanner...
-
Page 21: Moving The Scanner
Moving the Scanner ● When moving the scanner, always hold it with both hands to avoid dropping it. The scanner weighs approximately 1.8 kg (3.97 lb). ● Make sure to disconnect the interface cable and AC adapter before moving the scanner. If the scanner is transported with these items connected, the plugs and connectors may be damaged. - Page 22 HOME > "Chapter 2 Important Safety Instructions" > Handling...
- Page 23 OFF, and disconnect the power plug from the power outlet. Then, contact your local authorized Canon dealer or service representative for further information. ■ Do not drop the scanner, or subject it to impact or strong shock.
- Page 24 HOME > "Chapter 2 Important Safety Instructions" > Disposal...
- Page 25 Disposal When disposing of this scanner, be sure to follow all local ordinances and laws or consult with the retailer who sold you the scanner.
- Page 26 HOME > "Chapter 2 Important Safety Instructions" > When sending the scanner for repairs...
-
Page 27: When Sending The Scanner For Repairs
When sending the scanner for repairs When a request is made for repairs, the scanner needs to be sent to the specified address. When sending the scanner, use the packing box in which it came. Firmly secure the scanner with packaging material when you place it in the packing box. -
Page 28: Chapter 3 Installing The Software
HOME > Chapter 3 Installing the Software... - Page 29 Chapter 3 Installing the Software This section describes the software installation procedure using the setup disk (DVD) that comes with this product. "System requirements" "Setup Disc Contents" "Software Installation"...
- Page 30 HOME > "Chapter 3 Installing the Software" > System requirements...
-
Page 31: System Requirements
- .NET Framework 3.5 or later ■ Use the latest USB 2.0 driver made available by Microsoft. For details, consult your local authorized Canon dealer. ■ Scanning speeds are lower if your computer's standard USB interface is USB Full-Speed (equal to USB 1.1.) ■... - Page 32 HOME > "Chapter 3 Installing the Software" > Setup Disc Contents...
-
Page 33: Setup Disc Contents
Professional version. For details on upgrading, visit following URL. http://www.nuance.com/partneroffer/canon ● eCopy PDF Pro Office Nuance Communications PDF creation/editing software. When scanning with third-party software, user the scanner driver of this scanner to configure scanning conditions. For details on how to open the scanner driver, refer to the manuals supplied with each software application. - Page 34 HOME > "Chapter 3 Installing the Software" > Software Installation...
-
Page 35: Software Installation
Software Installation The procedure for installing the software is as follows: Install the software before connecting the scanner to the computer. ● Log on to Windows as an Administrator. ● Close all other applications before installing the software. 1 Insert the Setup Disc into the disc drive of the computer. The setup menu automatically starts up when you insert the disc into the drive. - Page 36 HOME > Chapter 4 Connecting the Scanner...
-
Page 37: Chapter 4 Connecting The Scanner
Chapter 4 Connecting the Scanner Connect the scanner to the computer and power outlet. "Connecting the Scanner to the Computer" "Turning the Power ON"... - Page 38 HOME > "Chapter 4 Connecting the Scanner" > Connecting the Scanner to the Computer...
-
Page 39: Connecting The Scanner To The Computer
Connecting the Scanner to the Computer Connect the scanner to the computer. ● Do not connect the scanner to the computer before installing the software. ● Before connecting the scanner to the computer, verify that the power of the scanner is OFF. If the power is ON, turn it OFF. 1 Connect the power cord to the AC adapter. - Page 40 HOME > "Chapter 4 Connecting the Scanner" > Turning the Power...
-
Page 41: Turning The Power On
Turning the Power ON The power of the scanner can be turned ON and OFF with the power button on the front of the scanner. 1 Make sure that the scanner and computer are connected properly with a USB cable. 2 Press the power button. -
Page 42: Chapter 5 Placing Documents
HOME > Chapter 5 Placing Documents... - Page 43 Chapter 5 Placing Documents There are two methods for feeding documents, the Normal mode and Bypass mode. Feeding pages continuously from a stack of documents placed in the feed tray is called the Normal mode. Feeding documents one sheet at a time or feeding documents consisting of multiple pages that are attached, is called the bypass mode.
- Page 44 HOME > "Chapter 5 Placing Documents" > Preparing Trays...
-
Page 45: Preparing Trays
Preparing Trays Prepare the document feed tray according to the paper size and type. Preparing the Document Feed Tray Open the document feed tray. Preparing the Document Eject Tray Open the document eject tray. ● Documents can be scanned with the document eject tray closed. ●... - Page 46 HOME > "Chapter 5 Placing Documents" > Documents...
- Page 47 Documents The scanner can scan documents ranging in size from business cards and checks to LTR/A4. The document sizes that this scanner can scan are shown below. Plain Paper Width: 50.8 mm to 215.9 mm (2" to 8.5") Size Length: 53.9 mm to 355.6mm (2.12" to 14")* Normal mode: 52 to 128 g/m (14 to 32 lb bond) 0.06 mm to 0.15 mm (0.0024"...
- Page 48 HOME > "Chapter 5 Placing Documents" > Feeding in the Normal Mode...
-
Page 49: Feeding In The Normal Mode
Feeding in the Normal Mode 1 Switch the feed selection lever to (Normal). 2 Adjust the document guides to fit the width of the document to be scanned. 3 Fan the pages of the document to be scanned, and shift them so that the top of the first page (the bottom of the front of the document) is the lowest. - Page 50 HOME > "Chapter 5 Placing Documents" > Feeding in the Bypass Mode...
-
Page 51: Feeding In The Bypass Mode
Feeding in the Bypass Mode 1 Switch the feed selection lever to (Bypass). 2 Adjust the document guides to fit the width of the document to be scanned ->"Feeding in the Normal Mode" 3 Place the document with the reverse side facing you, and the top of the document facing down. - Page 52 HOME > "Chapter 5 Placing Documents" > Placing Cards...
-
Page 53: Placing Cards
Placing Cards 1 Switch the feed selection lever to (Bypass) ■ When scanning cards, make sure to set the feed selection lever (Bypass). ■ Place cards one at a time. 2 Place the card horizontally, with the reverse side facing you, and the top of the card facing down. - Page 54 HOME > "Chapter 5 Placing Documents" > Placing Folded Documents...
-
Page 55: Placing Folded Documents
Placing Folded Documents Folio Scan enables you to scan documents that are larger than LTR/A4 and therefore do not fit in the feeder. (The maximum size is 11" X 17"/A3.) To use the function, fold the center of the document in half lengthwise and place it into the feeder. - Page 56 HOME > "Chapter 5 Placing Documents" > Setting the Long Document Mode...
-
Page 57: Setting The Long Document Mode
2 Click the Start button, and then click [All Programs], [Canon DR-C130], and [Canon imageFORMULA Utility]. imageFORMULA Utility starts. 3 Click [CANON DR-C130 USB] and click [Properties]. Scanner properties are displayed. 4 Select a Long Document mode. Select [Long Document mode (1,000 mm)] or [Long Document... -
Page 58: Chapter 6 Scanning With Captureontouch
HOME > Chapter 6 Scanning with CaptureOnTouch... - Page 59 Chapter 6 Scanning with CaptureOnTouch This section describes the scanning procedure when using CaptureOnTouch. "What is CaptureOnTouch?" "Starting and Exiting CaptureOnTouch" "Scan First" "Select Scan Job" "Scanning with Start Button" "Scanner Settings" "Operation in Continuous Scanning Screen" "Setting the Output Method" "Environmental Settings"...
- Page 60 HOME > "Chapter 6 Scanning with CaptureOnTouch" > What is CaptureOnTouch?
-
Page 61: What Is Captureontouch
What is CaptureOnTouch? CaptureOnTouch is a scanning application that allows you to scan a document with a simple operation by following the instructions on the screen. CaptureOnTouch is provided with multiple scanning methods that can be selected according to the purpose and application. Scan First Scan a document and then select the output method. - Page 62 HOME > "Chapter 6 Scanning with CaptureOnTouch" > Starting and Exiting CaptureOnTouch...
-
Page 63: Starting And Exiting Captureontouch
To use CaptureOnTouch after it has been made not resident in the system, use one of the following procedures to restart it. CaptureOnTouch will start and become resident in the system again. ● Click [Start] - [All Programs] - [Canon DR-C130] - [DR-C130 CaptureOnTouch]. - Page 64 HOME > "Chapter 6 Scanning with CaptureOnTouch" > Scan First...
-
Page 65: Scan First
Scan First Operation Flow : Scan the document -> Configure the output settings -> Output the scanned images 1 Place the document in the scanner. 2 Click [Scan First]. The top screen of Scan First appears. 3 Set the scan method in the top screen. (1) Specify whether to enable continuous scanning. - Page 66 HOME > "Chapter 6 Scanning with CaptureOnTouch" > Select Scan...
-
Page 67: Select Scan Job
Select Scan Job Operation Flow : Register the job -> Select the job -> Scan the document -> Output the scanned images In Select Scan Job, the page order cannot be changed using thumbnail images. Registering and Editing Jobs In CaptureOnTouch, up to 10 jobs can be registered for use with Select Scan Job. - Page 68 HOME > "Chapter 6 Scanning with CaptureOnTouch" > Scanning with Start Button...
-
Page 69: Scanning With Start Button
Scanning with Start Button By default, Scan First is pre-assigned to the Start button. If you place the document and press the Start button, CaptureOnTouch starts and scanning starts. You can also assign any job to the Start button. If a job is assigned, the document is scanned and the scanned images are output according to the settings of the job. - Page 70 HOME > "Chapter 6 Scanning with CaptureOnTouch" > Scanner Settings...
-
Page 71: Scanner Settings
Scanner Settings By default, CaptureOnTouch scans with scanning conditions that match the document because scanning in full auto mode is enabled. If you want to specify, for example, the scanning mode and document size, you can configure the desired scanning conditions in the scanner settings. - Page 72 HOME > "Chapter 6 Scanning with CaptureOnTouch" > Operation in Continuous Scanning Screen...
-
Page 73: Operation In Continuous Scanning Screen
Operation in Continuous Scanning Screen When [Enable continuous scanning] is set to [ON] in the Start screen, the continuous scanning screen appears when all of the pages of the placed document have been fed. You can confirm the scanned images and then continue scanning. (1) Thumbnail Display Area Displays the thumbnail images of the scanned document. - Page 74 HOME > "Chapter 6 Scanning with CaptureOnTouch" > Setting the Output Method...
-
Page 75: Setting The Output Method
Setting the Output Method CaptureOnTouch is provided with various output methods for processing scanned images. The output method specification is common to Scan First and Select Scan Job. When Scan First: For Scan First, select an output method in the output method selection screen that appears after scanning, and then specify each of the output method items. - Page 76 HOME > "Chapter Scanning with CaptureOnTouch" > Environmental Settings...
-
Page 77: Environmental Settings
Environmental Settings To configure the environmental settings of CaptureOnTouch, open the [Environmental settings] dialog box. Click (CaptureOnTouch icon) in the taskbar, and select [Environmental settings] from the menu. The following describes the setting items of each tab displayed in the [Environmental settings] dialog box. [Basic settings] Tab On the [Basic settings] tab, configure the following settings. -
Page 78: Chapter 7 Scanning With Captureperfect
HOME > Chapter 7 Scanning with CapturePerfect... - Page 79 Chapter 7 Scanning with CapturePerfect This section describes procedures from launching CapturePerfect to selecting a scanner, as well as procedures for scanning with the [Scan batch to file] function. See the "CapturePerfect Operating Guide" or help for details. "Scanning with CapturePerfect"...
- Page 80 HOME > "Chapter 7 Scanning with CapturePerfect" > Scanning with CapturePerfect...
- Page 81 Then click [CapturePerfect 3.1] followed by [CapturePerfect 3.1]. 2 Click [Select Scanner] in the [Scan] menu. 3 Select [Canon DR-C130] and click [OK]. If [Canon DR-C130] does not appear, reinstall the scanner driver. - > "Software Installation" 4 Set the default paper size and click [OK].
- Page 82 HOME > Chapter 8 Setting the Scanner Driver...
-
Page 83: Chapter 8 Setting The Scanner Driver
Chapter 8 Setting the Scanner Driver When you scan a document in an ISIS compatible or TWAIN compatible application (CaptureOnTouch, etc.), open the scanner driver and configure the scanning conditions and other settings. This section describes the configuration and functions of the scanner driver. - Page 84 HOME > "Chapter 8 Setting the Scanner Driver" > Configuration and Functions of the Scanner Driver...
-
Page 85: Configuration And Functions Of The Scanner Driver
Configuration and Functions of the Scanner Driver The scanner driver consists of the following five tabs. For details on the setting screen, see the Help of the scanner driver. Click the [Help] button of the driver to display help related to the corresponding tab or dialog box. - Page 86 HOME > "Chapter 8 Setting the Scanner Driver" > Setting Basic Scanning Conditions...
-
Page 87: Setting Basic Scanning Conditions
Setting Basic Scanning Conditions This section provides an overview of the basic setting items that are the minimum requirements when configuring the scanner settings. Confirming Basic Conditions for Scanning When you scan a document, make sure you confirm the [Color mode], [Page Size], [Dots per inch], and [Scanning Side] basic conditions in the Basic settings dialog box. - Page 88 HOME > Chapter 9 Special Scanning...
-
Page 89: Chapter 9 Special Scanning
Chapter 9 Special Scanning This section provides examples of scanning settings for different purposes. For details on setting options, see "Chapter 8 Setting the Scanner Driver". "Practical Examples" "Function Restrictions Depending on Mode Setting"... - Page 90 HOME > "Chapter 9 Special Scanning" > Practical Examples...
-
Page 91: Practical Examples
Practical Examples To scan unregistered size documents You can register a non-standard page size that has not been registered as a page size by naming and registering it as a custom page size in the Custom Paper Size dialog box, which is opened from the [Save] button on the [Basic] tab. - Page 92 HOME > "Chapter 9 Special Scanning" > Function Restrictions Depending on Mode Setting...
-
Page 93: Function Restrictions Depending On Mode Setting
Function Restrictions Depending on Mode Setting Some of the setting items in each of the driver tabs are disabled as follows depending on the setting for [Color Mode] on the [Basic] tab. [Brightness] tab Setting value Contrast Detect automatically Black and White Error Diffusion Advanced Text Enhancement Advanced Text Enhancement II... -
Page 94: Chapter 10 Regular Maintenance
HOME > Chapter 10 Regular Maintenance... - Page 95 Chapter 10 Regular Maintenance Clean the scanner and perform maintenance on a regular basis as described below to maintain peak scanning quality. "Cleaning the Scanner" "Cleaning the Sensor Glass and the Rollers" "Adjusting the Reduction Ratio" "Auto Power Off Setting" ■...
- Page 96 HOME > "Chapter 10 Regular Maintenance" > Cleaning the Scanner...
-
Page 97: Cleaning The Scanner
Cleaning the Scanner To clean the exterior of the scanner, dampen a cloth with water or a mild detergent, wring the cloth out thoroughly, and then wipe the dirt away. Then use a dry, soft cloth to wipe away any moisture. - Page 98 HOME > "Chapter 10 Regular Maintenance" > Cleaning the Sensor Glass and the Rollers...
-
Page 99: Cleaning The Sensor Glass And The Rollers
Cleaning the Sensor Glass and the Rollers If scanned images contain streaks, or if the scanned documents become dirty, the sensor glass or rollers inside the scanner may be dirty. Clean them periodically. 1 Open the document feed tray. 2 Press the OPEN knob from both sides, and pull the front unit out and downward to open it. - Page 100 HOME > "Chapter 10 Regular Maintenance" > Adjusting the Reduction Ratio...
-
Page 101: Adjusting The Reduction Ratio
1 Start Windows and log in as a user with administrator privileges. 2 Click the Start button, and then click [All Programs], [Canon DR-C130], and [Canon imageFORMULA Utility]. imageFORMULA Utility starts. 3 Click [CANON DR-C130 USB] and click [Properties]. - Page 102 HOME > "Chapter 10 Regular Maintenance" > Auto Power Off Setting...
-
Page 103: Auto Power Off Setting
To disable this setting, follow the procedure below. 1 Start Windows and log in as a user with administrator privileges. 2 Click the Start button, and then click [All Programs], [Canon DR-C130], and [Canon imageFORMULA Utility]. imageFORMULA Utility starts. 3 Click [CANON DR-C130 USB] and click [Properties]. - Page 104 HOME > Chapter 11 Removing and Attaching the Rollers and Document Holding Guide...
-
Page 105: Chapter 11 Removing And Attaching The Rollers And Document Holding Guide
Chapter 11 Removing and Attaching the Rollers and Document Holding Guide To clean or replace the feeding roller, retard roller, or document holding guide, remove and then attach the parts as described in each respective section. "Roller Replacement Cycle" "Resetting the Counters" "Removing/Attaching the Feeding Roller"... - Page 106 HOME > "Chapter 11 Removing and Attaching the Rollers and Document Holding Guide" > Roller Replacement Cycle...
-
Page 107: Roller Replacement Cycle
● Make sure to reset the counter after replacing the rollers. -> "Resetting the Counters" ● For information about the exchange roller kit (feeding roller, retard roller,) contact your local authorized Canon dealer or service representative. - Page 108 HOME > "Chapter 11 Removing and Attaching the Rollers and Document Holding Guide" > Resetting the Counters...
-
Page 109: Resetting The Counters
1 Start Windows and log in as a user with administrator privileges. 2 Click the Start button, and then click [All Programs], [Canon DR-C130], and [Canon imageFORMULA Utility]. imageFORMULA Utility starts. - Page 110 HOME > "Chapter 11 Removing and Attaching the Rollers and Document Holding Guide" > Removing/Attaching the Feeding Roller...
-
Page 111: Removing/Attaching The Feeding Roller
Removing/Attaching the Feeding Roller To remove or attach the feeding roller, follow the procedure below. Use caution when removing or attaching the feeding roller. Using excessive force may cause damage or personal injury. Removing the Feeding Roller 1 Press the OPEN knob from both sides, and pull the front unit out and downward to open it. - Page 112 HOME > "Chapter 11 Removing and Attaching the Rollers and Document Holding Guide" > Removing/Attaching the Retard Roller...
-
Page 113: Removing/Attaching The Retard Roller
Removing/Attaching the Retard Roller To remove or attach the retard roller, follow the procedure below. Use caution when removing or attaching the retard roller. Using excessive force may cause damage or personal injury. Removing the Retard Roller 1 Press the OPEN knob from both sides, and pull the front unit out and downward to open it. - Page 114 HOME > "Chapter 11 Removing and Attaching the Rollers and Document Holding Guide" > Removing/Attaching the Document Holding Guide...
-
Page 115: Removing/Attaching The Document Holding Guide
Removing/Attaching the Document Holding Guide To remove or attach the document holding guide, follow the procedure below. Use caution when removing or attaching the document holding guide. Using excessive force may cause damage or personal injury. Removing the Document Holding Guide 1 Open the roller cover, and slide the document holding guide backwards to remove it. -
Page 116: Chapter 12 Uninstalling The Software
HOME > Chapter 12 Uninstalling the Software... - Page 117 Chapter 12 Uninstalling the Software If the scan driver, CaptureOnTouch or CapturePerfect is not operating normally, follow the procedure below to uninstall them. Then, re-install the software from the Setup disc. -> "Software Installation" "Uninstallation"...
- Page 118 HOME > "Chapter 12 Uninstalling the Software" > Uninstallation...
- Page 119 Uninstallation Log on to Windows as an Administrator. 1 From the Windows task bar, click the [Start] button, and then [Control Panel]. 2 Click [Uninstall a program] ([Add or Remove Programs] for Windows XP). The [Uninstall or change a program] dialog box appears. 3 From the Programs list, select the software you want to remove and then click [Remove].
-
Page 120: Chapter 13 Troubleshooting
HOME > Chapter 13 Troubleshooting... - Page 121 Chapter 13 Troubleshooting "Clearing a Paper Jam" "Common Problems and Solutions" "Useful tips"...
- Page 122 HOME > "Chapter 13 Troubleshooting" > Clearing a Paper Jam...
-
Page 123: Clearing A Paper Jam
Clearing a Paper Jam When paper jams occur during scanning, use the following procedure to clear them. When removing jammed paper, take care not to cut your hands on the edges of the paper. 1 Remove any documents that have been left in the eject tray. - Page 124 HOME > "Chapter 13 Troubleshooting" > Common Problems and Solutions...
-
Page 125: Common Problems And Solutions
If the problem cannot be solved by cleaning, the internal glass may be scratched. Contact your local authorized Canon dealer. Pages are missing. - Page 126 HOME > "Chapter 13 Troubleshooting" > Useful tips...
-
Page 127: Useful Tips
Useful tips Here are some useful tips for scanning documents. Where are scanned images saved? Can the save destination be changed? Images are saved to the following locations, according to program settings. All destination locations can be changed to other folders. ●... -
Page 128: Chapter 14 Appendix
HOME > Chapter 14 Appendix... - Page 129 Chapter 14 Appendix "Specifications" "Replacement Parts" "Option" "External Dimensions"...
- Page 130 HOME > "Chapter 14 Appendix" > Specifications...
-
Page 131: Specifications
Specifications Main Unit Type Desktop sheetfed scanner Scanning Document Size Width: 50.8 mm to 215.9 mm (2" to 8.5") Size Length: 53.9 mm to 355.6mm (2.12" to 14")* Normal mode: 52 to 128 g/m (14 to 32 lb bond) Plain Paper 0.06 mm to 0.15 mm (0.0024"... - Page 132 HOME >"Chapter 14 Appendix" > Replacement Parts...
-
Page 133: Replacement Parts
Roller". ● For information on replacing the document holding guide, see "Removing/Attaching the Document Holding Guide". ● Contact your local authorized Canon dealer service representative for detailed information about the replacement parts. Product specifications are subject to change without notice. - Page 134 HOME >"Chapter 14 Appendix" > Option...
- Page 135 Option The optional Flatbed Scanner Unit 101 can be connected to and used with this scanner. Flatbed Scanner Unit 101 (product code: 4101B) Flatbed scanner unit that can be connected to and used with a DR scanner. Connecting the unit to this scanner enables you to use this scanner as a flatbed scanner with an automatic document feeder.
- Page 136 HOME >"Chapter 14 Appendix" > External Dimensions...
-
Page 137: External Dimensions
External Dimensions Front View With the document feed tray open... - Page 138 Chapter 1 Introduction Chapter 2 Important Safety Instructions Chapter 3 Installing the Software Chapter 4 Connecting the Scanner Chapter 5 Placing Documents Chapter 6 Scanning with CaptureOnTouch Chapter 7 Scanning with CapturePerfect Chapter 8 Setting the Scanner Driver CE-IM-880- Chapter 9 Special Scanning E1.00 Chapter 10 Regular Maintenance...
Need help?
Do you have a question about the image Formula DR-C130 and is the answer not in the manual?
Questions and answers