
Subscribe to Our Youtube Channel
Related Manuals for Body Break 1610639-2


Summary of Contents for Body Break 1610639-2
- Page 1 Owner’s Manual Model No. 1610639-2 - Assembly - Operation - Adjustments - Parts - Warranty CAUTION: Read and understand this manual before operating unit Retain For Future Reference...
-
Page 2: Table Of Contents
TABLE OF CONTENTS Warranty Safety Precautions Pack Assembly Check List Assembly Treadmill & Monitor Operation . 6-10 Folding ... 11 Parts list . 12-13 Overview Drawing ..14 Trouble Shooting ...15 Adjustment . 16-18 Maintenance Training Guidelines . 20-22 Stretching 23-24... -
Page 3: Warranty
Body Break treadmills as sold. The warranty does not apply to damage or failure due to accident, abuse, corrosion, discoloration of pain or plastic or neglect. Maurice Pincoffs Canada shall not be responsible to incidental or consequential damages. -
Page 4: Safety Precautions
In any event should you find this product to be defective or missing a part please contact our Customer Service Department. Your Body Break treadmill was designed and built for optimum safety. However, certain precautions apply whenever you use your treadmill. -
Page 5: Pack Assembly Check List
HARDWARE CHECK LIST # 52. 5/16"x 3/4" Round Bolt (x4) #68. 5/16"x 7t Nylon Nut (x1) # 53. 5/16"x 1-1/2" Round Bolt (x2) # 86. 5/16"x 1" Round Bolt (x1) # 58. 5/16"x 23 x1.5T Curve Washer (x2) # 73. M5 Allen Wrench (x1) # 74. -
Page 6: Assembly
ASSEMBLY INSTRUCTION STEP 1 Remove all the components from the carton. See figure 1. STEP 2 Connect the computer extension wire (14) to the lower computer wire (88). NOTE: Ensure that the wire is safely inserted in the handrail to avoid pinching the computer wire. See figure 2&3 STEP 3 Fasten the right handrail (4) to the lower hole of the frame... -
Page 7: Treadmill & Monitor Operation
TREADMILL OPERATION GROUNDING INSTRUCTIONS. This product must be grounded. No plug adapter should be used with this product. WARNING: Improper connection of the equipment grounding conductor can result in a risk of an electric shock. Check with a qualified electrician if you are in doubt as to whether the product is properly grounded. - Page 8 A- Manual mode: Before beginning your exercise program, you can set the time and/or laps. Press the “MODE” button until time or lap is displayed. Press the “FAST” or “SLOW” button to set the desired value, then press “MODE” to accept the value B- Program mode P1-P5: Before beginning you exercise program you need to set the time and the speed percentage program.
- Page 9 Functions Scan Displays each function in sequence every 5 seconds. The display loop is time, distance, speed, calories, pulse and laps. Time: Displays your elapsed workout time in minutes up to 99:59 Counts down from your preset target time to 00:00 during your workout Speed: Displays the current speed in KM per hour Distance:...
- Page 10 PRESET PROGRAM AT 100% OF SPEED Program SEG 1 SEG 2 SEG 3 SEG 4 SEG 5 SEG 6 SEG 7 SEG 8 SEG 9 SEG 10 3.0K 3.0K 7.0K 3.0K 7.0K 3.0K 7.0K 3.0K 3.0K 3.0K 3.0K 3.0K 5.0K 3.0K 6.0K 6.0K...
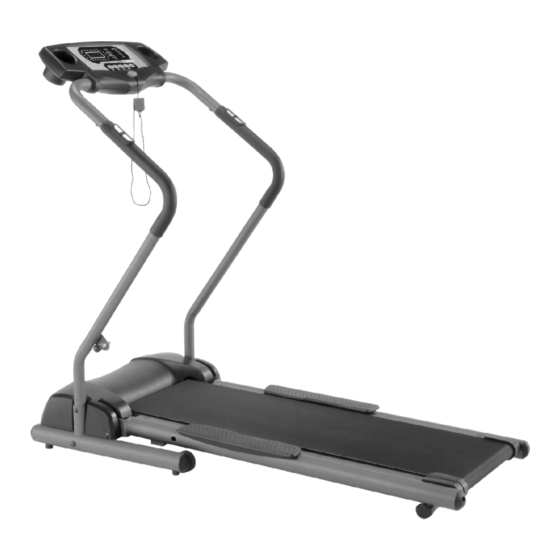
- Page 11 FIGURE 4. Console Safety Key Handpulse Handrail Lock Knob Running Belt Main Frame Wheel...
-
Page 12: Folding
FOLDING AND MOVING YOUR TREADMILL Before folding the treadmill, turn the power switch off located on the front of the motor cover and unplug the power cord. CAUTION: You must be able to safely lift 20 kg (45lbs) in order to raise and lower the treadmill. To decrease the possibility of injury, bend your legs and keep your back straight while you are raising or lowering your treadmill. -
Page 13: Parts List
PARTS LIST Key No Part No DESCRIPTION O'TY 063901 FRAME BASE 063902 MAIN FRAME 063903 LEFT HANDRAIL 063904 RIGHT HANDRAIL 063905 CONSOLE SUPPORT 063906 MOTOR BRACKET 063907 BELT GUIDE 063908-2 MOTOR 063909 DRIVE BELT 063910 FRONT ROLLER W/ PULLEY 063911 REAR ROLLER 063912 CONTROLLER... - Page 14 Key No Part No DESCRIPTION O'TY 063943 3/8"x2T SPRING WASHER 063945 3/8"x25x3T NYLON WASHER 063946 CYLINDER 063947 M8x12m/m HEX HEAD BOLT 063948 M8x50m/m HEX HEAD BOLT 063949 3/8"x3/4" HEX HEAD BOLT 063950 3/8"x1" HEX HEAD BOLT 063951 5/16"x3/4" ROUND BOLT 063952 5/16"x3/4"...
-
Page 15: Overview Drawing
EXPLODED DIAGRAM 34 83 24 53 76 84 930526AM1030... -
Page 16: Trouble Shooting
TROUBLE SHOOTING Problem Cause Correction Treadmill will not start Treadmill not plugged in Plug into three prong (grounded) outlet On / off switch not on Push the on/off button to on House circuit breaker tripped Reset or replace Treadmill reset switch tripped Reset treadmill reset switch see reset switch resetting on page 18 Treadmill motor controller fuse... -
Page 17: Adjustment
TREADBELT ADJUSTMENT The treadbelt has been factory pre-adjusted, however If TREADMILL If Treadbelt slips during use if during the operation: slips during use. Treadbelt slips during use if the treadbelt is too loose: a) Tighten both rear roller adjusting bolts (81) 1/4 turn clockwise using allen wrench. -
Page 18: Treadmill Lubrication
TREADMILL LUBRICATION Your treadmill should require little maintenance other then periodically applying lubricant. Lubricating under the treadbelt will ensure superior performance and extend its life expectancy. HOW TO CHECK TREADBELT FOR PROPER LUBRICATION Lift one side of the treadbelt and feel the top surface of the treadboard. If the surface is (slick) to the touch, then no further lubrication is required If the surface is dry to the touch, apply one packet of lubricant or half of the bottle of lubricant. - Page 19 RESET SWITCH RESETTING If your treadmill looses power or will not start, check the reset switch located on the front of the motor cover. If the white tab of the reset switch is not showing then the reset switch has not been tripped. If the white tab of the reset switch is showing, the reset switch has tripped.
-
Page 20: Maintenance
CLEANING AND MAINTENANCE Care has been taken to assure that your treadmill has been properly adjusted and lubricated at the factory. It is not recommended that the user attempt service on the internal components instead seek service from an authorized service center. However, from time-to-time the outer surfaces may appear dull or dirty, following the instructions listed below will restore and preserve the original finish. -
Page 21: Training Guidelines
TRAINING GUIDELINES Exercise is one of the most important factors in the overall health of an individual. Listed among its benefits are: ž Increased capacity for physical work (strength endurance) ž Increased cardiovascular (heart and arteries/veins) and respiratory efficiency ž Decreased risk of coronary heart disease ž... - Page 22 Specificity Different forms of exercise produce different results. The type of exercise that is carried out is specific both to the muscle groups being used and to the energy source involved. There is little transfer of the effects of exercise, i.e. from strength training to cardiovascular fitness. That is why it is important to have an exercise program tailored to your specific needs.
- Page 23 Target heart Rate 10 Second Count Beats per Minute Don’t push yourself too hard to reach the figures on this table. It can be very uncomfortable if you overdo it. Let it happen naturally as you work through your program. Remember, the target is a guide, not a rule, a little above or below is just fine.
-
Page 24: Stretching
STRETCHING Stretching should be included in both your warm up and cool down, and should be performed after 3- 5 minutes of low intensity aerobic activity or calisthenic type exercise. Movements should be performed slowly and smoothly, with no bouncing or jerking. Move into the stretch until slight tension, not pain, is felt in the muscle and hold for 20-30 seconds.
Need help?
Do you have a question about the 1610639-2 and is the answer not in the manual?
Questions and answers