Table of Contents
Advertisement
This manual contains all of the information you will need to know about your PaceMaster treadmill. Please read this manual in its entirety before
attempting to use your treadmill.
For your safety and the protection of your treadmill we have included warnings and other valuable information throughout this manual. This
information will be in bold print and marked by the symbols below. Be absolutely sure to thoroughly read and understand this information.
When you see the symbol
damage to your treadmill.
When you see the symbol
About This Manual-------------------
Important Safety Instructions--------
Installation Requirements------------
Unpacking our Treadmill------------
Tools for Assembly-------------------
Assembling your PaceMaster--------
Exercise and Your Treadmill---------
Manufactured by: Aerobics Inc., 34 Fairfield Place, West Caldwell NJ 07006 Tel (973) 276-9700 Fax (973) 276-9001 www.pacemaster.com
Owners Manual Pro-Plus.doc
About This Manual
CAUTION: be sure to understand and utilize this information. Failure to do so may result in personal injury or
you will find useful suggestions related to the section in which it appears.
Table of Contents
Front Cover
2
3
4
4
4
7
9
OWNERS MANUAL
Using PaceMaster for the First Time---------
Using the Preprogrammed Courses-----------
Designing Your Own Courses-----------------
Maintenance--------------------------------------
Troubleshooting---------------------------------
Specifications------------------------------------
Workout log--------------------------------------
10
11
13
13
15
15
16
03/14/00
Advertisement
Table of Contents

Related Manuals for PaceMaster Pro-Plus


Summary of Contents for PaceMaster Pro-Plus
-
Page 1: Table Of Contents
About This Manual This manual contains all of the information you will need to know about your PaceMaster treadmill. Please read this manual in its entirety before attempting to use your treadmill. For your safety and the protection of your treadmill we have included warnings and other valuable information throughout this manual. This information will be in bold print and marked by the symbols below. -
Page 2: Important Safety Instructions
Congratulations on the purchase of your PaceMaster Treadmill. Not only did you buy one of the highest quality treadmills on the market, you also obtained excellent value for your dollar. Aerobics, Inc. was founded in 1968, and has over 28 years experience in designing and building treadmills. -
Page 3: Installation Requirements
Installation Requirements • Electrical Requirements: It is the owners responsibility to be sure that the electrical requirements for PaceMaster are adequate. PaceMaster requires standard household current (120 VAC/60 Hz.) and a dedicated 20 amp non-switched circuit. The treadmill has a three prong plug, this grounding plug is necessary. -
Page 4: Tools Required For Assembly
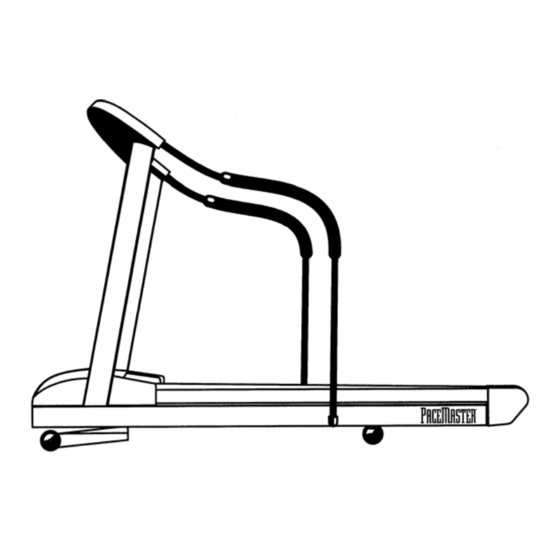
• The PaceMaster is packed in five pieces: the main unit, the handlebar, the siderails, the motor cover, and the hardware package which contains this manual. Once you have removed all of the pieces from the box, inspection of the treadmill should be made to check for any concealed damage that may have occurred during shipment. -
Page 5: Testing Your Treadmill
Figure 2 pick up the motor cover so that it is level and the word PaceMaster is upside down. Holding the motor cover level and waist high tilt it 45 degrees by lowering your left hand. Now slide it between the handlebar and rotate the motor cover so that it is level by raising your left hand. -
Page 6: Understanding The Control Panel
.5 percent change per press of the button. Bring the treadmill up to 3.0 percent incline and once it reaches 3.0 percent bring it down to 0.0 percent. CAUTION: Always remember to leave your treadmill at 0.0 percent incline when finished exercising. Understanding the PaceMaster Control Panel... - Page 7 • POWER UP - Using the magnetic safety key as described above, place the magnet into the slot. The control panel will first display the software version of your treadmill in the time window for about 2 seconds and then "150 Lb" for a few seconds indicating that PaceMaster is set for a 150 pound user.
- Page 8 PROGRAM SELECT until the indicator light next to the program is on, then press START. • LEARN - The LEARN button allows PaceMaster to memorize your exercise routine while you are doing it. Your program is stored in one of the four custom memories previously described, replacing the old program in that memory.
-
Page 9: Exercise And Your Treadmill
been erased. Now enter your time, speed, and elevation just as you would in manual operation. Add a warm up and cool down if desired, and press START to begin exercising. Perform your exercise exactly the way you wish it to be memorized. As you are exercising, you will notice that each time you change speed or elevation the CUSTOM LEARN light flashes for a few seconds to confirm that the changes are being learned. -
Page 10: How Often Should I Exercise
8. STOP may be pressed at any time during your workout to gradually stop. 9. If a problem occurs, PaceMaster can be stopped quickly by pulling on the red safety cord to remove the magnetic key from the control panel. The treadmill will stop more abruptly, but still gently enough to prevent you from being thrown. - Page 11 5. During the workout the computer will notify you of any speed or elevation changes in the program by flashing the current speed and/or elevation a few times, then displaying the new speed or elevation. • At anytime during the workout you may increase or decrease your speed or elevation to meet your own fitness level, but at the next point in time when there is a speed or elevation change, the treadmill will go to its new values.
-
Page 12: Designing Your Own Courses
Program #1 Cardiovascular - 30 minutes Speed Profile Elevation Profile Time in minutes Time in minutes Program #2 Interval - 30 minutes Speed Profile Elevation Profile Time in minutes Time in minutes Program #3 Fat Burn - 40 minutes Speed Profile Elevation Profile Time in minutes Time in minutes... -
Page 13: Maintenance
Designing your own workout course allows you to tailor the workout to your specific fitness level, abilities, and goals. PaceMaster has the ability to remember four of your favorite exercise routines. One routine can be stored in each of the four custom memory positions. Be certain that the proper custom memory (1,2,3, or 4) has been selected. - Page 14 If you tighten the drive belt adjustment screw 1 1/2 turns and there is still hesitation (slippage) contact your authorized PaceMaster dealer. Tightening the drive belt adjustment screw more than 1 1/2 turns can result in bearing damage to the motor and/or drive roller.
-
Page 15: Troubleshooting
Operating Temperature Range - 50° to 100° F Maximum Permitted Weight - 300 lbs. © Aerobics, Inc. 1995 PaceMaster is a registered trademark of Aerobics Inc. Workout Log This page should be photocopied and used to keep a daily record of your workouts. By recording your... - Page 16 motivation. Date Start Miles Calories Aerobic Average Average Warm up Cool down Comments Time Points Speed Incline...
Need help?
Do you have a question about the Pro-Plus and is the answer not in the manual?
Questions and answers